Cryptic Cavern: Difference between revisions
(Fixed time info and elaborated Pikmin maturity, as per the in-game files.) |
|||
| Line 3: | Line 3: | ||
|size=250px | |size=250px | ||
|red=5 | |red=5 | ||
|redm=f | |||
|white=5 | |white=5 | ||
|whitem=f | |||
|spicy=3 | |spicy=3 | ||
|bitter=2 | |bitter=2 | ||
|sublevels=5 | |sublevels=5 | ||
|gridcol=1 | |||
|gridrow=3 | |||
}} | }} | ||
'''Cryptic Cavern''' is the eleventh level in [[Challenge Mode (Pikmin 2)|Challenge Mode]] in ''[[Pikmin 2]]''. There are 5 [[sublevel]]s, each with one [[ | |||
'''Cryptic Cavern''' is the eleventh level in [[Challenge Mode (Pikmin 2)|Challenge Mode]] in ''[[Pikmin 2]]''. There are 5 [[sublevel]]s, each with one [[Piklopedia|enemy]], each with the same layout. | |||
== Sublevel 1 == | == Sublevel 1 == | ||
*'''Time''': 50 | |||
The [[Doodlebug]] is hidden in the middle of the level; it may be poisonous, but is very easy to beat. As soon as it takes a hit from the top, it'll disappear. Grab [[The Key]] and hurry to the next level. | The [[Doodlebug]] is hidden in the middle of the level; it may be poisonous, but is very easy to beat. As soon as it takes a hit from the top, it'll disappear. Grab [[The Key]] and hurry to the next level. | ||
== Sublevel 2 == | == Sublevel 2 == | ||
*'''Time''': +75 | |||
A [[Watery Blowhog]]. Kill it quickly, grab The Key, and off to the hole. | A [[Watery Blowhog]]. Kill it quickly, grab The Key, and off to the hole. | ||
== Sublevel 3 == | == Sublevel 3 == | ||
*'''Time''': +65 | |||
An [[Anode Dweevil]]. This can be defeated relatively easily with [[captain]]s, is hard to hit with [[Pikmin family|Pikmin]], and kills them instantly if it attacks, so attacking with captains is often the safer option. | An [[Anode Dweevil]]. This can be defeated relatively easily with [[captain]]s, is hard to hit with [[Pikmin family|Pikmin]], and kills them instantly if it attacks, so attacking with captains is often the safer option. | ||
== Sublevel 4 == | == Sublevel 4 == | ||
*'''Time''': +40 | |||
A [[Fiery Bulblax]]. Take the 5 [[Red Pikmin]] and use both kind of [[spray]]s, or else you are almost guaranteed to lose Pikmin. You will make it just before the Bulblax turns normal. After its defeat, advance to the last sublevel. There are no buried treasures to look for. | A [[Fiery Bulblax]]. Take the 5 [[Red Pikmin]] and use both kind of [[spray]]s, or else you are almost guaranteed to lose Pikmin. You will make it just before the Bulblax turns normal. After its defeat, advance to the last sublevel. There are no buried treasures to look for. | ||
== Sublevel 5 == | == Sublevel 5 == | ||
*'''Time''': +70 | |||
A [[Burrowing Snagret]]. Use all the sprays you have left. Always aim for the head, its weak point. When it buries itself in the ground, wait for it to get stuck on emerging, so you have time to aim at the head. When its head is being attacked by a number of Pikmin, it won't attack. | |||
{{CM}} | {{CM}} | ||
Revision as of 13:50, November 26, 2013
| Cryptic Cavern | |||
|---|---|---|---|

| |||
| Sublevels | 5 | Ultra-bitter sprays | 2 |
| Red Pikmin | 5 | Ultra-spicy sprays | 3 |
| Yellow Pikmin | 0 | ||
| Blue Pikmin | 0 | ||
| White Pikmin | 5 | ||
| Purple Pikmin | 0 | ||
| Bulbmin | 0 | ||
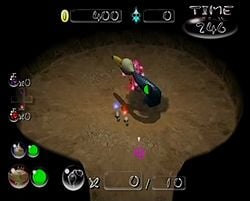
Cryptic Cavern is the eleventh level in Challenge Mode in Pikmin 2. There are 5 sublevels, each with one enemy, each with the same layout.
Sublevel 1
- Time: 50
The Doodlebug is hidden in the middle of the level; it may be poisonous, but is very easy to beat. As soon as it takes a hit from the top, it'll disappear. Grab The Key and hurry to the next level.
Sublevel 2
- Time: +75
A Watery Blowhog. Kill it quickly, grab The Key, and off to the hole.
Sublevel 3
- Time: +65
An Anode Dweevil. This can be defeated relatively easily with captains, is hard to hit with Pikmin, and kills them instantly if it attacks, so attacking with captains is often the safer option.
Sublevel 4
- Time: +40
A Fiery Bulblax. Take the 5 Red Pikmin and use both kind of sprays, or else you are almost guaranteed to lose Pikmin. You will make it just before the Bulblax turns normal. After its defeat, advance to the last sublevel. There are no buried treasures to look for.
Sublevel 5
- Time: +70
A Burrowing Snagret. Use all the sprays you have left. Always aim for the head, its weak point. When it buries itself in the ground, wait for it to get stuck on emerging, so you have time to aim at the head. When its head is being attacked by a number of Pikmin, it won't attack.