The printable version is no longer supported and may have rendering errors. Please update your browser bookmarks and please use the default browser print function instead.
|
The following article or section contains guides.
The strategies shown are just suggestions.
|
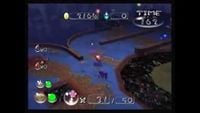
The Secret Testing Range is the twenty-fifth level in Pikmin 2's Challenge Mode. There are two sublevels, each involving creatures that have weapons as appendages, including a boss encounter with the Man-at-Legs.
Sublevel 1
- Theme: Metal
- Music: Metal 3
- Time: 100 (200 seconds)
- Starting Pikmin:
- Treasures:
- Enemies:
- Obstacles:
- Vegetation:
- Others:
This level is a little hard, but the secret to the easy killing of a Gatling Groink is to bring all of your Pikmin, make the Purple Pikmin be up front and hit its backside. Or you can leave the Pikmin with Olimar or Louie, be the opposite one and make the two Gatling Groinks come close to each other; then go underneath them, running back and forth when the Gatling Groink's life circles are yellow or red.
Generate sample map →
| Technical sublevel information
|
| Internal cave name
|
ch_MUKI_houdai
|
| "Main" object maximum (?)
|
3
|
| "Treasure" object maximum (?)
|
4
|
| "Gate" object maximum (?)
|
0
|
| Dead end unit probability (?)
|
0
|
| Number of rooms (?)
|
1
|
| Corridor-to-room ratio (?)
|
0
|
| Escape geyser (?)
|
No
|
| Clogged hole (?)
|
No
|
| Cave units file (?)
|
1_units_houdai_metal.txt
|
| Lighting file (?)
|
houdai_light.ini
|
| Background (?)
|
build ( steel) steel)
|
| Cave units (?)
|
|
|
|
|
|
|
| Dead end with item |
Three-way crossing |
Four-way crossing |
Turning corridor |
Corridor |
Long corridor
|
|
|
| Man-at-Legs dry arena
|
- For details on how objects are spawned, and how some may fail to spawn, see here.
Sublevel 2
The second floor of the level.
- Theme: Metal
- Music: Metal 2 (alternate)
- Time: +150 (+300 seconds)
- Treasures:
- Enemies:
- Obstacles:
- Vegetation:
- Others:
- See also: Man-at-Legs strategy.
This floor is very hard. Note you can lure the Man-at-Legs out of the water to make use of all of your Pikmin.
One useful technique (as depicted in the linked video below) is to stand close to the Man-at-Legs, just outside the circular ridge that the creature starts on. Position your Pikmin behind the ridge, in the water. If done correctly, the Man-at-Legs laser will target you, but its shots will hit the top of the ridge and do zero damage to your captain and your Pikmin.
Generate sample map →
| Technical sublevel information
|
| Internal cave name
|
ch_MUKI_houdai
|
| "Main" object maximum (?)
|
7
|
| "Treasure" object maximum (?)
|
5
|
| "Gate" object maximum (?)
|
0
|
| Dead end unit probability (?)
|
0
|
| Number of rooms (?)
|
1
|
| Corridor-to-room ratio (?)
|
0
|
| Escape geyser (?)
|
Yes
|
| Clogged hole (?)
|
No
|
| Cave units file (?)
|
1_units_houdai2_metal.txt
|
| Lighting file (?)
|
houdai_light.ini
|
| Background (?)
|
ice ( icy cavern) icy cavern)
|
| Cave units (?)
|
|
|
|
|
|
|
| Dead end with item |
Three-way crossing |
Four-way crossing |
Turning corridor |
Corridor |
Long corridor
|
|
|
| Man-at-Legs watery arena
|
| Detailed object list
|
| The game spawns these "main" objects:
|
| ID |
Object |
Amount |
Fall method |
Spawn location
|
| 1
|
 Man-at-Legs Man-at-Legs
|
1
|
None
|
"Hard" enemy spots
|
| -
|
 The Key The Key
|
Carried inside entry with ID 1
|
| 4
|
 Fire geyser Fire geyser
|
2
|
None
|
Cave unit seams
|
| 5
|
 Poison emitter Poison emitter
|
2
|
None
|
Cave unit seams
|
| 6
|
 Electrical wire Electrical wire
|
2
|
None
|
Cave unit seams
|
| Then it spawns these "decoration" objects:
|
| ID |
Object |
Amount |
Fall method |
Spawn location
|
| 2
|
 Glowstem (red) Glowstem (red)
|
3
|
None
|
Plant spots
|
| 3
|
Glowstem (green)
|
3
|
None
|
Plant spots
|
| Then it spawns these "treasure" objects:
|
| ID |
Object |
Amount |
Fall method |
Spawn location
|
| 7
|
 Remembered Old Buddy Remembered Old Buddy
|
1
|
None
|
Treasure spots
|
| 8
|
 Fond Gyro Block Fond Gyro Block
|
1
|
None
|
Treasure spots
|
| 9
|
 Lost Gyro Block Lost Gyro Block
|
1
|
None
|
Treasure spots
|
| 10
|
 Favorite Gyro Block Favorite Gyro Block
|
1
|
None
|
Treasure spots
|
| 11
|
 Memorable Gyro Block Memorable Gyro Block
|
1
|
None
|
Treasure spots
|
| Then it spawns these "dead end" objects:
|
| ID |
Object |
Amount |
Fall method |
Spawn location
|
| 12
|
 Egg Egg
|
1
|
None
|
Dead ends
|
- For details on how objects are spawned, and how some may fail to spawn, see here.
Walkthrough video
Names in other languages
| Language
|
Name
|
Meaning
|
Notes
|
 Japanese Japanese |
秘密兵器実験場? |
Secret Weapon Testing Zone |
|
 French (NoA) French (NoA) |
Camp d'entraînement |
Training camp |
|
 French (NoE) French (NoE) |
Camp d'Entraînement |
Training Camp |
|
 German German |
Geheimes Testgelände |
Secret Testing Range |
|
 Italian Italian |
Area collaudi segreti |
Secret testing area |
|
 Spanish (NoA) Spanish (NoA) |
Zona de Pruebas Secretas |
Secret Testing Zone |
This name implies the tests are secret, not the zone.
|

 Red Pikmin × 10 (flower)
 Yellow Pikmin × 10 (flower)
 Blue Pikmin × 10 (flower)
 Purple Pikmin × 10 (flower)
 White Pikmin × 10 (flower)
 Cosmic Archive × 1
 Dream Architect × 1
 Glee Spinner × 1
 Lustrous Element × 1 (inside Iridescent Glint Beetle)
 Prototype Detector × 1
 Stone of Glory × 1 (inside Gatling Groink)
 Gatling Groink (free) × 2
 Iridescent Glint Beetle × 1


 Mitite (group of 10) × 0 - 1 (from eggs)