Glutton's Kitchen: Difference between revisions
(Moved planning info to the opening of the article, instead of the "How to reach" section.) |
(Added Cavegen links.) |
||
| (19 intermediate revisions by 11 users not shown) | |||
| Line 1: | Line 1: | ||
{{ | {{game icons|p2=y}} | ||
{{infobox cave | |||
|image = Glutton's Kitchen.jpg | |image = Glutton's Kitchen.jpg | ||
|location = Perplexing Pool | |location = Perplexing Pool | ||
| Line 5: | Line 6: | ||
|treasures = 14 | |treasures = 14 | ||
|hazards = {{electricity}} | |hazards = {{electricity}} | ||
}} | }} | ||
{{guide}} | {{guide}} | ||
| Line 13: | Line 13: | ||
==How to reach== | ==How to reach== | ||
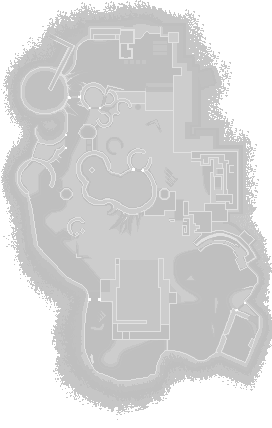
{{location map | width = 272 | height = 428 | image = PP texture.png | bg = #111 | caption = Location of the cave. | icons = | |||
{{map icon | cave | 109 | 98}} | |||
}} | |||
The cave is located beside the [[seesaw blocks]] leading up to where [[Yellow Pikmin]] are first found. Yellow Pikmin are required in order to destroy the [[Gate#Electric gate|electric gate]] blocking access to the cave. | |||
{{clear}} | |||
{{Notes|ship=y}} | {{Notes|ship=y}} | ||
==Sublevel 1== | ==Sublevel 1== | ||
*'''Theme''': Toybox | * '''Theme''': Toybox | ||
*'''Music''': ''[[Music in Pikmin 2# | * '''Music''': ''[[Music in Pikmin 2#Toy|Toy]]'' | ||
*'''Treasures''': | * '''Treasures''': | ||
**{{icon|Master's Instrument|y}} | ** {{icon|Master's Instrument|y}} | ||
*'''Enemies''': | * '''Enemies''': | ||
**{{icon|Dwarf Bulbear|y}} × 10 | ** {{icon|Dwarf Bulbear|y}} × 10 | ||
*'''Obstacles''': | * '''Obstacles''': | ||
**None | ** None | ||
*''' | * '''Vegetation''': | ||
**None | ** None | ||
*'''Others''': | * '''Others''': | ||
**None | ** None | ||
There are numerous [[Dwarf Bulbear]]s here. They should be killed with [[Purple Pikmin]]. Inside the large wooden box should be another Bulbear. It too should be defeated by [[throw]]ing Pikmin over the edge, allowing the player to grab the [[Master's Instrument]]. Wooden walls of a house can also be seen when {{button|gc|r|wii|padlr}} is held down. | |||
{{cavegen|gk1}} | |||
{{sublevel technical | {{sublevel technical | ||
|cave = yakushima_2 | |cave = yakushima_2 | ||
| Line 59: | Line 65: | ||
}} | }} | ||
}} | }} | ||
{| class="wikitable mw-collapsible mw-collapsed technicaltable" | |||
! colspan="5" style="width: 288px;" | {{tt|Detailed object list|This is a representation of the data in the cave's file, and how the game makes use of it.}} | |||
|- | |||
! colspan="5" | The game spawns these "main" objects: | |||
|- | |||
! ID !! Object !! Amount !! Fall method !! Spawn location | |||
|- | |||
| 1 | |||
| {{icon|Dwarf Bulbear|y}} | |||
| 4 | |||
| None | |||
| "Hard" enemy spots | |||
|- | |||
| 2 | |||
| {{icon|Dwarf Bulbear|y}} | |||
| 3 | |||
| None | |||
| "Easy" enemy spots | |||
|- | |||
| 3 | |||
| {{icon|Dwarf Bulbear|y}} | |||
| 3 | |||
| None | |||
| "Easy" enemy spots | |||
|- | |||
! colspan="5" | Then it spawns these "treasure" objects: | |||
|- | |||
! ID !! Object !! Amount !! Fall method !! Spawn location | |||
|- | |||
| 4 | |||
| {{icon|Master's Instrument|y}} | |||
| 1 | |||
| None | |||
| Treasure spots | |||
|} | |||
:''For details on how objects are spawned, and how some may fail to spawn, see [[Pikmin 2 cave generation|here]].'' | |||
==Sublevel 2== | |||
* '''Theme''': Toybox | |||
* '''Music''': ''[[Music in Pikmin 2#Toy Railroad|Toy Railroad]]'' | |||
* '''Treasures''': | |||
** {{icon|Massive Lid|y}} (GameCube US) / {{icon|Happiness Emblem|y|v=US}} (Wii US) / {{icon|Survival Container|y}} (Europe) / {{icon|Milk Lid|y}} (Japan) | |||
** {{icon|Imperative Cookie|y}} | |||
* '''Enemies''': | |||
** {{icon|Breadbug|y}} × 3 | |||
** {{icon|Cloaking Burrow-nit|y}} × 1 | |||
** {{icon|Female Sheargrub|y}} × 4 | |||
** {{icon|Male Sheargrub|y}} × 4 | |||
* '''Obstacles''': | |||
** None | |||
* '''Vegetation''': | |||
** {{icon|Violet Candypop Bud|y}} × 1 (if [[Candypop Bud#Maximum Pikmin requirement|max Pikmin requirement]] is met) | |||
* '''Others''': | |||
** [[#Chiyogami|Chiyogami paper]] × 2 | |||
There are | A toy train track surrounds the Research Pod. It is possible to walk around on it, although this serves no purpose for the game's objective. There are [[Breadbug]]s on this level that will carry away treasure and defeated enemies into their dens. [[Cloaking Burrow-nit]]s and [[Mandiblard|Sheargrubs]] may also hinder the Pikmin from collecting the [[Massive Lid]] and [[Imperative Cookie]]. A [[Violet Candypop Bud]] can also appear here, but only if Purple Pikmin total is less than 20. | ||
Pieces of [[#Chiyogami|chiyogami]] paper are also encountered on the floor. They are interactive, but like the train track, they serve no function other than to add to the scenery. | |||
{{cavegen|gk2}} | |||
{{sublevel technical | {{sublevel technical | ||
|cave = yakushima_2 | |cave = yakushima_2 | ||
| Line 107: | Line 152: | ||
}} | }} | ||
}} | }} | ||
{| class="wikitable mw-collapsible mw-collapsed technicaltable" | |||
! colspan="5" style="width: 288px;" | {{tt|Detailed object list|This is a representation of the data in the cave's file, and how the game makes use of it.}} | |||
|- | |||
! colspan="5" | The game spawns these "main" objects: | |||
|- | |||
! ID !! Object !! Amount !! Fall method !! Spawn location | |||
|- | |||
| 1 | |||
| {{icon|Violet Candypop Bud|y}} | |||
| 1 | |||
| None | |||
| "Special" enemy spots | |||
|- | |||
| 2 | |||
| {{icon|Female Sheargrub|y}} | |||
| 2 | |||
| None | |||
| "Easy" enemy spots | |||
|- | |||
| 3 | |||
| {{icon|Female Sheargrub|y}} | |||
| 2 | |||
| None | |||
| "Easy" enemy spots | |||
|- | |||
| 4 | |||
| {{icon|Male Sheargrub|y}} | |||
| 4 | |||
| None | |||
| "Hard" enemy spots | |||
|- | |||
| 5 | |||
| {{icon|Breadbug|y}} | |||
| 1 | |||
| None | |||
| "Hard" enemy spots | |||
|- | |||
! colspan="5" | Then it spawns these "decoration" objects: | |||
|- | |||
! ID !! Object !! Amount !! Fall method !! Spawn location | |||
|- | |||
| 6 | |||
| {{icon|Breadbug|y}} | |||
| 2 | |||
| None | |||
| Plant spots | |||
|- | |||
| 7 | |||
| {{icon|Cloaking Burrow-nit|y}} | |||
| 1 | |||
| None | |||
| Plant spots | |||
|- | |||
| 8 | |||
| [[#Chiyogami|Chiyogami paper]] | |||
| 2 | |||
| None | |||
| Plant spots | |||
|- | |||
! colspan="5" | Then it spawns these "treasure" objects: | |||
|- | |||
! ID !! Object !! Amount !! Fall method !! Spawn location | |||
|- | |||
| 9 | |||
| {{icon|Massive Lid|y}} (GC US)<br>{{icon|Happiness Emblem|y|v=US}} (Wii US)<br>{{icon|Survival Container|y}} (EU)<br>{{icon|Milk Lid|y}} (JP) | |||
| 1 | |||
| None | |||
| Treasure spots | |||
|- | |||
| 10 | |||
| {{icon|Imperative Cookie|y}} | |||
| 1 | |||
| None | |||
| Treasure spots | |||
|} | |||
:''For details on how objects are spawned, and how some may fail to spawn, see [[Pikmin 2 cave generation|here]].'' | |||
==Sublevel 3== | |||
* '''Theme''': Toybox | |||
* '''Music''': ''[[Music in Pikmin 2#Toy|Toy]]'' | |||
* '''Treasures''': | |||
** {{icon|Director of Destiny|y}} | |||
** {{icon|Harmonic Synthesizer|y}} | |||
* '''Enemies''': | |||
** {{icon|Anode Beetle|y}} × 10 | |||
** {{icon|Breadbug|y}} × 2 | |||
** {{icon|Mitite|y}} (group of 10) × indefinite amount (from eggs) | |||
** {{icon|Puffy Blowhog|y}} × 1 | |||
* '''Obstacles''': | |||
** {{icon|Electrical wire|y}} × 5 | |||
* '''Vegetation''': | |||
** {{icon|Golden Candypop Bud|y}} × 1 | |||
* '''Others''': | |||
** {{icon|Egg|y}} × 1 or more | |||
A | A {{w|xylophone}} and a small {{w|tambourine}} are the main decorations on this level and also serve as large obstacles. Lots of electrical wires and [[Anode Beetle]]s will be in the way, so those should taken care of with [[Yellow Pikmin]]; if the player lacks these, they may use this sublevel's [[Golden Candypop Bud]]. This type of Candypop cannot be found anywhere else in the game, so maybe it would be a good idea to throw a single Pikmin into it to make the Golden Candypop Bud appear in the Piklopedia. | ||
A [[Puffy Blowhog]] also flies around here, and it can be encountered and fought out of bounds. Breadbugs will be stealing treasures and corpses, such as the [[Harmonic Synthesizer]] and [[Director of Destiny]], since both lie in the open. | |||
Note that due to the way sublevel generation works, it is possible for Harmonic Synthesizer to not appear, as detailed [[Pikmin 2 cave generation|here]] and [[Mistake#Missing sublevel objects|here]]. | |||
{{cavegen|gk3}} | |||
{{sublevel technical | {{sublevel technical | ||
|cave = yakushima_2 | |cave = yakushima_2 | ||
| Line 158: | Line 283: | ||
}} | }} | ||
}} | }} | ||
{| class="wikitable mw-collapsible mw-collapsed technicaltable" | |||
! colspan="5" style="width: 288px;" | {{tt|Detailed object list|This is a representation of the data in the cave's file, and how the game makes use of it.}} | |||
|- | |||
! colspan="5" | The game spawns these "main" objects: | |||
|- | |||
! ID !! Object !! Amount !! Fall method !! Spawn location | |||
|- | |||
| 1 | |||
| {{icon|Puffy Blowhog|y}} | |||
| 1 | |||
| None | |||
| "Hard" enemy spots | |||
|- | |||
| 2 | |||
| {{icon|Breadbug|y}} | |||
| 2 | |||
| None | |||
| "Hard" enemy spots | |||
|- | |||
| 3 | |||
| {{icon|Anode Beetle|y}} | |||
| 4 | |||
| None | |||
| "Hard" enemy spots | |||
|- | |||
| 4 | |||
| {{icon|Anode Beetle|y}} | |||
| 2 | |||
| None | |||
| "Easy" enemy spots | |||
|- | |||
| 5 | |||
| {{icon|Anode Beetle|y}} | |||
| 2 | |||
| None | |||
| "Easy" enemy spots | |||
|- | |||
| 6 | |||
| {{icon|Electrical wire|y}} | |||
| 5 | |||
| None | |||
| Cave unit seams | |||
|- | |||
! colspan="5" | Then it spawns these "treasure" objects: | |||
|- | |||
! ID !! Object !! Amount !! Fall method !! Spawn location | |||
|- | |||
| 7 | |||
| {{icon|Director of Destiny|y}} | |||
| 1 | |||
| None | |||
| Treasure spots | |||
|- | |||
| 8 | |||
| {{icon|Harmonic Synthesizer|y}} | |||
| 1 | |||
| None | |||
| Treasure spots | |||
|- | |||
! colspan="5" | Then it spawns these "dead end" objects: | |||
|- | |||
! ID !! Object !! Amount !! Fall method !! Spawn location | |||
|- | |||
| 9 | |||
| {{icon|Golden Candypop Bud|y}} | |||
| 1 | |||
| None | |||
| Dead ends | |||
|- | |||
| 10 | |||
| {{icon|Egg|y}} | |||
| 1 | |||
| None | |||
| Dead ends | |||
|- | |||
| 11 | |||
| {{icon|Anode Beetle|y}} | |||
| 2 | |||
| Falls from the sky | |||
| Dead ends | |||
|- | |||
! colspan="5" | Then it spawns "dead end" objects in as many dead ends as it can. Chances: | |||
|- | |||
! ID !! Object !! Chance !! Fall method !! Spawn location | |||
|- | |||
| 10 | |||
| {{icon|Egg|y}} | |||
| 100% | |||
| None | |||
| Dead ends | |||
|} | |||
:''For details on how objects are spawned, and how some may fail to spawn, see [[Pikmin 2 cave generation|here]].'' | |||
==Sublevel 4== | |||
* '''Theme''': Toybox | |||
* '''Music''': ''[[Music in Pikmin 2#Toy Railroad|Toy Railroad (alternate)]]'' | |||
* '''Treasures''': | |||
** {{icon|Invigorator|y}} | |||
** {{icon|Happiness Emblem|y|v=US}} (GameCube US) / {{icon|Massive Lid|y}} (Wii US) / {{icon|Drone Supplies|y|v=EU}} (Europe) / {{icon|Good Old Memories|y}} (Japan) (inside Spotty Bulbear in all versions) | |||
** {{icon|White Goodness|y}} | |||
* '''Enemies''': | |||
** {{icon|Breadbug|y}} × 2 | |||
** {{icon|Dwarf Bulbear|y}} × 5 | |||
** {{icon|Spotty Bulbear|y}} × 1 | |||
* '''Obstacles''': | |||
** None | |||
* '''Vegetation''': | |||
** None | |||
* '''Others''': | |||
** None | |||
A [[ | A few Breadbugs and a [[Spotty Bulbear]] with its young are present here. It is possible to petrify both the parent and the young Bulbears with one single [[ultra-bitter spray|bitter spray]]. Another good strategy is to bring just a few Purple Pikmin and find it before it picks up any Dwarf Bulbears, than petrify it and toss away. Treasures available here are the [[Happiness Emblem]], [[Invigorator]] and [[White Goodness]]. | ||
{{cavegen|gk4}} | |||
{{sublevel technical | {{sublevel technical | ||
|cave = yakushima_2 | |cave = yakushima_2 | ||
| Line 210: | Line 425: | ||
}} | }} | ||
}} | }} | ||
{| class="wikitable mw-collapsible mw-collapsed technicaltable" | |||
! colspan="5" style="width: 288px;" | {{tt|Detailed object list|This is a representation of the data in the cave's file, and how the game makes use of it.}} | |||
|- | |||
! colspan="5" | The game spawns these "main" objects: | |||
|- | |||
! ID !! Object !! Amount !! Fall method !! Spawn location | |||
|- | |||
| 1 | |||
| {{icon|Spotty Bulbear|y}} | |||
| 1 | |||
| None | |||
| "Special" enemy spots | |||
|- | |||
| - | |||
| {{icon|Happiness Emblem|y|v=US}} (GC US)<br>{{icon|Massive Lid|y}} (Wii US)<br>{{icon|Drone Supplies|y|v=EU}} (EU)<br>{{icon|Good Old Memories|y}} (JP) | |||
| colspan="3" | Carried inside entry with ID 1 | |||
|- | |||
| 2 | |||
| {{icon|Dwarf Bulbear|y}} | |||
| 3 | |||
| None | |||
| "Hard" enemy spots | |||
|- | |||
| 3 | |||
| {{icon|Dwarf Bulbear|y}} | |||
| 2 | |||
| None | |||
| "Easy" enemy spots | |||
|- | |||
| 4 | |||
| {{icon|Breadbug|y}} | |||
| 2 | |||
| None | |||
| "Hard" enemy spots | |||
|- | |||
! colspan="5" | Then it spawns these "treasure" objects: | |||
|- | |||
! ID !! Object !! Amount !! Fall method !! Spawn location | |||
|- | |||
| 5 | |||
| {{icon|White Goodness|y}} | |||
| 1 | |||
| None | |||
| Treasure spots | |||
|- | |||
| 6 | |||
| {{icon|Invigorator|y}} | |||
| 1 | |||
| None | |||
| Treasure spots | |||
|} | |||
:''For details on how objects are spawned, and how some may fail to spawn, see [[Pikmin 2 cave generation|here]].'' | |||
==Sublevel 5== | |||
* '''Theme''': Toybox | |||
* '''Music''': ''[[Music in Pikmin 2#Toy|Toy]]'' | |||
* '''Treasures''': | |||
** {{icon|Boom Cone|y}} (US) / {{icon|Magical Stage|y}} (Europe/Japan) | |||
** {{icon|Sulking Antenna|y}} | |||
* '''Enemies''': | |||
** {{icon|Armored Cannon Larva|y|n=Armored Cannon Beetle Larva}} (buried) × 3 | |||
** {{icon|Dwarf Bulbear|y}} × 10 | |||
** {{icon|Mitite|y}} (group of 10) × indefinite amount (from eggs) | |||
* '''Obstacles''': | |||
** None | |||
* '''Vegetation''': | |||
** {{icon|Queen Candypop Bud|y}} × 1 | |||
** {{icon|Violet Candypop Bud|y}} × 1 | |||
* '''Others''': | |||
** {{icon|Egg|y}} × 1 or more | |||
Dwarf Bulbears and [[Armored Cannon Larva|Armored Cannon Beetle Larva]]e which burrow out of dirt piles can be found here. Pikmin must be thrown onto their plates/blocks in order to defeat them. The [[Sulking Antenna]] and the [[Boom Cone]] are found in this level. | |||
Alternatively, the Cannon Beetles can be used to defeat the Dwarf Bulbears and, with skill, other Cannon Beetles by luring them with a [[leader]]. | |||
A [[Violet Candypop Bud|Violet]] and a [[Queen Candypop Bud]] aid the players forces here. The flowers should fall from above in one of the "dead ends", though note that due to the way the sublevel generation works, the Violet Candypop Bud may fail to appear entirely, as detailed [[Pikmin 2 cave generation|here]] and [[Mistake#Missing sublevel objects|here]]. | |||
{{cavegen|gk5}} | |||
{{sublevel technical | {{sublevel technical | ||
|cave = yakushima_2 | |cave = yakushima_2 | ||
| Line 258: | Line 531: | ||
}} | }} | ||
}} | }} | ||
{| class="wikitable mw-collapsible mw-collapsed technicaltable" | |||
! colspan="5" style="width: 288px;" | {{tt|Detailed object list|This is a representation of the data in the cave's file, and how the game makes use of it.}} | |||
|- | |||
! colspan="5" | The game spawns these "main" objects: | |||
|- | |||
! ID !! Object !! Amount !! Fall method !! Spawn location | |||
|- | |||
| 1 | |||
| {{icon|Armored Cannon Larva|y|n=Armored Cannon Beetle Larva}} (buried) | |||
| 3 | |||
| None | |||
| "Special" enemy spots | |||
|- | |||
| 2 | |||
| {{icon|Dwarf Bulbear|y}} | |||
| 4 | |||
| None | |||
| "Hard" enemy spots | |||
|- | |||
| 3 | |||
| {{icon|Dwarf Bulbear|y}} | |||
| 2 | |||
| None | |||
| "Easy" enemy spots | |||
|- | |||
| 4 | |||
| {{icon|Dwarf Bulbear|y}} | |||
| 2 | |||
| None | |||
| "Easy" enemy spots | |||
|- | |||
| 5 | |||
| {{icon|Dwarf Bulbear|y}} | |||
| 2 | |||
| None | |||
| "Easy" enemy spots | |||
|- | |||
! colspan="5" | Then it spawns these "treasure" objects: | |||
|- | |||
! ID !! Object !! Amount !! Fall method !! Spawn location | |||
|- | |||
| 6 | |||
| {{icon|Boom Cone|y}} (US)<br>{{icon|Magical Stage|y}} (EU/JP) | |||
| 1 | |||
| None | |||
| Treasure spots | |||
|- | |||
| 7 | |||
| {{icon|Sulking Antenna|y}} | |||
| 1 | |||
| None | |||
| Treasure spots | |||
|- | |||
! colspan="5" | Then it spawns these "dead end" objects: | |||
|- | |||
! ID !! Object !! Amount !! Fall method !! Spawn location | |||
|- | |||
| 8 | |||
| {{icon|Queen Candypop Bud|y}} | |||
| 1 | |||
| Falls from the sky | |||
| Dead ends | |||
|- | |||
| 9 | |||
| {{icon|Violet Candypop Bud|y}} | |||
| 1 | |||
| None | |||
| Dead ends | |||
|- | |||
| 10 | |||
| {{icon|Egg|y}} | |||
| 1 | |||
| Falls from the sky | |||
| Dead ends | |||
|- | |||
! colspan="5" | Then it spawns "dead end" objects in as many dead ends as it can. Chances: | |||
|- | |||
! ID !! Object !! Chance !! Fall method !! Spawn location | |||
|- | |||
| 10 | |||
| {{icon|Egg|y}} | |||
| 100% | |||
| Falls from the sky | |||
| Dead ends | |||
|} | |||
:''For details on how objects are spawned, and how some may fail to spawn, see [[Pikmin 2 cave generation|here]].'' | |||
==Sublevel 6== | |||
* '''Theme''': Toybox | |||
* '''Music''': ''[[Music in Pikmin 2#Giant Breadbug|Giant Breadbug]]'' | |||
* '''Treasures''': | |||
** {{icon|Dream Material|y}} (inside Giant Breadbug) | |||
** {{icon|Hideous Victual|y}} | |||
** {{icon|Meat of Champions|y}} | |||
** {{icon|Sweet Dreamer|y}} | |||
* '''Enemies''': | |||
** {{icon|Anode Beetle|y}} × 6 | |||
** {{icon|Breadbug|y}} × 2 | |||
** {{icon|Giant Breadbug|y}} × 1 | |||
** {{icon|Mitite|y}} (group of 10) × 0 - 3 (from eggs) | |||
* '''Obstacles''': | |||
** {{icon|Electrical wire|y}} × 7 | |||
* '''Vegetation''': | |||
** None | |||
* '''Others''': | |||
** {{icon|Egg|y}} × 3 | |||
{{see also|Giant Breadbug#Strategy|t1=Giant Breadbug strategy}} | |||
This sublevel, unlike the others, is always fully illuminated, making the player able to see the whole area. The [[Giant Breadbug]] is this cave's [[boss]]. Unlike most bosses, it is not accompanied by the usual boss theme, but it has its own music instead. It walks around the level with some small Breadbugs. Once defeated, the player will be able to obtain the [[Hideous Victual]], the [[Meat of Champions]], the [[Sweet Dreamer]] and the [[Dream Material]]. The latter treasure makes the leaders immune to electrical damage. | |||
{{cavegen|gk6}} | |||
{{sublevel technical | {{sublevel technical | ||
|cave = yakushima_2 | |cave = yakushima_2 | ||
| Line 303: | Line 661: | ||
}} | }} | ||
}} | }} | ||
{| class="wikitable mw-collapsible mw-collapsed technicaltable" | |||
{{ | ! colspan="5" style="width: 288px;" | {{tt|Detailed object list|This is a representation of the data in the cave's file, and how the game makes use of it.}} | ||
|- | |||
This | ! colspan="5" | The game spawns these "main" objects: | ||
|- | |||
! ID !! Object !! Amount !! Fall method !! Spawn location | |||
|- | |||
| 1 | |||
| {{icon|Giant Breadbug|y}} | |||
| 1 | |||
| None | |||
| "Special" enemy spots | |||
|- | |||
| - | |||
| {{icon|Dream Material|y}} | |||
| colspan="3" | Carried inside entry with ID 1 | |||
|- | |||
| 2 | |||
| {{icon|Breadbug|y}} | |||
| 2 | |||
| None | |||
| "Hard" enemy spots | |||
|- | |||
| 3 | |||
| {{icon|Egg|y}} | |||
| 3 | |||
| None | |||
| "Easy" enemy spots | |||
|- | |||
| 4 | |||
| {{icon|Anode Beetle|y}} | |||
| 2 | |||
| None | |||
| "Easy" enemy spots | |||
|- | |||
| 5 | |||
| {{icon|Anode Beetle|y}} | |||
| 4 | |||
| None | |||
| "Easy" enemy spots | |||
|- | |||
! colspan="5" | Then it spawns these "decoration" objects: | |||
|- | |||
! ID !! Object !! Amount !! Fall method !! Spawn location | |||
|- | |||
| 6 | |||
| {{icon|Electrical wire|y}} | |||
| 7 | |||
| None | |||
| Plant spots | |||
|- | |||
! colspan="5" | Then it spawns these "treasure" objects: | |||
|- | |||
! ID !! Object !! Amount !! Fall method !! Spawn location | |||
|- | |||
| 7 | |||
| {{icon|Meat of Champions|y}} | |||
| 1 | |||
| None | |||
| Treasure spots | |||
|- | |||
| 8 | |||
| {{icon|Hideous Victual|y}} | |||
| 1 | |||
| None | |||
| Treasure spots | |||
|- | |||
| 9 | |||
| {{icon|Sweet Dreamer|y}} | |||
| 1 | |||
| None | |||
| Treasure spots | |||
|} | |||
:''For details on how objects are spawned, and how some may fail to spawn, see [[Pikmin 2 cave generation|here]].'' | |||
==Chiyogami== | ==Chiyogami== | ||
[[File:Glutton's Kitchen chiyogami.png|thumb|left|Chiyogami paper on the second sublevel.]] | [[File:Glutton's Kitchen chiyogami.png|thumb|left|Chiyogami paper on the second sublevel.]] | ||
The second sublevel of this cave features a unique object, exclusive to the cave and sublevel: a piece of {{w|Origami paper#Chiyogami|chiyogami paper}}. It is a brown and slightly crumbled piece of paper with an ocean wave pattern. When walked on top of, it rustles. When a Yellow Pikmin is thrown from a piece of chiyogami, it will be thrown much higher and will fall more slowly, in {{npcp2}} exclusively. All Pikmin types will act as if they hit an enemy when thrown.{{cite youtube|snR1T6LUNXQ|showing how Pikmin react to being thrown while on top of a piece of chiyogami}} This object is also special in that it is internally designed like an [[enemy]], complete with attributes such as health and weight. However, since it can't actually be fought, such values go unused in actual gameplay. | The second sublevel of this cave features a unique object, exclusive to the cave and sublevel: a piece of {{w|Origami paper#Chiyogami|chiyogami paper}}. It is a brown and slightly crumbled piece of paper with an ocean wave pattern. When walked on top of, it rustles. When a Yellow Pikmin is thrown from a piece of chiyogami, it will be thrown much higher and will fall more slowly, in {{npcp2}} (and, by extension, the [[Pikmin 2 (Nintendo Switch)|Nintendo Switch port]]) exclusively. All Pikmin types will act as if they hit an enemy when thrown.{{cite youtube|snR1T6LUNXQ|showing how Pikmin react to being thrown while on top of a piece of chiyogami}} This object is also special in that it is internally designed like an [[enemy]], complete with attributes such as health and weight. However, since it can't actually be fought, such values go unused in actual gameplay. | ||
{{clear}} | {{clear}} | ||
| Line 384: | Line 812: | ||
|JapR=Shokujin no Daidokoro | |JapR=Shokujin no Daidokoro | ||
|JapM=Cooking God's Kitchen | |JapM=Cooking God's Kitchen | ||
|FraE=La Grande Cuisine (GameCube version)<br>Grande Cuisine (Wii version) | |FraE=La Grande Cuisine (GameCube and Switch version)<br>Grande Cuisine (Wii version) | ||
|FraEM=The Great Kitchen<br>Great Kitchen | |FraEM=The Great Kitchen<br>Great Kitchen | ||
|FraA=Grande cuisine | |FraA=Grande cuisine | ||
| Line 390: | Line 818: | ||
|Ita=Cucina Golosa | |Ita=Cucina Golosa | ||
|ItaM=Gluttonous Kitchen | |ItaM=Gluttonous Kitchen | ||
| | |Spa=Paraíso del Glotón | ||
| | |SpaM=Glutton's Paradise | ||
|Ger=Schlemmers Küche | |Ger=Schlemmers Küche | ||
|GerM=Gourmet's Kitchen | |GerM=Gourmet's Kitchen | ||
|Kor=식신의 부엌 | |||
|KorM=Cooking God's Kitchen | |||
|ChiTrad=食神廚房 | |||
}} | }} | ||
| Line 407: | Line 836: | ||
{{Perplexing Pool}} | {{Perplexing Pool}} | ||
{{ | {{p2 caves}} | ||
[[Category:Glutton's Kitchen| ]] | [[Category:Glutton's Kitchen| ]] | ||
Latest revision as of 06:00, April 14, 2024
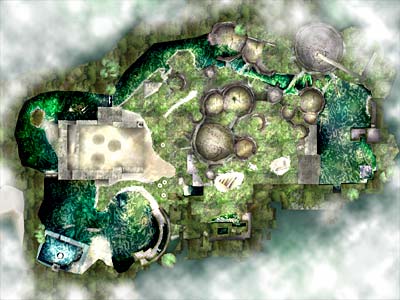
| Glutton's Kitchen | |
|---|---|

| |
| Location | Perplexing Pool |
| Sublevels | 6 |
| Treasures | 14 |
| Hazards | |
|
The following article or section contains guides. |
The Glutton's Kitchen (食神の台所?, lit.: "Cooking God's Kitchen") is one of the caves in the Perplexing Pool. The final boss of the cave is the Giant Breadbug. In the US version of this cave, there are ![]() × 1190 worth of treasures and
× 1190 worth of treasures and ![]() × 1270 worth of treasures in the European version.
× 1270 worth of treasures in the European version.
The only hazard in this cave is electricity. As such, the only Pikmin that are strictly necessary are Yellow Pikmin. Purple Pikmin are also recommended to deal with the Spotty Bulbear and Armored Cannon Larva, and also to fight the Breadbugs with. As such, your squad might contain 30-50 Purple Pikmin, and the remainder Yellow Pikmin. White Pikmin may be useful for their carrying speed, but not entirely necessary. There is also a Queen Candypop Bud, and because of the large scale of Pikmin numbers, it is not a problem to leave room for those eight.
How to reach[edit]
The cave is located beside the seesaw blocks leading up to where Yellow Pikmin are first found. Yellow Pikmin are required in order to destroy the electric gate blocking access to the cave.
Notes
Ship's dialogs
“Interesting! My odor detectors are reacting... A strong scent wafts from that hole!
I am a machine, so rating scents is beyond me, but your faces tell me all I need to know.
You are both drooling... I wish, just once, I could feel what it is like to drool.”Sublevel 1[edit]
- Theme: Toybox
- Music: Toy
- Treasures:
- Enemies:
 Dwarf Bulbear × 10
- Obstacles:
- None
- Vegetation:
- None
- Others:
- None
There are numerous Dwarf Bulbears here. They should be killed with Purple Pikmin. Inside the large wooden box should be another Bulbear. It too should be defeated by throwing Pikmin over the edge, allowing the player to grab the Master's Instrument. Wooden walls of a house can also be seen when ![]() /
/ ![]() is held down.
is held down.
| Technical sublevel information | |||||
|---|---|---|---|---|---|
| Internal cave name | yakushima_2 | ||||
| "Main" object maximum (?) | 10 | ||||
| "Treasure" object maximum (?) | 1 | ||||
| "Gate" object maximum (?) | 0 | ||||
| Dead end unit probability (?) | 0 | ||||
| Number of rooms (?) | 1 | ||||
| Corridor-to-room ratio (?) | 0 | ||||
| Escape geyser (?) | No | ||||
| Clogged hole (?) | No | ||||
| Cave units file (?) | 1_units_hit6x6_yakushima_toy.txt | ||||
| Lighting file (?) | yakushima_2_light.ini | ||||
| Background (?) | flooring ( | ||||
| Cave units (?) | |||||
 |
 |
 |
 |
 |
 |
| Dead end | Three-way crossing | Four-way crossing | Turning corridor | Corridor | Long corridor |
 |
|||||
| Room with wooden box | |||||
| Detailed object list | ||||
|---|---|---|---|---|
| The game spawns these "main" objects: | ||||
| ID | Object | Amount | Fall method | Spawn location |
| 1 | 4 | None | "Hard" enemy spots | |
| 2 | 3 | None | "Easy" enemy spots | |
| 3 | 3 | None | "Easy" enemy spots | |
| Then it spawns these "treasure" objects: | ||||
| ID | Object | Amount | Fall method | Spawn location |
| 4 | 1 | None | Treasure spots | |
- For details on how objects are spawned, and how some may fail to spawn, see here.
Sublevel 2[edit]
- Theme: Toybox
- Music: Toy Railroad
- Treasures:
 Massive Lid (GameCube US) /
  Happiness Emblem (Wii US) /
  Survival Container (Europe) /
  Milk Lid (Japan)
 Imperative Cookie
- Enemies:
 Breadbug × 3
 Cloaking Burrow-nit × 1
 Female Sheargrub × 4
 Male Sheargrub × 4
- Obstacles:
- None
- Vegetation:
 Violet Candypop Bud × 1 (if max Pikmin requirement is met)
- Others:
- Chiyogami paper × 2
A toy train track surrounds the Research Pod. It is possible to walk around on it, although this serves no purpose for the game's objective. There are Breadbugs on this level that will carry away treasure and defeated enemies into their dens. Cloaking Burrow-nits and Sheargrubs may also hinder the Pikmin from collecting the Massive Lid and Imperative Cookie. A Violet Candypop Bud can also appear here, but only if Purple Pikmin total is less than 20.
Pieces of chiyogami paper are also encountered on the floor. They are interactive, but like the train track, they serve no function other than to add to the scenery.
| Technical sublevel information | |||||
|---|---|---|---|---|---|
| Internal cave name | yakushima_2 | ||||
| "Main" object maximum (?) | 10 | ||||
| "Treasure" object maximum (?) | 2 | ||||
| "Gate" object maximum (?) | 0 | ||||
| Dead end unit probability (?) | 0 | ||||
| Number of rooms (?) | 1 | ||||
| Corridor-to-room ratio (?) | 0 | ||||
| Escape geyser (?) | No | ||||
| Clogged hole (?) | No | ||||
| Cave units file (?) | 1_units_large_toy.txt | ||||
| Lighting file (?) | yakushima_2_light.ini | ||||
| Background (?) | tatami ( | ||||
| Cave units (?) | |||||
|
|
|
|
|
|
| Dead end | Three-way crossing | Four-way crossing | Turning corridor | Corridor | Long corridor |
 |
|||||
| Toy train track room | |||||
| Detailed object list | ||||
|---|---|---|---|---|
| The game spawns these "main" objects: | ||||
| ID | Object | Amount | Fall method | Spawn location |
| 1 | 1 | None | "Special" enemy spots | |
| 2 | 2 | None | "Easy" enemy spots | |
| 3 | 2 | None | "Easy" enemy spots | |
| 4 | 4 | None | "Hard" enemy spots | |
| 5 | 1 | None | "Hard" enemy spots | |
| Then it spawns these "decoration" objects: | ||||
| ID | Object | Amount | Fall method | Spawn location |
| 6 | 2 | None | Plant spots | |
| 7 | 1 | None | Plant spots | |
| 8 | Chiyogami paper | 2 | None | Plant spots |
| Then it spawns these "treasure" objects: | ||||
| ID | Object | Amount | Fall method | Spawn location |
| 9 | 1 | None | Treasure spots | |
| 10 | 1 | None | Treasure spots | |
- For details on how objects are spawned, and how some may fail to spawn, see here.
Sublevel 3[edit]
- Theme: Toybox
- Music: Toy
- Treasures:
- Enemies:
 Anode Beetle × 10
- Breadbug × 2
 Mitite (group of 10) × indefinite amount (from eggs)
 Puffy Blowhog × 1
- Obstacles:
 Electrical wire × 5
- Vegetation:
- Others:
 Egg × 1 or more
A xylophone and a small tambourine are the main decorations on this level and also serve as large obstacles. Lots of electrical wires and Anode Beetles will be in the way, so those should taken care of with Yellow Pikmin; if the player lacks these, they may use this sublevel's Golden Candypop Bud. This type of Candypop cannot be found anywhere else in the game, so maybe it would be a good idea to throw a single Pikmin into it to make the Golden Candypop Bud appear in the Piklopedia.
A Puffy Blowhog also flies around here, and it can be encountered and fought out of bounds. Breadbugs will be stealing treasures and corpses, such as the Harmonic Synthesizer and Director of Destiny, since both lie in the open.
Note that due to the way sublevel generation works, it is possible for Harmonic Synthesizer to not appear, as detailed here and here.
| Technical sublevel information | |||||
|---|---|---|---|---|---|
| Internal cave name | yakushima_2 | ||||
| "Main" object maximum (?) | 16 | ||||
| "Treasure" object maximum (?) | 2 | ||||
| "Gate" object maximum (?) | 0 | ||||
| Dead end unit probability (?) | 50 | ||||
| Number of rooms (?) | 3 | ||||
| Corridor-to-room ratio (?) | 0 | ||||
| Escape geyser (?) | No | ||||
| Clogged hole (?) | No | ||||
| Cave units file (?) | 3_units_small2_small_mid_toy.txt | ||||
| Lighting file (?) | yakushima_2_light.ini | ||||
| Background (?) | flooring ( | ||||
| Cave units (?) | |||||
 |
|
|
|
|
|
| Dead end with item | Three-way crossing | Four-way crossing | Turning corridor | Corridor | Long corridor |
 |
 |
 |
|||
| Large rectangular empty room | Tambourine room | Xylophone room | |||
| Detailed object list | ||||
|---|---|---|---|---|
| The game spawns these "main" objects: | ||||
| ID | Object | Amount | Fall method | Spawn location |
| 1 | 1 | None | "Hard" enemy spots | |
| 2 | 2 | None | "Hard" enemy spots | |
| 3 | 4 | None | "Hard" enemy spots | |
| 4 | 2 | None | "Easy" enemy spots | |
| 5 | 2 | None | "Easy" enemy spots | |
| 6 | 5 | None | Cave unit seams | |
| Then it spawns these "treasure" objects: | ||||
| ID | Object | Amount | Fall method | Spawn location |
| 7 | 1 | None | Treasure spots | |
| 8 | 1 | None | Treasure spots | |
| Then it spawns these "dead end" objects: | ||||
| ID | Object | Amount | Fall method | Spawn location |
| 9 | 1 | None | Dead ends | |
| 10 | 1 | None | Dead ends | |
| 11 | 2 | Falls from the sky | Dead ends | |
| Then it spawns "dead end" objects in as many dead ends as it can. Chances: | ||||
| ID | Object | Chance | Fall method | Spawn location |
| 10 | 100% | None | Dead ends | |
- For details on how objects are spawned, and how some may fail to spawn, see here.
Sublevel 4[edit]
- Theme: Toybox
- Music: Toy Railroad (alternate)
- Treasures:
 Invigorator
- Happiness Emblem (GameCube US) / Massive Lid (Wii US) /
 Drone Supplies (Europe) /
  Good Old Memories (Japan) (inside Spotty Bulbear in all versions)
  White Goodness
- Enemies:
- Breadbug × 2
- Dwarf Bulbear × 5
 Spotty Bulbear × 1
- Obstacles:
- None
- Vegetation:
- None
- Others:
- None
A few Breadbugs and a Spotty Bulbear with its young are present here. It is possible to petrify both the parent and the young Bulbears with one single bitter spray. Another good strategy is to bring just a few Purple Pikmin and find it before it picks up any Dwarf Bulbears, than petrify it and toss away. Treasures available here are the Happiness Emblem, Invigorator and White Goodness.
| Technical sublevel information | |||||
|---|---|---|---|---|---|
| Internal cave name | yakushima_2 | ||||
| "Main" object maximum (?) | 8 | ||||
| "Treasure" object maximum (?) | 2 | ||||
| "Gate" object maximum (?) | 0 | ||||
| Dead end unit probability (?) | 0 | ||||
| Number of rooms (?) | 2 | ||||
| Corridor-to-room ratio (?) | 0 | ||||
| Escape geyser (?) | No | ||||
| Clogged hole (?) | No | ||||
| Cave units file (?) | 2_units_hit47_hit67_toy.txt | ||||
| Lighting file (?) | yakushima_2_light.ini | ||||
| Background (?) | flooring ( | ||||
| Cave units (?) | |||||
|
|
|
|
|
|
| Dead end | Three-way crossing | Four-way crossing | Turning corridor | Corridor | Long corridor |
 |
 |
||||
| Room with 3 exits | Room with 4 exits | ||||
| Detailed object list | ||||
|---|---|---|---|---|
| The game spawns these "main" objects: | ||||
| ID | Object | Amount | Fall method | Spawn location |
| 1 | 1 | None | "Special" enemy spots | |
| - | Carried inside entry with ID 1 | |||
| 2 | 3 | None | "Hard" enemy spots | |
| 3 | 2 | None | "Easy" enemy spots | |
| 4 | 2 | None | "Hard" enemy spots | |
| Then it spawns these "treasure" objects: | ||||
| ID | Object | Amount | Fall method | Spawn location |
| 5 | 1 | None | Treasure spots | |
| 6 | 1 | None | Treasure spots | |
- For details on how objects are spawned, and how some may fail to spawn, see here.
Sublevel 5[edit]
- Theme: Toybox
- Music: Toy
- Treasures:
 Boom Cone (US) /
  Magical Stage (Europe/Japan)
 Sulking Antenna
- Enemies:
 Armored Cannon Beetle Larva (buried) × 3
- Dwarf Bulbear × 10
- Mitite (group of 10) × indefinite amount (from eggs)
- Obstacles:
- None
- Vegetation:
- Others:
- Egg × 1 or more
Dwarf Bulbears and Armored Cannon Beetle Larvae which burrow out of dirt piles can be found here. Pikmin must be thrown onto their plates/blocks in order to defeat them. The Sulking Antenna and the Boom Cone are found in this level.
Alternatively, the Cannon Beetles can be used to defeat the Dwarf Bulbears and, with skill, other Cannon Beetles by luring them with a leader.
A Violet and a Queen Candypop Bud aid the players forces here. The flowers should fall from above in one of the "dead ends", though note that due to the way the sublevel generation works, the Violet Candypop Bud may fail to appear entirely, as detailed here and here.
| Technical sublevel information | |||||
|---|---|---|---|---|---|
| Internal cave name | yakushima_2 | ||||
| "Main" object maximum (?) | 13 | ||||
| "Treasure" object maximum (?) | 2 | ||||
| "Gate" object maximum (?) | 0 | ||||
| Dead end unit probability (?) | 50 | ||||
| Number of rooms (?) | 2 | ||||
| Corridor-to-room ratio (?) | 0 | ||||
| Escape geyser (?) | No | ||||
| Clogged hole (?) | No | ||||
| Cave units file (?) | 2_units_sara_sara2_toy.txt | ||||
| Lighting file (?) | yakushima_2_light.ini | ||||
| Background (?) | tatami ( | ||||
| Cave units (?) | |||||
|
|
|
|
|
|
| Dead end with item | Three-way crossing | Four-way crossing | Turning corridor | Corridor | Long corridor |
 |
 |
||||
| Room with a dirty plate | Room with colored half-discs | ||||
| Detailed object list | ||||
|---|---|---|---|---|
| The game spawns these "main" objects: | ||||
| ID | Object | Amount | Fall method | Spawn location |
| 1 | 3 | None | "Special" enemy spots | |
| 2 | 4 | None | "Hard" enemy spots | |
| 3 | 2 | None | "Easy" enemy spots | |
| 4 | 2 | None | "Easy" enemy spots | |
| 5 | 2 | None | "Easy" enemy spots | |
| Then it spawns these "treasure" objects: | ||||
| ID | Object | Amount | Fall method | Spawn location |
| 6 | 1 | None | Treasure spots | |
| 7 | 1 | None | Treasure spots | |
| Then it spawns these "dead end" objects: | ||||
| ID | Object | Amount | Fall method | Spawn location |
| 8 | 1 | Falls from the sky | Dead ends | |
| 9 | 1 | None | Dead ends | |
| 10 | 1 | Falls from the sky | Dead ends | |
| Then it spawns "dead end" objects in as many dead ends as it can. Chances: | ||||
| ID | Object | Chance | Fall method | Spawn location |
| 10 | 100% | Falls from the sky | Dead ends | |
- For details on how objects are spawned, and how some may fail to spawn, see here.
Sublevel 6[edit]
- Theme: Toybox
- Music: Giant Breadbug
- Treasures:
 Dream Material (inside Giant Breadbug)
 Hideous Victual
 Meat of Champions
 Sweet Dreamer
- Enemies:
- Anode Beetle × 6
- Breadbug × 2
 Giant Breadbug × 1
- Mitite (group of 10) × 0 - 3 (from eggs)
- Obstacles:
- Electrical wire × 7
- Vegetation:
- None
- Others:
- Egg × 3
- See also: Giant Breadbug strategy.
This sublevel, unlike the others, is always fully illuminated, making the player able to see the whole area. The Giant Breadbug is this cave's boss. Unlike most bosses, it is not accompanied by the usual boss theme, but it has its own music instead. It walks around the level with some small Breadbugs. Once defeated, the player will be able to obtain the Hideous Victual, the Meat of Champions, the Sweet Dreamer and the Dream Material. The latter treasure makes the leaders immune to electrical damage.
| Technical sublevel information | |||||
|---|---|---|---|---|---|
| Internal cave name | yakushima_2 | ||||
| "Main" object maximum (?) | 12 | ||||
| "Treasure" object maximum (?) | 3 | ||||
| "Gate" object maximum (?) | 0 | ||||
| Dead end unit probability (?) | 0 | ||||
| Number of rooms (?) | 1 | ||||
| Corridor-to-room ratio (?) | 0 | ||||
| Escape geyser (?) | Yes | ||||
| Clogged hole (?) | No | ||||
| Cave units file (?) | 1_units_opan_toy.txt | ||||
| Lighting file (?) | toy_light_cha.ini | ||||
| Background (?) | flooring ( | ||||
| Cave units (?) | |||||
 |
|||||
| Giant Breadbug arena | |||||
| Detailed object list | ||||
|---|---|---|---|---|
| The game spawns these "main" objects: | ||||
| ID | Object | Amount | Fall method | Spawn location |
| 1 | 1 | None | "Special" enemy spots | |
| - | Carried inside entry with ID 1 | |||
| 2 | 2 | None | "Hard" enemy spots | |
| 3 | 3 | None | "Easy" enemy spots | |
| 4 | 2 | None | "Easy" enemy spots | |
| 5 | 4 | None | "Easy" enemy spots | |
| Then it spawns these "decoration" objects: | ||||
| ID | Object | Amount | Fall method | Spawn location |
| 6 | 7 | None | Plant spots | |
| Then it spawns these "treasure" objects: | ||||
| ID | Object | Amount | Fall method | Spawn location |
| 7 | 1 | None | Treasure spots | |
| 8 | 1 | None | Treasure spots | |
| 9 | 1 | None | Treasure spots | |
- For details on how objects are spawned, and how some may fail to spawn, see here.
Chiyogami[edit]

The second sublevel of this cave features a unique object, exclusive to the cave and sublevel: a piece of chiyogami paper. It is a brown and slightly crumbled piece of paper with an ocean wave pattern. When walked on top of, it rustles. When a Yellow Pikmin is thrown from a piece of chiyogami, it will be thrown much higher and will fall more slowly, in New Play Control! Pikmin 2 (and, by extension, the Nintendo Switch port) exclusively. All Pikmin types will act as if they hit an enemy when thrown.[1] This object is also special in that it is internally designed like an enemy, complete with attributes such as health and weight. However, since it can't actually be fought, such values go unused in actual gameplay.
Technical information[edit]
| Pikmin 2 technical information (?) | |||
|---|---|---|---|
| Internal name | chiyogami
| ||
| Global properties (List) | |||
| ID | Japanese comment | Property | Value |
| s000 | friction(not used) | Friction | 0.5 |
| s001 | wallReflection | Unknown (wall bounce speed multiplier?) | 0.5 |
| s002 | faceDirAdjust | Unknown | 0.25 |
| s003 | accel | Acceleration | 0.1 |
| s004 | bounceFactor | Unknown (bounce when it hits the ground?) | 0.3 |
| fp00 | ライフ | HP | 1100 |
| fp01 | マップとの当り | Unknown (related to slopes) | 40 |
| fp02 | ダメージスケールXZ | Horizontal damage scale | 0.5 |
| fp03 | ダメージスケールY | Vertical damage scale | 0.5 |
| fp04 | ダメージフレーム | Damage scale duration | 0.35 |
| fp05 | 質量 | Unknown (weight?) | 0.1 |
| fp06 | 速度 | Move speed | 50 |
| fp08 | 回転速度率 | Rotation acceleration | 0.2 |
| fp09 | テリトリー | Territory radius | 25 |
| fp10 | ホーム範囲 | "Home" radius | 80 |
| fp11 | プライベート距離 | "Private" radius | 20 |
| fp12 | 視界距離 | Sight radius | 500 |
| fp13 | 視界角度 | FOV | 90 |
| fp14 | 探索距離 | Unknown (exploration radius?) | 500 |
| fp15 | 探索角度 | Unknown (exploration angle?) | 120 |
| fp16 | 振り払い率 | Successful shake rate | 1 |
| fp17 | 振り払い力 | Shake knockback | 200 |
| fp18 | 振り払いダメージ | Shake damage | 0 |
| fp19 | 振り払い範囲 | Shake range | 30 |
| fp20 | 攻撃可能範囲 | Unknown (shock attack max range?) | 80 |
| fp21 | 攻撃可能角度 | Unknown (shock attack max angle?) | 50 |
| fp22 | 攻撃ヒット範囲 | Unknown (attack hit range?) | 80 |
| fp23 | 攻撃ヒット角度 | Unknown (attack hit angle?) | 50 |
| fp24 | 攻撃力 | Attack damage | 10 |
| fp25 | 視界高 | Unknown (height visibility?) | 50 |
| fp26 | 探索高 | Unknown (exploration height?) | 50 |
| fp27 | ライフの高さ | HP wheel height | 90 |
| fp28 | 回転最大速度 | Rotation speed | 8 |
| fp29 | 警戒時間 | Unknown (warning time?) | 15 |
| fp30 | 警戒ライフ | Unknown | 30 |
| fp31 | ライフ回復率 | Regeneration rate | 0.0001 |
| fp32 | LOD半径 | Off-camera radius | 55 |
| fp33 | マップとのあたりポリゴンの選定 | Collision processing radius | 40 |
| fp34 | ピクミンとのあたり | Pikmin damage radius | 40 |
| fp35 | 石化時間 | Petrification duration | 1 |
| fp36 | ヒップドロップダメージ | Purple Pikmin drop damage | N/A |
| fp37 | 地震気絶確立 | Purple Pikmin stun chance | N/A |
| fp38 | 地震気絶時間 | Purple Pikmin stun time | N/A |
| ip01 | 振り払い打撃A | Shake mode 1 – hit count | 6 |
| ip02 | 振り払い張付1 | Shake mode 1 – Pikmin requirement | 5 |
| ip03 | 振り払い打撃B | Shake mode 2 – hit count | 12 |
| ip04 | 振り払い張付2 | Shake mode 2 – Pikmin requirement | 10 |
| ip05 | 振り払い打撃C | Shake mode 3 – hit count | 17 |
| ip06 | 振り払い張付3 | Shake mode 3 – Pikmin requirement | 20 |
| ip07 | 振り払い打撃D | Shake mode 4 – hit count | 22 |
| Specific properties | |||
| None | |||
Gallery[edit]
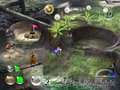
The entrance to the cave.
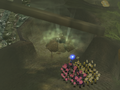
Closeup of the entrance.


Trivia[edit]
- The Massive Lid and Happiness Emblem's places are switched between the US GameCube and US Wii versions of the game. This is the only known instance in the entire series where two plot-based collectibles are switched between different versions of the game, within the same region.
- The Glutton's Kitchen is in the same location where the Pilot's Seat in Pikmin was in The Distant Spring.
Names in other languages[edit]
| Language | Name | Meaning |
|---|---|---|
| 食神の台所? Shokujin no Daidokoro |
Cooking God's Kitchen | |
(traditional) |
食神廚房 | |
| Grande cuisine | Great kitchen | |
| La Grande Cuisine (GameCube and Switch version) Grande Cuisine (Wii version) |
The Great Kitchen Great Kitchen | |
| Schlemmers Küche | Gourmet's Kitchen | |
| Cucina Golosa | Gluttonous Kitchen | |
| 식신의 부엌 | Cooking God's Kitchen | |
| Paraíso del Glotón | Glutton's Paradise |
See also[edit]
References[edit]
- ^ YouTube video showing how Pikmin react to being thrown while on top of a piece of chiyogami
| Caves in Pikmin 2 | |
|---|---|
| Valley of Repose | Emergence Cave • Subterranean Complex • Frontier Cavern |
| Awakening Wood | Hole of Beasts • White Flower Garden • Bulblax Kingdom • Snagret Hole |
| Perplexing Pool | Citadel of Spiders • Glutton's Kitchen • Shower Room • Submerged Castle |
| Wistful Wild | Cavern of Chaos • Hole of Heroes • Dream Den |