Cave unit: Difference between revisions
(Created page with "{{game icons|2=y}} Caves in ''Pikmin 2'' are made out of randomly placed '''units'''. There are units that represent dead ends, corridors, crossings, and rooms. Every...") |
(→Tiles) |
||
| (53 intermediate revisions by 16 users not shown) | |||
| Line 1: | Line 1: | ||
{{game icons| | {{game icons|p2=y}} | ||
[[Cave]]s in ''[[Pikmin 2]]'' are made out of | [[Cave]]s in ''[[Pikmin 2]]'' are made out of [[Randomness|random]]ly placed '''units'''. There are units that represent dead ends, corridors, crossings, and rooms. Every cave's sublevel has a list of units that can be used by the game to create it; the latter is then responsible to randomly align the units in order to create a level with no unconnected exits. | ||
== | There are three types of units, as defined by the "room type" property, declared in the sublevel unit definition text files: | ||
The following is a list of all existing units in ''Pikmin 2'', used and [[Unused content|unused]]. | *Dead ends/alcoves: These close off pathways and exits of rooms. Internally, these are called "caps", and their "room type" is 0. | ||
*Corridors: pathways and corridors that normally don't have any special features; their walls decide the path or paths the player can take. Their "room type" is 2. | |||
*Rooms: decorated and often large rooms, featuring walls and objects organized in a certain fashion. Their "room type" is 1. | |||
In [[2-Player Battle]], for all caves excluding the [[Dim Labyrinth]], there is a static list of units to use, as well as their position and rotation. Instead of the game generating a cave using the available units, it only has to pick one of the available static layouts. These static layouts can be found in <code>/user/Abe/vs</code>. | |||
==Regular units== | |||
The following is a list of all existing units in ''Pikmin 2'', used and [[Unused content in Pikmin 2|unused]], and sorted by theme. The themes are named based on the common word in the units' names. | |||
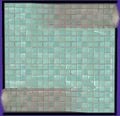
===Concrete=== | ===Concrete=== | ||
Units in the concrete theme have their names end with "conc", which is likely short for {{j|コンクリート|konkurīto|concrete|f=tp}}; this word comes from the concrete walls that these units have. | |||
<gallery> | <gallery> | ||
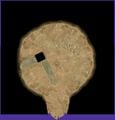
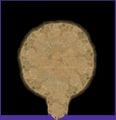
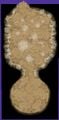
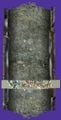
File: | File:P2CU_cap_conc.jpg|'''cap_conc''': Dead end. | ||
File: | File:P2CU_item_cap_conc.jpg|'''item_cap_conc''': Dead end (that presumably contains an item). | ||
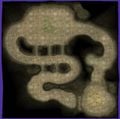
File: | File:P2CU_room_16x17r_conc.jpg|'''room_16x17r_conc''': Large unit with a circular room, a roughly plus-shaped room and a corridor with a stream of water, connected by pipes. It only appears on the [[Hidden Garden]] and sublevel 4 of the [[Shower Room]], being the only unit in both. | ||
File:P2CU_room_4x4a_4_conc.jpg|'''room_4x4a_4_conc''': Basic 4x4 room. | |||
File: | File:P2CU_room_4x4b_4_conc.jpg|'''room_4x4b_4_conc''': 4x4 room with a small portion of it closed inward. | ||
File: | File:P2CU_room_4x4c_4_conc.jpg|'''room_4x4c_4_conc''': 4x4 room with roots. | ||
File: | File:P2CU_room_4x4d_4_conc.jpg|'''room_4x4d_4_conc''': 4x4 room with a partially rocky floor and some extra walls. | ||
File: | File:P2CU_room_4x4e_4_conc.jpg|'''room_4x4e_4_conc''': 4x4 room, similar to the first, but with a C-shaped wall in the middle. | ||
File: | File:P2CU_room_4x4f_4_conc.jpg|'''room_4x4f_4_conc''': 4x4 room with a raised stone platform. | ||
File: | File:P2CU_room_4x4g_4_conc.jpg|'''room_4x4g_4_conc''': 4x4 room with 2 extra walls, one in the middle. | ||
File: | File:P2CU_room_4x4g_water_4_conc.jpg|'''room_4x4g_water_4_conc''': 4x4 room with 2 extra walls, one in the middle, and water. Only used on sublevel 1 of the [[Submerged Castle]]. | ||
File: | File:P2CU_room_dan4x4h_2_conc.jpg|'''room_dan4x4h_2_conc''': 4x4 room with the southwestern portion rising up. "dan" means {{j|段|dan|step|f=tp}}. | ||
File: | File:P2CU_room_dan4x4i_3_conc.jpg|'''room_dan4x4i_3_conc''': 4x4 room with some rising portions, a stony floor, and a sub-room at the north. "dan" means {{j|段|dan|step|f=tp}}. | ||
File: | File:P2CU_room_DKumo16x10t_conc.jpg|'''room_DKumo16x10t_conc''': Circular room, two roughly square rooms and a smaller circular room, connected by brief corridors. This is where the [[Beady Long Legs]] is first fought. "DKumo" refers to the boss, {{j|ダマグモ|Dama Gumo|Orb Spider|f=tp}}. | ||
File: | File:P2CU_room_hitode3x3m_5_conc.jpg|'''room_hitode3x3m_5_conc''': 3x3 room with a wall partially separating the north and south, and a partial and thick central wall on the south. "hitode" means {{j|人出|hitode|turnout|f=tp}}. | ||
File: | File:P2CU_room_manh7x7p_9_conc.jpg|'''room_manh7x7p_9_conc''': 7x7 circular room in the center, with 8 openings (and 9 exits) scattered around. It's the main room in the [[Dweevil Nest]]. "manh" could refer to "manhole". | ||
File: | File:P2CU_room_manh7x7q_8_conc.jpg|'''room_manh7x7q_8_conc''': 7x7 room similar to the previous one, but the center of the room has a sandpit. [[Snavian|Snagrets]] are commonly fought here. "manh" could refer to "manhole". | ||
File: | File:P2CU_room_manh_2_conc.jpg|'''room_manh_2_conc''': Large circular room with a partially stoned floor. "manh" could refer to "manhole". | ||
File: | File:P2CU_room_north4x4j_1_conc.jpg|'''room_north4x4j_1_conc''': 4x4 room with some rocky terrain, a wall, and a tube. | ||
File: | File:P2CU_room_north4x4k_1_bomb_conc.jpg|'''room_north4x4k_1_bomb_conc''': 4x4 room with a rusty open pipe and a crevice. "bomb" refers to the fact that this sublevel was used in a unused sublevel as part of a puzzle involving [[bomb rock]]s. Unused. | ||
File: | File:P2CU_room_north4x4k_1_conc.jpg|'''room_north4x4k_1_conc''': The same as the previous room, except portion of the tube is underground. Sublevel 2 of the [[Submerged Castle]] always ends with this. | ||
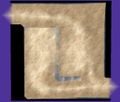
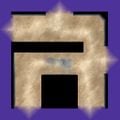
File:P2CU_room_north4x4l_1_conc.jpg|'''room_north4x4l_1_conc''': Corridor that leads to a dead end, after a U-turn. | |||
File: | File:P2CU_room_Oashi8x9_conc.jpg|'''room_Oashi8x9_conc''': Large circular room with a partially stoned floor, and light shining from above. It's only used on sublevel 15 of the [[Hole of Heroes]], where the [[Raging Long Legs]] is fought. "Oashi" refers to the boss's big feet. | ||
File: | File:P2CU_room_pype10x18s_conc.jpg|'''room_pype10x18s_conc''': 10x18 room with a central room, connected to a small circular room by a small tube, and a huge tube with flowing water spanning all-throughout. It's the main part of sublevel 2 of the [[Submerged Castle]]. "pype" means "pipe". | ||
File:P2CU_room_pype3x4n_2_conc.jpg|'''room_pype3x4n_2_conc''': 3x4 room with a pipe that opens on the top and east, as well as a rusted opening. "pype" means "pipe". | |||
File:P2CU_room_pype4x4o_3_conc.jpg|'''room_pype4x4o_3_conc''': 4x4 room with a pipe similar to the one in the previous unit, but on the center. "pype" means "pipe". | |||
File: | File:P2CU_room_spiral_1_conc.jpg|'''room_spiral_1_conc''': A small maze of concrete walls on sand, with the center spiraling. Only used on sublevel 8 of the [[Dream Den]]. | ||
File: | File:P2CU_way2x2_conc.jpg|'''way2x2_conc''': Straight corridor, 1x2. | ||
File: | File:P2CU_way2_conc.jpg|'''way2_conc''': Straight corridor. | ||
File: | File:P2CU_way3_conc.jpg|'''way3_conc''': Three-way crossing. | ||
File: | File:P2CU_way4_conc.jpg|'''way4_conc''': Four-way crossing. | ||
File: | File:P2CU_wayl_conc.jpg|'''wayl_conc''': Turning corridor. | ||
File: | |||
File: | |||
File: | |||
</gallery> | </gallery> | ||
===Garden=== | ===Garden=== | ||
Units in the garden theme have have their names end with "kusachi" ({{j|草地|kusachi|meadow}}). | |||
<gallery> | <gallery> | ||
File:P2CU_cap_kusachi.jpg|Dead end. | File:P2CU_cap_kusachi.jpg|'''cap_kusachi''': Dead end. | ||
File:P2CU_item_cap_kusachi.jpg|Dead end (that presumably contains an item). | File:P2CU_item_cap_kusachi.jpg|'''item_cap_kusachi''': Dead end (that presumably contains an item). | ||
File:P2CU_room_5x5a_2_kusachi.jpg|Room with a splitting path that circle around a central area. One of the paths is a dead end. | File:P2CU_room_5x5a_2_kusachi.jpg|'''room_5x5a_2_kusachi''': Room with a splitting path that circle around a central area. One of the paths is a dead end. | ||
File:P2CU_room_big2_kusachi.jpg|Like the bucket room, except without the bucket, shovel, or sand. Used only on sublevel 1 of the [[Breeding Ground]] and sublevel 1 of the [[Hole of Heroes]]. | File:P2CU_room_big2_kusachi.jpg|'''room_big2_kusachi''': Like the bucket room, except without the bucket, shovel, or sand. Used only on sublevel 1 of the [[Breeding Ground]] and sublevel 1 of the [[Hole of Heroes]]. | ||
File:P2CU_room_big_kusachi.jpg|Room with an upside-down bucket on top of sand, and a toy shovel leaning on it. | File:P2CU_room_big_kusachi.jpg|'''room_big_kusachi''': Room with an upside-down bucket on top of sand, and a toy shovel leaning on it. | ||
File:P2CU_room_ike_kusachi.jpg|Like the large three way crossing room, but with a pond in the middle; it can be crossed with some small wooden boards placed on top.| | File:P2CU_room_ike_kusachi.jpg|'''room_ike_kusachi''': Like the large three-way crossing room, but with a pond in the middle; it can be crossed with some small wooden boards placed on top. "ike" means {{j|池|ike|pond|f=tp}}. | ||
File:P2CU_room_mid_kusachi.jpg|Large three way crossing. | File:P2CU_room_mid_kusachi.jpg|'''room_mid_kusachi''': Large three-way crossing. | ||
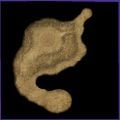
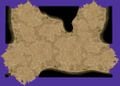
File:P2CU_room_torigoya_kusachi.jpg|Small circular rooms with roots, connected by a crossing corridor, and a pathway to | File:P2CU_room_torigoya_kusachi.jpg|'''room_torigoya_kusachi''': Small circular rooms with roots, connected by a crossing corridor, and a pathway to a birdhouse with light shining through the window. Exclusive to sublevel 1 of the [[Snagret Hole]]. "torigoya" means {{j|鳥小屋|torigoya|aviary|f=tp}}. | ||
File:P2CU_way2x2_kusachi.jpg|Straight corridor, 1x2. | File:P2CU_way2x2_kusachi.jpg|'''way2x2_kusachi''': Straight corridor, 1x2. | ||
File:P2CU_way2_kusachi.jpg|Straight corridor. | File:P2CU_way2_kusachi.jpg|'''way2_kusachi''': Straight corridor. | ||
File:P2CU_way3_kusachi.jpg|Three way crossing. | File:P2CU_way3_kusachi.jpg|'''way3_kusachi''': Three-way crossing. | ||
File:P2CU_way4_kusachi.jpg|Four way crossing. | File:P2CU_way4_kusachi.jpg|'''way4_kusachi''': Four-way crossing, featuring a twig with a leaf. Unused, as none of the used floor setups allow it to appear. | ||
File:P2CU_wayl_kusachi.jpg|Turning corridor. | File:P2CU_wayl_kusachi.jpg|'''wayl_kusachi''': Turning corridor. | ||
</gallery> | </gallery> | ||
===Metal=== | ===Metal=== | ||
Units in the metal theme have their names end with "metal". | |||
<gallery> | <gallery> | ||
File:P2CU_cap_metal.jpg|Dead end. | File:P2CU_cap_metal.jpg|'''cap_metal''': Dead end. | ||
File:P2CU_item_cap_metal.jpg|Dead end (that presumably contains an item). | File:P2CU_item_cap_metal.jpg|'''item_cap_metal''': Dead end (that presumably contains an item). | ||
File:P2CU_room_ari1_3_metal.jpg|Circular room with three rusty overhangs in the middle. | File:P2CU_room_ari1_3_metal.jpg|'''room_ari1_3_metal''': Circular room with three rusty overhangs in the middle. | ||
File:P2CU_room_cent_4_metal.jpg|Room with 4 exits and a bit of purple metal on the center. | File:P2CU_room_cent_4_metal.jpg|'''room_cent_4_metal''': Room with 4 exits and a bit of purple metal on the center. "cent" could mean "center". | ||
File:P2CU_room_hitode2x2_4_metal.jpg|Room with a very rusted metal board, with two tubes sticking up.| | File:P2CU_room_hitode2x2_4_metal.jpg|'''room_hitode2x2_4_metal''': Room with a very rusted metal board, with two tubes sticking up. "hitode" means {{j|人出|hitode|turnout|f=tp}}. | ||
File:P2CU_room_hitode2x3_5_metal.jpg|Large four way crossing, in an X shape.| | File:P2CU_room_hitode2x3_5_metal.jpg|'''room_hitode2x3_5_metal''': Large four-way crossing, in an X shape. "hitode" means {{j|人出|hitode|turnout|f=tp}}. | ||
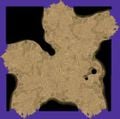
File:P2CU_room_hitode3x3_5_metal.jpg|Room with a raised platform in the corner, with a blue metal circle, sometimes housing an [[Armored Cannon Beetle Larva]].| | File:P2CU_room_hitode3x3_5_metal.jpg|'''room_hitode3x3_5_metal''': Room with a raised platform in the corner, with a blue metal circle, sometimes housing an [[Armored Cannon Larva|Armored Cannon Beetle Larva]]. "hitode" means {{j|人出|hitode|turnout|f=tp}}. | ||
File:P2CU_room_hitode3x4_4_metal.jpg|Room with 4 exits.| | File:P2CU_room_hitode3x4_4_metal.jpg|'''room_hitode3x4_4_metal''': Room with 4 exits. "hitode" means {{j|人出|hitode|turnout|f=tp}}. | ||
File:P2CU_room_hitode4x4_3_metal.jpg|Circular room with a raised platform in the corner, with dark and blue metal, commonly housing an [[Armored Cannon Beetle Larva]].| | File:P2CU_room_hitode4x4_3_metal.jpg|'''room_hitode4x4_3_metal''': Circular room with a raised platform in the corner, with dark and blue metal, commonly housing an [[Armored Cannon Larva|Armored Cannon Beetle Larva]]. "hitode" means {{j|人出|hitode|turnout|f=tp}}. | ||
File:P2CU_room_hitode4x4_6_metal.jpg|Room with a permanently-closed small rusty hatch.| | File:P2CU_room_hitode4x4_6_metal.jpg|'''room_hitode4x4_6_metal''': Room with a permanently-closed small rusty hatch. "hitode" means {{j|人出|hitode|turnout|f=tp}}. | ||
File:P2CU_room_hitode4x4_7_metal.jpg|Room with a large blue metal circle near the center, as well as a smaller one on a raised platform.| | File:P2CU_room_hitode4x4_7_metal.jpg|'''room_hitode4x4_7_metal''': Room with a large blue metal circle near the center, as well as a smaller one on a raised platform. "hitode" means {{j|人出|hitode|turnout|f=tp}}. | ||
File:P2CU_room_hitode4x4_tower_3_metal.jpg|Like the circular room with a raised platform that normally houses [[Armored Cannon Beetle Larva]]e, but with a tower in the center instead. Used only on sublevel 7 of [[Subterranean Complex]] and sublevel 1 of the [[Rusty Gulch]].| | File:P2CU_room_hitode4x4_tower_3_metal.jpg|'''room_hitode4x4_tower_3_metal''': Like the circular room with a raised platform that normally houses [[Armored Cannon Larva|Armored Cannon Beetle Larva]]e, but with a tower in the center instead. Used only on sublevel 7 of [[Subterranean Complex]] and sublevel 1 of the [[Rusty Gulch]]. "hitode" means {{j|人出|hitode|turnout|f=tp}}. | ||
File:P2CU_room_houdai2_1_metal.jpg|Room with several walls, and a pond with a white circle in the center. This is one of the [[Man-at-Legs]]' arenas. | File:P2CU_room_houdai2_1_metal.jpg|'''room_houdai2_1_metal''': Room with several walls, and a pond with a white circle in the center. This is one of the [[Man-at-Legs]]'s arenas. "houdai" is the boss' internal name. | ||
File:P2CU_room_houdai_1_metal.jpg|Circular room with a spiderweb-like formation on the ground. This is one of the [[Man-at-Legs]]' arenas. | File:P2CU_room_houdai_1_metal.jpg|'''room_houdai_1_metal''': Circular room with a spiderweb-like formation on the ground. This is one of the [[Man-at-Legs]]'s arenas. "houdai" is the boss' internal name. | ||
File:P2CU_room_mid1_6_metal.jpg|Slightly long room with a circle of blue metal on one end and rusty red metal on another. | File:P2CU_room_mid1_6_metal.jpg|'''room_mid1_6_metal''': Slightly long room with a circle of blue metal on one end and rusty red metal on another. "mid" means "middle (sized)". | ||
File:P2CU_room_mid2_3_metal.jpg|Room with two circles of rusty red metal and three exits. | File:P2CU_room_mid2_3_metal.jpg|'''room_mid2_3_metal''': Room with two circles of rusty red metal and three exits. "mid" means "middle (sized)". | ||
File:P2CU_room_nobo1_4_metal.jpg|Huge room mostly comprised of corridors, zigzagging and spiraling up and down.| | File:P2CU_room_nobo1_4_metal.jpg|'''room_nobo2_4_metal''': Huge room mostly comprised of corridors, zigzagging and spiraling up and down. "nobo" means {{j|上る|nobo|ascend|f=tp}}. | ||
File:P2CU_room_north2x2_1_metal.jpg|T-shaped room with only one exit. | File:P2CU_room_north2x2_1_metal.jpg|'''room_north2x2_1_metal''': T-shaped room with only one exit. | ||
File:P2CU_room_north_1_metal.jpg|Circular room with only one exit. | File:P2CU_room_north_1_metal.jpg|'''room_north_1_metal''': Circular room with only one exit. | ||
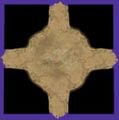
File:P2CU_room_white14x12_metal.jpg| | File:P2CU_room_white14x12_metal.jpg|'''room_white14x12_metal''': Soil room with shine lighting through the ceiling, connected to a metal room and a small circular room by corridors. It is exclusive to sublevel 3 of the [[White Flower Garden]], where [[White Pikmin]] are discovered. | ||
File:P2CU_way2x2_metal.jpg|Straight corridor, 1x2. | File:P2CU_way2x2_metal.jpg|'''way2x2_metal''': Straight corridor, 1x2. | ||
File:P2CU_way2_metal.jpg|Straight corridor. | File:P2CU_way2_metal.jpg|'''way2_metal''': Straight corridor. | ||
File:P2CU_way3_metal.jpg|Three way crossing. | File:P2CU_way3_metal.jpg|'''way3_metal''': Three-way crossing. | ||
File:P2CU_way4_metal.jpg|Four way crossing. | File:P2CU_way4_metal.jpg|'''way4_metal''': Four-way crossing. | ||
File:P2CU_wayl_metal.jpg|Turning corridor. | File:P2CU_wayl_metal.jpg|'''wayl_metal''': Turning corridor. | ||
</gallery> | </gallery> | ||
===Snow=== | ===Snow=== | ||
Units in the snow theme have their names end with "snow" or "renga" ({{j|レンガ|renga|brick}}), due to the brick walls they have. | |||
<gallery> | |||
File:P2CU_cap_snow.jpg|'''cap_snow''': Dead end. | |||
File:P2CU_item_cap_snow.jpg|'''item_cap_snow''': Dead end (that presumably contains an item). | |||
File:P2CU_room_4x4a_4_renga.jpg|'''room_4x4a_4_renga''': Simple 4x4 room, with brick walls. | |||
File:P2CU_room_4x4d_4_renga.jpg|'''room_4x4d_4_renga''': 4x4 brick and snow room with a few extra walls. | |||
File:P2CU_room_4x4g_4_renga.jpg|'''room_4x4g_4_renga''': 4x4 room with 2 extra walls, one in the middle. | |||
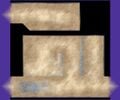
File:P2CU_room_block1_3_snow.jpg|'''room_block1_3_snow''': Room with a rectangular opening on a stone wall. | |||
File:P2CU_room_dan4x4h_2_renga.jpg|'''room_dan4x4h_2_renga''': 4x4 room with the southwestern portion rising up. "dan" means {{j|段|dan|step|f=tp}}. | |||
File:P2CU_room_hitode2_5_snow.jpg|'''room_hitode2_5_snow''': Room with 5 exits. "hitode" means {{j|人出|hitode|turnout|f=tp}}. | |||
File:P2CU_room_hitode3x3m_5_renga.jpg|'''room_hitode3x3m_5_renga''': 3x3 room with a brick wall partially separating the north and south, and a partial and thick central brick wall on the south. "hitode" means {{j|人出|hitode|turnout|f=tp}}. | |||
File:P2CU_room_hitode3_4_snow.jpg|'''room_hitode3_4_snow''': Room with 4 exits. "hitode" means {{j|人出|hitode|turnout|f=tp}}. | |||
File:P2CU_room_ike3_2_snow.jpg|'''room_ike3_2_snow''': Room with a ramp leading to the top of a wall that's in the center. "ike" means {{j|池|ike|pond|f=tp}}. | |||
File:P2CU_room_mid1_6_snow.jpg|'''room_mid1_6_snow''': Large room with 6 exits. "mid" means "middle (sized)". | |||
File:P2CU_room_mid2_3_snow.jpg|'''room_mid2_3_snow''': Room that splits into 2. "mid" means "middle (sized)". | |||
File:P2CU_room_north4_1_snow.jpg|'''room_north4_1_snow''': Same as the circular room with only one exit, but with 3 pieces of lumber perpendicular to one another, 2 of them slightly burrowed. | |||
File:P2CU_room_north_1_snow.jpg|'''room_north_1_snow''': Circular room with only one exit. | |||
File:P2CU_room_purple14x14_snow.jpg|'''room_purple14x14_snow''': A snowy room and a large circular room, with light shining in, connected by a corridor. This is where [[Purple Pikmin]] are first discovered. It's the only unit with a bit of the ceiling modeled. | |||
File:P2CU_room_saka1_1_snow.jpg|'''room_saka1_1_snow''': Circular room with a lightly rising curved edge and a tree trunk in the center. "saka" means {{j|坂|saka|slope|f=tp}}. | |||
File:P2CU_room_saka2_2_snow.jpg|'''room_saka2_2_snow''': Room with a C-shaped raised chunk of wood. "saka" means {{j|坂|saka|slope|f=tp}}. | |||
File:P2CU_room_uzu1_1_snow.jpg|'''room_uzu1_1_snow''': Circular room with a spiral going upwards, with parts of it not covered by snow. "uzu" means {{j|渦|uzu|whirlpool|f=tp}}. | |||
File:P2CU_way2x2_snow.jpg|'''way2x2_snow''': Straight corridor, 1x2. | |||
File:P2CU_way2_snow.jpg|'''way2_snow''': Straight corridor. | |||
File:P2CU_way3_snow.jpg|'''way3_snow''': Three-way crossing. | |||
File:P2CU_way4_snow.jpg|'''way4_snow''': Four-way crossing. | |||
File:P2CU_wayl_snow.jpg|'''wayl_snow''': Turning corridor. | |||
</gallery> | |||
===Soil=== | |||
Units in the soil theme have their names end with "tsuchi" ({{j|土|tsuchi|soil}}). | |||
<gallery> | <gallery> | ||
File: | File:P2CU_cap_tsuchi.jpg|'''cap_tsuchi''': Dead end. | ||
File: | File:P2CU_item_cap_tsuchi.jpg|'''item_cap_tsuchi''': Dead end (that presumably contains an item). | ||
File: | File:P2CU_room_block1_3_tsuchi.jpg|'''room_block1_3_tsuchi''': Room with a rectangular opening on a stone wall. | ||
File: | File:P2CU_room_boss_1_tsuchi.jpg|'''room_boss_1_tsuchi''': Room with 2 subrooms, one with white splatters, the other with a discarded [[Empress Bulblax]] skin. It's used on sublevel 5 of the [[Hole of Beasts]]. | ||
File: | File:P2CU_room_cent2_4_tsuchi.jpg|'''room_cent2_4_tsuchi''': Same as the circular room with 4 long exits, except there's a patch of grass in the center, bathed in sunlight. "cent" could mean "center". | ||
File: | File:P2CU_room_cent3_4_tsuchi.jpg|'''room_cent3_4_tsuchi''': Same as the previous room, but with a large patch of grass and scattered petals in the middle, bathed in sunlight. "cent" could mean "center". | ||
File: | File:P2CU_room_cent_4_tsuchi.jpg|'''room_cent_4_tsuchi''': Circular room with 4 evenly spread and long exits. "cent" could mean "center". | ||
File: | File:P2CU_room_hebi12x12_1_tsuchi.jpg|'''room_hebi12x12_1_tsuchi''': Circular room with a spiral design on the floor, and some corridors attached. Used in sublevel 5 of the [[White Flower Garden]]. "hebi" is part of the [[Burrowing Snagret]]'s name, {{j|ヘビガラス|Hebigarasu|Snake Crow|f=tp}}). | ||
File: | File:P2CU_room_hitode1_5_tsuchi.jpg|'''room_hitode1_5_tsuchi''': Room with 5 exits and two stalagmites. "hitode" means {{j|人出|hitode|turnout|f=tp}}. | ||
File: | File:P2CU_room_hitode2_5_tsuchi.jpg|'''room_hitode2_5_tsuchi''': Room with 5 exits. "hitode" means {{j|人出|hitode|turnout|f=tp}}. | ||
File: | File:P2CU_room_hitode3_4_tsuchi.jpg|'''room_hitode3_4_tsuchi''': Room with 4 exits. "hitode" means {{j|人出|hitode|turnout|f=tp}}. | ||
File: | File:P2CU_room_hitode4_4_tsuchi.jpg|'''room_hitode4_4_tsuchi''': Partially rounded room with 4 exits. "hitode" means {{j|人出|hitode|turnout|f=tp}}. | ||
File: | File:P2CU_room_ike1_2_tsuchi.jpg|'''room_ike1_2_tsuchi''': Room with water and a ramp leading to the top of a wall that's in the center. "ike" means {{j|池|ike|pond|f=tp}}. | ||
File: | File:P2CU_room_ike2_4_tsuchi.jpg|'''room_ike2_4_tsuchi''': Room with a small island in a pool of water. "ike" means {{j|池|ike|pond|f=tp}}. | ||
File: | File:P2CU_room_ike3_2_tsuchi.jpg|'''room_ike3_2_tsuchi''': Like the room before the previous one, except with no water on the base of the ramp. "ike" means {{j|池|ike|pond|f=tp}}. | ||
File: | File:P2CU_room_ike4_5_tsuchi.jpg|'''room_ike4_5_tsuchi''': Large room with a lot of water and several tree trunks above water. It's the main room in sublevel 6 of the [[Hole of Heroes]]. "ike" means {{j|池|ike|pond|f=tp}}. | ||
File: | File:P2CU_room_kingchap_a_tsuchi.jpg|'''room_kingchap_a_tsuchi''': Two spherical rooms connected by a crossing corridor. Only used on sublevel 7 of the [[Bulblax Kingdom]] and sublevel 2 of the [[Emperor's Realm]]. "kingchap" is short for "kingchappy", the [[Emperor Bulblax]]'s internal name. | ||
File: | File:P2CU_room_kingchap_b_tsuchi.jpg|'''room_kingchap_b_tsuchi''': Room with a ledge that can be reached by [[throw]]ing Pikmin through one side or from a path through the pond. This is where the [[Gyroid Bust]] is found. "kingchap" is short for "kingchappy", the [[Emperor Bulblax]]'s internal name. | ||
File: | File:P2CU_room_kingchp_tsuchi.jpg|'''room_kingchp_tsuchi''': Room with a tree's roots, and several ponds. [[Emperor Bulblax]]es can be found here. "kingchap" is short for "kingchappy", the Emperor Bulblax's internal name. | ||
File: | File:P2CU_room_mid1_6_tsuchi.jpg|'''room_mid1_6_tsuchi''': Large room with 6 exits. "mid" means "middle (sized)". | ||
File: | File:P2CU_room_mid2_3_tsuchi.jpg|'''room_mid2_3_tsuchi''': Room that joins two paths into one. "mid" means "middle (sized)". | ||
File: | File:P2CU_room_north2_1_tsuchi.jpg|'''room_north2_1_tsuchi''': Corridor with a dead end. | ||
File: | File:P2CU_room_north3_1_tsuchi.jpg|'''room_north3_1_tsuchi''': Corridor with a dead end after a U-turn. | ||
File: | File:P2CU_room_north4_1_tsuchi.jpg|'''room_north4_1_tsuchi''': Like the circular room with 1 exit, but with three connected pieces of lumber perpendicular to one another, partially burrowed. | ||
File:P2CU_room_north_1_tsuchi.jpg|'''room_north_1_tsuchi''': Circular room with a single exit. | |||
File:P2CU_room_queen_b_tsuchi.jpg|'''room_queen_b_tsuchi''': From the starting point, there's a double-S-shaped corridor. After this is the main room, squareish in shape. Finally, there's a room connected with a corridor afterwards. The [[Empress Bulblax]] on the [[Frontier Cavern]] is fought here. "queen" is the boss' internal name. | |||
File:P2CU_room_queen_c_tsuchi.jpg|'''room_queen_c_tsuchi''': Like the first [[Empress Bulblax]] room, but without the small alcoves and without the discarded skin. The creature is fought here on sublevel 11 of the [[Hole of Heroes]] and sublevel 4 of the [[Emperor's Realm]]. "queen" is the boss' internal name. | |||
File:P2CU_room_saka1_1_tsuchi.jpg|'''room_saka1_1_tsuchi''': Circular room with a lightly rising curved edge and a tree trunk in the center. "saka" means {{j|坂|saka|slope|f=tp}}. | |||
File:P2CU_room_saka2_2_tsuchi.jpg|'''room_saka2_2_tsuchi''': Room with a C-shaped raised chunk of wood. "saka" means {{j|坂|saka|slope|f=tp}}. | |||
File:P2CU_room_uzu1_1_tsuchi.jpg|'''room_uzu1_1_tsuchi''': Circular room with a spiral going upwards. "uzu" means {{j|渦|uzu|whirlpool|f=tp}}. | |||
File:P2CU_way2x2_tsuchi.jpg|'''way2x2_tsuchi''': Straight corridor, 1x2. | |||
File:P2CU_way2_tsuchi.jpg|'''way2_tsuchi''': Straight corridor. | |||
File:P2CU_way3_tsuchi.jpg|'''way3_tsuchi''': Three-way crossing. | |||
File:P2CU_way4_tsuchi.jpg|'''way4_tsuchi''': Four-way crossing. | |||
File:P2CU_way6_tsuchi.jpg|'''way6_tsuchi''': Path that splits into 5, with some odd dirt texture on the ground. Unused. | |||
File:P2CU_wayl_tsuchi.jpg|'''wayl_tsuchi''': Turning corridor. | |||
</gallery> | </gallery> | ||
===Toybox=== | ===Toybox=== | ||
Units in the toybox theme have their names end with "toy". | |||
<gallery> | <gallery> | ||
File:P2CU_cap_toy.jpg|Dead end. | File:P2CU_cap_toy.jpg|'''cap_toy''': Dead end. | ||
File:P2CU_item_cap_toy.jpg|Dead end (that presumably contains an item). | File:P2CU_item_cap_toy.jpg|'''item_cap_toy''': Dead end (that presumably contains an item). | ||
File:P2CU_room_hitode4x7_3_toy.jpg|Large three way crossing with building blocks making up some walls.| | File:P2CU_room_hitode4x7_3_toy.jpg|'''room_hitode4x7_3_toy''': Large three-way crossing with building blocks making up some walls. "hitode" means {{j|人出|hitode|turnout|f=tp}}. | ||
File:P2CU_room_hitode6x6_3_toy.jpg|Room with some walls and a box with some | File:P2CU_room_hitode6x6_3_toy.jpg|'''room_hitode6x6_3_toy''': Room with some walls and a box with some unsharpened pencils and building blocks. This version is only used on sublevel 1 of the [[Lost Toy Box]]. "hitode" means {{j|人出|hitode|turnout|f=tp}}. | ||
File:P2CU_room_hitode6x7_4_toy.jpg|Large four way crossing.| | File:P2CU_room_hitode6x7_4_toy.jpg|'''room_hitode6x7_4_toy''': Large four-way crossing. "hitode" means {{j|人出|hitode|turnout|f=tp}}. | ||
File:P2CU_room_large_7_toy.jpg|Room with a toy train track and some houses serving as walls. | File:P2CU_room_large_7_toy.jpg|'''room_large_7_toy''': Room with a toy train track and some houses serving as walls. | ||
File:P2CU_room_mid2_8_toy.jpg|Same as the room with the xylophone, but without the instrument. | File:P2CU_room_mid2_8_toy.jpg|'''room_mid2_8_toy''': Same as the room with the xylophone, but without the instrument. "mid" means "middle (sized)". | ||
File:P2CU_room_mid_8_toy.jpg|Room with a xylophone and two playing sticks in the middle. | File:P2CU_room_mid_8_toy.jpg|'''room_mid_8_toy''': Room with a xylophone and two playing sticks in the middle. "mid" means "middle (sized)". | ||
File:P2CU_room_mid_sara2_8_toy.jpg|Room with three colored half-discs, leading to sand pits.| | File:P2CU_room_mid_sara2_8_toy.jpg|'''room_mid_sara2_8_toy''': Room with three colored half-discs, leading to sand pits. "sara" means {{j|皿|sara|plate|f=tp}}. | ||
File:P2CU_room_mid_sara_8_toy.jpg|Room with a baby plate in the center.| | File:P2CU_room_mid_sara_8_toy.jpg|'''room_mid_sara_8_toy''': Room with a baby plate in the center. "sara" means {{j|皿|sara|plate|f=tp}}. | ||
File:P2CU_room_mid_tower2_8_toy.jpg|Room with a tower in the middle, and some walls scattered around to provide protection from the [[Gatling Groink]]s commonly found atop the tower. Used only on sublevel 1 of [[Three Color Training]]. | File:P2CU_room_mid_tower2_8_toy.jpg|'''room_mid_tower2_8_toy''': Room with a tower in the middle, and some walls scattered around to provide protection from the [[Gatling Groink]]s commonly found atop the tower. Used only on sublevel 1 of [[Three Color Training]]. | ||
File:P2CU_room_mid_tower_8_toy.jpg|Like the previous room, but the base of the tower is less round, and there are extra walls scattered around. | File:P2CU_room_mid_tower_8_toy.jpg|'''room_mid_tower_8_toy''': Like the previous room, but the base of the tower is less round, and there are extra walls scattered around. | ||
File:P2CU_room_opan_toy.jpg|Huge room enclosed by walls, with building block scattered about and 3 large plates on top of a picnic cloth. This is where the [[Giant Breadbug]] is fought.| | File:P2CU_room_opan_toy.jpg|'''room_opan_toy''': Huge room enclosed by walls, with building block scattered about and 3 large plates on top of a picnic cloth. This is where the [[Giant Breadbug]] is fought. "opan" is part of the boss' name, {{j|オオパンモドキ|Oopanmodoki|Giant Bread Beetle|f=tp}}. | ||
File:P2CU_room_small2_5_toy.jpg|Same as the room with the tambourine, but without the instrument. | File:P2CU_room_small2_5_toy.jpg|'''room_small2_5_toy''': Same as the room with the tambourine, but without the instrument. | ||
File:P2CU_room_small_5_toy.jpg|Room with a tambourine in the middle. | File:P2CU_room_small_5_toy.jpg|'''room_small_5_toy''': Room with a tambourine in the middle. | ||
File:P2CU_way2x2_toy.jpg|Straight corridor, 1x2. Features a small bump. | File:P2CU_way2x2_toy.jpg|'''way2x2_toy''': Straight corridor, 1x2. Features a small bump. | ||
File:P2CU_way2_toy.jpg|Corridor. | File:P2CU_way2_toy.jpg|'''way2_toy''': Corridor. | ||
File:P2CU_way3_toy.jpg|Three way crossing. | File:P2CU_way3_toy.jpg|'''way3_toy''': Three-way crossing. | ||
File:P2CU_way4_toy.jpg|Four way crossing. Features four | File:P2CU_way4_toy.jpg|'''way4_toy''': Four-way crossing. Features four poles connected by an X-shaped wire. Rare, but can be seen on sublevel 3 of the [[Glutton's Kitchen]]. It is also in the cave unit list files for [[Carpet Plain]], but can only be seen if the "random forcer" is used in [[New Play Control! Pikmin 2]]. | ||
File:P2CU_wayl_toy.jpg|Turning corridor. | File:P2CU_wayl_toy.jpg|'''wayl_toy''': Turning corridor. | ||
</gallery> | </gallery> | ||
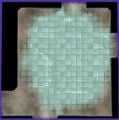
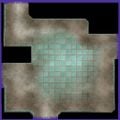
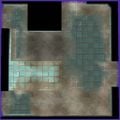
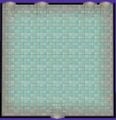
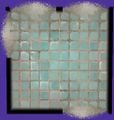
===Tiles=== | ===Tiles=== | ||
Units in the tiles theme have their names end with "tile". The tile theme does not actually have corridors attached to it; instead, there is a different "pipe" theme that is used exclusively for the tile theme's corridors. | |||
<gallery> | <gallery> | ||
File:P2CU_cap_pipe.jpg|Dead end. | File:P2CU_cap_pipe.jpg|'''cap_pipe''': Dead end. | ||
File:P2CU_item_cap_pipe.jpg|Dead end (that presumably contains an item). | File:P2CU_item_cap_pipe.jpg|'''item_cap_pipe''': Dead end (that presumably contains an item). | ||
File:P2CU_room_4x4a_4_tile.jpg|Simple 4x4 room. | File:P2CU_room_4x4a_4_tile.jpg|'''room_4x4a_4_tile''': Simple 4x4 room. | ||
File:P2CU_room_4x4d_4_tile.jpg|4x4 room with some extra walls. | File:P2CU_room_4x4d_4_tile.jpg|'''room_4x4d_4_tile''': 4x4 room with some extra walls. | ||
File:P2CU_room_4x4f_4_tile.jpg|4x4 room with a raised tile platform. | File:P2CU_room_4x4f_4_tile.jpg|'''room_4x4f_4_tile''': 4x4 room with a raised tile platform. | ||
File:P2CU_room_bunki7x7_8_tile.jpg|A large 7x7 room. It's the main room of the [[Subterranean Lair]] and sublevel 7 of the [[Hole of Heroes]].| | File:P2CU_room_bunki7x7_8_tile.jpg|'''room_bunki7x7_8_tile''': A large 7x7 room. It's the main room of the [[Subterranean Lair]] and sublevel 7 of the [[Hole of Heroes]]. "bunki" means {{j|分岐|bunki|forking|f=tp}}. | ||
File:P2CU_room_dangomushi_tile.jpg|One large square room connected to two smaller subrooms. This is where the [[Segmented Crawbster]] is fought. | File:P2CU_room_dangomushi_tile.jpg|'''room_dangomushi_tile''': One large square room connected to two smaller subrooms. This is where the [[Segmented Crawbster]] is fought. "dangomushi" is the boss' internal name. | ||
File:P2CU_room_drypool5x5_5_tile.jpg|Same as the pool room, but without the water. | File:P2CU_room_drypool5x5_5_tile.jpg|'''room_drypool5x5_5_tile''': Same as the pool room, but without the water. | ||
File:P2CU_room_north2x2_1_tile.jpg| | File:P2CU_room_north2x2_1_tile.jpg|'''room_north2x2_1_tile''': 2x2 square room with only one exit. | ||
File:P2CU_room_north4x4l_1_tile.jpg|Corridor that leads to a dead end, after a U-turn.|alt= | File:P2CU_room_north4x4l_1_tile.jpg|'''room_north4x4l_1_tile''': Corridor that leads to a dead end, after a U-turn.|alt=room_north4x4l_1 | ||
File:P2CU_room_oootakara_tile.jpg|Large square sink, with no drain, and scattered pieces of tiles around. Home of the [[Titan Dweevil]]. | File:P2CU_room_oootakara_tile.jpg|'''room_oootakara_tile''': Large square sink, with no drain, and scattered pieces of tiles around. Home of the [[Titan Dweevil]]. "oootakara" is the boss' internal name on some files. | ||
File:P2CU_room_pool5x5_5_tile.jpg|Room with a rectangular center that's lowered, like a pool; an escape ramp exists. | File:P2CU_room_pool5x5_5_tile.jpg|'''room_pool5x5_5_tile''': Room with a rectangular center that's lowered, like a pool; an escape ramp exists. | ||
File:P2CU_room_tako2x2_8_tile.jpg|Room with 4 exits.| | File:P2CU_room_tako2x2_8_tile.jpg|'''room_tako2x2_8_tile''': Room with 4 exits. "tako" means {{j|凧|tako|kite|f=tp}}. | ||
File:P2CU_room_ud4x4_2_tile.jpg|Room with the northern and southern edges lowering a bit. | File:P2CU_room_ud4x4_2_tile.jpg|'''room_ud4x4_2_tile''': Room with the northern and southern edges lowering a bit. | ||
File:P2CU_room_u_jikou1_4x4_2_tile.jpg|Room with a large bump of sand and a waterway path, covered by a grill. | File:P2CU_room_u_jikou1_4x4_2_tile.jpg|'''room_u_jikou1_4x4_2_tile''': Room with a large bump of sand and a waterway path, covered by a grill. | ||
File:P2CU_room_yukoana1_5x3_2_tile.jpg|Corridor with 6 small pipes, 3 on each side. | File:P2CU_room_yukoana1_5x3_2_tile.jpg|'''room_yukoana1_5x3_2_tile''': Corridor with 6 small pipes, 3 on each side. | ||
File:P2CU_way2x2_pipe.jpg|Straight corridor, 1x2. | File:P2CU_way2x2_pipe.jpg|'''way2x2_pipe''': Straight corridor, 1x2. | ||
File:P2CU_way2_pipe.jpg|Straight corridor. | File:P2CU_way2_pipe.jpg|'''way2_pipe''': Straight corridor. | ||
File:P2CU_way3_pipe.jpg|Three way crossing. | File:P2CU_way3_pipe.jpg|'''way3_pipe''': Three-way crossing. This unit has a hole visible in the back wall that cannot be moved through, even though it is at ground level and just the same size as a captain. | ||
File:P2CU_way4_pipe.jpg|Four way crossing. | File:P2CU_way4_pipe.jpg|'''way4_pipe''': Four-way crossing. | ||
File:P2CU_wayl_pipe.jpg|Turning corridor. | File:P2CU_wayl_pipe.jpg|'''wayl_pipe''': Turning corridor. | ||
</gallery> | </gallery> | ||
==Others== | |||
===Pathways with items=== | |||
The following units are copies of the regular pathway units, but presumed to have items (normally [[egg]]s) in them, judging by the names. All of these are unused. | The following units are copies of the regular pathway units, but presumed to have items (normally [[egg]]s) in them, judging by the names. All of these are unused. | ||
<gallery> | <gallery> | ||
File:P2CU_item_way3_conc.jpg|Concrete three way crossing that presumably contains an item. Unused. | File:P2CU_item_way3_conc.jpg|'''item_way3_conc''': Concrete three-way crossing that presumably contains an item. Unused. | ||
File:P2CU_item_way3_metal.jpg|Metal three way crossing that presumably contains an item. Unused. | File:P2CU_item_way3_metal.jpg|'''item_way3_metal''': Metal three-way crossing that presumably contains an item. Unused. | ||
File:P2CU_item_way3_tsuchi.jpg| | File:P2CU_item_way3_tsuchi.jpg|'''item_way3_tsuchi''': Soil three-way crossing that presumably contains an item. Unused. | ||
File:P2CU_item_way4_conc.jpg|Concrete four way crossing that presumably contains an item. Unused. | File:P2CU_item_way4_conc.jpg|'''item_way4_conc''': Concrete four-way crossing that presumably contains an item. Unused. | ||
File:P2CU_item_way4_metal.jpg|Metal four way crossing that presumably contains an item. Unused. | File:P2CU_item_way4_metal.jpg|'''item_way4_metal''': Metal four-way crossing that presumably contains an item. Unused. | ||
File:P2CU_item_way4_tsuchi.jpg| | File:P2CU_item_way4_tsuchi.jpg|'''item_way4_tsuchi''': Soil four-way crossing that presumably contains an item. Unused. | ||
File:P2CU_item_wayl_conc.jpg|Turning concrete corridor that presumably contains an item. Unused. | File:P2CU_item_wayl_conc.jpg|'''item_wayl_conc''': Turning concrete corridor that presumably contains an item. Unused. | ||
File:P2CU_item_wayl_metal.jpg|Turning metal corridor that presumably contains an item. Unused. | File:P2CU_item_wayl_metal.jpg|'''item_wayl_metal''': Turning metal corridor that presumably contains an item. Unused. | ||
File:P2CU_item_wayl_tsuchi.jpg|Turning | File:P2CU_item_wayl_tsuchi.jpg|'''item_wayl_tsuchi''': Turning soil corridor that presumably contains an item. Unused. | ||
</gallery> | </gallery> | ||
===Near duplicates=== | |||
These units are near duplicates of existing units, differing only on certain internal files. These duplicates could exist for a variety of reasons, but most of the time, it's to change the general layout of an existing unit, for the purposes of the cave or the objects within. | These units are near duplicates of existing units, differing only on certain internal files. These duplicates could exist for a variety of reasons, but most of the time, it's to change the general layout of an existing unit, for the purposes of the cave or the objects within. | ||
<gallery> | <gallery> | ||
File:P2CU_room_5x5a_2_kusachi.jpg|Near duplicate of '''room_5x5a_2_kusachi''' (garden two way split, 2 exits), differing only on '''layout.txt'''. Used only on the [[Sniper Room]].| | File:P2CU_room_5x5a_2_kusachi.jpg|'''room_5x5a_2_tekiF_kusachi''': Near duplicate of '''room_5x5a_2_kusachi''' (garden two way split, 2 exits), differing only on '''layout.txt'''. Used only on the [[Sniper Room]]. "tekiF" refers to the "f" version of an enemy; in this case, the stationary [[Armored Cannon Larva|Armored Cannon Beetle Larva]]. | ||
File:P2CU_room_big_kusachi.jpg|Near duplicate of '''room_big_kusachi''' (garden room with an upside-down bucket), differing only on '''grid.bin''' and '''layout.txt'''. Used only on the Sniper Room. | File:P2CU_room_big_kusachi.jpg|'''room_big_tekiF_kusachi''': Near duplicate of '''room_big_kusachi''' (garden room with an upside-down bucket), differing only on '''grid.bin''' and '''layout.txt'''. Used only on the Sniper Room. "tekiF" refers to the "f" version of an enemy; in this case, the stationary [[Gatling Groink]]. | ||
File:P2CU_room_block1_3_tsuchi.jpg|Near duplicate of '''room_block1_3_tsuchi''' ( | File:P2CU_room_block1_3_tsuchi.jpg|'''room_block1_3_hiba_tsuchi''': Near duplicate of '''room_block1_3_tsuchi''' (soil room with a wall with a rectangular hole), differing only on '''layout.txt'''. Used only on sublevel 3 of the [[Hole of Beasts]] and sublevel 1 of the [[Emperor's Realm]]. "hiba" is the internal name for the [[fire geyser]]s. | ||
File:P2CU_room_cent_4_metal.jpg|Near duplicate of '''room_cent_4_metal''' (large metal four way crossing with purple center), differing only on '''layout.txt'''. Used only on sublevel 1 of the [[White Flower Garden]] and sublevel 12 of the [[Hole of Heroes]]. | File:P2CU_room_cent_4_metal.jpg|'''room_cent2_4_metal''': Near duplicate of '''room_cent_4_metal''' (large metal four-way crossing with purple center), differing only on '''layout.txt'''. Used only on sublevel 1 of the [[White Flower Garden]] and sublevel 12 of the [[Hole of Heroes]]. | ||
File:P2CU_room_cent_4_tsuchi.jpg|Near duplicate of '''room_cent_4_tsuchi''' (circular | File:P2CU_room_cent_4_tsuchi.jpg|'''room_cent_4_mat_tsuchi''': Near duplicate of '''room_cent_4_tsuchi''' (circular soil room with 4 long exits), differing only on '''layout.txt'''. Unused. | ||
File:P2CU_room_hitode4x4_3_metal.jpg|Near duplicate of '''room_hitode4x4_3_metal''' (metal room with raised platform with [[Armored Cannon Beetle Larva]]e), differing only on '''layout.txt'''. Used only on sublevel 3 of the [[Subterranean Complex]] and sublevel 1 of the [[Brawny Abyss]]. | File:P2CU_room_hitode4x4_3_metal.jpg|'''room_hitode4x4_tekiF_3_metal''': Near duplicate of '''room_hitode4x4_3_metal''' (metal room with raised platform with [[Armored Cannon Larva|Armored Cannon Beetle Larva]]e), differing only on '''layout.txt'''. Used only on sublevel 3 of the [[Subterranean Complex]] and sublevel 1 of the [[Brawny Abyss]]. "tekiF" refers to the "f" version of an enemy; in this case, the stationary Armored Cannon Beetle Larva. | ||
File:P2CU_room_hitode6x6_3_toy.jpg|Near duplicate of '''room_hitode6x6_3_toy''' (toybox room with a box containing crayons and building blocks), differing only on '''layout.txt'''. Used only on sublevel 1 of the [[Glutton's Kitchen]]. | File:P2CU_room_hitode6x6_3_toy.jpg|'''room_hitode6x6_yakushima_3_toy''': Near duplicate of '''room_hitode6x6_3_toy''' (toybox room with a box containing crayons and building blocks), differing only on '''layout.txt'''. Used only on sublevel 1 of the [[Glutton's Kitchen]]. | ||
File:P2CU_room_manh7x7p_9_conc.jpg|Near duplicate of '''room_manh7x7p_9_conc''' (large circular room with 8 exits), differing only on '''layout.txt'''. Used only on the [[Angle Maze]] ([[Raging Long Legs]]) and sublevel 7 of the [[Snagret Hole]]. | File:P2CU_room_manh7x7p_9_conc.jpg|'''room_manh7x7p_boss_conc''': Near duplicate of '''room_manh7x7p_9_conc''' (large circular room with 8 exits), differing only on '''layout.txt'''. Used only on the [[Angle Maze]] ([[Raging Long Legs]]) and sublevel 7 of the [[Snagret Hole]]. | ||
File:P2CU_room_manh_2_conc.jpg|Near duplicate of '''room_manh_2_conc''' (large circular concrete room with a partial stone floor), differing only on '''layout.txt''' and '''route.txt'''. Used only on sublevel 5 of the [[Submerged Castle]]. | File:P2CU_room_manh_2_conc.jpg|'''room_manh_boss_conc''': Near duplicate of '''room_manh_2_conc''' (large circular concrete room with a partial stone floor), differing only on '''layout.txt''' and '''route.txt'''. Used only on sublevel 5 of the [[Submerged Castle]]. | ||
File:P2CU_room_mid1_6_tsuchi.jpg|Near duplicate of '''room_mid1_6_tsuchi''' (large | File:P2CU_room_mid1_6_tsuchi.jpg|'''room_mid1_6_boss_tsuchi''': Near duplicate of '''room_mid1_6_tsuchi''' (large soil room with 6 exits), differing only on '''layout.txt'''. Used only on sublevel 3 of the Snagret Hole. | ||
File:P2CU_room_nobo1_4_metal.jpg|Near duplicate of '''room_nobo2_4_metal''' (huge zigzagging and spiraling metal room), differing only on '''layout.txt'''. Unused. | File:P2CU_room_nobo1_4_metal.jpg|'''room_nobo1_4_metal''': Near duplicate of '''room_nobo2_4_metal''' (huge zigzagging and spiraling metal room), differing only on '''layout.txt'''. Unused. | ||
File:P2CU_room_north2x2_1_tile.jpg|Near duplicate of '''room_north2x2_1_tile''' (square tile room with one exit), differing only on '''layout.txt'''. Used only on sublevel 1 of [[The Giant's Bath]] and sublevel 2 of [[Hazard Training]]. | File:P2CU_room_north2x2_1_tile.jpg|'''room_north2x2_1_tekiF_tile''': Near duplicate of '''room_north2x2_1_tile''' (square tile room with one exit), differing only on '''layout.txt'''. Used only on sublevel 1 of [[The Giant's Bath]] and sublevel 2 of [[Hazard Training]]. "tekiF" refers to the "f" version of an enemy; in this case, it possibly refers to the [[Toady Bloyster]] (as opposed to the [[Ranging Bloyster]]). | ||
File:P2CU_room_north_1_snow.jpg|Near duplicate of ''' | File:P2CU_room_north_1_snow.jpg|'''room_north_tutorial_1_snow''': Near duplicate of '''room_north_1_snow''', differing only on '''layout.txt''' and '''route.txt'''. Used only on sublevel 1 of the [[Emergence Cave]]. | ||
File:P2CU_room_north_1_tsuchi.jpg|Near duplicate of '''room_north_1_tsuchi''' (circular | File:P2CU_room_north_1_tsuchi.jpg|'''room_north_1_hiba_tsuchi''': Near duplicate of '''room_north_1_tsuchi''' (circular soil room with one exit), differing only on '''layout.txt''' and '''route.txt'''. Used only on sublevel 3 of the [[Hole of Beasts]] and sublevel 2 of [[Emperor's Realm]]. "hiba" is the internal name for the [[fire geyser]]s. | ||
File:P2CU_room_north_1_tsuchi.jpg|Same as the previous one. All three of these units differ in the same files. | File:P2CU_room_north_1_tsuchi.jpg|'''room_north_1_mat_tsuchi''': Same as the previous one. All three of these units differ in the same files. This one is used in sublevels 1 and 5 of the [[Cryptic Cavern]]. | ||
File:P2CU_room_Oashi8x9_conc.jpg|Near duplicate of '''room_Oashi8x9_conc''' (large circular room with partial stone floor and light shining in), differing only on '''layout.txt'''. Used only on the [[Cavernous Abyss]]. | File:P2CU_room_Oashi8x9_conc.jpg|'''room_Oashi8x9_s_conc''': Near duplicate of '''room_Oashi8x9_conc''' (large circular room with partial stone floor and light shining in), differing only on '''layout.txt'''. Used only on the [[Cavernous Abyss]]. | ||
File:P2CU_room_tako2x2_8_tile.jpg|Near duplicate of '''room_tako2x2_8_tile''' (square tile room with 4 exits), differing only on '''layout.txt'''. Used only on the [[Bully Den]]. | File:P2CU_room_tako2x2_8_tile.jpg|'''room_tako2x2_8_tekiF_tile''': Near duplicate of '''room_tako2x2_8_tile''' (square tile room with 4 exits), differing only on '''layout.txt'''. Used only on the [[Bully Den]]. "tekiF" refers to the "f" version of an enemy. | ||
</gallery> | </gallery> | ||
===2-Player variants=== | |||
As with the previous section, these units are near duplicates of existing units, but with '''layout.txt''' changed to fit the [[2-Player Battle]] arenas. | As with the previous section, these units are near duplicates of existing units, but with '''layout.txt''' changed to fit the [[2-Player Battle]] arenas. | ||
<gallery> | <gallery> | ||
File:P2CU_room_5x5a_2_kusachi.jpg|Variant of '''room_5x5a_2_kusachi''' (garden room with 2 splitting paths, one with a dead end). | File:P2CU_room_5x5a_2_kusachi.jpg|'''room_vs_5x5a_2_kusachi''': Variant of '''room_5x5a_2_kusachi''' (garden room with 2 splitting paths, one with a dead end). | ||
File:P2CU_room_big2_kusachi.jpg|Variant of '''room_big2_kusachi''' (the room similar to the next one, but without the bucket). | File:P2CU_room_big2_kusachi.jpg|'''room_vs_big2_kusachi''': Variant of '''room_big2_kusachi''' (the room similar to the next one, but without the bucket). | ||
File:P2CU_room_big_kusachi.jpg|Variant of '''room_big_kusachi''' (garden room with an upside-down bucket). | File:P2CU_room_big_kusachi.jpg|'''room_vs_big_kusachi''': Variant of '''room_big_kusachi''' (garden room with an upside-down bucket). | ||
File:P2CU_room_bunki7x7_8_tile.jpg|Variant of '''room_bunki7x7_8_tile''' (large square tile room with 5 exits). | File:P2CU_room_bunki7x7_8_tile.jpg|'''room_vs_bunki7x7_8_tile''': Variant of '''room_bunki7x7_8_tile''' (large square tile room with 5 exits). | ||
File:P2CU_room_drypool5x5_5_tile.jpg|Variant of '''room_drypool5x5_5_tile''' (tile room with a dip with no water). | File:P2CU_room_drypool5x5_5_tile.jpg|'''room_vs_drypool5x5_5_tile''': Variant of '''room_drypool5x5_5_tile''' (tile room with a dip with no water). | ||
File:P2CU_room_hitode2x3_5_metal.jpg|Variant of '''room_hitode2x3_5_metal''' (large four way metal crossing). | File:P2CU_room_hitode2x3_5_metal.jpg|'''room_vs_hitode2x3_5_metal''': Variant of '''room_hitode2x3_5_metal''' (large four-way metal crossing). | ||
File:P2CU_room_hitode3x3m_5_conc.jpg|Variant of '''room_hitode3x3m_5_conc''' (concrete room with 2 walls in the way). | File:P2CU_room_hitode3x3m_5_conc.jpg|'''room_vs_hitode3x3m_5_conc''': Variant of '''room_hitode3x3m_5_conc''' (concrete room with 2 walls in the way). | ||
File:P2CU_room_hitode4x4_6_metal.jpg|Variant of '''room_hitode4x4_6_metal''' (room with a rusty closed hatch ). | File:P2CU_room_hitode4x4_6_metal.jpg|'''room_vs_hitode4x4_6_metal''': Variant of '''room_hitode4x4_6_metal''' (room with a rusty closed hatch). | ||
File:P2CU_room_hitode6x7_4_toy.jpg|Variant of '''room_hitode6x7_4_toy''' (garden room with 4 exits). | File:P2CU_room_hitode6x7_4_toy.jpg|'''room_vs_hitode6x7_4_toy''': Variant of '''room_hitode6x7_4_toy''' (garden room with 4 exits). Unused. | ||
File:P2CU_room_ike3_2_snow.jpg|Variant of '''room_ike3_2_snow''' (snow room with a ramp leading to the top of a wall in the middle). | File:P2CU_room_ike3_2_snow.jpg|'''room_vs_ike3_2_snow''': Variant of '''room_ike3_2_snow''' (snow room with a ramp leading to the top of a wall in the middle). | ||
File:P2CU_room_mid1_6_tsuchi.jpg|Variant of '''room_mid1_6_tsuchi''' ( | File:P2CU_room_mid1_6_tsuchi.jpg|'''room_vs_mid1_6_tsuchi''': Variant of '''room_mid1_6_tsuchi''' (soil room with 6 exits). | ||
File:P2CU_room_mid_kusachi.jpg|Variant of '''room_mid_kusachi''' (large three way garden crossing). | File:P2CU_room_mid_kusachi.jpg|'''room_vs_mid_kusachi''': Variant of '''room_mid_kusachi''' (large three-way garden crossing). | ||
File:P2CU_room_mid_sara2_8_toy.jpg|Variant of '''room_mid_sara2_8_toy''' (garden room with 3 colored half-discs). | File:P2CU_room_mid_sara2_8_toy.jpg|'''room_vs_mid_sara2_8_toy''': Variant of '''room_mid_sara2_8_toy''' (garden room with 3 colored half-discs). | ||
File:P2CU_room_nobo1_4_metal.jpg|Variant of '''room_nobo2_4_metal''' (zigzagging and spiraling metal corridors). | File:P2CU_room_nobo1_4_metal.jpg|'''room_vs_nobo2_4_metal''': Variant of '''room_nobo2_4_metal''' (zigzagging and spiraling metal corridors). | ||
File:P2CU_room_north2x2_1_tile.jpg|Variant of '''room_north2x2_1_tile''' (square tile room with one exit). | File:P2CU_room_north2x2_1_tile.jpg|'''room_vs_north2x2_1_tile''': Variant of '''room_north2x2_1_tile''' (square tile room with one exit). | ||
File:P2CU_room_north_1_metal.jpg|Variant of '''room_north_1_metal''' (large circular metal room with one exit). | File:P2CU_room_north_1_metal.jpg|'''room_vs_north_1_metal''': Variant of '''room_north_1_metal''' (large circular metal room with one exit). | ||
File:P2CU_room_saka2_2_snow.jpg|Variant of '''room_saka2_2_snow''' (snow room with a spiraling wooden ledge and alcove). | File:P2CU_room_saka2_2_snow.jpg|'''room_vs_saka2_2_snow''': Variant of '''room_saka2_2_snow''' (snow room with a spiraling wooden ledge and alcove). | ||
File:P2CU_room_spiral_1_conc.jpg|Variant of '''room_spiral_1_conc''' (concrete room with spiraling and zigzagging corridors). | File:P2CU_room_spiral_1_conc.jpg|'''room_vs_spiral_1_conc''': Variant of '''room_spiral_1_conc''' (concrete room with spiraling and zigzagging corridors). | ||
File:P2CU_room_yukoana1_5x3_2_tile.jpg|Variant of '''room_yukoana1_5x3_2_tile''' (tile corridor with 6 pipes). | File:P2CU_room_yukoana1_5x3_2_tile.jpg|'''room_vs_yukoana1_5x3_2_tile''': Variant of '''room_yukoana1_5x3_2_tile''' (tile corridor with 6 pipes). | ||
</gallery> | </gallery> | ||
[[Category:Caves| | == See also == | ||
* [[Cave]] | |||
* [[Pikmin 2 cave generation|''Pikmin 2'' cave generation]] | |||
[[Category:Caves| ]] | |||
[[Category:Technical]] | |||
Latest revision as of 05:56, April 27, 2024
Caves in Pikmin 2 are made out of randomly placed units. There are units that represent dead ends, corridors, crossings, and rooms. Every cave's sublevel has a list of units that can be used by the game to create it; the latter is then responsible to randomly align the units in order to create a level with no unconnected exits.
There are three types of units, as defined by the "room type" property, declared in the sublevel unit definition text files:
- Dead ends/alcoves: These close off pathways and exits of rooms. Internally, these are called "caps", and their "room type" is 0.
- Corridors: pathways and corridors that normally don't have any special features; their walls decide the path or paths the player can take. Their "room type" is 2.
- Rooms: decorated and often large rooms, featuring walls and objects organized in a certain fashion. Their "room type" is 1.
In 2-Player Battle, for all caves excluding the Dim Labyrinth, there is a static list of units to use, as well as their position and rotation. Instead of the game generating a cave using the available units, it only has to pick one of the available static layouts. These static layouts can be found in /user/Abe/vs.
Regular units[edit]
The following is a list of all existing units in Pikmin 2, used and unused, and sorted by theme. The themes are named based on the common word in the units' names.
Concrete[edit]
Units in the concrete theme have their names end with "conc", which is likely short for コンクリート? (lit.: "concrete"); this word comes from the concrete walls that these units have.
cap_conc: Dead end.
item_cap_conc: Dead end (that presumably contains an item).
room_16x17r_conc: Large unit with a circular room, a roughly plus-shaped room and a corridor with a stream of water, connected by pipes. It only appears on the Hidden Garden and sublevel 4 of the Shower Room, being the only unit in both.
room_4x4a_4_conc: Basic 4x4 room.
room_4x4b_4_conc: 4x4 room with a small portion of it closed inward.

room_4x4c_4_conc: 4x4 room with roots.
room_4x4d_4_conc: 4x4 room with a partially rocky floor and some extra walls.

room_4x4e_4_conc: 4x4 room, similar to the first, but with a C-shaped wall in the middle.
room_4x4f_4_conc: 4x4 room with a raised stone platform.
room_4x4g_4_conc: 4x4 room with 2 extra walls, one in the middle.
room_4x4g_water_4_conc: 4x4 room with 2 extra walls, one in the middle, and water. Only used on sublevel 1 of the Submerged Castle.
room_dan4x4h_2_conc: 4x4 room with the southwestern portion rising up. "dan" means 段? (lit.: "step").
room_dan4x4i_3_conc: 4x4 room with some rising portions, a stony floor, and a sub-room at the north. "dan" means 段? (lit.: "step").

room_DKumo16x10t_conc: Circular room, two roughly square rooms and a smaller circular room, connected by brief corridors. This is where the Beady Long Legs is first fought. "DKumo" refers to the boss, ダマグモ? (lit.: "Orb Spider").
room_hitode3x3m_5_conc: 3x3 room with a wall partially separating the north and south, and a partial and thick central wall on the south. "hitode" means 人出? (lit.: "turnout").
room_manh7x7p_9_conc: 7x7 circular room in the center, with 8 openings (and 9 exits) scattered around. It's the main room in the Dweevil Nest. "manh" could refer to "manhole".
room_manh7x7q_8_conc: 7x7 room similar to the previous one, but the center of the room has a sandpit. Snagrets are commonly fought here. "manh" could refer to "manhole".
room_manh_2_conc: Large circular room with a partially stoned floor. "manh" could refer to "manhole".
room_north4x4j_1_conc: 4x4 room with some rocky terrain, a wall, and a tube.
room_north4x4k_1_bomb_conc: 4x4 room with a rusty open pipe and a crevice. "bomb" refers to the fact that this sublevel was used in a unused sublevel as part of a puzzle involving bomb rocks. Unused.
room_north4x4k_1_conc: The same as the previous room, except portion of the tube is underground. Sublevel 2 of the Submerged Castle always ends with this.
room_north4x4l_1_conc: Corridor that leads to a dead end, after a U-turn.
room_Oashi8x9_conc: Large circular room with a partially stoned floor, and light shining from above. It's only used on sublevel 15 of the Hole of Heroes, where the Raging Long Legs is fought. "Oashi" refers to the boss's big feet.
room_pype10x18s_conc: 10x18 room with a central room, connected to a small circular room by a small tube, and a huge tube with flowing water spanning all-throughout. It's the main part of sublevel 2 of the Submerged Castle. "pype" means "pipe".
room_pype3x4n_2_conc: 3x4 room with a pipe that opens on the top and east, as well as a rusted opening. "pype" means "pipe".
room_pype4x4o_3_conc: 4x4 room with a pipe similar to the one in the previous unit, but on the center. "pype" means "pipe".
room_spiral_1_conc: A small maze of concrete walls on sand, with the center spiraling. Only used on sublevel 8 of the Dream Den.
way2x2_conc: Straight corridor, 1x2.
way2_conc: Straight corridor.
way3_conc: Three-way crossing.
way4_conc: Four-way crossing.
wayl_conc: Turning corridor.


Garden[edit]
Units in the garden theme have have their names end with "kusachi" (草地?, lit.: "meadow").
cap_kusachi: Dead end.
item_cap_kusachi: Dead end (that presumably contains an item).
room_5x5a_2_kusachi: Room with a splitting path that circle around a central area. One of the paths is a dead end.
room_big2_kusachi: Like the bucket room, except without the bucket, shovel, or sand. Used only on sublevel 1 of the Breeding Ground and sublevel 1 of the Hole of Heroes.
room_big_kusachi: Room with an upside-down bucket on top of sand, and a toy shovel leaning on it.
room_ike_kusachi: Like the large three-way crossing room, but with a pond in the middle; it can be crossed with some small wooden boards placed on top. "ike" means 池? (lit.: "pond").
room_mid_kusachi: Large three-way crossing.
room_torigoya_kusachi: Small circular rooms with roots, connected by a crossing corridor, and a pathway to a birdhouse with light shining through the window. Exclusive to sublevel 1 of the Snagret Hole. "torigoya" means 鳥小屋? (lit.: "aviary").
way2x2_kusachi: Straight corridor, 1x2.
way2_kusachi: Straight corridor.
way3_kusachi: Three-way crossing.
way4_kusachi: Four-way crossing, featuring a twig with a leaf. Unused, as none of the used floor setups allow it to appear.
wayl_kusachi: Turning corridor.


Metal[edit]
Units in the metal theme have their names end with "metal".
cap_metal: Dead end.
item_cap_metal: Dead end (that presumably contains an item).
room_ari1_3_metal: Circular room with three rusty overhangs in the middle.
room_cent_4_metal: Room with 4 exits and a bit of purple metal on the center. "cent" could mean "center".
room_hitode2x2_4_metal: Room with a very rusted metal board, with two tubes sticking up. "hitode" means 人出? (lit.: "turnout").
room_hitode2x3_5_metal: Large four-way crossing, in an X shape. "hitode" means 人出? (lit.: "turnout").
room_hitode3x3_5_metal: Room with a raised platform in the corner, with a blue metal circle, sometimes housing an Armored Cannon Beetle Larva. "hitode" means 人出? (lit.: "turnout").
room_hitode3x4_4_metal: Room with 4 exits. "hitode" means 人出? (lit.: "turnout").
room_hitode4x4_3_metal: Circular room with a raised platform in the corner, with dark and blue metal, commonly housing an Armored Cannon Beetle Larva. "hitode" means 人出? (lit.: "turnout").
room_hitode4x4_6_metal: Room with a permanently-closed small rusty hatch. "hitode" means 人出? (lit.: "turnout").
room_hitode4x4_7_metal: Room with a large blue metal circle near the center, as well as a smaller one on a raised platform. "hitode" means 人出? (lit.: "turnout").
room_hitode4x4_tower_3_metal: Like the circular room with a raised platform that normally houses Armored Cannon Beetle Larvae, but with a tower in the center instead. Used only on sublevel 7 of Subterranean Complex and sublevel 1 of the Rusty Gulch. "hitode" means 人出? (lit.: "turnout").
room_houdai2_1_metal: Room with several walls, and a pond with a white circle in the center. This is one of the Man-at-Legs's arenas. "houdai" is the boss' internal name.
room_houdai_1_metal: Circular room with a spiderweb-like formation on the ground. This is one of the Man-at-Legs's arenas. "houdai" is the boss' internal name.
room_mid1_6_metal: Slightly long room with a circle of blue metal on one end and rusty red metal on another. "mid" means "middle (sized)".
room_mid2_3_metal: Room with two circles of rusty red metal and three exits. "mid" means "middle (sized)".
room_nobo2_4_metal: Huge room mostly comprised of corridors, zigzagging and spiraling up and down. "nobo" means 上る? (lit.: "ascend").
room_north2x2_1_metal: T-shaped room with only one exit.
room_north_1_metal: Circular room with only one exit.
room_white14x12_metal: Soil room with shine lighting through the ceiling, connected to a metal room and a small circular room by corridors. It is exclusive to sublevel 3 of the White Flower Garden, where White Pikmin are discovered.
way2x2_metal: Straight corridor, 1x2.
way2_metal: Straight corridor.
way3_metal: Three-way crossing.
way4_metal: Four-way crossing.
wayl_metal: Turning corridor.


Snow[edit]
Units in the snow theme have their names end with "snow" or "renga" (レンガ?, lit.: "brick"), due to the brick walls they have.
cap_snow: Dead end.
item_cap_snow: Dead end (that presumably contains an item).
room_4x4a_4_renga: Simple 4x4 room, with brick walls.
room_4x4d_4_renga: 4x4 brick and snow room with a few extra walls.
room_4x4g_4_renga: 4x4 room with 2 extra walls, one in the middle.
room_block1_3_snow: Room with a rectangular opening on a stone wall.
room_dan4x4h_2_renga: 4x4 room with the southwestern portion rising up. "dan" means 段? (lit.: "step").
room_hitode2_5_snow: Room with 5 exits. "hitode" means 人出? (lit.: "turnout").

room_hitode3x3m_5_renga: 3x3 room with a brick wall partially separating the north and south, and a partial and thick central brick wall on the south. "hitode" means 人出? (lit.: "turnout").
room_hitode3_4_snow: Room with 4 exits. "hitode" means 人出? (lit.: "turnout").
room_ike3_2_snow: Room with a ramp leading to the top of a wall that's in the center. "ike" means 池? (lit.: "pond").
room_mid1_6_snow: Large room with 6 exits. "mid" means "middle (sized)".
room_mid2_3_snow: Room that splits into 2. "mid" means "middle (sized)".
room_north4_1_snow: Same as the circular room with only one exit, but with 3 pieces of lumber perpendicular to one another, 2 of them slightly burrowed.
room_north_1_snow: Circular room with only one exit.
room_purple14x14_snow: A snowy room and a large circular room, with light shining in, connected by a corridor. This is where Purple Pikmin are first discovered. It's the only unit with a bit of the ceiling modeled.
room_saka1_1_snow: Circular room with a lightly rising curved edge and a tree trunk in the center. "saka" means 坂? (lit.: "slope").
room_saka2_2_snow: Room with a C-shaped raised chunk of wood. "saka" means 坂? (lit.: "slope").
room_uzu1_1_snow: Circular room with a spiral going upwards, with parts of it not covered by snow. "uzu" means 渦? (lit.: "whirlpool").

way2x2_snow: Straight corridor, 1x2.
way2_snow: Straight corridor.

way3_snow: Three-way crossing.
way4_snow: Four-way crossing.
wayl_snow: Turning corridor.


Soil[edit]
Units in the soil theme have their names end with "tsuchi" (土?, lit.: "soil").
cap_tsuchi: Dead end.
item_cap_tsuchi: Dead end (that presumably contains an item).
room_block1_3_tsuchi: Room with a rectangular opening on a stone wall.
room_boss_1_tsuchi: Room with 2 subrooms, one with white splatters, the other with a discarded Empress Bulblax skin. It's used on sublevel 5 of the Hole of Beasts.
room_cent2_4_tsuchi: Same as the circular room with 4 long exits, except there's a patch of grass in the center, bathed in sunlight. "cent" could mean "center".

room_cent3_4_tsuchi: Same as the previous room, but with a large patch of grass and scattered petals in the middle, bathed in sunlight. "cent" could mean "center".
room_cent_4_tsuchi: Circular room with 4 evenly spread and long exits. "cent" could mean "center".
room_hebi12x12_1_tsuchi: Circular room with a spiral design on the floor, and some corridors attached. Used in sublevel 5 of the White Flower Garden. "hebi" is part of the Burrowing Snagret's name, ヘビガラス? (lit.: "Snake Crow")).
room_hitode1_5_tsuchi: Room with 5 exits and two stalagmites. "hitode" means 人出? (lit.: "turnout").
room_hitode2_5_tsuchi: Room with 5 exits. "hitode" means 人出? (lit.: "turnout").
room_hitode3_4_tsuchi: Room with 4 exits. "hitode" means 人出? (lit.: "turnout").
room_hitode4_4_tsuchi: Partially rounded room with 4 exits. "hitode" means 人出? (lit.: "turnout").
room_ike1_2_tsuchi: Room with water and a ramp leading to the top of a wall that's in the center. "ike" means 池? (lit.: "pond").
room_ike2_4_tsuchi: Room with a small island in a pool of water. "ike" means 池? (lit.: "pond").
room_ike3_2_tsuchi: Like the room before the previous one, except with no water on the base of the ramp. "ike" means 池? (lit.: "pond").
room_ike4_5_tsuchi: Large room with a lot of water and several tree trunks above water. It's the main room in sublevel 6 of the Hole of Heroes. "ike" means 池? (lit.: "pond").
room_kingchap_a_tsuchi: Two spherical rooms connected by a crossing corridor. Only used on sublevel 7 of the Bulblax Kingdom and sublevel 2 of the Emperor's Realm. "kingchap" is short for "kingchappy", the Emperor Bulblax's internal name.
room_kingchap_b_tsuchi: Room with a ledge that can be reached by throwing Pikmin through one side or from a path through the pond. This is where the Gyroid Bust is found. "kingchap" is short for "kingchappy", the Emperor Bulblax's internal name.
room_kingchp_tsuchi: Room with a tree's roots, and several ponds. Emperor Bulblaxes can be found here. "kingchap" is short for "kingchappy", the Emperor Bulblax's internal name.
room_mid1_6_tsuchi: Large room with 6 exits. "mid" means "middle (sized)".
room_mid2_3_tsuchi: Room that joins two paths into one. "mid" means "middle (sized)".
room_north2_1_tsuchi: Corridor with a dead end.

room_north3_1_tsuchi: Corridor with a dead end after a U-turn.
room_north4_1_tsuchi: Like the circular room with 1 exit, but with three connected pieces of lumber perpendicular to one another, partially burrowed.
room_north_1_tsuchi: Circular room with a single exit.
room_queen_b_tsuchi: From the starting point, there's a double-S-shaped corridor. After this is the main room, squareish in shape. Finally, there's a room connected with a corridor afterwards. The Empress Bulblax on the Frontier Cavern is fought here. "queen" is the boss' internal name.
room_queen_c_tsuchi: Like the first Empress Bulblax room, but without the small alcoves and without the discarded skin. The creature is fought here on sublevel 11 of the Hole of Heroes and sublevel 4 of the Emperor's Realm. "queen" is the boss' internal name.
room_saka1_1_tsuchi: Circular room with a lightly rising curved edge and a tree trunk in the center. "saka" means 坂? (lit.: "slope").
room_saka2_2_tsuchi: Room with a C-shaped raised chunk of wood. "saka" means 坂? (lit.: "slope").
room_uzu1_1_tsuchi: Circular room with a spiral going upwards. "uzu" means 渦? (lit.: "whirlpool").
way2x2_tsuchi: Straight corridor, 1x2.
way2_tsuchi: Straight corridor.
way3_tsuchi: Three-way crossing.

way4_tsuchi: Four-way crossing.
way6_tsuchi: Path that splits into 5, with some odd dirt texture on the ground. Unused.
wayl_tsuchi: Turning corridor.


Toybox[edit]
Units in the toybox theme have their names end with "toy".
cap_toy: Dead end.

item_cap_toy: Dead end (that presumably contains an item).
room_hitode4x7_3_toy: Large three-way crossing with building blocks making up some walls. "hitode" means 人出? (lit.: "turnout").
room_hitode6x6_3_toy: Room with some walls and a box with some unsharpened pencils and building blocks. This version is only used on sublevel 1 of the Lost Toy Box. "hitode" means 人出? (lit.: "turnout").
room_hitode6x7_4_toy: Large four-way crossing. "hitode" means 人出? (lit.: "turnout").
room_large_7_toy: Room with a toy train track and some houses serving as walls.
room_mid2_8_toy: Same as the room with the xylophone, but without the instrument. "mid" means "middle (sized)".
room_mid_8_toy: Room with a xylophone and two playing sticks in the middle. "mid" means "middle (sized)".

room_mid_sara2_8_toy: Room with three colored half-discs, leading to sand pits. "sara" means 皿? (lit.: "plate").

room_mid_sara_8_toy: Room with a baby plate in the center. "sara" means 皿? (lit.: "plate").
room_mid_tower2_8_toy: Room with a tower in the middle, and some walls scattered around to provide protection from the Gatling Groinks commonly found atop the tower. Used only on sublevel 1 of Three Color Training.
room_mid_tower_8_toy: Like the previous room, but the base of the tower is less round, and there are extra walls scattered around.

room_opan_toy: Huge room enclosed by walls, with building block scattered about and 3 large plates on top of a picnic cloth. This is where the Giant Breadbug is fought. "opan" is part of the boss' name, オオパンモドキ? (lit.: "Giant Bread Beetle").
room_small2_5_toy: Same as the room with the tambourine, but without the instrument.
room_small_5_toy: Room with a tambourine in the middle.
way2x2_toy: Straight corridor, 1x2. Features a small bump.
way2_toy: Corridor.

way3_toy: Three-way crossing.
way4_toy: Four-way crossing. Features four poles connected by an X-shaped wire. Rare, but can be seen on sublevel 3 of the Glutton's Kitchen. It is also in the cave unit list files for Carpet Plain, but can only be seen if the "random forcer" is used in New Play Control! Pikmin 2.
wayl_toy: Turning corridor.


Tiles[edit]
Units in the tiles theme have their names end with "tile". The tile theme does not actually have corridors attached to it; instead, there is a different "pipe" theme that is used exclusively for the tile theme's corridors.

cap_pipe: Dead end.
item_cap_pipe: Dead end (that presumably contains an item).
room_4x4a_4_tile: Simple 4x4 room.
room_4x4d_4_tile: 4x4 room with some extra walls.
room_4x4f_4_tile: 4x4 room with a raised tile platform.
room_bunki7x7_8_tile: A large 7x7 room. It's the main room of the Subterranean Lair and sublevel 7 of the Hole of Heroes. "bunki" means 分岐? (lit.: "forking").
room_dangomushi_tile: One large square room connected to two smaller subrooms. This is where the Segmented Crawbster is fought. "dangomushi" is the boss' internal name.

room_drypool5x5_5_tile: Same as the pool room, but without the water.
room_north2x2_1_tile: 2x2 square room with only one exit.
room_north4x4l_1_tile: Corridor that leads to a dead end, after a U-turn.
room_oootakara_tile: Large square sink, with no drain, and scattered pieces of tiles around. Home of the Titan Dweevil. "oootakara" is the boss' internal name on some files.

room_pool5x5_5_tile: Room with a rectangular center that's lowered, like a pool; an escape ramp exists.
room_tako2x2_8_tile: Room with 4 exits. "tako" means 凧? (lit.: "kite").
room_ud4x4_2_tile: Room with the northern and southern edges lowering a bit.
room_u_jikou1_4x4_2_tile: Room with a large bump of sand and a waterway path, covered by a grill.
room_yukoana1_5x3_2_tile: Corridor with 6 small pipes, 3 on each side.
way2x2_pipe: Straight corridor, 1x2.
way2_pipe: Straight corridor.
way3_pipe: Three-way crossing. This unit has a hole visible in the back wall that cannot be moved through, even though it is at ground level and just the same size as a captain.
way4_pipe: Four-way crossing.
wayl_pipe: Turning corridor.


Others[edit]
Pathways with items[edit]
The following units are copies of the regular pathway units, but presumed to have items (normally eggs) in them, judging by the names. All of these are unused.
item_way3_conc: Concrete three-way crossing that presumably contains an item. Unused.
item_way3_metal: Metal three-way crossing that presumably contains an item. Unused.
item_way3_tsuchi: Soil three-way crossing that presumably contains an item. Unused.
item_way4_conc: Concrete four-way crossing that presumably contains an item. Unused.
item_way4_metal: Metal four-way crossing that presumably contains an item. Unused.
item_way4_tsuchi: Soil four-way crossing that presumably contains an item. Unused.
item_wayl_conc: Turning concrete corridor that presumably contains an item. Unused.
item_wayl_metal: Turning metal corridor that presumably contains an item. Unused.
item_wayl_tsuchi: Turning soil corridor that presumably contains an item. Unused.


Near duplicates[edit]
These units are near duplicates of existing units, differing only on certain internal files. These duplicates could exist for a variety of reasons, but most of the time, it's to change the general layout of an existing unit, for the purposes of the cave or the objects within.
room_5x5a_2_tekiF_kusachi: Near duplicate of room_5x5a_2_kusachi (garden two way split, 2 exits), differing only on layout.txt. Used only on the Sniper Room. "tekiF" refers to the "f" version of an enemy; in this case, the stationary Armored Cannon Beetle Larva.
room_big_tekiF_kusachi: Near duplicate of room_big_kusachi (garden room with an upside-down bucket), differing only on grid.bin and layout.txt. Used only on the Sniper Room. "tekiF" refers to the "f" version of an enemy; in this case, the stationary Gatling Groink.
room_block1_3_hiba_tsuchi: Near duplicate of room_block1_3_tsuchi (soil room with a wall with a rectangular hole), differing only on layout.txt. Used only on sublevel 3 of the Hole of Beasts and sublevel 1 of the Emperor's Realm. "hiba" is the internal name for the fire geysers.
room_cent2_4_metal: Near duplicate of room_cent_4_metal (large metal four-way crossing with purple center), differing only on layout.txt. Used only on sublevel 1 of the White Flower Garden and sublevel 12 of the Hole of Heroes.
room_cent_4_mat_tsuchi: Near duplicate of room_cent_4_tsuchi (circular soil room with 4 long exits), differing only on layout.txt. Unused.
room_hitode4x4_tekiF_3_metal: Near duplicate of room_hitode4x4_3_metal (metal room with raised platform with Armored Cannon Beetle Larvae), differing only on layout.txt. Used only on sublevel 3 of the Subterranean Complex and sublevel 1 of the Brawny Abyss. "tekiF" refers to the "f" version of an enemy; in this case, the stationary Armored Cannon Beetle Larva.
room_hitode6x6_yakushima_3_toy: Near duplicate of room_hitode6x6_3_toy (toybox room with a box containing crayons and building blocks), differing only on layout.txt. Used only on sublevel 1 of the Glutton's Kitchen.
room_manh7x7p_boss_conc: Near duplicate of room_manh7x7p_9_conc (large circular room with 8 exits), differing only on layout.txt. Used only on the Angle Maze (Raging Long Legs) and sublevel 7 of the Snagret Hole.
room_manh_boss_conc: Near duplicate of room_manh_2_conc (large circular concrete room with a partial stone floor), differing only on layout.txt and route.txt. Used only on sublevel 5 of the Submerged Castle.
room_mid1_6_boss_tsuchi: Near duplicate of room_mid1_6_tsuchi (large soil room with 6 exits), differing only on layout.txt. Used only on sublevel 3 of the Snagret Hole.
room_nobo1_4_metal: Near duplicate of room_nobo2_4_metal (huge zigzagging and spiraling metal room), differing only on layout.txt. Unused.
room_north2x2_1_tekiF_tile: Near duplicate of room_north2x2_1_tile (square tile room with one exit), differing only on layout.txt. Used only on sublevel 1 of The Giant's Bath and sublevel 2 of Hazard Training. "tekiF" refers to the "f" version of an enemy; in this case, it possibly refers to the Toady Bloyster (as opposed to the Ranging Bloyster).
room_north_tutorial_1_snow: Near duplicate of room_north_1_snow, differing only on layout.txt and route.txt. Used only on sublevel 1 of the Emergence Cave.
room_north_1_hiba_tsuchi: Near duplicate of room_north_1_tsuchi (circular soil room with one exit), differing only on layout.txt and route.txt. Used only on sublevel 3 of the Hole of Beasts and sublevel 2 of Emperor's Realm. "hiba" is the internal name for the fire geysers.
room_north_1_mat_tsuchi: Same as the previous one. All three of these units differ in the same files. This one is used in sublevels 1 and 5 of the Cryptic Cavern.
room_Oashi8x9_s_conc: Near duplicate of room_Oashi8x9_conc (large circular room with partial stone floor and light shining in), differing only on layout.txt. Used only on the Cavernous Abyss.
room_tako2x2_8_tekiF_tile: Near duplicate of room_tako2x2_8_tile (square tile room with 4 exits), differing only on layout.txt. Used only on the Bully Den. "tekiF" refers to the "f" version of an enemy.
2-Player variants[edit]
As with the previous section, these units are near duplicates of existing units, but with layout.txt changed to fit the 2-Player Battle arenas.
room_vs_5x5a_2_kusachi: Variant of room_5x5a_2_kusachi (garden room with 2 splitting paths, one with a dead end).
room_vs_big2_kusachi: Variant of room_big2_kusachi (the room similar to the next one, but without the bucket).
room_vs_big_kusachi: Variant of room_big_kusachi (garden room with an upside-down bucket).
room_vs_bunki7x7_8_tile: Variant of room_bunki7x7_8_tile (large square tile room with 5 exits).
room_vs_drypool5x5_5_tile: Variant of room_drypool5x5_5_tile (tile room with a dip with no water).
room_vs_hitode2x3_5_metal: Variant of room_hitode2x3_5_metal (large four-way metal crossing).
room_vs_hitode3x3m_5_conc: Variant of room_hitode3x3m_5_conc (concrete room with 2 walls in the way).
room_vs_hitode4x4_6_metal: Variant of room_hitode4x4_6_metal (room with a rusty closed hatch).
room_vs_hitode6x7_4_toy: Variant of room_hitode6x7_4_toy (garden room with 4 exits). Unused.
room_vs_ike3_2_snow: Variant of room_ike3_2_snow (snow room with a ramp leading to the top of a wall in the middle).
room_vs_mid1_6_tsuchi: Variant of room_mid1_6_tsuchi (soil room with 6 exits).
room_vs_mid_kusachi: Variant of room_mid_kusachi (large three-way garden crossing).
room_vs_mid_sara2_8_toy: Variant of room_mid_sara2_8_toy (garden room with 3 colored half-discs).
room_vs_nobo2_4_metal: Variant of room_nobo2_4_metal (zigzagging and spiraling metal corridors).
room_vs_north2x2_1_tile: Variant of room_north2x2_1_tile (square tile room with one exit).
room_vs_north_1_metal: Variant of room_north_1_metal (large circular metal room with one exit).
room_vs_saka2_2_snow: Variant of room_saka2_2_snow (snow room with a spiraling wooden ledge and alcove).
room_vs_spiral_1_conc: Variant of room_spiral_1_conc (concrete room with spiraling and zigzagging corridors).
room_vs_yukoana1_5x3_2_tile: Variant of room_yukoana1_5x3_2_tile (tile corridor with 6 pipes).