Hero's Hideaway: Difference between revisions
m (misspelling) |
KawaiiKiwii (talk | contribs) m (→See also) |
||
| (110 intermediate revisions by 43 users not shown) | |||
| Line 1: | Line 1: | ||
{{game icons|p4=y}} | {{game icons|p4=y}} | ||
{{infobox area | {{infobox area | ||
|screenshot | |screenshot = P4 House Area.png | ||
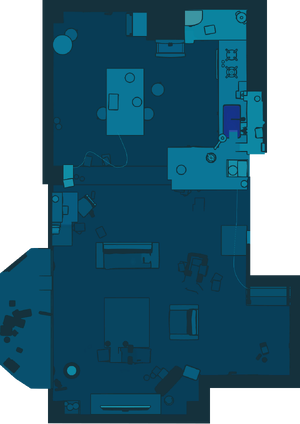
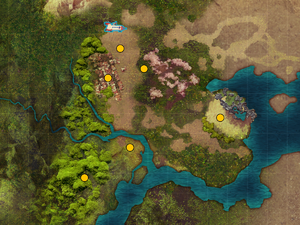
|map | |map = Hero's Hideaway map.png | ||
|treasures | |rescues = 6 | ||
|caves | |treasures = 86 | ||
| | |onions = 3 | ||
|requirements | |caves = 3 | ||
|next | |dandori_c = 1 | ||
|music | |dandori_b = 1 | ||
|suggested = {{icon|Yellow Pikmin|v=P4 HUD}} {{icon|Ice Pikmin|v=P4 HUD}} {{icon|Rock Pikmin|v=P4 HUD}} | |||
|wild = {{icon|Ice Pikmin|v=P4 HUD}} {{icon|Rock Pikmin|v=P4 HUD}} {{icon|Purple Pikmin|v=P4 HUD}} {{icon|White Pikmin|v=P4 HUD}} | |||
|requirements = {{sparklium|p4|7,000}} and cure [[Bernard]] | |||
|next = [[Giant's Hearth]] | |||
|music = [[Music in Pikmin 4#Hero's Hideaway|''Hero's Hideaway'']] | |||
}} | }} | ||
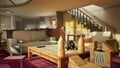
The '''Hero's Hideaway''' is the fourth main area in {{p4}}. It takes place inside of a house, specifically its living room and kitchen. This area has {{sparklium|p4|5,883}} worth of treasure, of which {{sparklium|p4|1,965}} is above ground. | |||
== Plot == | == Plot == | ||
When Captain Olimar first arrives in the area, he lands on the left side of a window seat. Shortly after he and [[Moss]] leave the [[S.S. Dolphin]], the [[Pikmin family|Pikmin]] emerge from the [[Onion]] without being called for and run off on their own. Concerned by their peculiar behavior, Olimar sets off to find them, as well as his missing ship part. After gathering some Pikmin and defeating | When Captain Olimar first arrives in the area, he lands on the left side of a window seat. Shortly after he and [[Moss]] leave the [[S.S. Dolphin]], the [[Pikmin family|Pikmin]] emerge from the [[Onion]] without being called for and run off on their own. Concerned by their peculiar behavior, Olimar sets off to find them, as well as his missing ship part. After gathering some Pikmin and defeating a [[Porquillion]] that is holding the [[Interstellar Radio]], Olimar quickly uses it to send a distress signal. After this, the [[Rescue Corps]]' part of the story begins. | ||
After exploring the first three areas, the Rescue Corps | After exploring the first three areas, the Rescue Corps search here for signs of Olimar. They find [[Moss]], as well as a Voyage Log mentioning a bunker that Olimar had set up. Upon figuring out the code to enter it and encountering the [[leafling]] they had repeatedly encountered, they beat him in a [[Dandori Battle]] and learn that the leafling is in fact Olimar himself. | ||
== Layout == | == Layout == | ||
| Line 28: | Line 29: | ||
* A living room with a loveseat and armchair. | * A living room with a loveseat and armchair. | ||
* Wooden building blocks. | * Wooden building blocks. | ||
* | * Two large wooden table. | ||
* A staircase with potted plants on it. | * A staircase with potted plants on it. | ||
* Childish crayon drawings. | * Childish crayon drawings. | ||
* A | * A locked bunker with three knobs. | ||
* A structure made up of various books. | * A structure made up of various books. | ||
* A kitchen island with barstools. | * A kitchen island with barstools. | ||
* A fridge with the Light Blue Onion in it. | |||
=== Bases === | === Bases === | ||
*Stargazer's Spot | *Stargazer's Spot: The default landing site, rather hard to miss. In the southern side of the map, west of the living room. | ||
*Feasting Centre | *Feasting Centre: Found in the kitchen, on the right side of the table. It is guarded by fifteen [[Shearflea]]s. | ||
*Foot of the Stairs | *Foot of the Stairs: Found in the living room, near the bottom right corner. It is guarded by two [[Bearded Amprat]]s. | ||
== Caves == | == Caves == | ||
*[[Doppelgänger's Den]] | *[[Doppelgänger's Den]] | ||
*[[Frozen Inferno]] | *[[Frozen Inferno]] | ||
*[[Plunder Palace]] | *[[Plunder Palace]] | ||
=== Dandori Challenge === | |||
Entrance is located at the top of a stepladder which requires using and changing the airstreams of the nearby fans around the kitchen to reach. Oatchi and the player character must split up to press the buttons accordingly. The fan leading to the entrance will be on a chair near a table that holds the music box treasure, [[Mechanical Harp (Windmills)]]. | |||
=== Dandori Battle === | |||
The area's Dandori Battle cave, [[Leafy Showdown]], can be found within a [[safe]]. To unlock it, the player must find the three treasures that provide the safe's code: the [[Courage Emblem]], the [[Power Emblem]], and the [[Wisdom Emblem]]. The safe's code will be randomly generated on each playthrough. | |||
== Objects == | == Objects == | ||
| Line 51: | Line 59: | ||
=== Treasures === | === Treasures === | ||
[[Love Nugget]] | {{columns|2| | ||
* {{icon|Buddy Display|v=P4|y}} × 1 | |||
* [[File:Courage_Emblem-Love_Emblem_P4_Icon.gif|24px]] [[Courage Emblem]] × 1 | |||
* {{icon|Divine Balloon|v=P4|y}} × 1 | |||
* {{icon|Doggy Bed|v=P4|y}} × 1 | |||
* {{icon|Fist-Force Combobot|v=P4|y}} × 1 | |||
* {{icon|Gold Nugget|v=P4|y}} × 5 | |||
* {{icon|Love Nugget|v=P4|y}} × 2 | |||
* {{icon|Mechanical Harp (Windmills)|v=P4|y}} × 1 | |||
* {{icon|Number Jumper|v=P4|y}} × 1 | |||
* {{icon|Peacemaker Combobot|v=P4|y}} × 1 | |||
* {{icon|Perforated Raft|v=P4|y}} × 5 | |||
* [[File:Power_Emblem-Money_Emblem_P4_Icon.gif|24px]] [[Power Emblem]] × 1 | |||
* {{icon|Priceless Bird|v=P4|y}} × 1 | |||
* {{icon|Relentless Spear|v=P4|y}} × 1 | |||
* {{icon|S.S. Chocolate|v=P4|y}} × 1 | |||
* {{icon|S.S. Peppermint|v=P4|y}} × 1 | |||
* {{icon|Searing Acidshock|v=P4|y}} × 1 | |||
* {{icon|Shooting-Star Shield|v=P4|y}} × 1 | |||
* {{icon|Spinning Memories Plank|v=P4|y}} × 1 | |||
* {{icon|Sure-Footed Combobot|v=P4|y}} × 1 | |||
* {{icon|Think-Tank Combobot|v=P4|y}} × 1 | |||
* {{icon|Trap Lid|v=P4|y}} × 1 | |||
* {{icon|Unbreakable Promise|v=P4|y}} × 1 | |||
* [[File:Wisdom_Emblem-Work_Emblem_P4_icon.gif|24px]] [[Wisdom Emblem]] × 1 | |||
}} | |||
=== Onions === | |||
* {{icon|Ice Onion|v=P4|y}} × 1 | |||
* {{icon|Flarlic|y|v=P4}} × 1 | |||
=== Enemies === | === Enemies === | ||
* | {{columns|2| | ||
* | * {{icon|Bearded Amprat|v=P4|y}} × 2 | ||
* | * {{icon|Dwarf Frosty Bulborb|v=P4|y}} × 5 | ||
* | * {{icon|Frosty Bulborb|v=P4|y}} × 1 | ||
* | * {{icon|Gildemandwee|v=P4|y}} × 6 | ||
* | * {{icon|Honeywisp|v=P4|y}} × 4 | ||
* | * {{icon|Horned Cannon Beetle|v=P4|y}} × 1 | ||
* | * {{icon|Iceblown Dweevil|v=P4|y}} × 3 | ||
* | * {{icon|Icy Blowhog|v=P4|y}} × 1 | ||
* | * {{icon|Miniature Snootwhacker|v=P4|y}} × 3 | ||
* | * {{icon|Moss|v=P4|y}} × 1 (disappears once the bunker is opened) | ||
* | * {{icon|Porquillion|v=P4|y}} × 1 | ||
* {{icon|Shearflea|v=P4|y}} × 36 | |||
* {{icon|Skutterchuck|v=P4|y}} × 6 | |||
* {{icon|Sunsquish|v=P4|y}} × 2 (inside eggs) | |||
* {{icon|Tusked Blowhog|v=P4|y}} × 4 | |||
}} | |||
=== Obstacles === | === Obstacles === | ||
{{columns|2| | |||
* {{icon|Breakable pot|v=P4|y}} × 7 (groups of 3 and 4) | |||
* {{icon|Cardboard box|y}} × 1 | |||
* {{icon|Hydro jelly|v=P4|y}} × 1 | |||
* {{icon|Narrow tunnel|v=P4|y}} × 1 | |||
* {{icon|Paper bag|v=P4|y}} × 1 | |||
* {{icon|Tunnel|v=P4|y}} × 2 | |||
}} | |||
=== Tools === | === Tools === | ||
{{columns|2| | |||
* {{icon|Clay mound|v=P4|y}} × 1 | |||
* {{icon|Climbing rope|v=P4|y}} × 3 | |||
* {{icon|Climbing wall|v=P4|y}} × 1 | |||
* {{icon|Fan|v=P4|y}} × 6 | |||
* {{icon|Floating platform|v=P4|y}} × 4 | |||
* {{icon|Slide rail|v=P4|y}} × 2 | |||
}} | |||
=== Others === | === Others === | ||
== Guide == | == Guide == | ||
{{stub|section=y}} | |||
=== Tutorial === | |||
{{guide}} | {{guide}} | ||
The tutorial segment of this area ends as soon as you defeat the [[Porquillion]] atop the table in the center of the living room. The exact amount of Pikmin you obtain does not matter, although the more you have the easier it is to fight against the creature, and it is possible to retrieve all 100 Pikmin. When you take control of Olimar, the first obstacle you are faced with is a series of [[ | The tutorial segment of this area ends as soon as you defeat the [[Porquillion]] atop the table in the center of the living room. The exact amount of Pikmin you obtain does not matter, although the more you have the easier it is to fight against the creature, and it is possible to retrieve all 100 Pikmin. When you take control of Olimar, the first obstacle you are faced with is a series of [[jar]]s. [[Rush]]ing against them is required, and this is how the game teaches you to do so. | ||
After this, you can explore the area freely, collecting Pikmin along the way, and then head to the series of wood blocks next to the center table, rush against the metal sheet in the way, walk up the blocks, and fight the creature. | After this, you can explore the area freely, collecting Pikmin along the way, and then head to the series of wood blocks next to the center table, rush against the metal sheet in the way, walk up the blocks, and fight the creature. | ||
| Line 80: | Line 142: | ||
The rest of this guide explains how to get all Pikmin. | The rest of this guide explains how to get all Pikmin. | ||
* 5 [[Red Pikmin]]: After breaking the | * 5 [[Red Pikmin]]: After breaking the jars at the beginning, 5 Red Pikmin will come out. | ||
* 2 Red Pikmin: Afterwards, you can turn left and whistle the Pikmin hiding behind the baskets. | * 2 Red Pikmin: Afterwards, you can turn left and whistle the Pikmin hiding behind the baskets. | ||
* 1 Red Pikmin: Proceeding forward, there is a Pikmin hiding behind the corkboard at the end of the window seat. | * 1 Red Pikmin: Proceeding forward, there is a Pikmin hiding behind the corkboard at the end of the window seat. | ||
* 5 [[Yellow Pikmin]]: To the right of the corkboard there are some more | * 5 [[Yellow Pikmin]]: To the right of the corkboard there are some more jars, these ones with 5 Yellow Pikmin inside. | ||
* 5 [[Blue Pikmin]]: After falling to the ground and turning right, at the corner of the area is a shelf with some tall grass on it. 5 Blue Pikmin are hiding inside. | * 5 [[Blue Pikmin]]: After falling to the ground and turning right, at the corner of the area is a shelf with some tall grass on it. 5 Blue Pikmin are hiding inside. | ||
* 5 Red Pikmin: Following the wall leftwards, there are some Pikmin under the cupboard. | * 5 Red Pikmin: Following the wall leftwards, there are some Pikmin under the cupboard. | ||
| Line 91: | Line 153: | ||
* 5 Blue Pikmin: Continuing to follow the walls leftward, there are some Pikmin cowering underneath the travel bag. | * 5 Blue Pikmin: Continuing to follow the walls leftward, there are some Pikmin cowering underneath the travel bag. | ||
* 2 Red Pikmin: At the corner of the area farther left, there are some car-shaped wood blocks, with 2 Red Pikmin above them. | * 2 Red Pikmin: At the corner of the area farther left, there are some car-shaped wood blocks, with 2 Red Pikmin above them. | ||
* 5 Blue Pikmin: Breaking the | * 5 Blue Pikmin: Breaking the jars nearby will reveal 5 Pikmin. | ||
* 5 Yellow Pikmin: Reaching the large staircase, there are Pikmin on the first step. | * 5 Yellow Pikmin: Reaching the large staircase, there are Pikmin on the first step. | ||
* 2 Yellow Pikmin: Continuing to circle the walls left, you'll reach a bookshelf with some Pikmin playing with a wire slide and a fan. 2 Pikmin are idling on the bookshelf itself. | * 2 Yellow Pikmin: Continuing to circle the walls left, you'll reach a bookshelf with some Pikmin playing with a wire slide and a fan. 2 Pikmin are idling on the bookshelf itself. | ||
| Line 112: | Line 174: | ||
This results in a total of 34 Red Pikmin, 33 Yellow Pikmin, and 33 Blue Pikmin. | This results in a total of 34 Red Pikmin, 33 Yellow Pikmin, and 33 Blue Pikmin. | ||
=== Main story === | |||
Recommended Types: [[Yellow Pikmin]], [[Rock Pikmin]], [[Ice Pikmin]] | |||
== Night Expeditions == | |||
=== Stargazer’s Spot === | |||
{{infobox night expedition | |||
|name = Stargazer’s Spot | |||
|danger = 2 | |||
|lumiknolls = 2 | |||
|enemies = 34 | |||
|glow_pikmin = 10 | |||
}} | |||
There are two [[Lumiknoll|Lumiknolls]], the blue one located on the coffee table where the Horned Cannon Beetle is located and the orange one located just west of the Foot of the Stairs base. This location has a danger level of 2 and starts the player off with 10 [[Glow Pikmin]]. | |||
==== Enemies ==== | |||
{{columns|2| | |||
* {{icon|Albino Dwarf Bulborb|v=P4|y}} × 18 | |||
* {{icon|Flighty Joustmite|v=P4|y}} × 5 | |||
* {{icon|Shearwig|v=P4|y}} × 11 | |||
}} | |||
==== Objects ==== | |||
* {{icon|Glow pellet|v=P4|y}} × 235 | |||
** Pile of 5 × 3 | |||
** Pile of 10 × 7 | |||
** Pile of 15 × 7 | |||
** Pile of 20 × 1 | |||
** Pile of 25 × 1 | |||
=== Feasting Center === | |||
{{infobox night expedition | |||
|name = Feasting Center | |||
|danger = 3 | |||
|lumiknolls = 1 | |||
|enemies = 17 | |||
|glow_pikmin = 10 | |||
}} | |||
There is one Lumiknoll located just south of the base. This location has a danger level of 3 and starts the player off with 10 Glow Pikmin. | |||
==== Enemies ==== | |||
{{columns|2| | |||
* {{icon|Frosty Bulborb|v=P4|y}} × 6 | |||
* {{icon|Shearwig|v=P4|y}} × 7 | |||
* {{icon|Smoky Progg|v=P4|y}} × 1 | |||
* {{icon|Tusked Blowhog|v=P4|y}} × 3 | |||
}} | |||
==== Objects ==== | |||
* {{icon|Glow pellet|v=P4|y}} × 290 | |||
** Pile of 5 × 3 | |||
** Pile of 10 × 11 | |||
** Pile of 15 × 3 | |||
** Pile of 20 × 2 | |||
** Pile of 25 × 1 | |||
=== Foot of the Stairs === | |||
{{infobox night expedition | |||
|name = Foot of the Stairs | |||
|danger = 4 | |||
|lumiknolls = 1 | |||
|enemies = 32 | |||
|glow_pikmin = 10 | |||
}} | |||
There is one Lumiknoll located directly at the base. This location has a danger level of 4 and starts the player off with 15 Glow Pikmin. | |||
==== Enemies ==== | |||
{{columns|2| | |||
* {{icon|Frosty Bulborb|v=P4|y}} × 2 | |||
* {{icon|Jumbo Bulborb|v=P4|y}} × 2 | |||
* {{icon|Male Sheargrub|v=P4|y}} × 26 | |||
* {{icon|Smoky Progg|v=P4|y}} × 2 | |||
}} | |||
==== Objects ==== | |||
* {{icon|Glow pellet|v=P4|y}} × 270 | |||
** Pile of 5 × 2 | |||
** Pile of 10 × 10 | |||
** Pile of 15 × 3 | |||
** Pile of 25 × 1 | |||
== Olimar's Shipwreck Tale == | |||
{{infobox area | |||
|screenshot = | |||
|map = Hero's Hideaway OST map.png | |||
|parts = 7 | |||
|onions = 0 | |||
|requirements = Recover 23 [[ship part]]s | |||
|music = ''[[Music in Pikmin 4#Hero's Hideaway (Olimar's Shipwreck Tale)|Hero's Hideaway (Olimar's Shipwreck Tale)]]'' | |||
}} | |||
The Hero's Hideaway is the fourth and final area [[Captain Olimar]] explores in his [[Olimar's Shipwreck Tale|Shipwreck Tale]]. It is only accessible once Olimar has collected all 23 [[ship part]]s in the other areas. It is similar in this respect to [[The Final Trial]] in {{p1}}, which only becomes accessible after Olimar has collected 29 out of the 30 parts in that game. | |||
When Olimar first lands in this area, the same sequence plays out as in the main game's prologue. The 100 Pikmin that appear are new Pikmin that do not take out of the stockpile you have when entering the area. The placement of said Pikmin are also identical to the placement of the ones in the prologue. After defeating the Gildemander, the sun meter activates and makes enemies and ship parts appear in the remainder of the area. | |||
=== Plot === | |||
As Captain Olimar lands in the Hero's Hideaway, the Pikmin start to behave differently and run off to hide. The confused Olimar and Moss give chase and track down all the missing Pikmin having no idea why the Pikmin are behaving this way. Once all the Pikmin have been found, Olimar, Moss, and the Pikmin make their way onto a huge structure where they run into a Porquillion. After a tough battle, the Porquillion collapses revealing it had been holding onto Olimar's missing Intersteller Radio. Before they could react, a Gildemander appears which Olimar deduces to be the culprit responsible for the confusing behaviour of the Pikmin. Olimar, with Moss and the Pikmin by his side, ready for another battle with the newly appeared enemy. They triumph and, as Olimar predicted, the Pikmin's behaviour returns to normal, allowing Olimar to collect the remaining ship parts for his ship. | |||
=== Layout === | |||
The layout of the Hero's Hideaway in Olimar's Shipwreck Tale is almost identical to that of the one in the main game. The major differences are the objects and enemies present, along with the caves entrances not being present. Some of the decorations, in the north part of the area, are different in Olimar's exploration of the area, such as there being less decorations on the windowsill, above the sink, in the Shipwreck Tale. | |||
==== Bases ==== | |||
* Stargazer's Spot: This is the default landing site. | |||
* Feasting Centre: This base is unguarded. | |||
=== Objects === | |||
==== Ship parts ==== | |||
{{columns|2| | |||
* {{icon|Automatic Gear|v=P4|y}} | |||
* {{icon|Chronos Reactor|v=P4|y}} (Inside Man-at-Legs) | |||
* {{icon|Extraordinary Bolt|v=P4|y}} | |||
* {{icon|Geiger Counter|v=P4|y}} | |||
* {{icon|Interstellar Radio|v=P4|y}} (inside Porquillion) | |||
* {{icon|Pilot's Seat|v=P4|y}} | |||
* {{icon|Repair-Type Bolt|v=P4|y}} | |||
}} | |||
==== Enemies ==== | |||
{{columns|2| | |||
* {{icon|Bearded Amprat|v=P4|y}} × 1 | |||
* {{icon|Gildemander|v=P4|y}} × 1 (drops 5 nectar) | |||
* {{icon|Gildemandwee|v=P4|y}} × 2 (drop 2 raw material each) | |||
* {{icon|Honeywisp|v=P4|y}} × 1 | |||
* {{icon|Hydro Dweevil|v=P4|y}} × 1 | |||
* {{icon|Icy Blowhog|v=P4|y}} × 1 (drops 6 raw material) | |||
* {{icon|Man-at-Legs|v=P4|y}} × 1 (drops a ship part) | |||
* {{icon|Miniature Snootwhacker|v=P4|y}} × 3 | |||
* {{icon|Porquillion|v=P4|y}} × 1 (drops a ship part) | |||
* {{icon|Snowy Blowhog|v=P4|y}} × 2 | |||
* {{icon|Toady Bloyster|v=P4|y}} × 1 | |||
* {{icon|Tusked Blowhog|v=P4|y}} × 2 | |||
}} | |||
==== Obstacles ==== | |||
{{columns|2| | |||
* {{icon|Bookend|v=P4|y}} × 2 | |||
* {{icon|Breakable pot|v=P4|y}} × 21 (1 drops 3 nectar) | |||
* {{icon|Electric gate|v=P4|y}} × 1 | |||
* {{icon|Hydro jelly|v=P4|y}} × 2 (both are frozen and each drop an ice blast) | |||
* {{icon|Narrow tunnel|v=P4|y}} × 1 | |||
* {{icon|Paper bag|v=P4|y}} × 2 (requires 10 Pikmin each) | |||
* {{icon|Stovetop|v=P4|y}} × 1 (produces fire) | |||
* {{icon|Tunnel|v=P4|y}} × 1 | |||
* {{icon|Water body|v=P4|y}} × 1 | |||
* {{icon|White gate|v=P4|y}} × 1 | |||
}} | |||
==== Tools ==== | |||
{{columns|2| | |||
* {{icon|Button|v=P4|y}} × 1 (for the white gate and is surrounded by fire) | |||
* {{icon|Clay mound|v=P4|y}} × 1 (requires 20 raw material) | |||
* {{icon|Climbing rope|v=P4|y}} × 2 (both are unwound) | |||
* {{icon|Fan|v=P4|y}} × 5 | |||
* {{icon|Floating platform|v=P4|y}} × 3 | |||
* {{icon|Slide rail|v=P4|y}} × 1 | |||
* {{icon|Switch|v=P4|y}} × 1 (for a fan) | |||
}} | |||
==== Other ==== | |||
* {{icon|Egg|v=P4|y}} × 2 | |||
* {{icon|Ice Blast|v=P4|y}} × 1 | |||
* {{icon|Pellet Posy|v=P4|y}} × 4 (3 × 1 pellet, 1 × 5 pellet) | |||
* {{icon|Raw material pile|v=P4|l=Pile of raw material|y}} × 2 (piles of 5) | |||
=== Guide === | |||
{{guide}} | |||
{{game help|p4|Add a guide for completing the area.}} | |||
== Gallery == | == Gallery == | ||
{{image}} | {{image}} | ||
<gallery> | <gallery> | ||
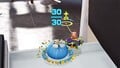
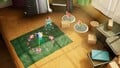
P4 Hero's Hideaway Introduction 1.jpg|Screenshot of the intro cutscene for the area, showing a [[Horned Cannon Beetle]] in a living room area. | |||
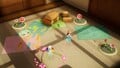
P4 Hero's Hideaway Introduction 2.jpg|Another screenshot of the intro cutscene, showing off a kitchen themed area. | |||
P4 Hero's Hideaway Introduction 3.jpg|The intro cutscene showing the [[S.S. Beagle]] landing. | |||
P4 unavailable cave exit.jpg|The cave exit for the [[Frozen Inferno]]. | |||
Pikmin carrying the Ice Onion.jpg|Some Pikmin carrying the [[Ice Onion]] found in the area. | |||
Stargazer's Spot P4.jpg|The The Stargazer's Spot base site. | |||
Foot Of The Stairs P4.jpg|The Foot Of The Stairs base site. | |||
</gallery> | </gallery> | ||
==Trivia== | |||
* There are two books on this area's floor with English titles. The first, "Encyclopedia of Origami", is found on the climb to the Feasting Center, on the first slope and with its title on the side. The second, of which only the words "The Complete Works" are readable, is the point of access to the platform that brings to the kitchen counter. | |||
* In [[Olimar's Shipwreck Tale]] this area contains the only [[Man-at-Legs]] and [[Gildemander]] specimens found above ground in any game of the ''Pikmin'' series. | |||
* Hero's Hideaway is the only area in ''[[Pikmin 4]]'' that doesn't have seven total caves (Including [[Dandori Challenge]]s and [[Dandori Battle]]s), instead only having five. | |||
== Names in other languages == | == Names in other languages == | ||
{{ | '''Hero's Hideaway''' | ||
{{foreignname | |||
|Jap = 一番星のかくれ家 | |||
|JapR = Ichibanboshi no Kakurega | |||
|JapM = The Brightest Star's Hideout | |||
|ChiTrad = 一等星的藏身之所 | |||
|ChiTradR = Yīděngxīng de Cángshēn zhī Suǒ | |||
|ChiTradM = The Brightest Star's Hiding Spot | |||
|ChiSimp = 一等星的藏身之所 | |||
|ChiSimpR = Yīděngxīng de Cángshēn zhī Suǒ | |||
|ChiSimpM = The Brightest Star's Hiding Spot | |||
|Dut = Domein van de reuzen | |||
|DutM = Giants' domain | |||
|Fra = Refuge du héros | |||
|FraM = Hero's refuge | |||
|Ger = Heldenversteck | |||
|GerM = Hero Hideout | |||
|Ita = Nascondiglio eroico | |||
|ItaM = Heroic hideout | |||
|Kor = 일등성의 아지트 | |||
|KorR = Ildeungseong-ui Ajiteu | |||
|KorM = The Brightest Star's Hideout | |||
|Por = Refúgio do herói | |||
|PorM = Hero's refuge | |||
|Spa = Refugio del héroe | |||
|SpaM = Hero's refuge | |||
}} | |||
'''Stargazer's Spot''' | |||
{{foreignname | |||
|Jap = | |||
|JapR = | |||
|JapM = | |||
|ChiTrad = | |||
|ChiTradR = | |||
|ChiTradM = | |||
|ChiSimp = | |||
|ChiSimpR = | |||
|ChiSimpM = | |||
|Dut = | |||
|DutM = | |||
|Fra = Observatoire | |||
|FraM = Observatory | |||
|Ger = Sternenausguck | |||
|GerM = star lookout | |||
|Ita = | |||
|ItaM = | |||
|Kor = | |||
|KorM = | |||
|Spa = | |||
|SpaM = | |||
|Por = Observatório | |||
|PorM = Observatory | |||
}} | |||
'''Feasting Centre''' | |||
{{foreignname | |||
|Jap = | |||
|JapR = | |||
|JapM = | |||
|ChiTrad = | |||
|ChiTradR = | |||
|ChiTradM = | |||
|ChiSimp = | |||
|ChiSimpR = | |||
|ChiSimpM = | |||
|Dut = | |||
|DutM = | |||
|Fra = Banquet des géants | |||
|FraM = Giants' feast | |||
|Ger = Nahrungszentrale | |||
|GerM = food center | |||
|Ita = | |||
|ItaM = | |||
|Kor = | |||
|KorM = | |||
|Spa = | |||
|SpaM = | |||
|Por = Praça de alimentação | |||
|PorM = Food court | |||
}} | |||
'''Foot of the Stairs''' | |||
{{foreignname | {{foreignname | ||
|Jap = | |Jap = | ||
| Line 127: | Line 450: | ||
|ChiTradR = | |ChiTradR = | ||
|ChiTradM = | |ChiTradM = | ||
|ChiSimp = | |||
|ChiSimpR = | |||
|ChiSimpM = | |||
|Dut = | |Dut = | ||
|DutM = | |DutM = | ||
|Fra = | |Fra = Pied des marches | ||
|FraM = | |FraM = Foot of the stairs | ||
|Ger = | |Ger = Fuß der Treppe | ||
|GerM = | |GerM = Foot of the stairs | ||
|Ita = | |Ita = | ||
|ItaM = | |ItaM = | ||
|Kor = | |Kor = | ||
|KorM = | |KorM = | ||
| | |Spa = | ||
| | |SpaM = | ||
| | |Por = Pé da escadaria | ||
| | |PorM = Foot of the stairs | ||
}} | }} | ||
== See also == | == See also == | ||
* [[Dream Home]] | |||
{{Hero's Hideaway}} | |||
{{p4 areas}} | {{p4 areas}} | ||
Latest revision as of 14:59, May 25, 2024
| Hero's Hideaway | |
|---|---|
| |
| Rescues | 6 |
| Treasures | 86 |
| Onions | 3 |
| Caves | 3 |
| Dandori Challenges | 1 |
| Dandori Battles | 1 |
| Suggested Pikmin | |
| Wild Pikmin | |
| Requirements | |
| Next area | Giant's Hearth |
| Music | Hero's Hideaway |


The Hero's Hideaway is the fourth main area in Pikmin 4. It takes place inside of a house, specifically its living room and kitchen. This area has ![]() × 5,883 worth of treasure, of which
× 5,883 worth of treasure, of which ![]() × 1,965 is above ground.
× 1,965 is above ground.
Plot[edit]
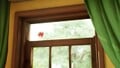
When Captain Olimar first arrives in the area, he lands on the left side of a window seat. Shortly after he and Moss leave the S.S. Dolphin, the Pikmin emerge from the Onion without being called for and run off on their own. Concerned by their peculiar behavior, Olimar sets off to find them, as well as his missing ship part. After gathering some Pikmin and defeating a Porquillion that is holding the Interstellar Radio, Olimar quickly uses it to send a distress signal. After this, the Rescue Corps' part of the story begins.
After exploring the first three areas, the Rescue Corps search here for signs of Olimar. They find Moss, as well as a Voyage Log mentioning a bunker that Olimar had set up. Upon figuring out the code to enter it and encountering the leafling they had repeatedly encountered, they beat him in a Dandori Battle and learn that the leafling is in fact Olimar himself.
Layout[edit]
|
The following article or section is in need of assistance from someone who plays Pikmin 4. |
The following notable features can be found in this area.
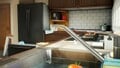
- A kitchen countertop with pots, a sink, and a burning stovetop.
- A living room with a loveseat and armchair.
- Wooden building blocks.
- Two large wooden table.
- A staircase with potted plants on it.
- Childish crayon drawings.
- A locked bunker with three knobs.
- A structure made up of various books.
- A kitchen island with barstools.
- A fridge with the Light Blue Onion in it.
Bases[edit]
- Stargazer's Spot: The default landing site, rather hard to miss. In the southern side of the map, west of the living room.
- Feasting Centre: Found in the kitchen, on the right side of the table. It is guarded by fifteen Shearfleas.
- Foot of the Stairs: Found in the living room, near the bottom right corner. It is guarded by two Bearded Amprats.
Caves[edit]
Dandori Challenge[edit]
Entrance is located at the top of a stepladder which requires using and changing the airstreams of the nearby fans around the kitchen to reach. Oatchi and the player character must split up to press the buttons accordingly. The fan leading to the entrance will be on a chair near a table that holds the music box treasure, Mechanical Harp (Windmills).
Dandori Battle[edit]
The area's Dandori Battle cave, Leafy Showdown, can be found within a safe. To unlock it, the player must find the three treasures that provide the safe's code: the Courage Emblem, the Power Emblem, and the Wisdom Emblem. The safe's code will be randomly generated on each playthrough.
Objects[edit]
|
The following article or section is in need of assistance from someone who plays Pikmin 4. |
Treasures[edit]
 Buddy Display × 1
 Courage Emblem × 1
 Divine Balloon × 1
 Doggy Bed × 1
 Fist-Force Combobot × 1
 Gold Nugget × 5
 Love Nugget × 2
 Mechanical Harp (Windmills) × 1
 Number Jumper × 1
 Peacemaker Combobot × 1
 Perforated Raft × 5
 Power Emblem × 1
 Priceless Bird × 1
 Relentless Spear × 1
 S.S. Chocolate × 1
 S.S. Peppermint × 1
 Searing Acidshock × 1
 Shooting-Star Shield × 1
 Spinning Memories Plank × 1
 Sure-Footed Combobot × 1
 Think-Tank Combobot × 1
 Trap Lid × 1
 Unbreakable Promise × 1
 Wisdom Emblem × 1
Onions[edit]
Enemies[edit]
 Bearded Amprat × 2
 Dwarf Frosty Bulborb × 5
 Frosty Bulborb × 1
 Gildemandwee × 6
 Honeywisp × 4
 Horned Cannon Beetle × 1
 Iceblown Dweevil × 3
 Icy Blowhog × 1
 Miniature Snootwhacker × 3
 Moss × 1 (disappears once the bunker is opened)
 Porquillion × 1
 Shearflea × 36
 Skutterchuck × 6
 Sunsquish × 2 (inside eggs)
 Tusked Blowhog × 4
Obstacles[edit]
 Breakable pot × 7 (groups of 3 and 4)
 Cardboard box × 1
 Hydro jelly × 1
 Narrow tunnel × 1
 Paper bag × 1
 Tunnel × 2
Tools[edit]
 Clay mound × 1
 Climbing rope × 3
 Climbing wall × 1
 Fan × 6
 Floating platform × 4
 Slide rail × 2
Others[edit]
Guide[edit]
|
This section is a stub. You can help Pikipedia by expanding it. |
Tutorial[edit]
|
The following article or section contains guides. |
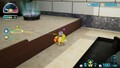
The tutorial segment of this area ends as soon as you defeat the Porquillion atop the table in the center of the living room. The exact amount of Pikmin you obtain does not matter, although the more you have the easier it is to fight against the creature, and it is possible to retrieve all 100 Pikmin. When you take control of Olimar, the first obstacle you are faced with is a series of jars. Rushing against them is required, and this is how the game teaches you to do so.
After this, you can explore the area freely, collecting Pikmin along the way, and then head to the series of wood blocks next to the center table, rush against the metal sheet in the way, walk up the blocks, and fight the creature.
The rest of this guide explains how to get all Pikmin.
- 5 Red Pikmin: After breaking the jars at the beginning, 5 Red Pikmin will come out.
- 2 Red Pikmin: Afterwards, you can turn left and whistle the Pikmin hiding behind the baskets.
- 1 Red Pikmin: Proceeding forward, there is a Pikmin hiding behind the corkboard at the end of the window seat.
- 5 Yellow Pikmin: To the right of the corkboard there are some more jars, these ones with 5 Yellow Pikmin inside.
- 5 Blue Pikmin: After falling to the ground and turning right, at the corner of the area is a shelf with some tall grass on it. 5 Blue Pikmin are hiding inside.
- 5 Red Pikmin: Following the wall leftwards, there are some Pikmin under the cupboard.
- 3 Red Pikmin: A bit farther ahead there are other Pikmin also under the cupboard.
- 2 Yellow Pikmin: There are a series of blocks next to a duffel bag farther left. 2 Pikmin can be found on top of them.
- 5 Yellow Pikmin: Climbing across all the blocks, you can whistle 5 Pikmin that are atop the duffel bag.
- 5 Blue Pikmin: Continuing to follow the walls leftward, there are some Pikmin cowering underneath the travel bag.
- 2 Red Pikmin: At the corner of the area farther left, there are some car-shaped wood blocks, with 2 Red Pikmin above them.
- 5 Blue Pikmin: Breaking the jars nearby will reveal 5 Pikmin.
- 5 Yellow Pikmin: Reaching the large staircase, there are Pikmin on the first step.
- 2 Yellow Pikmin: Continuing to circle the walls left, you'll reach a bookshelf with some Pikmin playing with a wire slide and a fan. 2 Pikmin are idling on the bookshelf itself.
- 3 Red Pikmin: Playing on the same contraption.
- 3 Blue Pikmin: Also playing on the same contraption.
- 2 Yellow Pikmin: Also playing.
- 5 Yellow Pikmin: Circling the walls still, you'll reach the small staircase leading to the kitchen. At the leftmost tip you will find 5 Pikmin atop some wood blocks.
- 5 Blue Pikmin: Nearby there is a tall wood block with a circle-shaped hole inside. 5 Pikmin can be found inside the hole.
- 1 Blue Pikmin: Heading to the closest sofa, there is a Pikmin looking at the pillow that is leaning against the sofa.
- 1 Yellow Pikmin: Another Pikmin can be found nearby also looking at the pillow.
- 1 Blue Pikmin: Checking behind that pillow you will find a Pikmin.
- 4 Yellow Pikmin: Atop the pillow are some Pikmin that can be whistled down.
- 5 Red Pikmin: Nearby there is a sequence of drawings. Following them will let you find 5 Pikmin scattered through them.
- 3 Red Pikmin: At the end of the drawings there is a wood block cage with a metal sheet blocking access. 3 Red Pikmin can be found at the entrance.
- 5 Blue Pikmin: After knocking down the sheet you can enter the cage, let the Pikmin climb on your back, and jump out.
- 2 Yellow Pikmin: Heading to the other sofa, there are some Pikmin looking at the pillow leaning on it.
- 5 Red Pikmin: Atop this pillow are some Pikmin that can be knocked down by rushing against it.
- 2 Blue Pikmin: Heading towards the upward path that leads to the final table there are two Pikmin near the entrance.
- 1 Blue Pikmin: Before entering the path, there is one Pikmin underneath the purse's flap that gives access to said path.
This results in a total of 34 Red Pikmin, 33 Yellow Pikmin, and 33 Blue Pikmin.
Main story[edit]
Recommended Types: Yellow Pikmin, Rock Pikmin, Ice Pikmin
Night Expeditions[edit]
Stargazer’s Spot[edit]
| Stargazer’s Spot | |
|---|---|
| Danger level | |
| Lumiknolls | 2 |
| Enemies | 34 |
| Starting Glow Pikmin | 10 |
There are two Lumiknolls, the blue one located on the coffee table where the Horned Cannon Beetle is located and the orange one located just west of the Foot of the Stairs base. This location has a danger level of 2 and starts the player off with 10 Glow Pikmin.
Enemies[edit]
 Albino Dwarf Bulborb × 18
 Flighty Joustmite × 5
 Shearwig × 11
Objects[edit]
 Glow pellet × 235
- Pile of 5 × 3
- Pile of 10 × 7
- Pile of 15 × 7
- Pile of 20 × 1
- Pile of 25 × 1
Feasting Center[edit]
| Feasting Center | |
|---|---|
| Danger level | |
| Lumiknolls | 1 |
| Enemies | 17 |
| Starting Glow Pikmin | 10 |
There is one Lumiknoll located just south of the base. This location has a danger level of 3 and starts the player off with 10 Glow Pikmin.
Enemies[edit]
- Frosty Bulborb × 6
- Shearwig × 7
 Smoky Progg × 1
- Tusked Blowhog × 3
Objects[edit]
- Glow pellet × 290
- Pile of 5 × 3
- Pile of 10 × 11
- Pile of 15 × 3
- Pile of 20 × 2
- Pile of 25 × 1
Foot of the Stairs[edit]
| Foot of the Stairs | |
|---|---|
| Danger level | |
| Lumiknolls | 1 |
| Enemies | 32 |
| Starting Glow Pikmin | 10 |
There is one Lumiknoll located directly at the base. This location has a danger level of 4 and starts the player off with 15 Glow Pikmin.
Enemies[edit]
- Frosty Bulborb × 2
 Jumbo Bulborb × 2
 Male Sheargrub × 26
- Smoky Progg × 2
Objects[edit]
- Glow pellet × 270
- Pile of 5 × 2
- Pile of 10 × 10
- Pile of 15 × 3
- Pile of 25 × 1
Olimar's Shipwreck Tale[edit]
| Hero's Hideaway | |
|---|---|

| |
| Ship parts | 7 |
| Onions | 0 |
| Requirements | Recover 23 ship parts |
| Music | Hero's Hideaway (Olimar's Shipwreck Tale) |
The Hero's Hideaway is the fourth and final area Captain Olimar explores in his Shipwreck Tale. It is only accessible once Olimar has collected all 23 ship parts in the other areas. It is similar in this respect to The Final Trial in Pikmin, which only becomes accessible after Olimar has collected 29 out of the 30 parts in that game.
When Olimar first lands in this area, the same sequence plays out as in the main game's prologue. The 100 Pikmin that appear are new Pikmin that do not take out of the stockpile you have when entering the area. The placement of said Pikmin are also identical to the placement of the ones in the prologue. After defeating the Gildemander, the sun meter activates and makes enemies and ship parts appear in the remainder of the area.
Plot[edit]
As Captain Olimar lands in the Hero's Hideaway, the Pikmin start to behave differently and run off to hide. The confused Olimar and Moss give chase and track down all the missing Pikmin having no idea why the Pikmin are behaving this way. Once all the Pikmin have been found, Olimar, Moss, and the Pikmin make their way onto a huge structure where they run into a Porquillion. After a tough battle, the Porquillion collapses revealing it had been holding onto Olimar's missing Intersteller Radio. Before they could react, a Gildemander appears which Olimar deduces to be the culprit responsible for the confusing behaviour of the Pikmin. Olimar, with Moss and the Pikmin by his side, ready for another battle with the newly appeared enemy. They triumph and, as Olimar predicted, the Pikmin's behaviour returns to normal, allowing Olimar to collect the remaining ship parts for his ship.
Layout[edit]
The layout of the Hero's Hideaway in Olimar's Shipwreck Tale is almost identical to that of the one in the main game. The major differences are the objects and enemies present, along with the caves entrances not being present. Some of the decorations, in the north part of the area, are different in Olimar's exploration of the area, such as there being less decorations on the windowsill, above the sink, in the Shipwreck Tale.
Bases[edit]
- Stargazer's Spot: This is the default landing site.
- Feasting Centre: This base is unguarded.
Objects[edit]
Ship parts[edit]
 Automatic Gear
 Chronos Reactor (Inside Man-at-Legs)
 Extraordinary Bolt
 Geiger Counter
 Interstellar Radio (inside Porquillion)
 Pilot's Seat
 Repair-Type Bolt
Enemies[edit]
- Bearded Amprat × 1
 Gildemander × 1 (drops 5 nectar)
- Gildemandwee × 2 (drop 2 raw material each)
- Honeywisp × 1
 Hydro Dweevil × 1
- Icy Blowhog × 1 (drops 6 raw material)
 Man-at-Legs × 1 (drops a ship part)
- Miniature Snootwhacker × 3
- Porquillion × 1 (drops a ship part)
 Snowy Blowhog × 2
 Toady Bloyster × 1
- Tusked Blowhog × 2
Obstacles[edit]
 Bookend × 2
- Breakable pot × 21 (1 drops 3 nectar)
 Electric gate × 1
- Hydro jelly × 2 (both are frozen and each drop an ice blast)
- Narrow tunnel × 1
- Paper bag × 2 (requires 10 Pikmin each)
 Stovetop × 1 (produces fire)
- Tunnel × 1
 Water body × 1
 White gate × 1
Tools[edit]
 Button × 1 (for the white gate and is surrounded by fire)
- Clay mound × 1 (requires 20 raw material)
- Climbing rope × 2 (both are unwound)
- Fan × 5
- Floating platform × 3
- Slide rail × 1
 Switch × 1 (for a fan)
Other[edit]
 Egg × 2
 Ice Blast × 1
 Pellet Posy × 4 (3 × 1 pellet, 1 × 5 pellet)
 Raw material pile × 2 (piles of 5)
Guide[edit]
|
The following article or section contains guides. |
|
The following article or section is in need of assistance from someone who plays Pikmin 4. |
Gallery[edit]
|
This article or section is in need of more images. |
Screenshot of the intro cutscene for the area, showing a Horned Cannon Beetle in a living room area.
Another screenshot of the intro cutscene, showing off a kitchen themed area.
The intro cutscene showing the S.S. Beagle landing.
The cave exit for the Frozen Inferno.
Some Pikmin carrying the Ice Onion found in the area.
The The Stargazer's Spot base site.
The Foot Of The Stairs base site.


Trivia[edit]
- There are two books on this area's floor with English titles. The first, "Encyclopedia of Origami", is found on the climb to the Feasting Center, on the first slope and with its title on the side. The second, of which only the words "The Complete Works" are readable, is the point of access to the platform that brings to the kitchen counter.
- In Olimar's Shipwreck Tale this area contains the only Man-at-Legs and Gildemander specimens found above ground in any game of the Pikmin series.
- Hero's Hideaway is the only area in Pikmin 4 that doesn't have seven total caves (Including Dandori Challenges and Dandori Battles), instead only having five.
Names in other languages[edit]
Hero's Hideaway
| Language | Name | Meaning |
|---|---|---|
| 一番星のかくれ家? Ichibanboshi no Kakurega |
The Brightest Star's Hideout | |
(traditional) |
一等星的藏身之所 Yīděngxīng de Cángshēn zhī Suǒ |
The Brightest Star's Hiding Spot |
(simplified) |
一等星的藏身之所 Yīděngxīng de Cángshēn zhī Suǒ |
The Brightest Star's Hiding Spot |
| Domein van de reuzen | Giants' domain | |
| Refuge du héros | Hero's refuge | |
| Heldenversteck | Hero Hideout | |
| Nascondiglio eroico | Heroic hideout | |
| 일등성의 아지트 Ildeungseong-ui Ajiteu |
The Brightest Star's Hideout | |
| Refúgio do herói | Hero's refuge | |
| Refugio del héroe | Hero's refuge |
Stargazer's Spot
| Language | Name | Meaning |
|---|---|---|
| Observatoire | Observatory | |
| Sternenausguck | star lookout | |
| Observatório | Observatory |
Feasting Centre
| Language | Name | Meaning |
|---|---|---|
| Banquet des géants | Giants' feast | |
| Nahrungszentrale | food center | |
| Praça de alimentação | Food court |
Foot of the Stairs
| Language | Name | Meaning |
|---|---|---|
| Pied des marches | Foot of the stairs | |
| Fuß der Treppe | Foot of the stairs | |
| Pé da escadaria | Foot of the stairs |
See also[edit]
| Pikmin 4 areas |
|---|
 Click an area on the image Rescue Command Post • Sun-Speckled Terrace • Blossoming Arcadia • Serene Shores • Hero's Hideaway • Giant's Hearth • Primordial Thicket |