Cavern of Chaos: Difference between revisions
(Undo: The official name is lowercase.) Tag: Undo |
(Added Cavegen links.) |
||
| (50 intermediate revisions by 23 users not shown) | |||
| Line 1: | Line 1: | ||
{{ | {{game icons|p2=y}} | ||
{{infobox cave | |||
|image = Cavern of Chaos sublevel 1.jpg | |image = Cavern of Chaos sublevel 1.jpg | ||
|location = Wistful Wild | |location = Wistful Wild | ||
| Line 5: | Line 6: | ||
|treasures = 17 | |treasures = 17 | ||
|hazards = {{fire}} {{water}} {{electricity}} {{poison}} {{explosion}} | |hazards = {{fire}} {{water}} {{electricity}} {{poison}} {{explosion}} | ||
}} | }} | ||
{{guide}} | {{guide}} | ||
The '''Cavern of Chaos''' ({{j|混沌の魔窟|Konton no Makutsu|Devil-Cave of Chaos}}) is the first cave found in the [[Wistful Wild]] in ''[[Pikmin 2]]''. It is the easiest cave in the [[Wistful Wild]], though that is not saying much as a long and hazardous crawl lies ahead, with 1940 | The '''Cavern of Chaos''' ({{j|混沌の魔窟|Konton no Makutsu|Devil-Cave of Chaos}}) is the first cave found in the [[Wistful Wild]] in ''[[Pikmin 2]]''. It is the easiest cave in the [[Wistful Wild]], though that is not saying much as a long and hazardous crawl lies ahead, with {{pokos|1940}} to obtain in the US [[Region|version]], and {{pokos|1920}} in the European version. Its boss is the [[Segmented Crawbster]]. The sublevel styles change throughout the cave, starting with metallic, then soil, then concrete, and lastly tile. | ||
==How to reach== | ==How to reach== | ||
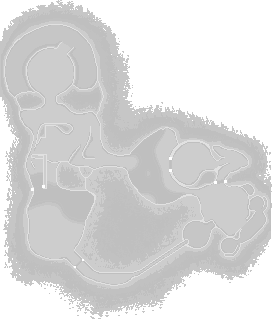
{{image | {{location map | width = 272 | height = 319 | image = WW texture.png | bg = #111 | caption = Location of the cave. | icons = | ||
{{map icon | cave | 50 | 129}} | |||
}} | |||
This cave, like the [[Citadel of Spiders]], is located right beside the landing site. There are very few enemies in the path to the cave, making it simple to access. | This cave, like the [[Citadel of Spiders]], is located right beside the landing site. There are very few enemies in the path to the cave, making it simple to access. | ||
A squad of all Pikmin types is recommended. [[Red Pikmin]] | A squad of all Pikmin types is recommended. A high number of [[Red Pikmin]] is important due to the three [[Fiery Bulblax]]es on sublevel 2, and [[Purple Pikmin]] are highly recommended to fight the [[Enemy|enemies]] in this cave. | ||
{{clear}} | |||
{{notes|ship=y}} | {{notes|ship=y}} | ||
==Sublevel 1== | ==Sublevel 1== | ||
*'''Theme''': Metal | * '''Theme''': Metal | ||
*'''Music''': ''[[Music in Pikmin 2#Metal 3|Metal 3]]'' | * '''Music''': ''[[Music in Pikmin 2#Metal 3|Metal 3]]'' | ||
*'''Treasures''': | * '''Treasures''': | ||
**{{icon|Enamel Buster|y}} | ** {{icon|Enamel Buster|y}} | ||
**{{icon|Mirth Sphere|y}} | ** {{icon|Mirth Sphere|y}} | ||
*'''Enemies''': | * '''Enemies''': | ||
** {{icon|Careening Dirigibug|y}} × 3 | |||
**{{icon|Careening Dirigibug|y}} × 3 | ** {{icon|Fiery Blowhog|y}} × 1 | ||
**{{icon|Fiery Blowhog|y}} × 1 | ** {{icon|Watery Blowhog|y}} × 1 | ||
**{{icon|Watery Blowhog|y}} × 1 | * '''Obstacles''': | ||
*'''Obstacles''': | ** {{icon|Bomb-rock|y}} × 13 | ||
**{{icon|Bomb-rock|y}} × 13 | ** {{icon|Electrical wire|y}} × 3 | ||
*''' | * '''Vegetation''': | ||
**{{icon|Glowstem|y}} (green) × 3 | ** {{icon|Glowstem|y}} (green) × 3 | ||
**{{icon|Glowstem|y}} (red) × 3 | ** {{icon|Glowstem|y}} (red) × 3 | ||
*'''Others''': | * '''Others''': | ||
**None | ** None | ||
[[Bomb-rock]]s, electrical hazards, [[Careening Dirigibug]]s, [[Fiery Blowhog]] and one [[Watery Blowhog]] are all cramped into this small space. | |||
[[Dismiss]] your Pikmin and go out with one leader, [[punch]]ing the bomb-rocks to set them off. Try to have the Careening Dirigibugs drop bomb-rocks near the electrical wires so that when they explode, the generators will be disabled. Once the hazards are cleared out, take all of your Pikmin and attack each enemy, one at a time. Try to keep your [[Red Pikmin]] out of trouble, as they will be needed on the next sublevel, and also be especially careful not to [[throw]] any Pikmin over the edge. | |||
The two treasures, the [[Mirth Sphere]] and the [[Enamel Buster]], are both somewhere above ground; however, watch out for falling bomb-rocks, especially if the treasures are in dead-ends. It is possible to get both treasures without killing enemies. Just let some whites [[carry]] them (as they are fast) and distract the Careening Dirigibugs. Once all the treasures are collected, find the hole and jump down. | |||
{{cavegen|coc1}} | |||
{{sublevel technical | {{sublevel technical | ||
|cave = last_1 | |cave = last_1 | ||
| Line 67: | Line 75: | ||
}} | }} | ||
}} | }} | ||
{| class="wikitable mw-collapsible mw-collapsed technicaltable" | |||
! colspan="5" style="width: 288px;" | {{tt|Detailed object list|This is a representation of the data in the cave's file, and how the game makes use of it.}} | |||
|- | |||
! colspan="5" | The game spawns these "main" objects: | |||
|- | |||
! ID !! Object !! Amount !! Fall method !! Spawn location | |||
|- | |||
| 1 | |||
| {{icon|Careening Dirigibug|y}} | |||
| 3 | |||
| None | |||
| "Hard" enemy spots | |||
|- | |||
| 2 | |||
| {{icon|Fiery Blowhog|y}} | |||
| 1 | |||
| None | |||
| "Hard" enemy spots | |||
|- | |||
| 3 | |||
| {{icon|Watery Blowhog|y}} | |||
| 1 | |||
| None | |||
| "Hard" enemy spots | |||
|- | |||
| 4 | |||
| {{icon|Bomb-rock|y}} | |||
| 2 | |||
| Falls when Pikmin are carrying nearby | |||
| "Hard" enemy spots | |||
|- | |||
| 5 | |||
| {{icon|Bomb-rock|y}} | |||
| 3 | |||
| None | |||
| "Easy" enemy spots | |||
|- | |||
| 6 | |||
| {{icon|Bomb-rock|y}} | |||
| 3 | |||
| None | |||
| "Easy" enemy spots | |||
|- | |||
| 7 | |||
| {{icon|Bomb-rock|y}} | |||
| 3 | |||
| None | |||
| "Easy" enemy spots | |||
|- | |||
| 8 | |||
| {{icon|Electrical wire|y}} | |||
| 3 | |||
| None | |||
| Cave unit seams | |||
|- | |||
! colspan="5" | Then it spawns these "decoration" objects: | |||
|- | |||
! ID !! Object !! Amount !! Fall method !! Spawn location | |||
|- | |||
| 9 | |||
| {{icon|Glowstem|y}} (red) | |||
| 3 | |||
| None | |||
| Plant spots | |||
|- | |||
| 10 | |||
| {{icon|Glowstem|y}} (green) | |||
| 3 | |||
| None | |||
| Plant spots | |||
|- | |||
! colspan="5" | Then it spawns these "treasure" objects: | |||
|- | |||
! ID !! Object !! Amount !! Fall method !! Spawn location | |||
|- | |||
| 11 | |||
| {{icon|Mirth Sphere|y}} | |||
| 1 | |||
| None | |||
| Treasure spots | |||
|- | |||
| 12 | |||
| {{icon|Enamel Buster|y}} | |||
| 1 | |||
| None | |||
| Treasure spots | |||
|- | |||
! colspan="5" | Then it spawns these "dead end" objects: | |||
|- | |||
! ID !! Object !! Amount !! Fall method !! Spawn location | |||
|- | |||
| 13 | |||
| {{icon|Bomb-rock|y}} | |||
| 2 | |||
| Falls from the sky | |||
| Dead ends | |||
|} | |||
:''For details on how objects are spawned, and how some may fail to spawn, see [[Pikmin 2 cave generation|here]].'' | |||
[[ | ==Sublevel 2== | ||
* '''Theme''': Metal | |||
* '''Music''': ''[[Music in Pikmin 2#Metal 2|Metal 2]]'' | |||
* '''Treasures''': | |||
** {{icon|Essence of Despair|y}} (inside Fiery Bulblax) | |||
** {{icon|Frosty Bauble|y}} (inside Fiery Bulblax) | |||
** {{icon|Gemstar Wife|y}} (inside Fiery Bulblax) | |||
* '''Enemies''': | |||
** {{icon|Fiery Bulblax|y}} × 3 | |||
** {{icon|Swooping Snitchbug|y}} × 3 | |||
* '''Obstacles''': | |||
** None | |||
* '''Vegetation''': | |||
** None | |||
* '''Others''': | |||
** None | |||
{{see also|Fiery Bulblax#Strategy|t1=Fiery Bulblax strategy}} | |||
[[ | This sublevel is very large, just like the ninth sublevel of the [[Subterranean Complex]], but difficult nonetheless if you have a small amount of Red Pikmin. Along with a few [[Swooping Snitchbug]]s who try to pick up your Pikmin, there are three [[Fiery Bulblax]]es here, and each contains a treasure. | ||
Defeat all three of them, and take back the [[Frosty Bauble]], [[Gemstar Wife]], and [[Essence of Despair]] the Bulblaxes left behind. Find the hole (which is next to your starting area) and continue down. | |||
{{cavegen|coc2}} | |||
{{sublevel technical | {{sublevel technical | ||
|cave = last_1 | |cave = last_1 | ||
| Line 118: | Line 224: | ||
}} | }} | ||
}} | }} | ||
{| class="wikitable mw-collapsible mw-collapsed technicaltable" | |||
! colspan="5" style="width: 288px;" | {{tt|Detailed object list|This is a representation of the data in the cave's file, and how the game makes use of it.}} | |||
|- | |||
! colspan="5" | The game spawns these "main" objects: | |||
|- | |||
! ID !! Object !! Amount !! Fall method !! Spawn location | |||
|- | |||
| 1 | |||
| {{icon|Fiery Bulblax|y}} | |||
| 1 | |||
| None | |||
| "Easy" enemy spots | |||
|- | |||
| - | |||
| {{icon|Gemstar Wife|y}} | |||
| colspan="3" | Carried inside entry with ID 1 | |||
|- | |||
| 2 | |||
| {{icon|Fiery Bulblax|y}} | |||
| 1 | |||
| None | |||
| "Easy" enemy spots | |||
|- | |||
| - | |||
| {{icon|Frosty Bauble|y}} | |||
| colspan="3" | Carried inside entry with ID 2 | |||
|- | |||
| 3 | |||
| {{icon|Fiery Bulblax|y}} | |||
| 1 | |||
| None | |||
| "Easy" enemy spots | |||
|- | |||
| - | |||
| {{icon|Essence of Despair|y}} | |||
| colspan="3" | Carried inside entry with ID 3 | |||
|- | |||
| 4 | |||
| {{icon|Swooping Snitchbug|y}} | |||
| 1 | |||
| None | |||
| "Easy" enemy spots | |||
|- | |||
| 5 | |||
| {{icon|Swooping Snitchbug|y}} | |||
| 1 | |||
| None | |||
| "Easy" enemy spots | |||
|- | |||
| 6 | |||
| {{icon|Swooping Snitchbug|y}} | |||
| 1 | |||
| None | |||
| "Easy" enemy spots | |||
|- | |||
! colspan="5" | Alongside it spawns 0 "main" objects. Chances: | |||
|- | |||
! ID !! Object !! Chance !! Fall method !! Spawn location | |||
|- | |||
| 7 | |||
| {{icon|Glowstem|y}} (green) | |||
| 100%<ref group="Sublevel 2 note">All the other objects in the sublevel already hit the "main" object limit of 6, so this Glowstem can never be spawned.</ref> | |||
| None | |||
| "Hard" enemy spots | |||
|} | |||
<references group="Sublevel 2 note"/> | |||
:''For details on how objects are spawned, and how some may fail to spawn, see [[Pikmin 2 cave generation|here]].'' | |||
{{ | ==Sublevel 3== | ||
* '''Theme''': Soil | |||
* '''Music''': ''[[Music in Pikmin 2#Soil 1|Soil 1]]'' | |||
* '''Treasures''': | |||
** {{icon|Child of the Earth|y}} (fully buried) | |||
** {{icon|Infernal Vegetable|y}} | |||
* '''Enemies''': | |||
** {{icon|Creeping Chrysanthemum|y}} × 5 | |||
** {{icon|Mamuta|y}} × 2 | |||
** {{icon|Mitite|y}} (group of 10) × 0 - 4 (from eggs) | |||
* '''Obstacles''': | |||
** {{icon|Boulder|y}} × 10 | |||
* '''Vegetation''': | |||
** {{icon|Clover|y}} × 9 | |||
** {{icon|Figwort|y}} (small red) × 9 | |||
** {{icon|Margaret|y}} × 7 | |||
* '''Others''': | |||
** [[Gate]] with 4000 [[Health|HP]] × 4 | |||
** {{icon|Egg|y}} × 4 | |||
At first sight, this may look like a rest level, but it's not; the music is a giveaway. [[Creeping Chrysanthemum]]s, [[Mamuta]]s, and falling rocks make this calm-looking level not what it seems. | |||
Alcoves and pathways between circular areas contain falling rocks, so you may want to go in with your leaders to trigger the falling boulders before you begin fighting enemies. Use [[Purple Pikmin]] to defeat the Chrysanthemums, and use any Pikmin to defeat the Mamutas, unless you want them to [[Maturity|flower]] your Pikmin first. | |||
One treasure, the [[Infernal Vegetable]], is somewhere above ground, and the other treasure, the [[Child of the Earth]], is underground, so you'll need to listen to your treasure gauge and use [[White Pikmin]] to find it. When everything is collected and safe, go down the hole. | |||
{{cavegen|coc3}} | |||
{{sublevel technical | {{sublevel technical | ||
|cave = last_1 | |cave = last_1 | ||
| Line 173: | Line 348: | ||
}} | }} | ||
}} | }} | ||
{| class="wikitable mw-collapsible mw-collapsed technicaltable" | |||
! colspan="5" style="width: 288px;" | {{tt|Detailed object list|This is a representation of the data in the cave's file, and how the game makes use of it.}} | |||
|- | |||
! colspan="5" | The game spawns these "main" objects: | |||
|- | |||
! ID !! Object !! Amount !! Fall method !! Spawn location | |||
|- | |||
| 1 | |||
| {{icon|Mamuta|y}} | |||
| 2 | |||
| None | |||
| "Hard" enemy spots | |||
|- | |||
| 2 | |||
| {{icon|Creeping Chrysanthemum|y}} | |||
| 5 | |||
| None | |||
| "Hard" enemy spots | |||
|- | |||
| 3 | |||
| {{icon|Boulder|y}} | |||
| 5 | |||
| None | |||
| Cave unit seams | |||
|- | |||
| 4 | |||
| {{icon|Boulder|y}} | |||
| 5 | |||
| None | |||
| "Easy" enemy spots | |||
|- | |||
| 5 | |||
| {{icon|Margaret|y}} | |||
| 3 | |||
| None | |||
| "Hard" enemy spots | |||
|- | |||
| 6 | |||
| {{icon|Figwort|y}} (small red) | |||
| 5 | |||
| None | |||
| "Easy" enemy spots | |||
|- | |||
| 7 | |||
| {{icon|Clover|y}} | |||
| 5 | |||
| None | |||
| "Easy" enemy spots | |||
|- | |||
! colspan="5" | Then it spawns these "decoration" objects: | |||
|- | |||
! ID !! Object !! Amount !! Fall method !! Spawn location | |||
|- | |||
| 8 | |||
| {{icon|Margaret|y}} | |||
| 4 | |||
| None | |||
| Plant spots | |||
|- | |||
| 9 | |||
| {{icon|Figwort|y}} (small red) | |||
| 4 | |||
| None | |||
| Plant spots | |||
|- | |||
| 10 | |||
| {{icon|Clover|y}} | |||
| 4 | |||
| None | |||
| Plant spots | |||
|- | |||
! colspan="5" | Then it spawns these "treasure" objects: | |||
|- | |||
! ID !! Object !! Amount !! Fall method !! Spawn location | |||
|- | |||
| 11 | |||
| {{icon|Infernal Vegetable|y}} | |||
| 1 | |||
| None | |||
| Treasure spots | |||
|- | |||
| 12 | |||
| {{icon|Child of the Earth|y}} | |||
| 1 | |||
| None | |||
| Treasure spots | |||
|- | |||
! colspan="5" | Then it spawns these "dead end" objects: | |||
|- | |||
! ID !! Object !! Amount !! Fall method !! Spawn location | |||
|- | |||
| 14 | |||
| {{icon|Egg|y}} | |||
| 4 | |||
| None | |||
| Dead ends | |||
|- | |||
! colspan="5" | Then it spawns 4 "gate" objects. Chances: | |||
|- | |||
! ID !! Object !! Chance !! Fall method !! Spawn location | |||
|- | |||
| 13 | |||
| [[Gate]] (4000 [[Health|HP]]) | |||
| 100% | |||
| None | |||
| Gate spots | |||
|} | |||
:''For details on how objects are spawned, and how some may fail to spawn, see [[Pikmin 2 cave generation|here]].'' | |||
==Sublevel 4== | |||
[[File:Cavern of Chaos sublevel 4.jpg|thumb|Sublevel 4.]] | |||
* '''Theme''': Soil | |||
* '''Music''': ''[[Music in Pikmin 2#Common boss battle|Boss]]'' (only when combating) | |||
* '''Treasures''': | |||
** {{icon|Milk Tub|y}} | |||
** {{icon|Mysterious Remains|y}} (US) / {{icon|Container of Knowledge|y}} (Europe) / {{icon|Understood Person Symbol|y}} (Japan) (inside Emperor Bulblax in all regions) | |||
* '''Enemies''': | |||
** {{icon|Emperor Bulblax|y}} × 2 | |||
** {{icon|Mitite|y}} (group of 10) × 0 - 2 (from eggs) | |||
* '''Obstacles''': | |||
** {{icon|Bomb-rock|y}} × 21<ref group="Sublevel 4 note" name="s4n1">The sublevel's data makes it so 24 bomb-rocks should spawn in total, but no sublevel layout can ever accommodate that many. Only up to 21 are known to spawn.</ref> | |||
** {{icon|Fire geyser|y}} × 13 | |||
* '''Vegetation''': | |||
** {{icon|Queen Candypop Bud|y}} × 1 | |||
** {{icon|Shoot|y}} (large) × 2 | |||
** {{icon|Shoot|y}} (small) × 2 | |||
* '''Others''': | |||
** [[Gate]] with 4000 [[Health|HP]] × 3 | |||
** {{icon|Egg|y}} × 2 | |||
{{see also|Emperor Bulblax#Strategy|t1=Emperor Bulblax strategy}} | |||
The Emperor Bulblax makes a return in this wet sublevel, but this time, there are two of them – usually one on land and one submerged in water. At first, it is helpful to find which of the Bulblaxes has the treasure using the treasure gauge. With one leader, take all the Pikmin, or stash them in a crevice. Take the other leader out alone and wake up the Emperor Bulblax. When it is on or near land, lure it so that a [[bomb rock]] is in front of it. It will try to eat the bomb-rock, which will explode in its mouth, taking some damage and stunning it. | |||
With the other leader, take the Pikmin and throw [[Purple Pikmin]] onto its face while it is stunned. This will take away a good chunk of its [[HP|health]]. Repeat until it is dead, and then do the same thing for the other Bulblax, or just ignore it if it isn't disturbing you. You may want to use [[Red Pikmin]] to disable fire geysers before you start. | |||
[[ | |||
There is also a treasure, the [[Milk Tub]], above ground, usually behind a gate. Take both treasures back and then leave this watery sublevel. If you are in need of Blue Pikmin to collect the treasures, a [[Queen Candypop Bud]] will drop in one of the alcoves. | |||
{{cavegen|coc4}} | |||
{{sublevel technical | {{sublevel technical | ||
|cave = last_1 | |cave = last_1 | ||
| Line 230: | Line 514: | ||
}} | }} | ||
}} | }} | ||
{| class="wikitable mw-collapsible mw-collapsed technicaltable" | |||
! colspan="5" style="width: 288px;" | {{tt|Detailed object list|This is a representation of the data in the cave's file, and how the game makes use of it.}} | |||
|- | |||
! colspan="5" | The game spawns these "main" objects: | |||
|- | |||
! ID !! Object !! Amount !! Fall method !! Spawn location | |||
|- | |||
| 1 | |||
| {{icon|Emperor Bulblax|y}} | |||
| 1 | |||
| None | |||
| "Hard" enemy spots | |||
|- | |||
| - | |||
| {{icon|Mysterious Remains|y}} (US)<br>{{icon|Container of Knowledge|y}} (EU)<br>{{icon|Understood Person Symbol|y}} (JP) | |||
| colspan="3" | Carried inside entry with ID 1 | |||
|- | |||
| 2 | |||
| {{icon|Emperor Bulblax|y}} | |||
| 1 | |||
| None | |||
| "Hard" enemy spots | |||
|- | |||
| 4 | |||
| {{icon|Bomb-rock|y}} | |||
| 9 | |||
| None | |||
| "Easy" enemy spots | |||
|- | |||
| 5 | |||
| {{icon|Shoot|y}} (large) | |||
| 1 | |||
| None | |||
| "Easy" enemy spots | |||
|- | |||
| 6 | |||
| {{icon|Shoot|y}} (large) | |||
| 1 | |||
| None | |||
| "Easy" enemy spots | |||
|- | |||
| 7 | |||
| {{icon|Shoot|y}} (small) | |||
| 1 | |||
| None | |||
| "Easy" enemy spots | |||
|- | |||
| 8 | |||
| {{icon|Shoot|y}} (small) | |||
| 1 | |||
| None | |||
| "Easy" enemy spots | |||
|- | |||
! colspan="5" | Alongside it spawns 15 "main" objects. Chances: | |||
|- | |||
! ID !! Object !! Chance !! Fall method !! Spawn location | |||
|- | |||
| 4 | |||
| {{icon|Bomb-rock|y}} | |||
| 100%<ref group="Sublevel 4 note" name="s4n1"/> | |||
| None | |||
| "Easy" enemy spots | |||
|- | |||
! colspan="5" | Then it spawns these "decoration" objects: | |||
|- | |||
! ID !! Object !! Amount !! Fall method !! Spawn location | |||
|- | |||
| 3 | |||
| {{icon|Fire geyser|y}} | |||
| 13 | |||
| None | |||
| Plant spots | |||
|- | |||
! colspan="5" | Then it spawns these "treasure" objects: | |||
|- | |||
! ID !! Object !! Amount !! Fall method !! Spawn location | |||
|- | |||
| 9 | |||
| {{icon|Milk Tub|y}} | |||
| 1 | |||
| None | |||
| Treasure spots | |||
|- | |||
! colspan="5" | Then it spawns these "dead end" objects: | |||
|- | |||
! ID !! Object !! Amount !! Fall method !! Spawn location | |||
|- | |||
| 11 | |||
| {{icon|Queen Candypop Bud|y}} | |||
| 1 | |||
| Falls from the sky | |||
| Dead ends | |||
|- | |||
| 12 | |||
| {{icon|Egg|y}} | |||
| 2 | |||
| Falls from the sky | |||
| Dead ends | |||
|- | |||
! colspan="5" | Then it spawns 3 "gate" objects. Chances: | |||
|- | |||
! ID !! Object !! Chance !! Fall method !! Spawn location | |||
|- | |||
| 10 | |||
| [[Gate]] (4000 [[Health|HP]]) | |||
| 100% | |||
| None | |||
| Gate spots | |||
|} | |||
<references group="Sublevel 4 note"/> | |||
:''For details on how objects are spawned, and how some may fail to spawn, see [[Pikmin 2 cave generation|here]].'' | |||
{{ | ==Sublevel 5== | ||
* '''Theme''': Soil | |||
* '''Music''': ''[[Music in Pikmin 2#Relax|Relax]]'' | |||
* '''Treasures''': | |||
** None | |||
* '''Enemies''': | |||
** {{icon|Iridescent Flint Beetle|y}} × 2 | |||
** {{icon|Mitite|y}} (group of 10) × 0 - 2 (from eggs) | |||
* '''Obstacles''': | |||
** None | |||
* '''Vegetation''': | |||
** {{icon|Clover|y}} × 2 | |||
** {{icon|Figwort|y}} (small red) × 3 | |||
** {{icon|Ivory Candypop Bud|y}} × 1 | |||
** {{icon|Queen Candypop Bud|y}} × 1 | |||
** {{icon|Violet Candypop Bud|y}} × 1 | |||
* '''Others''': | |||
** {{icon|Egg|y}} × 2 | |||
This is the only rest level in the Cavern of Chaos. It contains two [[Iridescent Flint Beetle]]s, an [[Ivory Candypop Bud]], a [[Violet Candypop Bud]], a [[Queen Candypop Bud]], and falling eggs that contain nectar or sprays. Regroup your Pikmin, go up the geyser if you need to, or continue down the hole. | |||
{{cavegen|coc5}} | |||
{{sublevel technical | {{sublevel technical | ||
|cave = last_1 | |cave = last_1 | ||
| Line 285: | Line 676: | ||
}} | }} | ||
}} | }} | ||
{| class="wikitable mw-collapsible mw-collapsed technicaltable" | |||
! colspan="5" style="width: 288px;" | {{tt|Detailed object list|This is a representation of the data in the cave's file, and how the game makes use of it.}} | |||
|- | |||
! colspan="5" | The game spawns these "main" objects: | |||
|- | |||
! ID !! Object !! Amount !! Fall method !! Spawn location | |||
|- | |||
| 1 | |||
| {{icon|Iridescent Flint Beetle|y}} | |||
| 2 | |||
| None | |||
| "Hard" enemy spots | |||
|- | |||
| 2 | |||
| {{icon|Egg|y}} | |||
| 2 | |||
| Falls from the sky | |||
| "Hard" enemy spots | |||
|- | |||
! colspan="5" | Then it spawns these "decoration" objects: | |||
|- | |||
! ID !! Object !! Amount !! Fall method !! Spawn location | |||
|- | |||
| 3 | |||
| {{icon|Figwort|y}} (small red) | |||
| 3 | |||
| None | |||
| Plant spots | |||
|- | |||
| 4 | |||
| {{icon|Clover|y}} | |||
| 2 | |||
| None | |||
| Plant spots | |||
|- | |||
! colspan="5" | Then it spawns these "dead end" objects: | |||
|- | |||
! ID !! Object !! Amount !! Fall method !! Spawn location | |||
|- | |||
| 5 | |||
| {{icon|Queen Candypop Bud|y}} | |||
| 1 | |||
| None | |||
| Dead ends | |||
|- | |||
| 6 | |||
| {{icon|Violet Candypop Bud|y}} | |||
| 1 | |||
| None | |||
| Dead ends | |||
|- | |||
| 7 | |||
| {{icon|Ivory Candypop Bud|y}} | |||
| 1 | |||
| None | |||
| Dead ends | |||
|} | |||
:''For details on how objects are spawned, and how some may fail to spawn, see [[Pikmin 2 cave generation|here]].'' | |||
==Sublevel 6== | |||
* '''Theme''': Concrete | |||
* '''Music''': ''[[Music in Pikmin 2#Concrete 2|Concrete 2]]'' | |||
* '''Treasures''': | |||
** {{icon|Growshroom|y}} (partially buried) | |||
** {{icon|Princess Pearl|y}} (inside Wollywog) | |||
* '''Enemies''': | |||
** {{icon|Anode Beetle|y}} × 6 | |||
** {{icon|Water Dumple|y}} × 5 | |||
** {{icon|Wollywog|y}} × 2 | |||
* '''Obstacles''': | |||
** {{icon|Electrical wire|y}} × 2 | |||
* '''Vegetation''': | |||
** {{icon|Shoot|y}} (small) × 6 | |||
* '''Others''': | |||
** None | |||
This area is home to two hazards – water and electrical wires. There are also [[Wollywog]]s, [[Water Dumple]]s, and [[Anode Beetle]]s which make it even harder. Start by using [[Yellow Pikmin]] to disable electrical wires near your area, unless an enemy is dangerously close to it. Kill anything near your starting area with Purple Pikmin, and then go out with leaders, defeating Water Dumples. Avoid Wollywogs for now. | |||
After the coast is clear, go back to your starting area, grab [[Purple Pikmin]], and use them to defeat Wollywogs, being careful to avoid Anode Beetles, water, and electrical wires you missed. After that, go back to camp, grab your Yellows, and use them to kill the Anode Beetles (use Blue Pikmin if they are in water). | |||
As soon as the coast is clear, you will see that one of the Wollywogs was carrying the [[Princess Pearl]]; take it back to camp (you may need [[Blue Pikmin]] if it was dropped in the water). The [[Growshroom]] is always half-buried and can be anywhere in the sublevel, usually in a puddle. Take back both treasures and any carcasses you want, and then continue down to the next sublevel. | |||
One of the Wollywogs can get stuck in a small crevice and will continuously bounce from wall to wall. It cannot get out of this state without killing it. | |||
{{cavegen|coc6}} | |||
{{sublevel technical | {{sublevel technical | ||
|cave = last_1 | |cave = last_1 | ||
| Line 334: | Line 790: | ||
}} | }} | ||
}} | }} | ||
{| class="wikitable mw-collapsible mw-collapsed technicaltable" | |||
! colspan="5" style="width: 288px;" | {{tt|Detailed object list|This is a representation of the data in the cave's file, and how the game makes use of it.}} | |||
|- | |||
! colspan="5" | The game spawns these "main" objects: | |||
|- | |||
! ID !! Object !! Amount !! Fall method !! Spawn location | |||
|- | |||
| 1 | |||
| {{icon|Water Dumple|y}} | |||
| 5 | |||
| None | |||
| "Hard" enemy spots | |||
|- | |||
| 2 | |||
| {{icon|Wollywog|y}} | |||
| 1 | |||
| None | |||
| "Hard" enemy spots | |||
|- | |||
| - | |||
| {{icon|Princess Pearl|y}} | |||
| colspan="3" | Carried inside entry with ID 2 | |||
|- | |||
| 3 | |||
| {{icon|Wollywog|y}} | |||
| 1 | |||
| None | |||
| "Hard" enemy spots | |||
|- | |||
| 4 | |||
| {{icon|Anode Beetle|y}} | |||
| 3 | |||
| None | |||
| "Easy" enemy spots | |||
|- | |||
| 5 | |||
| {{icon|Anode Beetle|y}} | |||
| 3 | |||
| None | |||
| "Easy" enemy spots | |||
|- | |||
| 6 | |||
| {{icon|Electrical wire|y}} | |||
| 2 | |||
| None | |||
| Cave unit seams | |||
|- | |||
! colspan="5" | Then it spawns these "decoration" objects: | |||
|- | |||
! ID !! Object !! Amount !! Fall method !! Spawn location | |||
|- | |||
| 7 | |||
| {{icon|Shoot|y}} (small) | |||
| 6 | |||
| None | |||
| Plant spots | |||
|- | |||
! colspan="5" | Then it spawns these "treasure" objects: | |||
|- | |||
! ID !! Object !! Amount !! Fall method !! Spawn location | |||
|- | |||
| 8 | |||
| {{icon|Growshroom|y}} | |||
| 1 | |||
| None | |||
| Treasure spots | |||
|} | |||
:''For details on how objects are spawned, and how some may fail to spawn, see [[Pikmin 2 cave generation|here]].'' | |||
==Sublevel 7== | |||
* '''Theme''': Concrete | |||
* '''Music''': ''[[Music in Pikmin 2#Concrete 3|Concrete 3]]'' | |||
* '''Treasures''': | |||
** {{icon|Fuel Reservoir|y}} (US/Europe) / {{icon|Omegatron|y}} (Japan) | |||
** {{icon|Impenetrable Cookie|y}} (inside Puffy Blowhog) | |||
* '''Enemies''': | |||
** {{icon|Cloaking Burrow-nit|y}} × 3 | |||
** {{icon|Mitite|y}} (group of 10) × 0 - 2 (from eggs) | |||
** {{icon|Puffy Blowhog|y}} × 2 | |||
** {{icon|Withering Blowhog|y}} × 3 | |||
* '''Obstacles''': | |||
** {{icon|Poison emitter|v=P2|y}} × 6 | |||
* '''Vegetation''': | |||
** {{icon|Shoot|y}} (large) × 2 | |||
** {{icon|Shoot|y}} (small) × 6 | |||
* '''Others''': | |||
** [[Gate]] with 4000 [[Health|HP]] × 4 | |||
** {{icon|Egg|y}} × 2 | |||
Several [[Puffy Blowhog]]s, [[Withering Blowhog]]s, [[Cloaking Burrow-Nit]]s, and poisonous gas pipes inhabit this sublevel. However, the strategy is very simple – use [[White Pikmin]] to disable the poison, and then send [[Purple Pikmin]] or [[Red Pikmin]] to attack the Blowhogs and Burrow-Nits. Be careful of the Blowhogs' nasal blasts – they will knock most of your Pikmin over (and you too if you don't have the [[Rush Boots]]) and, in the case of the Withering Blowhog, [[Maturity|de-flower]] them. | |||
One Puffy Blowhog contains the [[Impenetrable Cookie]], and the [[Fuel Reservoir]] can be anywhere above ground, but likely behind gates. Be careful not to miss Cloaking Burrow-Nits behind walls; they might eat unwatched Pikmin at the worst possible times. Take back the treasures, find the hole, and continue down. | |||
{{cavegen|coc7}} | |||
{{sublevel technical | {{sublevel technical | ||
|cave = last_1 | |cave = last_1 | ||
| Line 389: | Line 913: | ||
}} | }} | ||
}} | }} | ||
{| class="wikitable mw-collapsible mw-collapsed technicaltable" | |||
! colspan="5" style="width: 288px;" | {{tt|Detailed object list|This is a representation of the data in the cave's file, and how the game makes use of it.}} | |||
|- | |||
! colspan="5" | The game spawns these "main" objects: | |||
|- | |||
! ID !! Object !! Amount !! Fall method !! Spawn location | |||
|- | |||
| 1 | |||
| {{icon|Puffy Blowhog|y}} | |||
| 1 | |||
| None | |||
| "Hard" enemy spots | |||
|- | |||
| - | |||
| {{icon|Impenetrable Cookie|y}} | |||
| colspan="3" | Carried inside entry with ID 1 | |||
|- | |||
| 2 | |||
| {{icon|Puffy Blowhog|y}} | |||
| 1 | |||
| None | |||
| "Hard" enemy spots | |||
|- | |||
| 3 | |||
| {{icon|Withering Blowhog|y}} | |||
| 3 | |||
| None | |||
| "Hard" enemy spots | |||
|- | |||
| 4 | |||
| {{icon|Cloaking Burrow-nit|y}} | |||
| 3 | |||
| None | |||
| "Hard" enemy spots | |||
|- | |||
| 5 | |||
| {{icon|Poison emitter|v=P2|y}} | |||
| 2 | |||
| None | |||
| "Hard" enemy spots | |||
|- | |||
| 6 | |||
| {{icon|Poison emitter|v=P2|y}} | |||
| 2 | |||
| None | |||
| "Hard" enemy spots | |||
|- | |||
| 7 | |||
| {{icon|Poison emitter|v=P2|y}} | |||
| 2 | |||
| None | |||
| Cave unit seams | |||
|- | |||
! colspan="5" | Then it spawns these "decoration" objects: | |||
|- | |||
! ID !! Object !! Amount !! Fall method !! Spawn location | |||
|- | |||
| 8 | |||
| {{icon|Shoot|y}} (small) | |||
| 6 | |||
| None | |||
| Plant spots | |||
|- | |||
| 9 | |||
| {{icon|Shoot|y}} (large) | |||
| 2 | |||
| None | |||
| Plant spots | |||
|- | |||
! colspan="5" | Then it spawns these "treasure" objects: | |||
|- | |||
! ID !! Object !! Amount !! Fall method !! Spawn location | |||
|- | |||
| 10 | |||
| {{icon|Fuel Reservoir|y}} (US/EU)<br>{{icon|Omegatron|y}} (JP) | |||
| 1 | |||
| None | |||
| Treasure spots | |||
|- | |||
! colspan="5" | Then it spawns these "dead end" objects: | |||
|- | |||
! ID !! Object !! Amount !! Fall method !! Spawn location | |||
|- | |||
| 12 | |||
| {{icon|Egg|y}} | |||
| 2 | |||
| Falls from the sky | |||
| Dead ends | |||
|- | |||
! colspan="5" | Then it spawns 4 "gate" objects. Chances: | |||
|- | |||
! ID !! Object !! Chance !! Fall method !! Spawn location | |||
|- | |||
| 11 | |||
| [[Gate]] (4000 [[Health|HP]]) | |||
| 100% | |||
| None | |||
| Gate spots | |||
|} | |||
:''For details on how objects are spawned, and how some may fail to spawn, see [[Pikmin 2 cave generation|here]].'' | |||
==Sublevel 8== | |||
[[File:Cavern of Chaos sublevel 8.jpg|thumb|An image of some of the many Dwarf Red Bulborbs in sublevel 8.]] | |||
* '''Theme''': Tiles | |||
* '''Music''': ''[[Music in Pikmin 2#Tile|Tile]]'' | |||
* '''Treasures''': | |||
** {{icon|Fruit Guard|y}} (US) / {{icon|Empty Space Container|y}} (Europe/Japan) | |||
* '''Enemies''': | |||
** {{icon|Dwarf Bulborb|y|n=Dwarf Red Bulborb}} × 54 | |||
** {{icon|Gatling Groink|y}} (free) × 2 | |||
** {{icon|Mitite|y}} (group of 10) × 0 - 4 (from eggs) | |||
* '''Obstacles''': | |||
** None | |||
* '''Vegetation''': | |||
** None | |||
* '''Others''': | |||
** {{icon|Egg|y}} × 4 | |||
This sublevel is unique, in that it contains the most enemies of any sublevel in the game – over 50 [[Dwarf Bulborb|Dwarf Red Bulborb]]s, along with two [[Gatling Groink]]s as well. To defeat a Gatling Groink, try to trap it by a wall, and then come in with an army of 20-30 [[Purple Pikmin]] and attack its backside. Once it is defeated, take it back as soon as possible, as its health [[HP#Regeneration|regenerates]]; use [[White Pikmin]] preferably. | |||
To get through this sublevel without any casualties, use the aforementioned strategy on defeating Gatling Groinks, and then go through the level with an army of Purple Pikmin, leaving a leader with the rest of your Pikmin to keep an eye on them. Go through the sublevel, using your Purple Pikmin to defeat the Dwarf Red Bulborbs. | |||
The reason you should go through the sublevel with very few Pikmin is to make sure that Pikmin that are left behind don't get eaten by other Bulborbs. Use the Purple Pikmin to kill any Bulborbs that are in your path, but don't take any of them back yet. Several parts in the sublevel have a huge cluster of Bulborbs together – resist the urge to [[swarm]] them! Just keep throwing your Purple Pikmin and you will be fine. Alternatively, you can lure a Groink into shooting most of the sublevel's Bulborbs, provided you can keep the Pikmin safe from the other Groink. | |||
Eventually in the sublevel, you will get to its only treasure in a dead end somewhere: the [[Fruit Guard]] in the US version, or the [[Empty Space Container]] in Europe or Japan. If you've already cleared the area of Dwarf Red Bulborbs, that's great – take the treasure back. If not, go back and clear it, as the Bulborbs will try to eat your Pikmin on the way back. After you're sure all Gatling Groinks and Dwarf Red Bulborbs are dead and they are all taken back to your base, and all your Pikmin are safe, you can start taking back the massive amount of carcasses. Find the hole that leads to the next sublevel, and then jump down. | |||
{{cavegen|coc8}} | |||
{{sublevel technical | {{sublevel technical | ||
|cave = last_1 | |cave = last_1 | ||
| Line 439: | Line 1,069: | ||
}} | }} | ||
}} | }} | ||
{| class="wikitable mw-collapsible mw-collapsed technicaltable" | |||
! colspan="5" style="width: 288px;" | {{tt|Detailed object list|This is a representation of the data in the cave's file, and how the game makes use of it.}} | |||
|- | |||
! colspan="5" | The game spawns these "main" objects: | |||
|- | |||
! ID !! Object !! Amount !! Fall method !! Spawn location | |||
|- | |||
| 1 | |||
| {{icon|Gatling Groink|y}} (free) | |||
| 2 | |||
| None | |||
| "Hard" enemy spots | |||
|- | |||
| 2 | |||
| {{icon|Dwarf Bulborb|y|n=Dwarf Red Bulborb}} | |||
| 6 | |||
| None | |||
| "Hard" enemy spots | |||
|- | |||
| 3 | |||
| {{icon|Dwarf Bulborb|y|n=Dwarf Red Bulborb}} | |||
| 6 | |||
| None | |||
| Cave unit seams | |||
|- | |||
| 4 | |||
| {{icon|Dwarf Bulborb|y|n=Dwarf Red Bulborb}} | |||
| 6 | |||
| None | |||
| Cave unit seams | |||
|- | |||
| 5 | |||
| {{icon|Dwarf Bulborb|y|n=Dwarf Red Bulborb}} | |||
| 6 | |||
| None | |||
| "Easy" enemy spots | |||
|- | |||
| 6 | |||
| {{icon|Dwarf Bulborb|y|n=Dwarf Red Bulborb}} | |||
| 6 | |||
| None | |||
| "Easy" enemy spots | |||
|- | |||
| 7 | |||
| {{icon|Dwarf Bulborb|y|n=Dwarf Red Bulborb}} | |||
| 6 | |||
| None | |||
| "Easy" enemy spots | |||
|- | |||
| 8 | |||
| {{icon|Dwarf Bulborb|y|n=Dwarf Red Bulborb}} | |||
| 6 | |||
| None | |||
| "Easy" enemy spots | |||
|- | |||
| 9 | |||
| {{icon|Dwarf Bulborb|y|n=Dwarf Red Bulborb}} | |||
| 6 | |||
| None | |||
| "Easy" enemy spots | |||
|- | |||
| 10 | |||
| {{icon|Dwarf Bulborb|y|n=Dwarf Red Bulborb}} | |||
| 6 | |||
| None | |||
| "Easy" enemy spots | |||
|- | |||
! colspan="5" | Then it spawns these "treasure" objects: | |||
|- | |||
! ID !! Object !! Amount !! Fall method !! Spawn location | |||
|- | |||
| 11 | |||
| {{icon|Fruit Guard|y}} (US)<br>{{icon|Empty Space Container|y}} (EU/JP) | |||
| 1 | |||
| None | |||
| Treasure spots | |||
|- | |||
! colspan="5" | Then it spawns these "dead end" objects: | |||
|- | |||
! ID !! Object !! Amount !! Fall method !! Spawn location | |||
|- | |||
| 12 | |||
| {{icon|Egg|y}} | |||
| 4 | |||
| None | |||
| Dead ends | |||
|} | |||
:''For details on how objects are spawned, and how some may fail to spawn, see [[Pikmin 2 cave generation|here]].'' | |||
==Sublevel 9== | |||
* '''Theme''': Tiles | |||
* '''Music''': ''[[Music in Pikmin 2#Jellyfloat|Jellyfloat]]'' | |||
* '''Treasures''': | |||
** {{icon|Maternal Sculpture|y}} | |||
** {{icon|Wiggle Noggin|y}} | |||
* '''Enemies''': | |||
** {{icon|Bumbling Snitchbug|y}} × 1 | |||
** {{icon|Careening Dirigibug|y}} × 2 | |||
* '''Obstacles''': | |||
** {{icon|Poison emitter|v=P2|y}} × 5 | |||
* '''Vegetation''': | |||
** None | |||
* '''Others''': | |||
** None | |||
When you begin, you will probably be close to some poison emitters – disable these before going any further. Take note of the pool of water that will probably be near your starting area when you begin – its walls are too high for Pikmin to come out of. If any of your Pikmin fall in, you will have to move to the slope and try to call them back from there. After all the poison emitters around your area are disabled, clear out any Careening Dirigibugs in your starting area with [[Yellow Pikmin]]. | |||
After you're done with that, place your Pikmin in a dead-end and go out with one leader. Find a Careening Dirigibug, and try to lure it so that it destroys poison pipes with its bomb-rocks. This will save a trip for your [[White Pikmin]]. After the poison pipes are cleared out, use [[Blue Pikmin]] to take care of any enemies in water, and then go after the Careening Dirigibugs to clear out this level. | |||
The [[Maternal Sculpture]] and the [[Wiggle Noggin]] can be anywhere above ground, even in the water (in which you will need Blue Pikmin to reach it). When the treasures aren't in the water, you can maybe get through this sublevel without killing any water enemies. If you're lucky, they might even be right next to the [[Research Pod]]. After collecting carcasses and treasures, look for the hole and jump down. | |||
{{cavegen|coc9}} | |||
{{sublevel technical | {{sublevel technical | ||
|cave = last_1 | |cave = last_1 | ||
| Line 494: | Line 1,211: | ||
}} | }} | ||
}} | }} | ||
{| class="wikitable mw-collapsible mw-collapsed technicaltable" | |||
! colspan="5" style="width: 288px;" | {{tt|Detailed object list|This is a representation of the data in the cave's file, and how the game makes use of it.}} | |||
|- | |||
! colspan="5" | The game spawns these "main" objects: | |||
|- | |||
! ID !! Object !! Amount !! Fall method !! Spawn location | |||
|- | |||
| 1 | |||
| {{icon|Bumbling Snitchbug|y}} | |||
| 1 | |||
| None | |||
| "Hard" enemy spots | |||
|- | |||
| 2 | |||
| {{icon|Poison emitter|v=P2|y}} | |||
| 1 | |||
| None | |||
| "Easy" enemy spots | |||
|- | |||
| 3 | |||
| {{icon|Poison emitter|v=P2|y}} | |||
| 1 | |||
| None | |||
| "Easy" enemy spots | |||
|- | |||
| 4 | |||
| {{icon|Poison emitter|v=P2|y}} | |||
| 1 | |||
| None | |||
| "Easy" enemy spots | |||
|- | |||
| 5 | |||
| {{icon|Careening Dirigibug|y}} | |||
| 2 | |||
| None | |||
| "Hard" enemy spots | |||
|- | |||
| 6 | |||
| {{icon|Poison emitter|v=P2|y}} | |||
| 2 | |||
| None | |||
| Cave unit seams | |||
|- | |||
! colspan="5" | Then it spawns these "treasure" objects: | |||
|- | |||
! ID !! Object !! Amount !! Fall method !! Spawn location | |||
|- | |||
| 7 | |||
| {{icon|Maternal Sculpture|y}} | |||
| 1 | |||
| None | |||
| Treasure spots | |||
|- | |||
| 8 | |||
| {{icon|Wiggle Noggin|y}} | |||
| 1 | |||
| None | |||
| Treasure spots | |||
|} | |||
:''For details on how objects are spawned, and how some may fail to spawn, see [[Pikmin 2 cave generation|here]].'' | |||
==Sublevel 10== | |||
* '''Theme''': Tiles | |||
* '''Music''': ''[[Music in Pikmin 2#Common boss battle|Boss]]'' (only when combating) | |||
* '''Treasures''': | |||
** {{icon|Silencer|y}} (inside Segmented Crawbster) | |||
* '''Enemies''': | |||
** {{icon|Segmented Crawbster|y}} × 1 | |||
* '''Obstacles''': | |||
** None | |||
* '''Vegetation''': | |||
** None | |||
* '''Others''': | |||
** None | |||
{{see also|Segmented Crawbster#Strategy|t1=Segmented Crawbster strategy}} | |||
The battle with the [[Segmented Crawbster]] will be a difficult one, so it is best to take only [[Red Pikmin]] (and maybe [[Purple Pikmin]] also, if they are flowered). This is also a great place to use your [[ultra-spicy spray]]s, as the Crawbster will be much, much easier to defeat with them. Use the in-depth strategy linked above for defeating the boss, and then take back the [[Silencer]]. Use the eggs that might have fallen from above during the battle to give your Pikmin flowers if you need to, look for the geyser, and escape. Oddly, this sublevel actually becomes [[Solar System#Cavern of Chaos 10|darker if the player has the Solar System]]. | |||
{{cavegen|coc10}} | |||
{{sublevel technical | {{sublevel technical | ||
|cave = last_1 | |cave = last_1 | ||
| Line 534: | Line 1,309: | ||
}} | }} | ||
}} | }} | ||
{| class="wikitable mw-collapsible mw-collapsed technicaltable" | |||
{{ | ! colspan="5" style="width: 288px;" | {{tt|Detailed object list|This is a representation of the data in the cave's file, and how the game makes use of it.}} | ||
|- | |||
! colspan="5" | The game spawns these "main" objects: | |||
|- | |||
! ID !! Object !! Amount !! Fall method !! Spawn location | |||
|- | |||
| 1 | |||
| {{icon|Segmented Crawbster|y}} | |||
| 1 | |||
| None | |||
| "Hard" enemy spots | |||
|- | |||
| - | |||
| {{icon|Silencer|y}} | |||
| colspan="3" | Carried inside entry with ID 1 | |||
|} | |||
:''For details on how objects are spawned, and how some may fail to spawn, see [[Pikmin 2 cave generation|here]].'' | |||
==Gallery== | ==Gallery== | ||
<gallery> | <gallery> | ||
Cavern of Chaos Location.png|Entrance to the cave. | |||
Cavern of Chaos Dwarf Bulborbs.jpg|Several Dwarf Red Bulborb corpses crammed together. | |||
</gallery> | </gallery> | ||
| Line 549: | Line 1,339: | ||
==Names in other languages== | ==Names in other languages== | ||
{{Foreignname | {{Foreignname | ||
|Jap=混沌の魔窟 | |||
|Jap= | |JapR=Konton no Makutsu | ||
|JapR=Konton no | |JapM= | ||
|JapM= | |||
|SpaA=Caverna del Caos | |SpaA=Caverna del Caos | ||
|SpaAM=Cavern of Chaos | |SpaAM=Cavern of Chaos | ||
| Line 560: | Line 1,349: | ||
|ItaM=Chaotic Den | |ItaM=Chaotic Den | ||
|Ger=Chaos-Kaverne | |Ger=Chaos-Kaverne | ||
|GerM=Chaos-Cavern | |||
|ChiTrad=渾沌魔窟 | |||
}} | }} | ||
| Line 570: | Line 1,361: | ||
{{Wistful Wild}} | {{Wistful Wild}} | ||
{{ | {{p2 caves}} | ||
[[Category:Cavern of Chaos| ]] | [[Category:Cavern of Chaos| ]] | ||
Latest revision as of 06:07, April 14, 2024
| Cavern of Chaos | |
|---|---|

| |
| Location | Wistful Wild |
| Sublevels | 10 |
| Treasures | 17 |
| Hazards | |
|
The following article or section contains guides. |
The Cavern of Chaos (混沌の魔窟?, lit.: "Devil-Cave of Chaos") is the first cave found in the Wistful Wild in Pikmin 2. It is the easiest cave in the Wistful Wild, though that is not saying much as a long and hazardous crawl lies ahead, with ![]() × 1940 to obtain in the US version, and
× 1940 to obtain in the US version, and ![]() × 1920 in the European version. Its boss is the Segmented Crawbster. The sublevel styles change throughout the cave, starting with metallic, then soil, then concrete, and lastly tile.
× 1920 in the European version. Its boss is the Segmented Crawbster. The sublevel styles change throughout the cave, starting with metallic, then soil, then concrete, and lastly tile.
How to reach[edit]
This cave, like the Citadel of Spiders, is located right beside the landing site. There are very few enemies in the path to the cave, making it simple to access.
A squad of all Pikmin types is recommended. A high number of Red Pikmin is important due to the three Fiery Bulblaxes on sublevel 2, and Purple Pikmin are highly recommended to fight the enemies in this cave.
Notes
Ship's dialogs
“Wait... From all appearances, this is a particulary frightening crevasse. The data is horrifying!
Courage is one thing, but recklessness is something else. Perhaps we should turn back?
Well, if you still wish to enter, keep your daring in check and just focus on surviving.”Sublevel 1[edit]
- Theme: Metal
- Music: Metal 3
- Treasures:
- Enemies:
 Careening Dirigibug × 3
 Fiery Blowhog × 1
 Watery Blowhog × 1
- Obstacles:
 Bomb-rock × 13
 Electrical wire × 3
- Vegetation:
- Others:
- None
Bomb-rocks, electrical hazards, Careening Dirigibugs, Fiery Blowhog and one Watery Blowhog are all cramped into this small space.
Dismiss your Pikmin and go out with one leader, punching the bomb-rocks to set them off. Try to have the Careening Dirigibugs drop bomb-rocks near the electrical wires so that when they explode, the generators will be disabled. Once the hazards are cleared out, take all of your Pikmin and attack each enemy, one at a time. Try to keep your Red Pikmin out of trouble, as they will be needed on the next sublevel, and also be especially careful not to throw any Pikmin over the edge.
The two treasures, the Mirth Sphere and the Enamel Buster, are both somewhere above ground; however, watch out for falling bomb-rocks, especially if the treasures are in dead-ends. It is possible to get both treasures without killing enemies. Just let some whites carry them (as they are fast) and distract the Careening Dirigibugs. Once all the treasures are collected, find the hole and jump down.
| Technical sublevel information | |||||
|---|---|---|---|---|---|
| Internal cave name | last_1 | ||||
| "Main" object maximum (?) | 19 | ||||
| "Treasure" object maximum (?) | 2 | ||||
| "Gate" object maximum (?) | 0 | ||||
| Dead end unit probability (?) | 50 | ||||
| Number of rooms (?) | 4 | ||||
| Corridor-to-room ratio (?) | 0 | ||||
| Escape geyser (?) | No | ||||
| Clogged hole (?) | No | ||||
| Cave units file (?) | 1_units_hit224_metal.txt | ||||
| Lighting file (?) | metal_light_lv0.ini | ||||
| Background (?) | test ( | ||||
| Cave units (?) | |||||
 |
 |
 |
 |
 |
|
| Dead end with item | Three-way crossing | Four-way crossing | Turning corridor | Corridor | Long corridor |
 |
|||||
| Pathway with tubes | |||||
| Detailed object list | ||||
|---|---|---|---|---|
| The game spawns these "main" objects: | ||||
| ID | Object | Amount | Fall method | Spawn location |
| 1 | 3 | None | "Hard" enemy spots | |
| 2 | 1 | None | "Hard" enemy spots | |
| 3 | 1 | None | "Hard" enemy spots | |
| 4 | 2 | Falls when Pikmin are carrying nearby | "Hard" enemy spots | |
| 5 | 3 | None | "Easy" enemy spots | |
| 6 | 3 | None | "Easy" enemy spots | |
| 7 | 3 | None | "Easy" enemy spots | |
| 8 | 3 | None | Cave unit seams | |
| Then it spawns these "decoration" objects: | ||||
| ID | Object | Amount | Fall method | Spawn location |
| 9 | 3 | None | Plant spots | |
| 10 | 3 | None | Plant spots | |
| Then it spawns these "treasure" objects: | ||||
| ID | Object | Amount | Fall method | Spawn location |
| 11 | 1 | None | Treasure spots | |
| 12 | 1 | None | Treasure spots | |
| Then it spawns these "dead end" objects: | ||||
| ID | Object | Amount | Fall method | Spawn location |
| 13 | 2 | Falls from the sky | Dead ends | |
- For details on how objects are spawned, and how some may fail to spawn, see here.
Sublevel 2[edit]
- Theme: Metal
- Music: Metal 2
- Treasures:
 Essence of Despair (inside Fiery Bulblax)
 Frosty Bauble (inside Fiery Bulblax)
 Gemstar Wife (inside Fiery Bulblax)
- Enemies:
 Fiery Bulblax × 3
 Swooping Snitchbug × 3
- Obstacles:
- None
- Vegetation:
- None
- Others:
- None
- See also: Fiery Bulblax strategy.
This sublevel is very large, just like the ninth sublevel of the Subterranean Complex, but difficult nonetheless if you have a small amount of Red Pikmin. Along with a few Swooping Snitchbugs who try to pick up your Pikmin, there are three Fiery Bulblaxes here, and each contains a treasure.
Defeat all three of them, and take back the Frosty Bauble, Gemstar Wife, and Essence of Despair the Bulblaxes left behind. Find the hole (which is next to your starting area) and continue down.
| Technical sublevel information | |||||
|---|---|---|---|---|---|
| Internal cave name | last_1 | ||||
| "Main" object maximum (?) | 6 | ||||
| "Treasure" object maximum (?) | 0 | ||||
| "Gate" object maximum (?) | 0 | ||||
| Dead end unit probability (?) | 0 | ||||
| Number of rooms (?) | 1 | ||||
| Corridor-to-room ratio (?) | 0 | ||||
| Escape geyser (?) | No | ||||
| Clogged hole (?) | No | ||||
| Cave units file (?) | 1_units_houdai_metal.txt | ||||
| Lighting file (?) | metal_light_lv1.ini | ||||
| Background (?) | test ( | ||||
| Cave units (?) | |||||
|
|
|
|
|
|
| Dead end with item | Three-way crossing | Four-way crossing | Turning corridor | Corridor | Long corridor |
 |
|||||
| Man-at-Legs arena | |||||
| Detailed object list | ||||
|---|---|---|---|---|
| The game spawns these "main" objects: | ||||
| ID | Object | Amount | Fall method | Spawn location |
| 1 | 1 | None | "Easy" enemy spots | |
| - | Carried inside entry with ID 1 | |||
| 2 | 1 | None | "Easy" enemy spots | |
| - | Carried inside entry with ID 2 | |||
| 3 | 1 | None | "Easy" enemy spots | |
| - | Carried inside entry with ID 3 | |||
| 4 | 1 | None | "Easy" enemy spots | |
| 5 | 1 | None | "Easy" enemy spots | |
| 6 | 1 | None | "Easy" enemy spots | |
| Alongside it spawns 0 "main" objects. Chances: | ||||
| ID | Object | Chance | Fall method | Spawn location |
| 7 | 100%[Sublevel 2 note 1] | None | "Hard" enemy spots | |
- ^ All the other objects in the sublevel already hit the "main" object limit of 6, so this Glowstem can never be spawned.
- For details on how objects are spawned, and how some may fail to spawn, see here.
Sublevel 3[edit]
- Theme: Soil
- Music: Soil 1
- Treasures:
 Child of the Earth (fully buried)
 Infernal Vegetable
- Enemies:
 Creeping Chrysanthemum × 5
 Mamuta × 2
 Mitite (group of 10) × 0 - 4 (from eggs)
- Obstacles:
 Boulder × 10
- Vegetation:
- Others:
At first sight, this may look like a rest level, but it's not; the music is a giveaway. Creeping Chrysanthemums, Mamutas, and falling rocks make this calm-looking level not what it seems.
Alcoves and pathways between circular areas contain falling rocks, so you may want to go in with your leaders to trigger the falling boulders before you begin fighting enemies. Use Purple Pikmin to defeat the Chrysanthemums, and use any Pikmin to defeat the Mamutas, unless you want them to flower your Pikmin first.
One treasure, the Infernal Vegetable, is somewhere above ground, and the other treasure, the Child of the Earth, is underground, so you'll need to listen to your treasure gauge and use White Pikmin to find it. When everything is collected and safe, go down the hole.
| Technical sublevel information | |||||
|---|---|---|---|---|---|
| Internal cave name | last_1 | ||||
| "Main" object maximum (?) | 30 | ||||
| "Treasure" object maximum (?) | 2 | ||||
| "Gate" object maximum (?) | 4 | ||||
| Dead end unit probability (?) | 70 | ||||
| Number of rooms (?) | 4 | ||||
| Corridor-to-room ratio (?) | 0 | ||||
| Escape geyser (?) | No | ||||
| Clogged hole (?) | No | ||||
| Cave units file (?) | 3_units_cent_cent2_north_tsuchi.txt | ||||
| Lighting file (?) | normal_light_lv2.ini | ||||
| Background (?) | None | ||||
| Cave units (?) | |||||
 |
 |
 |
 |
 |
|
| Dead end with item | Three-way crossing | Four-way crossing | Turning corridor | Corridor | Long corridor |
 |
 |
 |
|||
| Circular room with 1 exit | Circular room with 4 exits | Circular room with 4 exits | |||
| Detailed object list | ||||
|---|---|---|---|---|
| The game spawns these "main" objects: | ||||
| ID | Object | Amount | Fall method | Spawn location |
| 1 | 2 | None | "Hard" enemy spots | |
| 2 | 5 | None | "Hard" enemy spots | |
| 3 | 5 | None | Cave unit seams | |
| 4 | 5 | None | "Easy" enemy spots | |
| 5 | 3 | None | "Hard" enemy spots | |
| 6 | 5 | None | "Easy" enemy spots | |
| 7 | 5 | None | "Easy" enemy spots | |
| Then it spawns these "decoration" objects: | ||||
| ID | Object | Amount | Fall method | Spawn location |
| 8 | 4 | None | Plant spots | |
| 9 | 4 | None | Plant spots | |
| 10 | 4 | None | Plant spots | |
| Then it spawns these "treasure" objects: | ||||
| ID | Object | Amount | Fall method | Spawn location |
| 11 | 1 | None | Treasure spots | |
| 12 | 1 | None | Treasure spots | |
| Then it spawns these "dead end" objects: | ||||
| ID | Object | Amount | Fall method | Spawn location |
| 14 | 4 | None | Dead ends | |
| Then it spawns 4 "gate" objects. Chances: | ||||
| ID | Object | Chance | Fall method | Spawn location |
| 13 | Gate (4000 HP) | 100% | None | Gate spots |
- For details on how objects are spawned, and how some may fail to spawn, see here.
Sublevel 4[edit]

- Theme: Soil
- Music: Boss (only when combating)
- Treasures:
 Milk Tub
 Mysterious Remains (US) /
  Container of Knowledge (Europe) /
  Understood Person Symbol (Japan) (inside Emperor Bulblax in all regions)
- Enemies:
 Emperor Bulblax × 2
- Mitite (group of 10) × 0 - 2 (from eggs)
- Obstacles:
- Bomb-rock × 21[Sublevel 4 note 1]
 Fire geyser × 13
- Vegetation:
 Queen Candypop Bud × 1
 Shoot (large) × 2
- Shoot (small) × 2
- Others:
- See also: Emperor Bulblax strategy.
The Emperor Bulblax makes a return in this wet sublevel, but this time, there are two of them – usually one on land and one submerged in water. At first, it is helpful to find which of the Bulblaxes has the treasure using the treasure gauge. With one leader, take all the Pikmin, or stash them in a crevice. Take the other leader out alone and wake up the Emperor Bulblax. When it is on or near land, lure it so that a bomb rock is in front of it. It will try to eat the bomb-rock, which will explode in its mouth, taking some damage and stunning it.
With the other leader, take the Pikmin and throw Purple Pikmin onto its face while it is stunned. This will take away a good chunk of its health. Repeat until it is dead, and then do the same thing for the other Bulblax, or just ignore it if it isn't disturbing you. You may want to use Red Pikmin to disable fire geysers before you start.
There is also a treasure, the Milk Tub, above ground, usually behind a gate. Take both treasures back and then leave this watery sublevel. If you are in need of Blue Pikmin to collect the treasures, a Queen Candypop Bud will drop in one of the alcoves.
| Technical sublevel information | |||||
|---|---|---|---|---|---|
| Internal cave name | last_1 | ||||
| "Main" object maximum (?) | 30 | ||||
| "Treasure" object maximum (?) | 1 | ||||
| "Gate" object maximum (?) | 3 | ||||
| Dead end unit probability (?) | 0 | ||||
| Number of rooms (?) | 1 | ||||
| Corridor-to-room ratio (?) | 0 | ||||
| Escape geyser (?) | No | ||||
| Clogged hole (?) | No | ||||
| Cave units file (?) | 1_ABE_king_tsuchi.txt | ||||
| Lighting file (?) | normal_light_lv3.ini | ||||
| Background (?) | None | ||||
| Cave units (?) | |||||
|
|
|
|
|
|
| Dead end with item | Three-way crossing | Four-way crossing | Turning corridor | Corridor | Long corridor |
 |
|||||
| Large swamp room | |||||
| Detailed object list | ||||
|---|---|---|---|---|
| The game spawns these "main" objects: | ||||
| ID | Object | Amount | Fall method | Spawn location |
| 1 | 1 | None | "Hard" enemy spots | |
| - | Carried inside entry with ID 1 | |||
| 2 | 1 | None | "Hard" enemy spots | |
| 4 | 9 | None | "Easy" enemy spots | |
| 5 | 1 | None | "Easy" enemy spots | |
| 6 | 1 | None | "Easy" enemy spots | |
| 7 | 1 | None | "Easy" enemy spots | |
| 8 | 1 | None | "Easy" enemy spots | |
| Alongside it spawns 15 "main" objects. Chances: | ||||
| ID | Object | Chance | Fall method | Spawn location |
| 4 | 100%[Sublevel 4 note 1] | None | "Easy" enemy spots | |
| Then it spawns these "decoration" objects: | ||||
| ID | Object | Amount | Fall method | Spawn location |
| 3 | 13 | None | Plant spots | |
| Then it spawns these "treasure" objects: | ||||
| ID | Object | Amount | Fall method | Spawn location |
| 9 | 1 | None | Treasure spots | |
| Then it spawns these "dead end" objects: | ||||
| ID | Object | Amount | Fall method | Spawn location |
| 11 | 1 | Falls from the sky | Dead ends | |
| 12 | 2 | Falls from the sky | Dead ends | |
| Then it spawns 3 "gate" objects. Chances: | ||||
| ID | Object | Chance | Fall method | Spawn location |
| 10 | Gate (4000 HP) | 100% | None | Gate spots |
- For details on how objects are spawned, and how some may fail to spawn, see here.
Sublevel 5[edit]
- Theme: Soil
- Music: Relax
- Treasures:
- None
- Enemies:
 Iridescent Flint Beetle × 2
- Mitite (group of 10) × 0 - 2 (from eggs)
- Obstacles:
- None
- Vegetation:
 Clover × 2
 Figwort (small red) × 3
 Ivory Candypop Bud × 1
- Queen Candypop Bud × 1
 Violet Candypop Bud × 1
- Others:
 Egg × 2
This is the only rest level in the Cavern of Chaos. It contains two Iridescent Flint Beetles, an Ivory Candypop Bud, a Violet Candypop Bud, a Queen Candypop Bud, and falling eggs that contain nectar or sprays. Regroup your Pikmin, go up the geyser if you need to, or continue down the hole.
| Technical sublevel information | |||||
|---|---|---|---|---|---|
| Internal cave name | last_1 | ||||
| "Main" object maximum (?) | 4 | ||||
| "Treasure" object maximum (?) | 0 | ||||
| "Gate" object maximum (?) | 0 | ||||
| Dead end unit probability (?) | 100 | ||||
| Number of rooms (?) | 2 | ||||
| Corridor-to-room ratio (?) | 0 | ||||
| Escape geyser (?) | Yes | ||||
| Clogged hole (?) | No | ||||
| Cave units file (?) | 2_ABE_blk_hit3_tsuchi.txt | ||||
| Lighting file (?) | normal_light_lv4.ini | ||||
| Background (?) | None | ||||
| Cave units (?) | |||||
|
|
|
|
|
|
| Dead end with item | Three-way crossing | Four-way crossing | Turning corridor | Corridor | Long corridor |
 |
 |
||||
| Room with hole in wall | Room with 4 exits | ||||
| Detailed object list | ||||
|---|---|---|---|---|
| The game spawns these "main" objects: | ||||
| ID | Object | Amount | Fall method | Spawn location |
| 1 | 2 | None | "Hard" enemy spots | |
| 2 | 2 | Falls from the sky | "Hard" enemy spots | |
| Then it spawns these "decoration" objects: | ||||
| ID | Object | Amount | Fall method | Spawn location |
| 3 | 3 | None | Plant spots | |
| 4 | 2 | None | Plant spots | |
| Then it spawns these "dead end" objects: | ||||
| ID | Object | Amount | Fall method | Spawn location |
| 5 | 1 | None | Dead ends | |
| 6 | 1 | None | Dead ends | |
| 7 | 1 | None | Dead ends | |
- For details on how objects are spawned, and how some may fail to spawn, see here.
Sublevel 6[edit]
- Theme: Concrete
- Music: Concrete 2
- Treasures:
 Growshroom (partially buried)
 Princess Pearl (inside Wollywog)
- Enemies:
 Anode Beetle × 6
 Water Dumple × 5
 Wollywog × 2
- Obstacles:
- Electrical wire × 2
- Vegetation:
- Shoot (small) × 6
- Others:
- None
This area is home to two hazards – water and electrical wires. There are also Wollywogs, Water Dumples, and Anode Beetles which make it even harder. Start by using Yellow Pikmin to disable electrical wires near your area, unless an enemy is dangerously close to it. Kill anything near your starting area with Purple Pikmin, and then go out with leaders, defeating Water Dumples. Avoid Wollywogs for now.
After the coast is clear, go back to your starting area, grab Purple Pikmin, and use them to defeat Wollywogs, being careful to avoid Anode Beetles, water, and electrical wires you missed. After that, go back to camp, grab your Yellows, and use them to kill the Anode Beetles (use Blue Pikmin if they are in water).
As soon as the coast is clear, you will see that one of the Wollywogs was carrying the Princess Pearl; take it back to camp (you may need Blue Pikmin if it was dropped in the water). The Growshroom is always half-buried and can be anywhere in the sublevel, usually in a puddle. Take back both treasures and any carcasses you want, and then continue down to the next sublevel.
One of the Wollywogs can get stuck in a small crevice and will continuously bounce from wall to wall. It cannot get out of this state without killing it.
| Technical sublevel information | |||||
|---|---|---|---|---|---|
| Internal cave name | last_1 | ||||
| "Main" object maximum (?) | 15 | ||||
| "Treasure" object maximum (?) | 1 | ||||
| "Gate" object maximum (?) | 0 | ||||
| Dead end unit probability (?) | 50 | ||||
| Number of rooms (?) | 3 | ||||
| Corridor-to-room ratio (?) | 0.2 | ||||
| Escape geyser (?) | No | ||||
| Clogged hole (?) | No | ||||
| Cave units file (?) | 3_MAT_f_k_o_conc.txt | ||||
| Lighting file (?) | normal_light_lv1.ini | ||||
| Background (?) | None | ||||
| Cave units (?) | |||||
 |
 |
 |
 |
 |
|
| Dead end with item | Three-way crossing | Four-way crossing | Turning corridor | Corridor | Long corridor |
 |
 |
 |
|||
| Room with 4 exits and a raised edge | Room with a pipe and a depression | Room with a pipe in the center | |||
| Detailed object list | ||||
|---|---|---|---|---|
| The game spawns these "main" objects: | ||||
| ID | Object | Amount | Fall method | Spawn location |
| 1 | 5 | None | "Hard" enemy spots | |
| 2 | 1 | None | "Hard" enemy spots | |
| - | Carried inside entry with ID 2 | |||
| 3 | 1 | None | "Hard" enemy spots | |
| 4 | 3 | None | "Easy" enemy spots | |
| 5 | 3 | None | "Easy" enemy spots | |
| 6 | 2 | None | Cave unit seams | |
| Then it spawns these "decoration" objects: | ||||
| ID | Object | Amount | Fall method | Spawn location |
| 7 | 6 | None | Plant spots | |
| Then it spawns these "treasure" objects: | ||||
| ID | Object | Amount | Fall method | Spawn location |
| 8 | 1 | None | Treasure spots | |
- For details on how objects are spawned, and how some may fail to spawn, see here.
Sublevel 7[edit]
- Theme: Concrete
- Music: Concrete 3
- Treasures:
 Fuel Reservoir (US/Europe) /
  Omegatron (Japan)
 Impenetrable Cookie (inside Puffy Blowhog)
- Enemies:
 Cloaking Burrow-nit × 3
- Mitite (group of 10) × 0 - 2 (from eggs)
 Puffy Blowhog × 2
 Withering Blowhog × 3
- Obstacles:
 Poison emitter × 6
- Vegetation:
- Others:
Several Puffy Blowhogs, Withering Blowhogs, Cloaking Burrow-Nits, and poisonous gas pipes inhabit this sublevel. However, the strategy is very simple – use White Pikmin to disable the poison, and then send Purple Pikmin or Red Pikmin to attack the Blowhogs and Burrow-Nits. Be careful of the Blowhogs' nasal blasts – they will knock most of your Pikmin over (and you too if you don't have the Rush Boots) and, in the case of the Withering Blowhog, de-flower them.
One Puffy Blowhog contains the Impenetrable Cookie, and the Fuel Reservoir can be anywhere above ground, but likely behind gates. Be careful not to miss Cloaking Burrow-Nits behind walls; they might eat unwatched Pikmin at the worst possible times. Take back the treasures, find the hole, and continue down.
| Technical sublevel information | |||||
|---|---|---|---|---|---|
| Internal cave name | last_1 | ||||
| "Main" object maximum (?) | 14 | ||||
| "Treasure" object maximum (?) | 1 | ||||
| "Gate" object maximum (?) | 4 | ||||
| Dead end unit probability (?) | 80 | ||||
| Number of rooms (?) | 4 | ||||
| Corridor-to-room ratio (?) | 0 | ||||
| Escape geyser (?) | No | ||||
| Clogged hole (?) | No | ||||
| Cave units file (?) | 3_MAT_d_i_m_conc.txt | ||||
| Lighting file (?) | normal_light_lv4.ini | ||||
| Background (?) | None | ||||
| Cave units (?) | |||||
|
|
|
|
|
|
| Dead end with item | Three-way crossing | Four-way crossing | Turning corridor | Corridor | Long corridor |
 |
 |
 |
|||
| Room with 4 exits | 2 conjoined rooms | Room with 5 exits and 2 walls | |||
| Detailed object list | ||||
|---|---|---|---|---|
| The game spawns these "main" objects: | ||||
| ID | Object | Amount | Fall method | Spawn location |
| 1 | 1 | None | "Hard" enemy spots | |
| - | Carried inside entry with ID 1 | |||
| 2 | 1 | None | "Hard" enemy spots | |
| 3 | 3 | None | "Hard" enemy spots | |
| 4 | 3 | None | "Hard" enemy spots | |
| 5 | 2 | None | "Hard" enemy spots | |
| 6 | 2 | None | "Hard" enemy spots | |
| 7 | 2 | None | Cave unit seams | |
| Then it spawns these "decoration" objects: | ||||
| ID | Object | Amount | Fall method | Spawn location |
| 8 | 6 | None | Plant spots | |
| 9 | 2 | None | Plant spots | |
| Then it spawns these "treasure" objects: | ||||
| ID | Object | Amount | Fall method | Spawn location |
| 10 | 1 | None | Treasure spots | |
| Then it spawns these "dead end" objects: | ||||
| ID | Object | Amount | Fall method | Spawn location |
| 12 | 2 | Falls from the sky | Dead ends | |
| Then it spawns 4 "gate" objects. Chances: | ||||
| ID | Object | Chance | Fall method | Spawn location |
| 11 | Gate (4000 HP) | 100% | None | Gate spots |
- For details on how objects are spawned, and how some may fail to spawn, see here.
Sublevel 8[edit]

- Theme: Tiles
- Music: Tile
- Treasures:
 Fruit Guard (US) /
  Empty Space Container (Europe/Japan)
- Enemies:
 Dwarf Red Bulborb × 54
 Gatling Groink (free) × 2
- Mitite (group of 10) × 0 - 4 (from eggs)
- Obstacles:
- None
- Vegetation:
- None
- Others:
- Egg × 4
This sublevel is unique, in that it contains the most enemies of any sublevel in the game – over 50 Dwarf Red Bulborbs, along with two Gatling Groinks as well. To defeat a Gatling Groink, try to trap it by a wall, and then come in with an army of 20-30 Purple Pikmin and attack its backside. Once it is defeated, take it back as soon as possible, as its health regenerates; use White Pikmin preferably.
To get through this sublevel without any casualties, use the aforementioned strategy on defeating Gatling Groinks, and then go through the level with an army of Purple Pikmin, leaving a leader with the rest of your Pikmin to keep an eye on them. Go through the sublevel, using your Purple Pikmin to defeat the Dwarf Red Bulborbs.
The reason you should go through the sublevel with very few Pikmin is to make sure that Pikmin that are left behind don't get eaten by other Bulborbs. Use the Purple Pikmin to kill any Bulborbs that are in your path, but don't take any of them back yet. Several parts in the sublevel have a huge cluster of Bulborbs together – resist the urge to swarm them! Just keep throwing your Purple Pikmin and you will be fine. Alternatively, you can lure a Groink into shooting most of the sublevel's Bulborbs, provided you can keep the Pikmin safe from the other Groink.
Eventually in the sublevel, you will get to its only treasure in a dead end somewhere: the Fruit Guard in the US version, or the Empty Space Container in Europe or Japan. If you've already cleared the area of Dwarf Red Bulborbs, that's great – take the treasure back. If not, go back and clear it, as the Bulborbs will try to eat your Pikmin on the way back. After you're sure all Gatling Groinks and Dwarf Red Bulborbs are dead and they are all taken back to your base, and all your Pikmin are safe, you can start taking back the massive amount of carcasses. Find the hole that leads to the next sublevel, and then jump down.
| Technical sublevel information | |||||
|---|---|---|---|---|---|
| Internal cave name | last_1 | ||||
| "Main" object maximum (?) | 56 | ||||
| "Treasure" object maximum (?) | 1 | ||||
| "Gate" object maximum (?) | 0 | ||||
| Dead end unit probability (?) | 80 | ||||
| Number of rooms (?) | 4 | ||||
| Corridor-to-room ratio (?) | 0.1 | ||||
| Escape geyser (?) | No | ||||
| Clogged hole (?) | No | ||||
| Cave units file (?) | 2_ABE_a_dry_tile.txt | ||||
| Lighting file (?) | normal_light_lv4.ini | ||||
| Background (?) | None | ||||
| Cave units (?) | |||||
|
|
|
|
|
|
| Dead end with item | Three-way crossing | Four-way crossing | Turning corridor | Corridor | Long corridor |
 |
 |
||||
| Room with waterless pool | Room with 4 exits | ||||
| Detailed object list | ||||
|---|---|---|---|---|
| The game spawns these "main" objects: | ||||
| ID | Object | Amount | Fall method | Spawn location |
| 1 | 2 | None | "Hard" enemy spots | |
| 2 | 6 | None | "Hard" enemy spots | |
| 3 | 6 | None | Cave unit seams | |
| 4 | 6 | None | Cave unit seams | |
| 5 | 6 | None | "Easy" enemy spots | |
| 6 | 6 | None | "Easy" enemy spots | |
| 7 | 6 | None | "Easy" enemy spots | |
| 8 | 6 | None | "Easy" enemy spots | |
| 9 | 6 | None | "Easy" enemy spots | |
| 10 | 6 | None | "Easy" enemy spots | |
| Then it spawns these "treasure" objects: | ||||
| ID | Object | Amount | Fall method | Spawn location |
| 11 | 1 | None | Treasure spots | |
| Then it spawns these "dead end" objects: | ||||
| ID | Object | Amount | Fall method | Spawn location |
| 12 | 4 | None | Dead ends | |
- For details on how objects are spawned, and how some may fail to spawn, see here.
Sublevel 9[edit]
- Theme: Tiles
- Music: Jellyfloat
- Treasures:
- Enemies:
- Obstacles:
- Poison emitter × 5
- Vegetation:
- None
- Others:
- None
When you begin, you will probably be close to some poison emitters – disable these before going any further. Take note of the pool of water that will probably be near your starting area when you begin – its walls are too high for Pikmin to come out of. If any of your Pikmin fall in, you will have to move to the slope and try to call them back from there. After all the poison emitters around your area are disabled, clear out any Careening Dirigibugs in your starting area with Yellow Pikmin.
After you're done with that, place your Pikmin in a dead-end and go out with one leader. Find a Careening Dirigibug, and try to lure it so that it destroys poison pipes with its bomb-rocks. This will save a trip for your White Pikmin. After the poison pipes are cleared out, use Blue Pikmin to take care of any enemies in water, and then go after the Careening Dirigibugs to clear out this level.
The Maternal Sculpture and the Wiggle Noggin can be anywhere above ground, even in the water (in which you will need Blue Pikmin to reach it). When the treasures aren't in the water, you can maybe get through this sublevel without killing any water enemies. If you're lucky, they might even be right next to the Research Pod. After collecting carcasses and treasures, look for the hole and jump down.
| Technical sublevel information | |||||
|---|---|---|---|---|---|
| Internal cave name | last_1 | ||||
| "Main" object maximum (?) | 8 | ||||
| "Treasure" object maximum (?) | 2 | ||||
| "Gate" object maximum (?) | 0 | ||||
| Dead end unit probability (?) | 0 | ||||
| Number of rooms (?) | 2 | ||||
| Corridor-to-room ratio (?) | 0 | ||||
| Escape geyser (?) | No | ||||
| Clogged hole (?) | No | ||||
| Cave units file (?) | 2_units_north_pool_tile.txt | ||||
| Lighting file (?) | normal_light_lv3.ini | ||||
| Background (?) | None | ||||
| Cave units (?) | |||||
|
|
|
 |
 | |
| Dead end with item | Three-way crossing | Four-way crossing | Long corridor | Dead end | Dead end with item |
 |
 |
 |
 |
||
| Turning corridor | Corridor | Square room with 1 exit | Room with pool | ||
| Detailed object list | ||||
|---|---|---|---|---|
| The game spawns these "main" objects: | ||||
| ID | Object | Amount | Fall method | Spawn location |
| 1 | 1 | None | "Hard" enemy spots | |
| 2 | 1 | None | "Easy" enemy spots | |
| 3 | 1 | None | "Easy" enemy spots | |
| 4 | 1 | None | "Easy" enemy spots | |
| 5 | 2 | None | "Hard" enemy spots | |
| 6 | 2 | None | Cave unit seams | |
| Then it spawns these "treasure" objects: | ||||
| ID | Object | Amount | Fall method | Spawn location |
| 7 | 1 | None | Treasure spots | |
| 8 | 1 | None | Treasure spots | |
- For details on how objects are spawned, and how some may fail to spawn, see here.
Sublevel 10[edit]
- Theme: Tiles
- Music: Boss (only when combating)
- Treasures:
 Silencer (inside Segmented Crawbster)
- Enemies:
- Obstacles:
- None
- Vegetation:
- None
- Others:
- None
- See also: Segmented Crawbster strategy.
The battle with the Segmented Crawbster will be a difficult one, so it is best to take only Red Pikmin (and maybe Purple Pikmin also, if they are flowered). This is also a great place to use your ultra-spicy sprays, as the Crawbster will be much, much easier to defeat with them. Use the in-depth strategy linked above for defeating the boss, and then take back the Silencer. Use the eggs that might have fallen from above during the battle to give your Pikmin flowers if you need to, look for the geyser, and escape. Oddly, this sublevel actually becomes darker if the player has the Solar System.
| Technical sublevel information | |||||
|---|---|---|---|---|---|
| Internal cave name | last_1 | ||||
| "Main" object maximum (?) | 1 | ||||
| "Treasure" object maximum (?) | 0 | ||||
| "Gate" object maximum (?) | 0 | ||||
| Dead end unit probability (?) | 0 | ||||
| Number of rooms (?) | 1 | ||||
| Corridor-to-room ratio (?) | 0 | ||||
| Escape geyser (?) | Yes | ||||
| Clogged hole (?) | No | ||||
| Cave units file (?) | 1_units_dangomushi_tile.txt | ||||
| Lighting file (?) | light.ini | ||||
| Background (?) | None | ||||
| Cave units (?) | |||||
 |
|||||
| Segmented Crawbster arena | |||||
| Detailed object list | ||||
|---|---|---|---|---|
| The game spawns these "main" objects: | ||||
| ID | Object | Amount | Fall method | Spawn location |
| 1 | 1 | None | "Hard" enemy spots | |
| - | Carried inside entry with ID 1 | |||
- For details on how objects are spawned, and how some may fail to spawn, see here.
Gallery[edit]
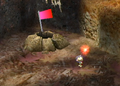
Entrance to the cave.
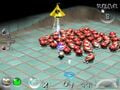
Several Dwarf Red Bulborb corpses crammed together.


Trivia[edit]
- This cave allows the player to see an otherwise unused game limitation: there can be no more than 64 carriable objects on a single area at any one time. If there need to be more, some of the existing carriable objects get deleted. The number of carriable objects can be increased by having leaders lie down and getting some Mitites from eggs.[1]
Names in other languages[edit]
| Language | Name | Meaning |
|---|---|---|
| 混沌の魔窟? Konton no Makutsu |
||
(traditional) |
渾沌魔窟 | |
| Grotte du Chaos | Cave of Chaos | |
| Chaos-Kaverne | Chaos-Cavern | |
| Covo Caotico | Chaotic Den | |
| Caverna del Caos | Cavern of Chaos |
See also[edit]
References[edit]
- ^ YouTube video showing how the game deletes objects in order to keep the 64 carriable object limit
| Wistful Wild | |||||||||
|---|---|---|---|---|---|---|---|---|---|
|
Click an object |
| ||||||||