Submerged Castle: Difference between revisions
m (→Gallery: added image) |
(Added Cavegen links.) |
||
| (41 intermediate revisions by 20 users not shown) | |||
| Line 1: | Line 1: | ||
{{ | {{game icons|p2=y}} | ||
{{infobox cave | |||
|image = Submerged Castle sublevel 4.jpg | |image = Submerged Castle sublevel 4.jpg | ||
|location = Perplexing Pool | |location = Perplexing Pool | ||
| Line 5: | Line 6: | ||
|treasures = 13 | |treasures = 13 | ||
|hazards = {{fire}} {{water}} {{electricity}} {{poison}} {{explosion}} | |hazards = {{fire}} {{water}} {{electricity}} {{poison}} {{explosion}} | ||
}} | }} | ||
{{guide}} | {{guide}} | ||
The '''Submerged Castle''' ({{j|水中の城|Suichū no Shiro|Castle in the Water}}) is a cave | The '''Submerged Castle''' ({{j|水中の城|Suichū no Shiro|Castle in the Water}}) is a [[cave]] in the [[Perplexing Pool]] in {{p2}}. Located in a far corner of the area, its entrance is submerged in [[water]], meaning only [[Blue Pikmin]] can enter the cave. The cave contains all 4 elemental [[hazard]]s, making it quite dangerous, though [[Bulbmin]] are found within the cave. The most notable part of the Submerged Castle is its [[boss]]: the [[Waterwraith]]. After 5 minutes are spent in a sublevel, the Waterwraith will drop from the ceiling and start chasing the [[leader]]s and their [[Pikmin family|Pikmin]]. It is capable of [[crush]]ing Pikmin with its rollers, making it extremely dangerous. It is impossible to defeat until the 5th and final sublevel, where [[Violet Candypop Bud]]s allow [[Purple Pikmin]] to be created, which are the boss's only weakness. There are a total of {{pokos|690}} worth of treasures here in the US [[Region|version]] of the game, and {{pokos|620}} in the European version. | ||
==How to reach== | ==How to reach== | ||
{{location map | width = 272 | height = 428 | image = PP texture.png | bg = #111 | caption = Location of the cave. | icons = | |||
{{map icon | cave | 160 | 48}} | |||
}} | |||
In the river beside the [[Glutton's Kitchen]] is a black gate. Destroying it leads to a large pool, with [[Hermit Crawmad]]s, [[Water Dumple]]s, and a [[Withering Blowhog]]. The cave is nearby, where the [[Chronos Reactor]] puzzle was originally located. | In the river beside the [[Glutton's Kitchen]] is a black gate. Destroying it leads to a large pool, with [[Hermit Crawmad]]s, [[Water Dumple]]s, and a [[Withering Blowhog]]. The cave is nearby, where the [[Chronos Reactor]] puzzle was originally located. | ||
There is little choice in Pikmin squad: only Blue Pikmin are permitted entry. Bringing 60 Blue Pikmin allows all [[Bulbmin]] to be collected, while bringing more Blue Pikmin initially makes earlier floors easier. Those not going for a [[no-death run]] might consider bringing more to serve as a death-buffer. | There is little choice in Pikmin squad: only Blue Pikmin are permitted entry. Even if the player utilizes any of a few methods of getting a non-Blue Pikmin to the cave's entrance, the game is programmed specifically to disallow it from entering the cave under any circumstances.{{cite youtube|6o61v2-pWno|demonstrating how to bring other Pikmin, and showing that they still won't enter}} Bringing 60 Blue Pikmin allows all [[Bulbmin]] to be collected, while bringing more Blue Pikmin initially makes earlier floors easier. Those not going for a [[no-death run]] might consider bringing more to serve as a death-buffer. | ||
{{clear}} | |||
{{Notes|ship=y}} | {{Notes|ship=y}} | ||
==Waterwraith== | ==Waterwraith== | ||
On | {{main|Waterwraith}} | ||
On sublevels 1-4, the Waterwraith will appear after being in the sublevel for five minutes. A few key points to remember about the Waterwraith are: | |||
#It | #It will steam around the level on two stone rollers, which will [[crush]] and kill any Pikmin in the way, but will also kill most enemies and disable traps. Try to use this to your advantage. | ||
#It will not go into small corners or spaces, so you can hide there. | #It will not go into small corners or spaces, so you can hide there. | ||
#The best way to deal with it is to quickly snag all of the treasures and leave the sublevel before it appears. This means that you must NOT waste any time, so only focus on the treasures. Ignore enemies whenever possible and don't bother bringing back their carcasses. | #The best way to deal with it is to quickly snag all of the treasures and leave the sublevel before it appears. This means that you must NOT waste any time, so only focus on the treasures. Ignore enemies whenever possible and don't bother bringing back their carcasses. | ||
#The Waterwraith is very, very deadly to your Pikmin, so it is vital that | #The Waterwraith is very, very deadly to your Pikmin, so it is vital that your Pikmin stay out of its way. If you are careless, you could lose every one of your Pikmin. | ||
#It follows your active leader, so watch out. However, you | #It follows your active leader, so watch out. However, you can exploit this by splitting up Olimar and Louie and using one (without any Pikmin) to bait it while the other does the main tasks. | ||
#There is | #There is absolutely no way to harm it before sublevel 5, so don't bother trying. | ||
#Move quickly and collect as many treasures as you can. Remember, if you forget to get a treasure, you can always | #Move quickly and collect as many treasures as you can. Remember, if you forget to get a treasure or can't get it in time, you can always return to the cave and get it later, though the Waterwraith will also return. | ||
==Sublevel 1== | ==Sublevel 1== | ||
*'''Theme''': Concrete | * '''Theme''': Concrete | ||
*'''Music''': ''[[Music in Pikmin 2#Submerged Castle|Submerged Castle]]''; ''[[Music in Pikmin 2#Waterwraith|Waterwraith]]'' (after the Waterwraith appears) | * '''Music''': ''[[Music in Pikmin 2#Submerged Castle|Submerged Castle]]''; ''[[Music in Pikmin 2#Waterwraith|Waterwraith]]'' (after the Waterwraith appears) | ||
*'''Treasures''': | * '''Treasures''': | ||
**{{icon|Bug Bait|y}} (inside | ** {{icon|Bug Bait|y}} (inside Fiery Bulblax) | ||
**{{icon|Diet Doomer|y}} | ** {{icon|Diet Doomer|y}} | ||
**{{icon|Pastry Wheel|y}} | ** {{icon|Pastry Wheel|y}} | ||
*'''Enemies''': | * '''Enemies''': | ||
**{{icon|Fiery Blowhog|y}} × 2 | ** {{icon|Fiery Blowhog|y}} × 2 | ||
**{{icon|Fiery Bulblax|y}} × 1 | ** {{icon|Fiery Bulblax|y}} × 1 | ||
**{{icon|Waterwraith|y}} × 1 | ** {{icon|Mitite|y}} (group of 10) × indefinite amount (from eggs) | ||
*'''Obstacles''': | ** {{icon|Waterwraith|y}} × 1 | ||
**{{icon|Fire geyser|y}} × 7 | * '''Obstacles''': | ||
*''' | ** {{icon|Fire geyser|y}} × 7 | ||
**{{icon|Fiddlehead|y}} × 9 | * '''Vegetation''': | ||
*'''Others''': | ** {{icon|Fiddlehead|y}} × 9 | ||
**{{icon|Egg|y}} × | * '''Others''': | ||
** {{icon|Egg|y}} × 1 or more | |||
You have likely already taken note that this sublevel contains many fire hazards; keep in mind that this cave is possible to complete. To kill the [[Fiery Blowhog]], [[swarm]] it and blow your whistle when it shakes, then swarm it again until it is defeated. | |||
Now to killing the [[Fiery Bulblax]]. You should first find the Bulblax; once you do, [[throw]] a Pikmin onto its body or [[punch]] it. Blow your whistle once the Pikmin touches the flaming body so it doesn't die but the Bulblax wakes up. Lead it into a nearby pool of water, and the second its flames are put out, use an [[ultra-bitter spray]] to keep it there. Once it dies, the [[Bug Bait]] will appear. | |||
Search for the other two treasures; the Diet Doomer is usually in the open, as is the Pastry Wheel. Look for the hole and leave. There is also a geyser on this floor, allowing you to escape after having found all treasures. However, there is little sense to doing so, as the level is usually cleared before the Waterwraith appears. | |||
{{cavegen|smc1}} | |||
{{sublevel technical | {{sublevel technical | ||
|cave = yakushima_4 | |cave = yakushima_4 | ||
| Line 78: | Line 88: | ||
}} | }} | ||
}} | }} | ||
{| class="wikitable mw-collapsible mw-collapsed technicaltable" | |||
! colspan="5" style="width: 288px;" | {{tt|Detailed object list|This is a representation of the data in the cave's file, and how the game makes use of it.}} | |||
|- | |||
! colspan="5" | The game spawns these "main" objects: | |||
|- | |||
! ID !! Object !! Amount !! Fall method !! Spawn location | |||
|- | |||
| 1 | |||
| {{icon|Waterwraith|y}} | |||
| 1 | |||
| None | |||
| "Hard" enemy spots | |||
|- | |||
| - | |||
| {{icon|Professional Noisemaker|y}} | |||
| colspan="3" | Carried inside entry with ID 1<ref group="Noisemaker note" name="pnn">The sublevel's data specifies that the Waterwraith is carrying the Professional Noisemaker in sublevels 1 to 4, even though it cannot normally be obtained in those sublevels. By using external tools to somehow damage and defeat the Waterwraith in one of these sublevels, it will not appear in any following sublevel. In addition, the [[Treasure Gauge]] won't detect this treasure, and will shut off if all the other treasures in the sublevel are collected.</ref> | |||
|- | |||
| 2 | |||
| {{icon|Fiery Bulblax|y}} | |||
| 1 | |||
| None | |||
| "Hard" enemy spots | |||
|- | |||
| - | |||
| {{icon|Bug Bait|y}} | |||
| colspan="3" | Carried inside entry with ID 2 | |||
|- | |||
| 3 | |||
| {{icon|Fiery Blowhog|y}} | |||
| 1 | |||
| None | |||
| "Hard" enemy spots | |||
|- | |||
| 4 | |||
| {{icon|Fire geyser|y}} | |||
| 1 | |||
| None | |||
| "Easy" enemy spots | |||
|- | |||
| 5 | |||
| {{icon|Fire geyser|y}} | |||
| 1 | |||
| None | |||
| "Easy" enemy spots | |||
|- | |||
| 6 | |||
| {{icon|Fire geyser|y}} | |||
| 1 | |||
| None | |||
| "Easy" enemy spots | |||
|- | |||
| 7 | |||
| {{icon|Fire geyser|y}} | |||
| 4 | |||
| None | |||
| Cave unit seams | |||
|- | |||
! colspan="5" | Then it spawns these "decoration" objects: | |||
|- | |||
! ID !! Object !! Amount !! Fall method !! Spawn location | |||
|- | |||
| 8 | |||
| {{icon|Fiddlehead|y}} | |||
| 9 | |||
| None | |||
| Plant spots | |||
|- | |||
! colspan="5" | Then it spawns these "treasure" objects: | |||
|- | |||
! ID !! Object !! Amount !! Fall method !! Spawn location | |||
|- | |||
| 9 | |||
| {{icon|Pastry Wheel|y}} | |||
| 1 | |||
| None | |||
| Treasure spots | |||
|- | |||
| 10 | |||
| {{icon|Diet Doomer|y}} | |||
| 1 | |||
| None | |||
| Treasure spots | |||
|- | |||
! colspan="5" | Then it spawns these "dead end" objects: | |||
|- | |||
! ID !! Object !! Amount !! Fall method !! Spawn location | |||
|- | |||
| 11 | |||
| {{icon|Egg|y}} | |||
| 1 | |||
| None | |||
| Dead ends | |||
|- | |||
| 12 | |||
| {{icon|Fiery Blowhog|y}} | |||
| 1 | |||
| Falls from the sky | |||
| Dead ends | |||
|- | |||
! colspan="5" | Then it spawns "dead end" objects in as many dead ends as it can. Chances: | |||
|- | |||
! ID !! Object !! Chance !! Fall method !! Spawn location | |||
|- | |||
| 11 | |||
| {{icon|Egg|y}} | |||
| 100% | |||
| None | |||
| Dead ends | |||
|} | |||
:''For details on how objects are spawned, and how some may fail to spawn, see [[Pikmin 2 cave generation|here]].'' | |||
==Sublevel 2== | |||
* '''Theme''': Concrete | |||
* '''Music''': ''[[Music in Pikmin 2#Submerged Castle|Submerged Castle]]''; ''[[Music in Pikmin 2#Waterwraith|Waterwraith]]'' (after the Waterwraith appears) | |||
* '''Treasures''': | |||
** {{icon|Chocolate Cushion|y}} | |||
** {{icon|Comfort Cookie|y}} (inside Bulbmin) | |||
** {{icon|Confection Hoop|y}} | |||
* '''Enemies''': | |||
** {{icon|Bulbmin|y}} × 1 | |||
** {{icon|Careening Dirigibug|y}} × 1 | |||
** {{icon|Dwarf Orange Bulborb|y}} × 3 | |||
** {{icon|Fiery Dweevil|y}} × 4 | |||
** {{icon|Waterwraith|y}} × 1 | |||
* '''Obstacles''': | |||
** None | |||
* '''Vegetation''': | |||
** {{icon|Fiddlehead|y}} × 9 | |||
* '''Others''': | |||
** [[Gate]] with 4000 [[Health|HP]] × 2 | |||
This area contains [[Careening Dirigibug]]s, [[Fiery Dweevil]]s and [[Bulbmin]]. To ensure safety, kill the Careening Dirigibug by throwing Pikmin at it and then [[Group move|swarming]] when it falls to the ground. For the Fiery Dweevils, ignore them unless they grab a treasure you are carrying, in which case use the leader's punches to kill it. | |||
The Fiery Dweevils are usually in an open, rusty pipe that is near the entrance of a long pipe. They are likely to leave this space to pick up objects Pikmin are carrying past them, so it is advised to travel with any Pikmin carrying treasure or corpses in that area. Look around for that pipe entrance and walk inside (the [[Waterwraith]] cannot enter this area). Follow the pipe to a slide-like passageway, where you will go down quickly and fall out, landing near the Chocolate Cushion. | |||
Once that part of the level is complete, you can find the Bulbmin. The parent can be killed by getting close, and then throwing Pikmin onto its back. If you were to swarm it, the adult Bulbmin would most likely get a few mouthfuls of Pikmin. Once they see their leader is dead, the smaller Bulbmin will panic and begin running around; blow your whistle to gain control of them. The game decides the amount of Bulbmin at the beginning of the sublevel depending on your Pikmin amount. The Comfort Cookie will come out of the parent Bulbmin once it is defeated. | |||
Finally, the [[Dwarf Orange Bulborb]]s can be killed by just swarming them the old-fashioned way. The final treasure, the Confection Hoop can be found on a ledge guarded by some Dwarf Orange Bulborbs. To get there, walk to the opposite ledge and throw Pikmin over the gap and to the treasure. Throw more Pikmin over, since it is surrounded by the Bulborbs. | |||
The exit is [[Clog|sealed]], so you will have to use Pikmin to smash the rock and open the cave to the next sublevel. One strategy is to destroy the clog before the rest of the cave, so you can leave as soon as the Waterwraith shows up. Getting the treasure back to the Research Pod takes some effort because the Waterwraith is always coming down a small aisle that you have to walk through; do your best to try to avoid it and eventually it will go away. Get the treasure back to your ship and continue on down. | |||
{{cavegen|smc2}} | |||
{{sublevel technical | {{sublevel technical | ||
|cave = yakushima_4 | |cave = yakushima_4 | ||
| Line 134: | Line 259: | ||
}} | }} | ||
}} | }} | ||
{| class="wikitable mw-collapsible mw-collapsed technicaltable" | |||
! colspan="5" style="width: 288px;" | {{tt|Detailed object list|This is a representation of the data in the cave's file, and how the game makes use of it.}} | |||
|- | |||
! colspan="5" | The game spawns these "main" objects: | |||
|- | |||
! ID !! Object !! Amount !! Fall method !! Spawn location | |||
|- | |||
| 1 | |||
| {{icon|Waterwraith|y}} | |||
| 1 | |||
| None | |||
| "Hard" enemy spots | |||
|- | |||
| - | |||
| {{icon|Professional Noisemaker|y}} | |||
| colspan="3" | Carried inside entry with ID 1<ref group="Noisemaker note" name="pnn"/> | |||
|- | |||
| 2 | |||
| {{icon|Careening Dirigibug|y}} | |||
| 1 | |||
| None | |||
| "Hard" enemy spots | |||
|- | |||
| 3 | |||
| {{icon|Bulbmin|y}} | |||
| 1 | |||
| None | |||
| "Hard" enemy spots | |||
|- | |||
| - | |||
| {{icon|Comfort Cookie|y}} | |||
| colspan="3" | Carried inside entry with ID 3 | |||
|- | |||
| 4 | |||
| {{icon|Dwarf Orange Bulborb|y}} | |||
| 2 | |||
| None | |||
| "Easy" enemy spots | |||
|- | |||
| 5 | |||
| {{icon|Dwarf Orange Bulborb|y}} | |||
| 1 | |||
| None | |||
| "Easy" enemy spots | |||
|- | |||
| 6 | |||
| {{icon|Fiery Dweevil|y}} | |||
| 3 | |||
| None | |||
| "Special" enemy spots | |||
|- | |||
| 7 | |||
| {{icon|Fiery Dweevil|y}} | |||
| 1 | |||
| Falls when Pikmin are carrying nearby | |||
| "Hard" enemy spots | |||
|- | |||
! colspan="5" | Then it spawns these "decoration" objects: | |||
|- | |||
! ID !! Object !! Amount !! Fall method !! Spawn location | |||
|- | |||
| 8 | |||
| {{icon|Fiddlehead|y}} | |||
| 9 | |||
| None | |||
| Plant spots | |||
|- | |||
! colspan="5" | Then it spawns these "treasure" objects: | |||
|- | |||
! ID !! Object !! Amount !! Fall method !! Spawn location | |||
|- | |||
| 9 | |||
| {{icon|Chocolate Cushion|y}} | |||
| 1 | |||
| None | |||
| Treasure spots | |||
|- | |||
| 10 | |||
| {{icon|Confection Hoop|y}} | |||
| 1 | |||
| None | |||
| Treasure spots | |||
|- | |||
! colspan="5" | Then it spawns 2 "gate" objects. Chances: | |||
|- | |||
! ID !! Object !! Chance !! Fall method !! Spawn location | |||
|- | |||
| 11 | |||
| [[Gate]] (4000 [[Health|HP]]) | |||
| 100% | |||
| None | |||
| Gate spots | |||
|} | |||
:''For details on how objects are spawned, and how some may fail to spawn, see [[Pikmin 2 cave generation|here]].'' | |||
==Sublevel 3== | |||
* '''Theme''': Concrete | |||
* '''Music''': ''[[Music in Pikmin 2#Submerged Castle|Submerged Castle]]''; ''[[Music in Pikmin 2#Waterwraith|Waterwraith]]'' (after the Waterwraith appears) | |||
* '''Treasures''': | |||
** {{icon|Activity Arouser|y|v=US}} (US) / {{icon|Pondering Emblem|y|v=EU}} (Europe) / {{icon|Anywhere Floater|y}} (Japan) (inside Withering Blowhog in all regions) | |||
** {{icon|Compelling Cookie|y}} | |||
** {{icon|Succulent Mattress|y}} | |||
* '''Enemies''': | |||
** {{icon|Anode Beetle|y}} × 4 | |||
** {{icon|Anode Dweevil|y}} × 3 | |||
** {{icon|Bulbmin|y}} × 1 | |||
** {{icon|Mitite|y}} (group of 10) × indefinite amount (from eggs) | |||
** {{icon|Waterwraith|y}} × 1 | |||
** {{icon|Withering Blowhog|y}} × 2 | |||
** {{icon|Wollywog|y}} × 1 | |||
* '''Obstacles''': | |||
** {{icon|Electrical wire|y}} × 5 | |||
* '''Vegetation''': | |||
** {{icon|Fiddlehead|y}} × 9 | |||
** {{icon|Ivory Candypop Bud|y}} × 1 | |||
* '''Others''': | |||
** [[Gate]] with 4000 [[Health|HP]] × 3 | |||
** {{icon|Egg|y}} × 1 or more | |||
This level contains electrical hazards, so take caution. [[Group move|Swarm]] the electrical wires the very second they turn off. If you have Bulbmin, let them work on it instead. The [[Withering Blowhog]] is killed the same way as always: throw Pikmin and Bulbmin on it. The Withering Blowhog holds the Activity Arouser, but the Bulbmin holds nothing. For Anode Dweevils, just throw Bulbmin on them, as Bulbmin are immune to all hazards. Defeat the [[Wollywog]] in the same way as you would a Yellow Wollywog. | |||
To end this short sublevel, take note that the last two treasures, the Succulent Mattress and the Compelling Cookie can be anywhere in the open, usually behind a gate. The [[Waterwraith]] will likely have appeared by this time, so try to ignore and break the exit, which is yet again covered in rocks. | |||
There is an [[Ivory Candypop Bud]] in one of the alcoves on this floor, but it is best ignored as the White Pikmin will have a harder time following the rest of your group throughout the next sublevel's bothersome puddles and will prove to be more of an obstacle than a helpful unit. | |||
Note: Avoid swarming the electrical wires while a treasure is about to be delivered, as you won't be able to control your leader or Pikmin. | |||
{{cavegen|smc3}} | |||
{{sublevel technical | {{sublevel technical | ||
|cave = yakushima_4 | |cave = yakushima_4 | ||
| Line 197: | Line 416: | ||
}} | }} | ||
}} | }} | ||
{| class="wikitable mw-collapsible mw-collapsed technicaltable" | |||
! colspan="5" style="width: 288px;" | {{tt|Detailed object list|This is a representation of the data in the cave's file, and how the game makes use of it.}} | |||
|- | |||
! colspan="5" | The game spawns these "main" objects: | |||
|- | |||
! ID !! Object !! Amount !! Fall method !! Spawn location | |||
|- | |||
| 1 | |||
| {{icon|Waterwraith|y}} | |||
| 1 | |||
| None | |||
| "Hard" enemy spots | |||
|- | |||
| - | |||
| {{icon|Professional Noisemaker|y}} | |||
| colspan="3" | Carried inside entry with ID 1<ref group="Noisemaker note" name="pnn"/> | |||
|- | |||
| 2 | |||
| {{icon|Withering Blowhog|y}} | |||
| 1 | |||
| None | |||
| "Hard" enemy spots | |||
|- | |||
| - | |||
| {{icon|Activity Arouser|y|v=US}} (US)<br>{{icon|Pondering Emblem|y|v=EU}} (EU)<br>{{icon|Anywhere Floater|y}} (JP) | |||
| colspan="3" | Carried inside entry with ID 2 | |||
|- | |||
| 3 | |||
| {{icon|Bulbmin|y}} | |||
| 1 | |||
| None | |||
| "Hard" enemy spots | |||
|- | |||
| 4 | |||
| {{icon|Wollywog|y}} | |||
| 1 | |||
| None | |||
| "Hard" enemy spots | |||
|- | |||
| 5 | |||
| {{icon|Anode Dweevil|y}} | |||
| 2 | |||
| None | |||
| "Hard" enemy spots | |||
|- | |||
| 6 | |||
| {{icon|Anode Beetle|y}} | |||
| 2 | |||
| None | |||
| "Easy" enemy spots | |||
|- | |||
| 7 | |||
| {{icon|Anode Beetle|y}} | |||
| 2 | |||
| None | |||
| "Easy" enemy spots | |||
|- | |||
| 8 | |||
| {{icon|Electrical wire|y}} | |||
| 5 | |||
| None | |||
| Cave unit seams | |||
|- | |||
! colspan="5" | Then it spawns these "decoration" objects: | |||
|- | |||
! ID !! Object !! Amount !! Fall method !! Spawn location | |||
|- | |||
| 9 | |||
| {{icon|Fiddlehead|y}} | |||
| 9 | |||
| None | |||
| Plant spots | |||
|- | |||
! colspan="5" | Then it spawns these "treasure" objects: | |||
|- | |||
! ID !! Object !! Amount !! Fall method !! Spawn location | |||
|- | |||
| 10 | |||
| {{icon|Compelling Cookie|y}} | |||
| 1 | |||
| None | |||
| Treasure spots | |||
|- | |||
| 11 | |||
| {{icon|Succulent Mattress|y}} | |||
| 1 | |||
| None | |||
| Treasure spots | |||
|- | |||
! colspan="5" | Then it spawns these "dead end" objects: | |||
|- | |||
! ID !! Object !! Amount !! Fall method !! Spawn location | |||
|- | |||
| 13 | |||
| {{icon|Ivory Candypop Bud|y}} | |||
| 1 | |||
| None | |||
| Dead ends | |||
|- | |||
| 14 | |||
| {{icon|Egg|y}} | |||
| 1 | |||
| None | |||
| Dead ends | |||
|- | |||
| 15 | |||
| {{icon|Withering Blowhog|y}} | |||
| 1 | |||
| Falls from the sky | |||
| Dead ends | |||
|- | |||
| 16 | |||
| {{icon|Anode Dweevil|y}} | |||
| 1 | |||
| Falls from the sky | |||
| Dead ends | |||
|- | |||
! colspan="5" | Then it spawns "dead end" objects in as many dead ends as it can. Chances: | |||
|- | |||
! ID !! Object !! Chance !! Fall method !! Spawn location | |||
|- | |||
| 14 | |||
| {{icon|Egg|y}} | |||
| 100% | |||
| None | |||
| Dead ends | |||
|- | |||
! colspan="5" | Then it spawns 3 "gate" objects. Chances: | |||
|- | |||
! ID !! Object !! Chance !! Fall method !! Spawn location | |||
|- | |||
| 12 | |||
| [[Gate]] (4000 [[Health|HP]]) | |||
| 100% | |||
| None | |||
| Gate spots | |||
|} | |||
:''For details on how objects are spawned, and how some may fail to spawn, see [[Pikmin 2 cave generation|here]].'' | |||
==Sublevel 4== | |||
* '''Theme''': Concrete | |||
* '''Music''': ''[[Music in Pikmin 2#Submerged Castle|Submerged Castle]]''; ''[[Music in Pikmin 2#Waterwraith|Waterwraith]]'' (after the Waterwraith appears) | |||
* '''Treasures''': | |||
** {{icon|Drone Supplies|y|v=US}} (US) / {{icon|Open Archive|y}} (partially buried) (Europe/Japan) | |||
** {{icon|Pale Passion|y}} (inside Iridescent Glint Beetle) | |||
** {{icon|Proton AA|y}} (US/Europe) / {{icon|Proton X|y}} (Japan) | |||
* '''Enemies''': | |||
** {{icon|Bulbmin|y}} × 2 | |||
** {{icon|Careening Dirigibug|y}} × 2 | |||
** {{icon|Iridescent Glint Beetle|y}} × 1 | |||
** {{icon|Mitite|y}} (group of 10) × indefinite amount (from eggs) | |||
** {{icon|Volatile Dweevil|y}} × 5 | |||
** {{icon|Waterwraith|y}} × 1 | |||
* '''Obstacles''': | |||
** {{icon|Bomb-rock|y}} × 11 | |||
** {{icon|Poison emitter|v=P2|y}} × 3 | |||
* '''Vegetation''': | |||
** {{icon|Fiddlehead|y}} × 9 | |||
* '''Others''': | |||
** [[Gate]] with 4000 [[Health|HP]] × 4 | |||
** {{icon|Egg|y}} × 1 or more | |||
This floor is difficult due to the [[bomb-rock]]s and [[Volatile Dweevil]]s that fall from the ceiling, and the Careening Digiribugs. Take careful steps here, and search for the Drone Supplies and the Proton AA. | |||
There is an [[ | There is an [[Iridescent Glint Beetle]] running around the place. Throw a Pikmin at it to make it to drop the Pale Passion. In order to make the path safer for your Pikmin, quickly run through the area with a single leader and detonate all the bomb-rocks and Volatile Dweevils. Finish by breaking the hole and then diving on down to the final floor. | ||
As a side note, it is possible for the Waterwraith to get stuck in one of the corners of this sublevel, making collecting everything a breeze, although the creature will still follow you to the next sublevel once you go in. Also to note is that, due to the way sublevel generation works, the [[Iridescent Glint Beetle]] of this sublevel may not appear, and by extension, the Pale Passion, as detailed [[Pikmin 2 cave generation|here]] and [[Mistake#Missing sublevel objects|here]]. | |||
{{cavegen|smc4}} | |||
{{sublevel technical | {{sublevel technical | ||
|cave = yakushima_4 | |cave = yakushima_4 | ||
| Line 263: | Line 620: | ||
}} | }} | ||
}} | }} | ||
{| class="wikitable mw-collapsible mw-collapsed technicaltable" | |||
! colspan="5" style="width: 288px;" | {{tt|Detailed object list|This is a representation of the data in the cave's file, and how the game makes use of it.}} | |||
|- | |||
! colspan="5" | The game spawns these "main" objects: | |||
|- | |||
! ID !! Object !! Amount !! Fall method !! Spawn location | |||
|- | |||
| 1 | |||
| {{icon|Waterwraith|y}} | |||
| 1 | |||
| None | |||
| "Hard" enemy spots | |||
|- | |||
| - | |||
| {{icon|Professional Noisemaker|y}} | |||
| colspan="3" | Carried inside entry with ID 1<ref group="Noisemaker note" name="pnn"/> | |||
|- | |||
| 2 | |||
| {{icon|Volatile Dweevil|y}} | |||
| 5 | |||
| Falls from the sky | |||
| "Hard" enemy spots | |||
|- | |||
| 3 | |||
| {{icon|Careening Dirigibug|y}} | |||
| 2 | |||
| Falls from the sky | |||
| "Hard" enemy spots | |||
|- | |||
| 4 | |||
| {{icon|Bomb-rock|y}} | |||
| 3 | |||
| Falls from the sky | |||
| "Hard" enemy spots | |||
|- | |||
| 5 | |||
| {{icon|Bomb-rock|y}} | |||
| 3 | |||
| Falls from the sky | |||
| "Easy" enemy spots | |||
|- | |||
| 6 | |||
| {{icon|Bulbmin|y}} | |||
| 2 | |||
| None | |||
| "Hard" enemy spots | |||
|- | |||
| 7 | |||
| {{icon|Iridescent Glint Beetle|y}} | |||
| 1 | |||
| None | |||
| "Hard" enemy spots | |||
|- | |||
| - | |||
| {{icon|Pale Passion|y}} | |||
| colspan="3" | Carried inside entry with ID 7 | |||
|- | |||
| 8 | |||
| {{icon|Poison emitter|v=P2|y}} | |||
| 3 | |||
| None | |||
| Cave unit seams | |||
|- | |||
! colspan="5" | Alongside it spawns 5 "main" objects. Chances: | |||
|- | |||
! ID !! Object !! Chance !! Fall method !! Spawn location | |||
|- | |||
| 4 | |||
| {{icon|Bomb-rock|y}} | |||
| 50% | |||
| Falls from the sky | |||
| "Hard" enemy spots | |||
|- | |||
| 5 | |||
| {{icon|Bomb-rock|y}} | |||
| 50% | |||
| Falls from the sky | |||
| "Easy" enemy spots | |||
|- | |||
! colspan="5" | Then it spawns these "decoration" objects: | |||
|- | |||
! ID !! Object !! Amount !! Fall method !! Spawn location | |||
|- | |||
| 9 | |||
| {{icon|Fiddlehead|y}} | |||
| 9 | |||
| None | |||
| Plant spots | |||
|- | |||
! colspan="5" | Then it spawns these "treasure" objects: | |||
|- | |||
! ID !! Object !! Amount !! Fall method !! Spawn location | |||
|- | |||
| 10 | |||
| {{icon|Drone Supplies|y|v=US}} (US)<br>{{icon|Open Archive|y}} (EU/JP) | |||
| 1 | |||
| None | |||
| Treasure spots | |||
|- | |||
| 11 | |||
| {{icon|Proton AA|y}} (US/EU)<br>{{icon|Proton X|y}} (JP) | |||
| 1 | |||
| None | |||
| Treasure spots | |||
|- | |||
! colspan="5" | Then it spawns these "dead end" objects: | |||
|- | |||
! ID !! Object !! Amount !! Fall method !! Spawn location | |||
|- | |||
| 13 | |||
| {{icon|Egg|y}} | |||
| 1 | |||
| None | |||
| Dead ends | |||
|- | |||
! colspan="5" | Then it spawns "dead end" objects in as many dead ends as it can. Chances: | |||
|- | |||
! ID !! Object !! Chance !! Fall method !! Spawn location | |||
|- | |||
| 13 | |||
| {{icon|Egg|y}} | |||
| 100% | |||
| None | |||
| Dead ends | |||
|- | |||
! colspan="5" | Then it spawns 4 "gate" objects. Chances: | |||
|- | |||
! ID !! Object !! Chance !! Fall method !! Spawn location | |||
|- | |||
| 12 | |||
| [[Gate]] (4000 [[Health|HP]]) | |||
| 100% | |||
| None | |||
| Gate spots | |||
|} | |||
<references group="Noisemaker note"/> | |||
:''For details on how objects are spawned, and how some may fail to spawn, see [[Pikmin 2 cave generation|here]].'' | |||
==Sublevel 5== | |||
* '''Theme''': Concrete | |||
* '''Music''': ''[[Music in Pikmin 2#Common boss battle|Boss]]'' (only when combating); ''[[Music in Pikmin 2#Waterwraith|Waterwraith vulnerable]]'' (when the Waterwraith is halfway defeated) | |||
* '''Treasures''': | |||
** {{icon|Professional Noisemaker|y}} (inside Waterwraith) | |||
* '''Enemies''': | |||
** {{icon|Mitite|y}} (group of 10) × 0 - 3 (from eggs) | |||
** {{icon|Waterwraith|y}} × 1 | |||
* '''Obstacles''': | |||
** None | |||
* '''Vegetation''': | |||
** {{icon|Fiddlehead|y}} × 3 | |||
** {{icon|Figwort|y}} (small brown) × 3 | |||
** {{icon|Violet Candypop Bud|y}} × 2 | |||
* '''Others''': | |||
** [[Gate]] with 100 [[Health|HP]] × 4 | |||
** {{icon|Egg|y}} × 3 | |||
{{see also|Waterwraith#Strategy|t1=Waterwraith strategy}} | |||
Here, the Waterwraith will only appear in the arena after you enter. You should have plenty of Bulbmin by this point. Start out by smashing the three gates in the starting area. Since you can't take them with you, use your Bulbmin to produce ten [[Purple Pikmin]] from the two [[Violet Candypop Bud]]s. Now, smash the three [[egg]]s and use the nectar to give your Pikmin flowers. Then smash the final black gate that blocks access to the boss arena. | |||
Follow the strategy linked above. Once defeated, the Waterwraith will drop the Professional Noisemaker. This gives you a device called the [[Pluckaphone]], which allows you to [[pluck]] Pikmin sprouts from the ground just by whistling at them. | |||
{{cavegen|smc5}} | |||
{{sublevel technical | {{sublevel technical | ||
|cave = yakushima_4 | |cave = yakushima_4 | ||
| Line 315: | Line 810: | ||
}} | }} | ||
}} | }} | ||
{| class="wikitable mw-collapsible mw-collapsed technicaltable" | |||
{{ | ! colspan="5" style="width: 288px;" | {{tt|Detailed object list|This is a representation of the data in the cave's file, and how the game makes use of it.}} | ||
|- | |||
! colspan="5" | The game spawns these "main" objects: | |||
|- | |||
! ID !! Object !! Amount !! Fall method !! Spawn location | |||
|- | |||
| 1 | |||
| {{icon|Waterwraith|y}} | |||
| 1 | |||
| None | |||
| "Special" enemy spots | |||
|- | |||
| - | |||
| {{icon|Professional Noisemaker|y}} | |||
| colspan="3" | Carried inside entry with ID 1 | |||
|- | |||
| 2 | |||
| {{icon|Egg|y}} | |||
| 3 | |||
| None | |||
| "Hard" enemy spots | |||
|- | |||
! colspan="5" | Then it spawns these "decoration" objects: | |||
|- | |||
! ID !! Object !! Amount !! Fall method !! Spawn location | |||
|- | |||
| 3 | |||
| {{icon|Figwort|y}} (small brown) | |||
| 3 | |||
| None | |||
| Plant spots | |||
|- | |||
| 4 | |||
| {{icon|Fiddlehead|y}} | |||
| 3 | |||
| None | |||
| Plant spots | |||
|- | |||
! colspan="5" | Then it spawns these "dead end" objects: | |||
|- | |||
! ID !! Object !! Amount !! Fall method !! Spawn location | |||
|- | |||
| 6 | |||
| {{icon|Violet Candypop Bud|y}} | |||
| 2 | |||
| None | |||
| Dead ends | |||
|- | |||
! colspan="5" | Then it spawns 4 "gate" objects. Chances: | |||
|- | |||
! ID !! Object !! Chance !! Fall method !! Spawn location | |||
|- | |||
| 5 | |||
| [[Gate]] (100 [[Health|HP]]) | |||
| 100% | |||
| None | |||
| Gate spots | |||
|} | |||
:''For details on how objects are spawned, and how some may fail to spawn, see [[Pikmin 2 cave generation|here]].'' | |||
==Gallery== | ==Gallery== | ||
| Line 331: | Line 880: | ||
{{game help|p2|Add video reference to the Waterwraith being damaged in an earlier sublevel, preferably with Purples.}} | {{game help|p2|Add video reference to the Waterwraith being damaged in an earlier sublevel, preferably with Purples.}} | ||
*The cavern contains 13 treasures, a famously unlucky number; this appears to be intended to reflect the cave's nature, and especially that of its boss. | *The cavern contains 13 treasures, a famously unlucky number; this appears to be intended to reflect the cave's nature, and especially that of its boss. | ||
*An earlier version of the game's English script reveals that this cave was originally intended to be called "Lookout Ruins".{{cite web|http://tcrf.net/Pikmin_2/Early_English_Script|Pikmin 2/Early English Script|The Cutting Room Floor}} | *An earlier version of the game's English script reveals that this cave was originally intended to be called "Lookout Ruins".{{cite web|http://tcrf.net/Pikmin_2/Early_English_Script|Pikmin 2/Early English Script|The Cutting Room Floor}} | ||
*The Waterwraith is actually programmed to drop the [[Professional Noisemaker]] in all sublevels, not just the final one. By using external tools to somehow damage and defeat the Waterwraith in one of these sublevels, it will not appear in any following sublevel. | *The Waterwraith is actually programmed to drop the [[Professional Noisemaker]] in all sublevels, not just the final one. By using external tools to somehow damage and defeat the Waterwraith in one of these sublevels, it will not appear in any following sublevel.{{cite youtube|rqMG5fcwT9Y|showing the Waterwraith taking damaged in an earlier sublevel and preventing its appearance in the last sublevel.|s=42}} | ||
*The cave's file contains a timer for the Waterwraith to appear after 15 seconds on the final sublevel, but it remains unused in favor of having the creature spawn when the arena is entered. | *The cave's file contains a timer for the Waterwraith to appear after 15 seconds on the final sublevel, but it remains unused in favor of having the creature spawn when the arena is entered. | ||
*Curiously, the games files specify that | *Curiously, the games files specify that the [[Music in Pikmin 2#Flooded Stump|musical theme]] for sublevel 6 of the [[Hole of Heroes]] should play on all five sublevels. Despite that, in practice, the Submerged Castle's normal theme is hard-coded to play instead. The same occurs on sublevel 9 of the [[Dream Den]]. | ||
==Names in other languages== | ==Names in other languages== | ||
| Line 350: | Line 898: | ||
|Ger=Versunkene Burg | |Ger=Versunkene Burg | ||
|GerM=Sunken Castle | |GerM=Sunken Castle | ||
|ChiTrad=水中之城 | |||
}} | }} | ||
==See also== | ==See also== | ||
*[[ | *[[Engulfed Castle]] | ||
*[[Formidable Oak]] | |||
*[[Waterwraith]] | *[[Waterwraith]] | ||
==References== | ==References== | ||
| Line 361: | Line 910: | ||
{{Perplexing Pool}} | {{Perplexing Pool}} | ||
{{ | {{p2 caves}} | ||
[[Category:Submerged Castle| ]] | [[Category:Submerged Castle| ]] | ||
Latest revision as of 06:04, April 14, 2024
| Submerged Castle | |
|---|---|

| |
| Location | Perplexing Pool |
| Sublevels | 5 |
| Treasures | 13 |
| Hazards | |
|
The following article or section contains guides. |
The Submerged Castle (水中の城?, lit.: "Castle in the Water") is a cave in the Perplexing Pool in Pikmin 2. Located in a far corner of the area, its entrance is submerged in water, meaning only Blue Pikmin can enter the cave. The cave contains all 4 elemental hazards, making it quite dangerous, though Bulbmin are found within the cave. The most notable part of the Submerged Castle is its boss: the Waterwraith. After 5 minutes are spent in a sublevel, the Waterwraith will drop from the ceiling and start chasing the leaders and their Pikmin. It is capable of crushing Pikmin with its rollers, making it extremely dangerous. It is impossible to defeat until the 5th and final sublevel, where Violet Candypop Buds allow Purple Pikmin to be created, which are the boss's only weakness. There are a total of ![]() × 690 worth of treasures here in the US version of the game, and
× 690 worth of treasures here in the US version of the game, and ![]() × 620 in the European version.
× 620 in the European version.
How to reach[edit]
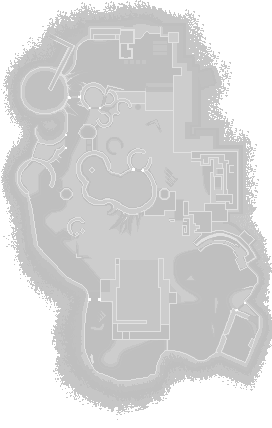
In the river beside the Glutton's Kitchen is a black gate. Destroying it leads to a large pool, with Hermit Crawmads, Water Dumples, and a Withering Blowhog. The cave is nearby, where the Chronos Reactor puzzle was originally located.
There is little choice in Pikmin squad: only Blue Pikmin are permitted entry. Even if the player utilizes any of a few methods of getting a non-Blue Pikmin to the cave's entrance, the game is programmed specifically to disallow it from entering the cave under any circumstances.[1] Bringing 60 Blue Pikmin allows all Bulbmin to be collected, while bringing more Blue Pikmin initially makes earlier floors easier. Those not going for a no-death run might consider bringing more to serve as a death-buffer.
Notes
Ship's dialogs
“Interesting! Deeper sections of this hole seem to be submerged in liquid...
Sadly, I am a delicate piece of machinery that is sensitive to water. You two must go alone.
...Why do you look at me with such scornful expressions? ...I am an expensive machine!
...Fine. I'll go. But this wantonly reckless treatment of company property will be reported!”Waterwraith[edit]
- Main article: Waterwraith.
On sublevels 1-4, the Waterwraith will appear after being in the sublevel for five minutes. A few key points to remember about the Waterwraith are:
- It will steam around the level on two stone rollers, which will crush and kill any Pikmin in the way, but will also kill most enemies and disable traps. Try to use this to your advantage.
- It will not go into small corners or spaces, so you can hide there.
- The best way to deal with it is to quickly snag all of the treasures and leave the sublevel before it appears. This means that you must NOT waste any time, so only focus on the treasures. Ignore enemies whenever possible and don't bother bringing back their carcasses.
- The Waterwraith is very, very deadly to your Pikmin, so it is vital that your Pikmin stay out of its way. If you are careless, you could lose every one of your Pikmin.
- It follows your active leader, so watch out. However, you can exploit this by splitting up Olimar and Louie and using one (without any Pikmin) to bait it while the other does the main tasks.
- There is absolutely no way to harm it before sublevel 5, so don't bother trying.
- Move quickly and collect as many treasures as you can. Remember, if you forget to get a treasure or can't get it in time, you can always return to the cave and get it later, though the Waterwraith will also return.
Sublevel 1[edit]
- Theme: Concrete
- Music: Submerged Castle; Waterwraith (after the Waterwraith appears)
- Treasures:
 Bug Bait (inside Fiery Bulblax)
 Diet Doomer
 Pastry Wheel
- Enemies:
 Fiery Blowhog × 2
 Fiery Bulblax × 1
 Mitite (group of 10) × indefinite amount (from eggs)
 Waterwraith × 1
- Obstacles:
 Fire geyser × 7
- Vegetation:
 Fiddlehead × 9
- Others:
 Egg × 1 or more
You have likely already taken note that this sublevel contains many fire hazards; keep in mind that this cave is possible to complete. To kill the Fiery Blowhog, swarm it and blow your whistle when it shakes, then swarm it again until it is defeated.
Now to killing the Fiery Bulblax. You should first find the Bulblax; once you do, throw a Pikmin onto its body or punch it. Blow your whistle once the Pikmin touches the flaming body so it doesn't die but the Bulblax wakes up. Lead it into a nearby pool of water, and the second its flames are put out, use an ultra-bitter spray to keep it there. Once it dies, the Bug Bait will appear.
Search for the other two treasures; the Diet Doomer is usually in the open, as is the Pastry Wheel. Look for the hole and leave. There is also a geyser on this floor, allowing you to escape after having found all treasures. However, there is little sense to doing so, as the level is usually cleared before the Waterwraith appears.
| Technical sublevel information | |||||
|---|---|---|---|---|---|
| Internal cave name | yakushima_4 | ||||
| "Main" object maximum (?) | 10 | ||||
| "Treasure" object maximum (?) | 2 | ||||
| "Gate" object maximum (?) | 0 | ||||
| Dead end unit probability (?) | 50 | ||||
| Number of rooms (?) | 3 | ||||
| Corridor-to-room ratio (?) | 0 | ||||
| Escape geyser (?) | Yes | ||||
| Clogged hole (?) | No | ||||
| Cave units file (?) | 2_units_gw_l_conc.txt | ||||
| Lighting file (?) | suityu_light_lv0.ini | ||||
| Background (?) | None | ||||
| Cave units (?) | |||||
 |
 |
 |
 |
 |
|
| Dead end with item | Three-way crossing | Four-way crossing | Turning corridor | Corridor | Long corridor |
 |
 |
||||
| Room with 4 exits and 2 walls | Room with a dead end after U-turn | ||||
| Detailed object list | ||||
|---|---|---|---|---|
| The game spawns these "main" objects: | ||||
| ID | Object | Amount | Fall method | Spawn location |
| 1 | 1 | None | "Hard" enemy spots | |
| - | Carried inside entry with ID 1[Noisemaker note 1] | |||
| 2 | 1 | None | "Hard" enemy spots | |
| - | Carried inside entry with ID 2 | |||
| 3 | 1 | None | "Hard" enemy spots | |
| 4 | 1 | None | "Easy" enemy spots | |
| 5 | 1 | None | "Easy" enemy spots | |
| 6 | 1 | None | "Easy" enemy spots | |
| 7 | 4 | None | Cave unit seams | |
| Then it spawns these "decoration" objects: | ||||
| ID | Object | Amount | Fall method | Spawn location |
| 8 | 9 | None | Plant spots | |
| Then it spawns these "treasure" objects: | ||||
| ID | Object | Amount | Fall method | Spawn location |
| 9 | 1 | None | Treasure spots | |
| 10 | 1 | None | Treasure spots | |
| Then it spawns these "dead end" objects: | ||||
| ID | Object | Amount | Fall method | Spawn location |
| 11 | 1 | None | Dead ends | |
| 12 | 1 | Falls from the sky | Dead ends | |
| Then it spawns "dead end" objects in as many dead ends as it can. Chances: | ||||
| ID | Object | Chance | Fall method | Spawn location |
| 11 | 100% | None | Dead ends | |
- For details on how objects are spawned, and how some may fail to spawn, see here.
Sublevel 2[edit]
- Theme: Concrete
- Music: Submerged Castle; Waterwraith (after the Waterwraith appears)
- Treasures:
 Chocolate Cushion
 Comfort Cookie (inside Bulbmin)
 Confection Hoop
- Enemies:
 Bulbmin × 1
 Careening Dirigibug × 1
 Dwarf Orange Bulborb × 3
 Fiery Dweevil × 4
- Waterwraith × 1
- Obstacles:
- None
- Vegetation:
- Fiddlehead × 9
- Others:
This area contains Careening Dirigibugs, Fiery Dweevils and Bulbmin. To ensure safety, kill the Careening Dirigibug by throwing Pikmin at it and then swarming when it falls to the ground. For the Fiery Dweevils, ignore them unless they grab a treasure you are carrying, in which case use the leader's punches to kill it.
The Fiery Dweevils are usually in an open, rusty pipe that is near the entrance of a long pipe. They are likely to leave this space to pick up objects Pikmin are carrying past them, so it is advised to travel with any Pikmin carrying treasure or corpses in that area. Look around for that pipe entrance and walk inside (the Waterwraith cannot enter this area). Follow the pipe to a slide-like passageway, where you will go down quickly and fall out, landing near the Chocolate Cushion.
Once that part of the level is complete, you can find the Bulbmin. The parent can be killed by getting close, and then throwing Pikmin onto its back. If you were to swarm it, the adult Bulbmin would most likely get a few mouthfuls of Pikmin. Once they see their leader is dead, the smaller Bulbmin will panic and begin running around; blow your whistle to gain control of them. The game decides the amount of Bulbmin at the beginning of the sublevel depending on your Pikmin amount. The Comfort Cookie will come out of the parent Bulbmin once it is defeated.
Finally, the Dwarf Orange Bulborbs can be killed by just swarming them the old-fashioned way. The final treasure, the Confection Hoop can be found on a ledge guarded by some Dwarf Orange Bulborbs. To get there, walk to the opposite ledge and throw Pikmin over the gap and to the treasure. Throw more Pikmin over, since it is surrounded by the Bulborbs.
The exit is sealed, so you will have to use Pikmin to smash the rock and open the cave to the next sublevel. One strategy is to destroy the clog before the rest of the cave, so you can leave as soon as the Waterwraith shows up. Getting the treasure back to the Research Pod takes some effort because the Waterwraith is always coming down a small aisle that you have to walk through; do your best to try to avoid it and eventually it will go away. Get the treasure back to your ship and continue on down.
| Technical sublevel information | |||||
|---|---|---|---|---|---|
| Internal cave name | yakushima_4 | ||||
| "Main" object maximum (?) | 10 | ||||
| "Treasure" object maximum (?) | 2 | ||||
| "Gate" object maximum (?) | 2 | ||||
| Dead end unit probability (?) | 0 | ||||
| Number of rooms (?) | 3 | ||||
| Corridor-to-room ratio (?) | 0 | ||||
| Escape geyser (?) | No | ||||
| Clogged hole (?) | Yes | ||||
| Cave units file (?) | 3_units_h_k_pypes_conc.txt | ||||
| Lighting file (?) | suityu_light_lv1.ini | ||||
| Background (?) | None | ||||
| Cave units (?) | |||||
|
|
|
|
|
|
| Dead end with item | Three-way crossing | Four-way crossing | Turning corridor | Corridor | Long corridor |
 |
 |
 |
|||
| Huge room with waterway and pipes | Room with raised portion | Room with pipe and a depression | |||
| Detailed object list | ||||
|---|---|---|---|---|
| The game spawns these "main" objects: | ||||
| ID | Object | Amount | Fall method | Spawn location |
| 1 | 1 | None | "Hard" enemy spots | |
| - | Carried inside entry with ID 1[Noisemaker note 1] | |||
| 2 | 1 | None | "Hard" enemy spots | |
| 3 | 1 | None | "Hard" enemy spots | |
| - | Carried inside entry with ID 3 | |||
| 4 | 2 | None | "Easy" enemy spots | |
| 5 | 1 | None | "Easy" enemy spots | |
| 6 | 3 | None | "Special" enemy spots | |
| 7 | 1 | Falls when Pikmin are carrying nearby | "Hard" enemy spots | |
| Then it spawns these "decoration" objects: | ||||
| ID | Object | Amount | Fall method | Spawn location |
| 8 | 9 | None | Plant spots | |
| Then it spawns these "treasure" objects: | ||||
| ID | Object | Amount | Fall method | Spawn location |
| 9 | 1 | None | Treasure spots | |
| 10 | 1 | None | Treasure spots | |
| Then it spawns 2 "gate" objects. Chances: | ||||
| ID | Object | Chance | Fall method | Spawn location |
| 11 | Gate (4000 HP) | 100% | None | Gate spots |
- For details on how objects are spawned, and how some may fail to spawn, see here.
Sublevel 3[edit]
- Theme: Concrete
- Music: Submerged Castle; Waterwraith (after the Waterwraith appears)
- Treasures:
 Activity Arouser (US) /
  Pondering Emblem (Europe) /
  Anywhere Floater (Japan) (inside Withering Blowhog in all regions)
 Compelling Cookie
 Succulent Mattress
- Enemies:
 Anode Beetle × 4
 Anode Dweevil × 3
- Bulbmin × 1
- Mitite (group of 10) × indefinite amount (from eggs)
- Waterwraith × 1
 Withering Blowhog × 2
 Wollywog × 1
- Obstacles:
 Electrical wire × 5
- Vegetation:
- Fiddlehead × 9
 Ivory Candypop Bud × 1
- Others:
This level contains electrical hazards, so take caution. Swarm the electrical wires the very second they turn off. If you have Bulbmin, let them work on it instead. The Withering Blowhog is killed the same way as always: throw Pikmin and Bulbmin on it. The Withering Blowhog holds the Activity Arouser, but the Bulbmin holds nothing. For Anode Dweevils, just throw Bulbmin on them, as Bulbmin are immune to all hazards. Defeat the Wollywog in the same way as you would a Yellow Wollywog.
To end this short sublevel, take note that the last two treasures, the Succulent Mattress and the Compelling Cookie can be anywhere in the open, usually behind a gate. The Waterwraith will likely have appeared by this time, so try to ignore and break the exit, which is yet again covered in rocks.
There is an Ivory Candypop Bud in one of the alcoves on this floor, but it is best ignored as the White Pikmin will have a harder time following the rest of your group throughout the next sublevel's bothersome puddles and will prove to be more of an obstacle than a helpful unit.
Note: Avoid swarming the electrical wires while a treasure is about to be delivered, as you won't be able to control your leader or Pikmin.
| Technical sublevel information | |||||
|---|---|---|---|---|---|
| Internal cave name | yakushima_4 | ||||
| "Main" object maximum (?) | 15 | ||||
| "Treasure" object maximum (?) | 2 | ||||
| "Gate" object maximum (?) | 3 | ||||
| Dead end unit probability (?) | 50 | ||||
| Number of rooms (?) | 4 | ||||
| Corridor-to-room ratio (?) | 0.2 | ||||
| Escape geyser (?) | No | ||||
| Clogged hole (?) | Yes | ||||
| Cave units file (?) | 3_units_f_g_m_conc.txt | ||||
| Lighting file (?) | suityu_light_lv2.ini | ||||
| Background (?) | None | ||||
| Cave units (?) | |||||
|
|
|
|
|
|
| Dead end with item | Three-way crossing | Four-way crossing | Turning corridor | Corridor | Long corridor |
 |
|
 |
|||
| Room with 4 exits and raised ledge | Room with 4 exits and 2 walls | Room with 5 exits and 2 walls | |||
| Detailed object list | ||||
|---|---|---|---|---|
| The game spawns these "main" objects: | ||||
| ID | Object | Amount | Fall method | Spawn location |
| 1 | 1 | None | "Hard" enemy spots | |
| - | Carried inside entry with ID 1[Noisemaker note 1] | |||
| 2 | 1 | None | "Hard" enemy spots | |
| - | Carried inside entry with ID 2 | |||
| 3 | 1 | None | "Hard" enemy spots | |
| 4 | 1 | None | "Hard" enemy spots | |
| 5 | 2 | None | "Hard" enemy spots | |
| 6 | 2 | None | "Easy" enemy spots | |
| 7 | 2 | None | "Easy" enemy spots | |
| 8 | 5 | None | Cave unit seams | |
| Then it spawns these "decoration" objects: | ||||
| ID | Object | Amount | Fall method | Spawn location |
| 9 | 9 | None | Plant spots | |
| Then it spawns these "treasure" objects: | ||||
| ID | Object | Amount | Fall method | Spawn location |
| 10 | 1 | None | Treasure spots | |
| 11 | 1 | None | Treasure spots | |
| Then it spawns these "dead end" objects: | ||||
| ID | Object | Amount | Fall method | Spawn location |
| 13 | 1 | None | Dead ends | |
| 14 | 1 | None | Dead ends | |
| 15 | 1 | Falls from the sky | Dead ends | |
| 16 | 1 | Falls from the sky | Dead ends | |
| Then it spawns "dead end" objects in as many dead ends as it can. Chances: | ||||
| ID | Object | Chance | Fall method | Spawn location |
| 14 | 100% | None | Dead ends | |
| Then it spawns 3 "gate" objects. Chances: | ||||
| ID | Object | Chance | Fall method | Spawn location |
| 12 | Gate (4000 HP) | 100% | None | Gate spots |
- For details on how objects are spawned, and how some may fail to spawn, see here.
Sublevel 4[edit]
- Theme: Concrete
- Music: Submerged Castle; Waterwraith (after the Waterwraith appears)
- Treasures:
 Drone Supplies (US) /
  Open Archive (partially buried) (Europe/Japan)
 Pale Passion (inside Iridescent Glint Beetle)
 Proton AA (US/Europe) /
  Proton X (Japan)
- Enemies:
- Bulbmin × 2
- Careening Dirigibug × 2
 Iridescent Glint Beetle × 1
- Mitite (group of 10) × indefinite amount (from eggs)
 Volatile Dweevil × 5
- Waterwraith × 1
- Obstacles:
 Bomb-rock × 11
 Poison emitter × 3
- Vegetation:
- Fiddlehead × 9
- Others:
This floor is difficult due to the bomb-rocks and Volatile Dweevils that fall from the ceiling, and the Careening Digiribugs. Take careful steps here, and search for the Drone Supplies and the Proton AA.
There is an Iridescent Glint Beetle running around the place. Throw a Pikmin at it to make it to drop the Pale Passion. In order to make the path safer for your Pikmin, quickly run through the area with a single leader and detonate all the bomb-rocks and Volatile Dweevils. Finish by breaking the hole and then diving on down to the final floor.
As a side note, it is possible for the Waterwraith to get stuck in one of the corners of this sublevel, making collecting everything a breeze, although the creature will still follow you to the next sublevel once you go in. Also to note is that, due to the way sublevel generation works, the Iridescent Glint Beetle of this sublevel may not appear, and by extension, the Pale Passion, as detailed here and here.
| Technical sublevel information | |||||
|---|---|---|---|---|---|
| Internal cave name | yakushima_4 | ||||
| "Main" object maximum (?) | 25 | ||||
| "Treasure" object maximum (?) | 2 | ||||
| "Gate" object maximum (?) | 4 | ||||
| Dead end unit probability (?) | 50 | ||||
| Number of rooms (?) | 4 | ||||
| Corridor-to-room ratio (?) | 0.2 | ||||
| Escape geyser (?) | No | ||||
| Clogged hole (?) | Yes | ||||
| Cave units file (?) | 4_units_d_j_n_o_conc.txt | ||||
| Lighting file (?) | suityu_light_lv3.ini | ||||
| Background (?) | None | ||||
| Cave units (?) | |||||
|
|
|
|
|
|
| Dead end with item | Three-way crossing | Four-way crossing | Turning corridor | Corridor | Long corridor |
 |
 |
 |
 |
 | |
| Dead end with item | Turning corridor | Long corridor | Room with 4 exits | Room with 1 exit and a pipe | Room with 2 exits and a pipe |
 |
|||||
| Room with 3 exits and a pipe | |||||
| Detailed object list | ||||
|---|---|---|---|---|
| The game spawns these "main" objects: | ||||
| ID | Object | Amount | Fall method | Spawn location |
| 1 | 1 | None | "Hard" enemy spots | |
| - | Carried inside entry with ID 1[Noisemaker note 1] | |||
| 2 | 5 | Falls from the sky | "Hard" enemy spots | |
| 3 | 2 | Falls from the sky | "Hard" enemy spots | |
| 4 | 3 | Falls from the sky | "Hard" enemy spots | |
| 5 | 3 | Falls from the sky | "Easy" enemy spots | |
| 6 | 2 | None | "Hard" enemy spots | |
| 7 | 1 | None | "Hard" enemy spots | |
| - | Carried inside entry with ID 7 | |||
| 8 | 3 | None | Cave unit seams | |
| Alongside it spawns 5 "main" objects. Chances: | ||||
| ID | Object | Chance | Fall method | Spawn location |
| 4 | 50% | Falls from the sky | "Hard" enemy spots | |
| 5 | 50% | Falls from the sky | "Easy" enemy spots | |
| Then it spawns these "decoration" objects: | ||||
| ID | Object | Amount | Fall method | Spawn location |
| 9 | 9 | None | Plant spots | |
| Then it spawns these "treasure" objects: | ||||
| ID | Object | Amount | Fall method | Spawn location |
| 10 | 1 | None | Treasure spots | |
| 11 | 1 | None | Treasure spots | |
| Then it spawns these "dead end" objects: | ||||
| ID | Object | Amount | Fall method | Spawn location |
| 13 | 1 | None | Dead ends | |
| Then it spawns "dead end" objects in as many dead ends as it can. Chances: | ||||
| ID | Object | Chance | Fall method | Spawn location |
| 13 | 100% | None | Dead ends | |
| Then it spawns 4 "gate" objects. Chances: | ||||
| ID | Object | Chance | Fall method | Spawn location |
| 12 | Gate (4000 HP) | 100% | None | Gate spots |
- ^ a b c d The sublevel's data specifies that the Waterwraith is carrying the Professional Noisemaker in sublevels 1 to 4, even though it cannot normally be obtained in those sublevels. By using external tools to somehow damage and defeat the Waterwraith in one of these sublevels, it will not appear in any following sublevel. In addition, the Treasure Gauge won't detect this treasure, and will shut off if all the other treasures in the sublevel are collected.
- For details on how objects are spawned, and how some may fail to spawn, see here.
Sublevel 5[edit]
- Theme: Concrete
- Music: Boss (only when combating); Waterwraith vulnerable (when the Waterwraith is halfway defeated)
- Treasures:
 Professional Noisemaker (inside Waterwraith)
- Enemies:
- Mitite (group of 10) × 0 - 3 (from eggs)
- Waterwraith × 1
- Obstacles:
- None
- Vegetation:
- Fiddlehead × 3
 Figwort (small brown) × 3
 Violet Candypop Bud × 2
- Others:
- See also: Waterwraith strategy.
Here, the Waterwraith will only appear in the arena after you enter. You should have plenty of Bulbmin by this point. Start out by smashing the three gates in the starting area. Since you can't take them with you, use your Bulbmin to produce ten Purple Pikmin from the two Violet Candypop Buds. Now, smash the three eggs and use the nectar to give your Pikmin flowers. Then smash the final black gate that blocks access to the boss arena.
Follow the strategy linked above. Once defeated, the Waterwraith will drop the Professional Noisemaker. This gives you a device called the Pluckaphone, which allows you to pluck Pikmin sprouts from the ground just by whistling at them.
| Technical sublevel information | |||||
|---|---|---|---|---|---|
| Internal cave name | yakushima_4 | ||||
| "Main" object maximum (?) | 4 | ||||
| "Treasure" object maximum (?) | 0 | ||||
| "Gate" object maximum (?) | 4 | ||||
| Dead end unit probability (?) | 0 | ||||
| Number of rooms (?) | 2 | ||||
| Corridor-to-room ratio (?) | 0 | ||||
| Escape geyser (?) | Yes | ||||
| Clogged hole (?) | No | ||||
| Cave units file (?) | 1_units_manh_boss_conc.txt | ||||
| Lighting file (?) | normal_light_lv4.ini | ||||
| Background (?) | None | ||||
| Cave units (?) | |||||
|
|
|
|
|
|
| Dead end with item | Three-way crossing | Four-way crossing | Turning corridor | Corridor | Long corridor |
 |
|
||||
| Circular room with 1 exit | Room with 4 exits | ||||
| Detailed object list | ||||
|---|---|---|---|---|
| The game spawns these "main" objects: | ||||
| ID | Object | Amount | Fall method | Spawn location |
| 1 | 1 | None | "Special" enemy spots | |
| - | Carried inside entry with ID 1 | |||
| 2 | 3 | None | "Hard" enemy spots | |
| Then it spawns these "decoration" objects: | ||||
| ID | Object | Amount | Fall method | Spawn location |
| 3 | 3 | None | Plant spots | |
| 4 | 3 | None | Plant spots | |
| Then it spawns these "dead end" objects: | ||||
| ID | Object | Amount | Fall method | Spawn location |
| 6 | 2 | None | Dead ends | |
| Then it spawns 4 "gate" objects. Chances: | ||||
| ID | Object | Chance | Fall method | Spawn location |
| 5 | Gate (100 HP) | 100% | None | Gate spots |
- For details on how objects are spawned, and how some may fail to spawn, see here.
Gallery[edit]
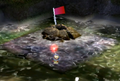
The cave entrance.

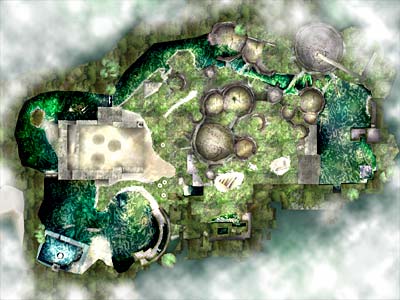
An earlier, unused variant of the Submerged Castle.


Trivia[edit]
|
The following article or section is in need of assistance from someone who plays Pikmin 2. |
- The cavern contains 13 treasures, a famously unlucky number; this appears to be intended to reflect the cave's nature, and especially that of its boss.
- An earlier version of the game's English script reveals that this cave was originally intended to be called "Lookout Ruins".[2]
- The Waterwraith is actually programmed to drop the Professional Noisemaker in all sublevels, not just the final one. By using external tools to somehow damage and defeat the Waterwraith in one of these sublevels, it will not appear in any following sublevel.[3]
- The cave's file contains a timer for the Waterwraith to appear after 15 seconds on the final sublevel, but it remains unused in favor of having the creature spawn when the arena is entered.
- Curiously, the games files specify that the musical theme for sublevel 6 of the Hole of Heroes should play on all five sublevels. Despite that, in practice, the Submerged Castle's normal theme is hard-coded to play instead. The same occurs on sublevel 9 of the Dream Den.
Names in other languages[edit]
| Language | Name | Meaning |
|---|---|---|
| 水中の城? Suichū no Shiro |
Underwater Castle | |
(traditional) |
水中之城 | |
| Fort Submergé | Submerged Fort | |
| Versunkene Burg | Sunken Castle | |
| Castello Immerso | Immersed Castle | |
| Castillo Sumergido | Submerged Castle |
See also[edit]
References[edit]
- ^ YouTube video demonstrating how to bring other Pikmin, and showing that they still won't enter
- ^ Pikmin 2/Early English Script on The Cutting Room Floor
- ^ YouTube video showing the Waterwraith taking damaged in an earlier sublevel and preventing its appearance in the last sublevel. (at 0:42)
| Caves in Pikmin 2 | |
|---|---|
| Valley of Repose | Emergence Cave • Subterranean Complex • Frontier Cavern |
| Awakening Wood | Hole of Beasts • White Flower Garden • Bulblax Kingdom • Snagret Hole |
| Perplexing Pool | Citadel of Spiders • Glutton's Kitchen • Shower Room • Submerged Castle |
| Wistful Wild | Cavern of Chaos • Hole of Heroes • Dream Den |