


Reinforced wall

Reinforced walls (also known as stone walls[1], rock walls[2], rock gates[3] or stone gates[4]) are gates that can only be destroyed with bomb rocks. Pikmin cannot break these stone walls on their own; if they are directed to the wall, they will briefly attempt to attack the wall like they would any other gate, before eventually sighing and giving up.
In Pikmin, they look like rudimentary walls made of stone and come in two varieties, white and black. Black walls require more bomb rocks to destroy than white ones. In Pikmin 3 and Pikmin 4, reinforced walls seem to be made out of concrete, as pieces of rebar can be seen sticking out of the top. In Pikmin 3 Deluxe, most of these walls have designs featuring thin white lines in the shape of Olimar and some Pikmin.
Health[edit]
Every reinforced wall has a health value that gets depleted with bomb rock explosions.
In Pikmin, a bomb rock causes 20 hit points of damage to a reinforced wall. In the entire game, there are only four types of reinforced walls:
| Color | Bomb rocks | Health |
|---|---|---|
| White | 2 | 24 |
| White | 3 | 48 |
| Gray | 6 | 120 |
| Black | 9 | 168 |
Challenge Mode only uses the 24 HP walls, and Story Mode only uses the other types. With the 24 HP walls, the first bomb rock takes the wall down by two out of its three segments.
In Pikmin 3 and Pikmin 4, three bomb rocks are required to destroy any reinforced wall, except for one wall in the Battle Enemies! version of Clockwork Chasm that only requires one bomb rock.
Locations[edit]
Pikmin[edit]
Areas[edit]
- The Impact Site
- White, 3 bomb rocks: Towards the northwest, between the tree stump arena and the beach-like area with the Pearly Clamclamps.
- The Forest of Hope
- White, 3 bomb rocks: In the landing site towards the north.
- White, 3 bomb rocks: Towards the west, in the section where the Yellow Onion is originally discovered. It is north of that, leading to the thin pathway containing the Whimsical Radar.
- White, 3 bomb rocks: Towards the west in the section where the Yellow Onion is originally discovered. It is south of that, on the path leading to the cardboard box.
- Black, 9 bomb rocks: At the end of the thin path north of where the Yellow Onion is originally discovered, past the white reinforced wall. The wall is guarded by multiple Sheargrubs and Dwarf Bulborbs, and it blocks the Extraordinary Bolt from being collected.
- The Forest Navel
- Gray, 6 bomb rocks: In the landing site towards the southwest.
- Gray, 6 bomb rocks: Towards the far east, blocking the arena where the Beady Long Legs spawns. The wall is adjacent to a black bramble gate and some fire geysers.
- Gray, 6 bomb rocks: Slightly southeast of the landing site, next to a black reinforced wall. Each wall requires six bomb-rocks each to be destroyed fully.
- Black, 9 bomb rocks: Slightly southwest of the landing site, just past the white reinforced wall and next to the climbing stick.
- Black, 9 bomb rocks: Slightly southeast of the landing site, next to a white reinforced wall.
- The Distant Spring
- Gray, 6 bomb rocks: West of the landing site, between two tree stumps.
- Black, 9 bomb rocks: Slightly northeast of the landing site, allowing for multiple ship parts to be collected quicker.
- The Final Trial
- White, 3 bomb rocks: Directly north of the landing site, on the island between the two stick bridges.
Challenge Mode[edit]
- The Impact Site
- White, 2 bomb rocks: Shares the same location as the one during Story Mode, northwest of the landing site.
- The Forest of Hope
- White, 2 bomb rocks: Shares the same location as one of the walls during Story Mode; specifically, it's the wall south of where the Yellow Onion would be discovered, now replaced with a Spotty Bulbear.
- White, 2 bomb rocks: Towards the north of the area, replacing what would be a black bramble gate during Story Mode. This wall blocks access to the arena containing another Spotty Bulbear, two Bulborbs, and a Pearly Clamclamp.
- The Final Trial
- White, 2 bomb rocks: Towards the north of the area, slightly southeast of the arena.
- White, 2 bomb rocks: Towards the north of the area, at the northern end of the arena.
Pikmin 3[edit]
Areas[edit]
- Tropical Wilds
- There are three reinforced walls in this area. The first wall can be found in the landing site and slightly west, with a Whiptongue Bulborb on the other side. The second wall is located north of the landing site, between the Dawn Pustules and the red fragment bridge. The third and final wall can be found towards the northwest, beyond the two Skutterchucks and in the northern Shaggy Long Legs arena. The wall is on the eastern side of this arena.
- Twilight River
- There are two reinforced walls in this area. The first wall is located in the landing site and slightly west, with a Flighty Joustmite on the other side. The second wall can be found in the second main segment, with it being towards the west. It's in the section with the two clipboards, and the wall is blocking an alcove containing the Tremendous Sniffer.
- Formidable Oak
- There is one reinforced wall in this area. It is located in the entrance corridor segment, which is where the Mysterious Life-Form appears. The wall is on the southern side of this corridor, creating a shortcut that skips the first main segment.
Side Stories[edit]
Olimar's Comeback[edit]
- Team Monster Hunt
- There is one reinforced wall in this story's area. It can be found east of the Winged Onion, across the body of water. The wall is in the section with the Calcified Crushblat, or where the pair of Skutterchuck would be located during Story Mode. An electric gate would be found here during Story Mode as well.
- Channel Gone Dry
- Looking for Louie
- There are four reinforced walls in this story's area. Three are located in the area's second main segment; the segment Olimar starts in. The first wall shares the same location as the one in the Channel Gone Dry story, and the second wall can be found at the opposite end of the wooden bridge. The third wall is located just beyond the Yellow Onion, being guarded by a Whiptongue Bulborb. The fourth and final wall, which is in the area's first main segment; the segment Louie starts in, can be found towards the far west, blocking the pathway to the second main segment.
- Another Part Found
- There are two reinforced walls in this story's area. The first wall can be found towards the northwest, in the section containing the Orange Bulborb and the Whiptongue Bulborb. This wall allows for the entrance corridor, where the SPERO is located, to be accessed. The second wall is located in the section slightly southeast from the previous section, where the Spotty Bulbear and Skutterchucks are located. The wall replaces the dirt wall found during Story Mode.
Mission Mode[edit]
Collect Treasures![edit]
- Shaded Garden Remix
- There is one reinforced wall in this stage. It can be found east of the SPERO, along the path and guarded by a Bearded Amprat.
- The Rustyard
- There is one reinforced wall in this stage. It is located just in front of the SPERO, blocking access to the geyser.
- Beastly Caverns
- There are two reinforced walls in this stage. They are both located in the central segment, with the first being adjacent to the SPERO and the Blue Onion and the second being towards the northeast. The first wall allows for the Fire-Breathing Feast and the other collectibles to be carried back without the use of Blue Pikmin. The second wall creates a pathway to reach the eastern cavern.
- Forgotten Cove
- There are three reinforced walls in this stage. The first wall can be found next to the SPERO and towards the north. The second wall is located north of the previous wall, being guarded by the Medusal Slurker that contains Louie. The third and final wall can be found southwest of the SPERO, adjacent to a bundle of hay and a dirt wall.
Battle Enemies![edit]
- Tropical Wilds Remix
- There is one reinforced wall in this stage. It is located slightly southeast of the SPERO, with a Burgeoning Spiderwort on the other side.
- Forgotten Cove
- There are three reinforced walls in this stage. They all share the same locations as the walls in the Collect Treasures! version.
- Clockwork Chasm
- There is one reinforced wall in this stage. It can be found southeast of the SPERO, at the top of the moving walkway. It blocks access to the section where the two Hermit Crawmads are located.
Bingo Battle[edit]
- Parched Brook
- There are two reinforced walls in layout A. The first wall can be found at the top of the slope east of the easternmost Onion, and the second wall is located at the top of the slope west of the westernmost Onion.
- Corroded Maze
- There are two reinforced walls in layout B. They are both located in the center of the map, with one slightly north and the other slightly south. The walls are blocking the section containing the Citrus Lump and the Insect Condo.
Pikmin 4[edit]
Areas[edit]
- Blossoming Arcadia
- There is one reinforced wall in this area. It can be found towards the south of the area, across the clay bridge from the Sunwashed Plateau base. It blocks access to one of the Dandori Challenge caves, and it is being guarded by two Downy Snagrets.
- Giant's Hearth
- There is one reinforced wall in this area. It is located directly south of The Central Flame base and it is blocking the arena where the Sovereign Bulblax is located. This arena also holds the Rock Onion.
Olimar's Shipwreck Tale[edit]
- Blossoming Arcadia
- There is one reinforced wall in this tale's area. It can be found east of the Fragrant Ravine base, in the raised section replacing what would be an electric gate during Story Mode. The wall blocks access to the Omega Stabilizer.
Gallery[edit]
|
This article or section is in need of more images. |
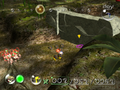 A white reinforced wall in Pikmin.
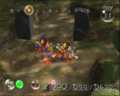 A destroyed black reinforced wall in The Forest of Hope.
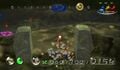 A white reinforced wall seen in The Impact Site's Challenge Mode stage.
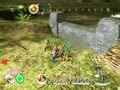 A reinforced wall seen in an early version of Pikmin.
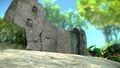 A reinforced wall in Pikmin 3.
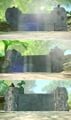 The 3 designs of reinforced walls in Pikmin 3 Deluxe.
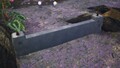 A reinforced wall in Pikmin 4.


Names in other languages[edit]
Rock wall
| Language | Name | Meaning |
|---|---|---|
 Japanese Japanese |
岩のカベ Iwa no Kabe 白い岩のカベ Shiroi Iwa no Kabe 黒い岩のカベ Kuroi Iwa no Kabe? |
Rock wall White rock wall Black rock wall |
Reinforced wall
| Language | Name | Meaning |
|---|---|---|
| Japanese |
鉄筋のカべ? Tekkin no Kabe |
Reinforced concrete wall |
 Spanish Spanish |
Muro reforzado | Reinforced wall |
See also[edit]
References[edit]
- ^ “The bomb-rocks are dangerous, so I must take care when using them, but they should be able to blast open the stone walls that block the pathways!” – Captain Olimar in a monolog
- ^ “These creatures can wield bomb-rocks, so perhaps I can use them to blast down rock walls and open up new regions.” – Captain Olimar in the voyage log
- ^ “Only bomb-rocks can destroy rock gates, and only yellow Pikmin can carry the explosives.” – The Forest of Hope section 4-C "Blasting the Wall" in the Pikmin Nintendo Player's Guide
- ^ NEW PLAY CONTROL! Pikmin on Nintendo.co.uk
| Obstacles |
|---|
|
|
| Minor obstacles |


