|
|
| (163 intermediate revisions by 27 users not shown) |
| Line 1: |
Line 1: |
| In ''[[Pikmin 2]]'' the '''Treasure Hoard''' is an in-game list of all the treasures the player has collected throughout their exploration. Some differences in the list occur between the NTSC-J (Japanese), NTSC (American), and PAL (European and Australian) versions of the game, owing to the fact some objects are real life brands, and the licensing and recognition of these vary between regions. It is the counterpart to the [[Piklopedia]]; these two also share the same music:
| | {{game icons|pikmin2=y}} |
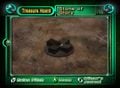
| | [[File:Treasure Hoard.jpg|thumb|300px|Screenshot of the Treasure Hoard.]] |
| | {{otheruses|the Treasure Menu in Pikmin 2|the menu in [[Pikmin 4]]|Treasure Catalog}} |
| | The '''Treasure Hoard''' in {{p2}} is an in-game list of all the [[treasure]]s the player has collected throughout their exploration. To enter the [[Piklopedia and Treasure Hoard menu#Treasure Hoard|Treasure Hoard menu]], the player must press {{button|gc|r|wii|padr}} when on the [[area selection menu]]. |
|
| |
|
| [[Image:Hoard.ogg]] | | Some differences in the list occur between the Japanese, North American, and European (+ Australian) [[region|versions]] of the game, owing to the fact some objects are real life brands, and the licensing and recognition of these vary between regions; the list in this page contains information for the US and European treasures only. It is the counterpart to the [[Piklopedia (Pikmin 2)|Piklopedia]], with the two sharing [[Music in Pikmin 2#Piklopedia/Treasure hoard|the same music]]. |
|
| |
|
| Treasures are arranged into series by subject matter. As each series is completed, [[the ship]] makes an [[:category:ship announcements|announcement]], describing it and making the [[Sales Pitch]] available for each treasure in the group. | | Treasures are arranged into [[series]] by subject matter, and each treasure has accompanying [[#Notes|notes]], by [[Captain Olimar]] and by the [[Hocotate ship]]. As each series is completed, the ship announces it and makes its sales pitch available for each treasure in the group; Olimar's journal are available from the start. Finally, the Treasure Hoard also points out how many [[Poko]]s a treasure is worth, as well as its [[Carry|weight]]. It should be noted that if the player wishes to see the Hocotate ship's announcements after completing a series, they should check the Treasure Hoard on the same day they complete the series; starting a new day and collecting a treasure in the meantime will not trigger the announcement the next day. |
|
| |
|
| {|class="wikitable sortable" | | The total treasure value in [[Pokos]] is {{pokos|26,985}} in the US version, {{pokos|26,885}} in the European version, and {{pokos|26,181}} in the Japanese version. |
| !class="hideable unsortable"|Image!!NTSC #!!PAL #!!Name!!class="hideable"|Series!!class="unsortable hideable"|Description!!class="hideable"|Location!!Value ([[Poko]]s)!!Weight!!Max. carriers
| | |
| |-
| | == List of treasures == |
| |[[Image:Cupidgrenade.jpg|30px]]||1||1||[[Cupid's Grenade]]||[[Succulent Series]]||Cherry||[[Snagret Hole]]||20||3 (1 in [[2-Player mode]])||6
| | {{see|List of Pikmin 2 treasures}} |
| |- | | |
| |[[Image:Thumb_sunseedberry.jpg|30px]]||2||2||[[Sunseed Berry]]||[[Succulent Series]]||Small Strawberry||[[Awakening Wood]]||170||5||10 | | == Notes == |
| |-
| | Every treasure has accompanying notes by [[Captain Olimar]] and the [[Hocotate ship]]. These notes are merely for fun and for world-building, and rarely contain any information useful for gameplay. Only the notes of unlocked entries can be seen. |
| |[[Image:Thumb_combustionberry.jpg|30px]]||3||3||[[Combustion Berry]]||[[Succulent Series]]||Large Strawberry||[[Snagret Hole]]||190||12||24
| | |
| |-
| | === Olimar's journal === |
| |[[Image:Thumb_seedofgreed.jpg|30px]]||4||4||[[Seed of Greed]]||[[Succulent Series]]||Chestnut||[[Wistful Wild]]||100||10||15
| | {{for|a full list|Category:Journal entries|t1=Category:Journal entries}} |
| |- | | |
| |[[Image:Thumb_disguiseddelicacy.jpg|30px]]||5||5||[[Disguised Delicacy]]||[[Succulent Series]]||Half of a Kiwi||[[Dream Den]]||40||15||25
| | Olimar's journal are the notes he writes on treasures collected. They can be read by picking an entry and pressing {{button|gc|x|wii|+}}. Like the name implies, they read a bit like a diary, often reflecting on the day's expeditions and findings in doing so. He refers to such things as his family, his working life with Hocotate Freight, and his feelings at the time, as well as speculation on what the treasure's intended use might be. |
| |- | | |
| |[[Image:Thumb_insectcondo.jpg|30px]]||6||6||[[Insect Condo]]||[[Succulent Series]]||Apple||[[Dream Den]]||40||15||25 | | === Sales pitch === |
| |-
| | {{for|a full list|Category:Sales pitches|t1=Category:Sales pitches|Category:Ship announcements|t2=Category:Ship announcements}} |
| |[[Image:Thumb_citruslump.jpg|30px]]||7||7||[[Citrus Lump]]||[[Succulent Series]]||Orange||[[Emergence Cave]]||180||15||25
| | |
| |-
| | The sales pitches are provided by the Hocotate ship in an attempt to sell the items back at [[Hocotate]]. They can be read by picking an entry and pressing {{button|gc|y|wii|-}}. Often, the ship creates stories about the objects which they are selling in an attempt to get them to sell better. For instance, it claims that the [[Fossilized Ursidae]] may come alive under a full moon, or that the [[Essence of Despair]] was created as the result of the forces of evil being defeated by the forces of justice. |
| |[[Image:Thumb_spinyalientreat.jpg|30px]]||8||8||[[Spiny Alien Treat]]||[[Nature's Candy Series]]||Artichoke||[[Valley of Repose]]||50||4||8
| | |
| |-
| | Any given sales pitch comes with a [[Series|group]], and becomes available once that specific group of treasures has been collected. An example of this would be in the [[Crystallized Emotion Series]]; all marbles in the game must be collected before their sales pitches are provided. In addition, when this happens, the ship will announce the completion of a series, with a quick blurb with what the series is about. |
| |[[Image:Thumb_anxioussprout.jpg|30px]]||9||9||[[Anxious Sprout]]||[[Nature's Candy Series]]||Asparagus Head||[[Bulblax Kingdom]]||50||15||25
| | |
| |-
| | == Controls == |
| |[[Image:Childoftheearth.jpg|30px]]||10||10||[[Child of the Earth]]||[[Nature's Candy Series]]||Potato||[[Cavern of Chaos]]||40||15||25
| | {{see|Controls#Piklopedia and Treasure Hoard}} |
| |-
| | |
| |[[Image:Thumb_lovenugget.jpg|30px]]||11||11||[[Love Nugget]]||[[Nature's Candy Series]]||Tomato||[[Citadel of Spiders]]||40||20||30
| | == Areas == |
| |-
| | {{main|Piklopedia (Pikmin 2)#Areas}} |
| |[[Image:-12Infernal_Vegetable.png|30px]]||12||12||[[Infernal Vegetable]]||[[Nature's Candy Series]]||Green Bell Pepper||[[Cavern of Chaos]]||30||12||20
| | |
| |-
| | The scenery seen on the Treasure Hoard and [[Piklopedia (Pikmin 2)|Piklopedia]] will depend on whatever [[area]] the ship's icon is on, on the [[area selection menu]]. The [[Valley of Repose]], the [[Awakening Wood]] and the [[Perplexing Pool]] have some notable differences in this version of the area, but the [[Wistful Wild]] has no differences in the level design with the only change being the background theme. |
| |[[Image:Anti-hiccupfungus.jpg|30px]]||13||13||[[Anti-hiccup Fungus]]||[[Nature's Candy Series]]||Mushroom||[[Wistful Wild]]||30||5||10
| | |
| |-
| | == Gallery == |
| |[[Image:Thumb_toxictoadstool.jpg|30px]]||14||14||[[Toxic Toadstool]]||[[Nature's Candy Series]]||Poisonous Mushroom||[[White Flower Garden]]||30||5||10
| | <gallery> |
| |-
| | ProtonX.png|The Treasure Hoard during daytime. |
| |[[Image:-15Growshroom.png|30px]]||15||15||[[Growshroom]]||[[Nature's Candy Series]]||Large Mushroom||[[Cavern of Chaos]]||50||5||10
| | Treasure hoard sunrise.jpg|The Treasure Hoard while the sun is rising. |
| |-
| | Treasure Hoard night.jpg|The Treasure Hoard at night. |
| |[[Image:Thumb_onionreplica.jpg|30px]]||16||16||[[Onion Replica]]||[[Nature's Candy Series]]||Onion||[[Perplexing Pool]]||30||20||30
| | Treasure Hoard 3.jpg|The Treasure Hoard when the sun is setting down. |
| |-
| | Treasure Hoard close-up.jpg|The close-up mode. |
| |[[Image:Thumb scienceproject.jpg|30px]]||17||17||[[Science Project]]||[[Xenoflora Series]]||Four-leaved Clover||[[Snagret Hole]]||20||1||1
| | Pikmin 2 Menu Rubber Ugly Icon.png|The [[Rubber Ugly]] icon used to represent the Treasure Hoard within the [[area selection menu]] and the [[Piklopedia (Pikmin 2)|Piklopedia]]. |
| |-
| | </gallery> |
| |[[Image:Thumb pligrimbulb.jpg|30px]]||18||18||[[Pilgrim Bulb]]||[[Xenoflora Series]]||Turnip Bulb||[[Awakening Wood]]||55||10||20
| | |
| |-
| | == Names in other languages == |
| |[[Image:Arborealfrippery.jpg|30px]]||19||19||[[Arboreal Frippery]]||[[Xenoflora Series]]||Maple Leaf||[[Shower Room]]||10||1||1
| | {{Foreignname |
| |-
| | |Jap=お宝一覧 |
| |[[Image:-20Conifer Spire.png|30px]]||20||20||[[Conifer Spire]]||[[Xenoflora Series]]||Pine Cone||[[Wistful Wild]]||15||7||15
| | |JapR= Otakara Ichiran |
| |-
| | |JapM=Treasure List |
| |[[Image:-21Armored Nut.png|30px]]||21||21||[[Armored Nut]]||[[Xenoflora Series]]||Small Acorn||[[Wistful Wild]]||60||4||8
| | |Fra=Liste des trésors |
| |-
| | |FraM=List of treasures |
| |[[Image:Thumb corpulentnut.jpg|30px]]||22||22||[[Corpulent Nut]]||[[Xenoflora Series]]||Large Acorn||[[Hole of Heroes]]||80||8||16
| | |Ger=Schatzhort |
| |-
| | |GerM=Treasure hoard |
| |[[Image:Thumb_meatofchampions.jpg|30px]]||23||23||[[Meat of Champions]]||[[Gourmet Series]]||Slice of Ham||[[Glutton's Kitchen]]||35||10||20
| | |Ita=Lista tesori |
| |-
| | |ItaM=List of treasures |
| |[[Image:Thumb_hideousvictual.jpg|30px]]||24||24||[[Hideous Victual]]||[[Gourmet Series]]||Fried Egg||[[Glutton's Kitchen]]||100||10||15
| | |Spa=Tesoros |
| |-
| | |SpaM=Treasures |
| |[[Image:Thumb_meatsatchel.jpg|30px]]||25||25||[[Meat Satchel]]||[[Gourmet Series]]||Hot Dog||[[Snagret Hole]]||40||5||10
| | }} |
| |-
| | |
| |[[Image:Thumb_tastesensation.jpg|30px]]||26||26||[[Taste Sensation]]||[[Gourmet Series]]||Piece of Sushi||[[Snagret Hole]]||40||15||25
| | == Trivia == |
| |-
| | * Treasures in the same [[series]] have the same background color behind their icons, and this color alternates between green and blue for each series. In the European and Japanese [[Region|versions]] of the game, there are an even number of series, so when the list wraps around back to the start, the colors are the same. But in the North American version, there are an odd number of series, so after scrolling through the entire list, the background color of each series is different from what it was the last time, and alternates as the list is repeated. |
| |[[Image:Thumb_triplesugarthreat.jpg|30px]]||27||27||[[Triple Sugar Threat]]||[[Gourmet Series]]||Sugar Shish-Kabob||[[Snagret Hole]]||60||6||12
| | * The [[Rubber Ugly]] icon which represents treasure in the [[area selection menu]] and [[saved game selection menu]] is different from the icon for the [[Rubber Ugly]] entry within the Treasure Hoard and the actual in-game texture. Specifically, the duck in the menu icon has completely black eyes, while the duck for the in-game model and the Treasure Hoard entry icon has black pupils surrounded by visible white scleras. This icon actually matches an early Rubber Ugly [[Unused content in Pikmin 2|unused treasure icon]]. |
| |-
| | |
| |[[Image:Thumb_compellingcookie.jpg|30px]]||28||28||[[Compelling Cookie]]||[[Sweet Tooth Series]]||Vanilla Swirl Cookie||[[Submerged Castle]]||10||3||8
| | == See also == |
| |-
| | *[[Treasure Catalog]] |
| |[[Image:Thumb_impenatrablecookie.jpg|30px]]||29||29||[[Impenetrable Cookie]]||[[Sweet Tooth Series]]||Chocolate Swirl Cookie||[[Cavern of Chaos]]||25||8||16
| | *[[Hey! Pikmin logs|''Hey! Pikmin'' logs]] |
| |-
| | *[[Piklopedia (Pikmin 2)|Piklopedia (''Pikmin 2'')]] |
| |[[Image:Thumb_bugbait.jpg|30px]]||30||30||[[Bug Bait]]||[[Sweet Tooth Series]]||Wafer||[[Submerged Castle]]||15||5||10
| | |
| |-
| | {{treasures}} |
| |[[Image:Thumb_imperativecookie.jpg|30px]]||31||31||[[Imperative Cookie]]||[[Sweet Tooth Series]]||Large Swirl Cookie||[[Glutton's Kitchen]]||25||5||10
| |
| |-
| |
| |[[Image:Thumb_comfortcookie.jpg|30px]]||32||32||[[Comfort Cookie]]||[[Sweet Tooth Series]]||Small Checkerboard Cookie||[[Submerged Castle]]||10||4||8
| |
| |-
| |
| |[[Image:Thumb_succulentmattress.jpg|30px]]||33||33||[[Succulent Mattress]]||[[Sweet Tooth Series]]||Large Checkerboard Cookie||[[Submerged Castle]]||50||8||16
| |
| |-
| |
| |[[Image:Thumb_kingofsweets.jpg|30px]]||34||34||[[King of Sweets]]||[[Sweet Tooth Series]]||Chocolate Truffle||[[Citadel of Spiders]]||15||5||10
| |
| |-
| |
| |[[Image:Enamelbuster.jpg|30px]]||35||35||[[Enamel Buster]]||[[Sweet Tooth Series]]||Chocolate Cupcake with Nut||[[Cavern of Chaos]]||60||8||16
| |
| |-
| |
| |[[Image:Thumb_dietdoomer.jpg|30px]]||36||36||[[Diet Doomer]]||[[Sweet Tooth Series]]||Pink Truffle||[[Submerged Castle]]||25||5||10
| |
| |-
| |
| |[[Image:Thumb_palepassion.jpg|30px]]||37||37||[[Pale Passion]]||[[Sweet Tooth Series]]||Vanilla Truffle||[[Submerged Castle]]||25||5||10
| |
| |-
| |
| |[[Image:Thumb_whitegoodness.jpg|30px]]||38||38||[[White Goodness]]||[[Sweet Tooth Series]]||White Chocolate with Chocolate syrup||[[Glutton's Kitchen]]||60||8||16
| |
| |-
| |
| |[[Image:Thumb_chocolatecushion.jpg|30px]]||39||39||[[Chocolate Cushion]]||[[Sweet Tooth Series]]||Chocolate Frosted Donut||[[Submerged Castle]]||40||10||20
| |
| |-
| |
| |[[Image:Thumb_sweetdreamer.jpg|30px]]||40||40||[[Sweet Dreamer]]||[[Sweet Tooth Series]]||Strawberry Frosted Donut||[[Glutton's Kitchen]]||40||10||20
| |
| |-
| |
| |[[Image:Thumb_confectionhoop.jpg|30px]]||41||41||[[Confection Hoop]]||[[Sweet Tooth Series]]||Donut||[[Submerged Castle]]||60||20||30
| |
| |-
| |
| |[[Image:Thumb_pastrywheel.jpg|30px]]||42||42||[[Pastry Wheel]]||[[Sweet Tooth Series]]||Powdered Donut||[[Submerged Castle]]||35||10||20
| |
| |-
| |
| |[[Image:-43Possessed_Squash.png|30px]]||43||43||[[Possessed Squash]]||[[Paleontology Series]]||Jack-o-Lantern||[[Dream Den]]||180||30||50
| |
| |-
| |
| |[[Image:Thumb_fossilizedursidae.jpg|30px]]||44||44||[[Fossilized Ursidae]]||[[Paleontology Series]]||Wooden Bear Statue||[[Valley of Repose]]||160||25||35
| |
| |-
| |
| |[[Image:Thumb_colossalfossil.jpg|30px]]||45||45||[[Colossal Fossil]]||[[Paleontology Series]]||Primate Skull||[[Bulblax Kingdom]]||140||20||30
| |
| |-
| |
| |[[Image:Thumb_leviathanfeather.jpg|30px]]||46||46||[[Leviathan Feather]]||[[Paleontology Series]]||Feather||[[Snagret Hole]]||10||1||1
| |
| |-
| |
| |[[Image:Thumb_olimarniteshell.jpg|30px]]||47||47||[[Olimarnite Shell]]||[[Paleontology Series]]||Ammonite Fossil||[[Bulblax Kingdom]]||40||15||25
| |
| |-
| |
| |[[Image:Thumb_fortifieddelicacy.jpg|30px]]||48||48||[[Fortified Delicacy]]||[[Paleontology Series]]||Conch Shell||[[Perplexing Pool]]||60||20||30
| |
| |-
| |
| |[[Image:Thumb_scrumptiousshell.jpg|30px]]||49||49||[[Scrumptious Shell]]||[[Paleontology Series]]||Scallop Shell Top Half||[[Shower Room]]||60||10||20
| |
| |-
| |
| |[[Image:Thumb_memorialshell.jpg|30px]]||50||50||[[Memorial Shell]]||[[Paleontology Series]]||Scallop Shell Bottom Half||[[Citadel of Spiders]]||100||10||20
| |
| |-
| |
| |[[Image:Thumb_mysteriousremains.jpg|30px]]||51||51||[[Mysterious Remains]]||[[Paleontology Series]]||Lobster Claw||[[Cavern of Chaos]]||150||8||15
| |
| |-
| |
| |[[Image:Thumb_crystalking.jpg|30px]]||52||52||[[Crystal King]]||[[Ancient Secrets Series]]||Large Crystal||[[Bulblax Kingdom]]||110||10||15
| |
| |-
| |
| |[[Image:Thumb_futureorb.jpg|30px]]||53||53||[[Future Orb]]||[[Ancient Secrets Series]]||Crystal Ball||[[Dream Den]]||200||25||35
| |
| |-
| |
| |[[Image:Thumb_gyroidbust.jpg|30px]]||54||54||[[Gyroid Bust]]||[[Ancient Secrets Series]]||Wooden Sculpture||[[Bulblax Kingdom]]||250||10||15
| |
| |-
| |
| |[[Image:Thumb_unknownmerit.jpg|30px]]||55||55||[[Unknown Merit]]||[[Ancient Secrets Series]]||Yen||[[Bulblax Kingdom]]||100||5||10
| |
| |-
| |
| |[[Image:Thumb_lustrouselement.jpg|30px]]||56||56||[[Lustrous Element]]||[[Ancient Secrets Series]]||Golden Coin||[[Hole of Heroes]]||1000||10||15
| |
| |-
| |
| |[[Image:Thumb_mirroredelement.jpg|30px]]||57||57||[[Mirrored Element]]||[[Ancient Secrets Series]]||Silver Coin||[[Dream Den]]||300||10||15
| |
| |-
| |
| |[[Image:Thumb_vorpalplatter.jpg|30px]]||58||58||[[Vorpal Platter]]||[[Cook's Arsenal Series]]||Pudding Can Lid||[[Shower Room]]||60||12||20
| |
| |-
| |
| |[[Image:Thumb_invigarator.jpg|30px]]||59||59||[[Invigorator]]||[[Cook's Arsenal Series]]||Mug||[[Glutton's Kitchen]]||130||20||30
| |
| |-
| |
| |[[Image:Thumb_milktub.jpg|30px]]||60||60||[[Milk Tub]]||[[Cook's Arsenal Series]]||Cream Cup||[[Cavern of Chaos]]||60||5||10
| |
| |-
| |
| |[[Image:Thumb_mercilessextractor.jpg|30px]]||61||61||[[Merciless Extractor]]||[[Cook's Arsenal Series]]||Juicer||[[Shower Room]]||90||20||30
| |
| |-
| |
| |[[Image:Thumb_brokenfoodmaster.jpg|30px]]||62||62||[[Broken Food Master \ Divine Cooking Tool|Broken Food Master (NTSC) / Divine Cooking Tool (PAL)]]||[[Cook's Arsenal Series]]||Ladle||[[Shower Room]]||90||20||30
| |
| |-
| |
| |[[File:Thumb utterscrap.jpg|30px]]||63||63||[[Utter Scrap]]||[[Cook's Arsenal Series]]||Crushed soda can||[[Shower Room]]||170||35||45
| |
| |-
| |
| |[[Image:Thumb_decorativegoo.jpg|30px]]||64||64||[[Decorative Goo]]||[[Tortured Artist Series]]||Blue Paint Tube||[[Awakening Wood]]||80||10||20
| |
| |-
| |
| |[[Image:Thumb_mastersinstrument.jpg|30px]]||65||65||[[Master's Instrument]]||[[Tortured Artist Series]]||Pastel Crayon||[[Glutton's Kitchen]]||30||4||8
| |
| |-
| |
| |[[Image:Thumb_manualhoner.jpg|30px]]||66||66||[[Manual Honer]]||[[Tortured Artist Series]]||Pencil Sharpener||[[Dream Den]]||130||10||20
| |
| |-
| |
| |[[Image:Implement_of_Toil.png|30px]]||67||67||[[Implement of Toil]]||[[Tortured Artist Series]]||Small Double-Ended Pencil||[[Dream Den]]||55||2||4
| |
| |-
| |
| |[[Image:Thumb_heavydutymagnetizer.jpg|30px]]||68||68||[[Heavy-duty Magnetizer]]||[[Tortured Artist Series]]||Horseshoe Magnet||[[Snagret Hole]]||150||10||15
| |
| |-
| |
| |[[Image:Thumb_harmonicsynthesizer.jpg|30px]]||69||69||[[Harmonic Synthesizer]]||[[Tortured Artist Series]]||Castanet||[[Glutton's Kitchen]]||120||10||20
| |
| |-
| |
| |[[Image:Thumb_emperorwhistle.jpg|30px]]||70||70||[[Emperor Whistle]]||[[Tortured Artist Series]]||Whistle||[[Snagret Hole]]||75||15||25
| |
| |-
| |
| |[[Image:Thumb_directorofdestiny.jpg|30px]]||71||71||[[Director of Destiny]]||[[Tortured Artist Series]]||Broken Compass||[[Glutton's Kitchen]]||100||20||30
| |
| |-
| |
| |[[Image:Thumb_sudgenerator.jpg|30px]]||72||72||[[Sud Generator]]||[[Modern Amenities Series]]||Bar of Mild Soap||[[Shower Room]]||60||20||35
| |
| |-
| |
| |[[Image:Thumb_flameoftomorrow.jpg|30px]]||73||73||[[Flame of Tomorrow]]||[[Modern Amenities Series]]||Box of Matches||[[Citadel of Spiders]]||10||10||25
| |
| |-
| |
| |[[Image:-74Impediment_Scourge.png|30px]]||74||74||[[Impediment Scourge]]||[[Modern Amenities Series]]||Bottle Opener||[[Perplexing Pool]]||50||10||15
| |
| |-
| |
| |[[Image:Thumb_dimensionalslicer.jpg|30px]]||75||---||[[Dimensional Slicer]]||[[Modern Amenities Series]]||Can Opener||[[Hole of Heroes]]||100||8||15
| |
| |-
| |
| |[[Image:Thumb_timecapsule.jpg|30px]]||76||75||[[Time Capsule]]||[[Modern Amenities Series]]||Locket with a Corgi Dog Picture||[[Citadel of Spiders]]||70||7||15
| |
| |-
| |
| |[[Image:Thumb_lipservice.jpg|30px]]||77||76||[[Lip Service]]||[[Modern Amenities Series]]||Lipstick||[[Citadel of Spiders]]||50||4||8
| |
| |-
| |
| |[[Image:Thumb_mirroredstage.jpg|30px]]||78||77||[[Mirrored Stage]]||[[Modern Amenities Series]]||Compact||[[Shower Room]]||140||15||25
| |
| |-
| |
| |[[Image:Thumb_behemothjaw.jpg|30px]]||79||78||[[Behemoth Jaw]]||[[Modern Amenities Series]]||Maxillary (upper jaw) Denture||[[Shower Room]]||100||20||25
| |
| |-
| |
| |[[Image:Joy_Receptacle.png|30px]]||80||79||[[Joy Receptacle]]||[[Frigid Series]]||Christmas Present||[[Frontier Cavern]]||60||15||25
| |
| |-
| |
| |[[Image:Fleeting_Art_Form.png|30px]]||81||80||[[Fleeting Art Form]]||[[Frigid Series]]||Small Candle||[[Frontier Cavern]]||75||2||4
| |
| |-
| |
| |[[Image:Danger_Chime.png|30px]]||82||81||[[Danger Chime]]||[[Frigid Series]]||Golden Bell||[[Frontier Cavern]]||120||10||20
| |
| |-
| |
| |[[Image:Spouse_Alert.png|30px]]||83||82||[[Spouse Alert]]||[[Frigid Series]]||Sleigh Bell||[[Frontier Cavern]]||120||10||20
| |
| |-
| |
| |[[Image:Innocence_Lost.png|30px]]||84||83||[[Innocence Lost]]||[[Frigid Series]]||Christmas Tree Star||[[Frontier Cavern]]||100||15||25
| |
| |-
| |
| |[[Image:Essential_Furnishing.png|30px]]||85||84||[[Essential Furnishing]]||[[Frigid Series]]||Crystal Ball||[[Frontier Cavern]]||100||5||10
| |
| |-
| |
| |[[Image:Icon_of_Progress.png|30px]]||86||85||[[Icon of Progress]]||[[Frigid Series]]||Christmas Stocking||[[Frontier Cavern]]||85||15||25
| |
| |-
| |
| |[[Image:Thumb_temporalmechanism.jpg|30px]]||87||86||[[Temporal Mechanism]]||[[Hyper-technology Series]]||Pocket Watch||[[Valley of Repose]]||110||30||40
| |
| |-
| |
| |[[Image:87.jpg|30px]]||88||87||[[Mystical Disc]]||[[Hyper-technology Series]]||Clock Face||[[Subterranean Complex]]||75||6||15
| |
| |-
| |
| |[[Image:-88Vacuum_Processor.png|30px]]||89||88||[[Vacuum Processor]]||[[Hyper-technology Series]]||FEE Processor||[[Subterranean Complex]]||100||10||18
| |
| |-
| |
| |[[Image:-89Indomitable_CPU.png|30px]]||90||89||[[Indomitable CPU]]||[[Hyper-technology Series]]||Preceding Person System Processor||[[Subterranean Complex]]||100||10||18
| |
| |-
| |
| |[[Image:-90Network_Mainbrain.png|30px]]||91||90||[[Network Mainbrain]]||[[Hyper-technology Series]]||NCL Processor||[[Subterranean Complex]]||100||10||18
| |
| |-
| |
| |[[Image:-91Spacewave_Receiver.png|30px]]||92||91||[[Space Wave Receiver]]||[[Hyper-technology Series]]||TV Dial||[[Subterranean Complex]]||80||10||20
| |
| |-
| |
| |[[Image:Thumb_sulkingantenna.jpg|30px]]||93||92||[[Sulking Antenna]]||[[Hyper-technology Series]]||TV Antenna||[[Glutton's Kitchen]]||150||35||45
| |
| |-
| |
| |[[Image:-93Nouveau_Table.png|30px]]||94||93||[[Nouveau Table]]||[[Hyper-technology Series]]||Phone Dial||[[Subterranean Complex]]||100||25||35
| |
| |-
| |
| |[[Image:-94Omega_Flywheel.png|30px]]||95||94||[[Omega Flywheel]]||[[Industrial Set]]||Rusty Gear||[[Subterranean Complex]]||60||20||30
| |
| |-
| |
| |[[Image:-95Spirit_Flogger.png|30px]]||96||95||[[Spirit Flogger]]||[[Industrial Set]]||Hollow Rusty Gear||[[Subterranean Complex]]||70||20||30
| |
| |-
| |
| |[[Image:-96Superstrong_Stabilizer.png|30px]]||97||96||[[Superstrong Stabilizer]]||[[Industrial Set]]||Shiny Bolt||[[Subterranean Complex]]||60||10||15
| |
| |-
| |
| |[[Image:-97Repair_Juggernaut.png|30px]]||98||97||[[Repair Juggernaut]]||[[Industrial Set]]||Rusty Bolt||[[Subterranean Complex]]||85||20||30
| |
| |-
| |
| |[[Image:-98Adamantine_Girdle.png|30px]]||99||98||[[Adamantine Girdle]]||[[Industrial Set]]||Lugnut||[[Subterranean Complex]]||70||12||20
| |
| |-
| |
| |[[Image:Thumb_massagegirdle.jpg|30px]]||100||99||[[Massage Girdle]]||[[Industrial Set]]||Flat Lugnut||[[Perplexing Pool]]||100||20||30
| |
| |-
| |
| |[[Image:Thumb_supersticktextile.jpg|30px]]||101||100||[[Superstick Textile]]||[[Industrial Set]]||Roll of Tape||[[White Flower Garden]]||80||30||50
| |
| |-
| |
| |[[Image:Thumb_exhaustedsuperstick.jpg|30px]]||102||101||[[Exhausted Superstick]]||[[Industrial Set]]||Thin Roll of Tape||[[Subterranean Complex]]||50||12||20
| |
| |-
| |
| |[[Image:-102FuriousAdhesive.png|30px]]||103||102||[[Furious Adhesive]]||[[Industrial Set]]||Roll of Red Tape||[[Subterranean Complex]]||60||10||15
| |
| |-
| |
| |[[Image:Thumb_petrifiedheart.jpg|30px]]||104||103||[[Petrified Heart]]||[[Husband's Tears Series]]||Heart-Shaped Diamond||[[White Flower Garden]]||100||5||10
| |
| |-
| |
| |[[Image:Thumb_externalemeraldeye.jpg|30px]]||105||104||[[Eternal Emerald Eye]]||[[Husband's Tears Series]]||Broach with Green Diamond||[[Bulblax Kingdom]]||150||20||30
| |
| |-
| |
| |[[Image:Thumb_regaldiamond.jpg|30px]]||106||105||[[Regal Diamond]]||[[Husband's Tears Series]]||Diamond||[[Citadel of Spiders]]||100||5||10
| |
| |-
| |
| |[[Image:Thumb_tearstone.jpg|30px]]||107||106||[[Tear Stone]]||[[Husband's Tears Series]]||Tear-Shaped Diamond||[[Bulblax Kingdom]]||150||5||10
| |
| |-
| |
| |[[Image:-107Princess_Pearl.png|30px]]||108||107||[[Princess Pearl]]||[[Husband's Tears Series]]||Pearl Earring||[[Cavern of Chaos]]||100||5||10
| |
| |-
| |
| |[[Image:Thumb_crystalclover.jpg|30px]]||109||108||[[Crystal Clover]]||[[Husband's Tears Series]]||Clover-Shaped Broach||[[Bulblax Kingdom]]||150||20||30
| |
| |-
| |
| |[[Image:Thumb_unspeakablewonder.jpg|30px]]||110||109||[[Unspeakable Wonder]]||[[Space Love Series]]||Gem-Encrusted Crown||[[Valley of Repose]]||120||30||40
| |
| |-
| |
| |[[Image:-110Essence_of_Rage.png|30px]]||111||110||[[Essence of Rage]]||[[Space Love Series]]||Ruby Mounted on Silver Circle||[[Frontier Cavern]]||70||8||16
| |
| |-
| |
| |[[Image:-111Essence_of_DespairB.png|30px]]||112||111||[[Essence of Despair]]||[[Space Love Series]]||Emerald Mounted on Silver Circle||[[Cavern of Chaos]]||80||6||12
| |
| |-
| |
| |[[Image:Thumb_essenceoftruelove.jpg|30px]]||113||112||[[Essence of True Love]]||[[Space Love Series]]||Sapphire Mounted on Gold Square||[[Hole of Heroes]]||60||5||10
| |
| |-
| |
| |[[Image:113.jpg|30px]]||114||113||[[Essence of Desire]]||[[Space Love Series]]||Amethyst Mounted on Gold Square||[[Dream Den]]||90||8||16
| |
| |-
| |
| |[[Image:Thumb_pinkmenace.jpg|30px]]||115||114||[[Pink Menace]]||[[Space Love Series]]||Pink Heart Mounted on Gold Ring||[[Valley of Repose]]||100||5||10
| |
| |-
| |
| |[[Image:Thumb_joylessjewel.jpg|30px]]||116||115||[[Joyless Jewel]]||[[Space Love Series]]||Green Heart Mounted on Silver Ring||[[Hole of Heroes]]||100||5||10
| |
| |-
| |
| |[[Image:Frostybauble.jpg|30px]]||117||116||[[Frosty Bauble]]||[[Space Love Series]]||Blue Square Mounted on Gold Ring||[[Cavern of Chaos]]||100||5||10
| |
| |-
| |
| |[[Image:Thumb_gemstarwife.jpg|30px]]||118||117||[[Gemstar Wife]]||[[Space Love Series]]||Pink Star Mounted on Silver Ring||[[Cavern of Chaos]]||100||5||10
| |
| |-
| |
| |[[Image:-118Gemstar_Husband.png|30px]]||119||118||[[Gemstar Husband]]||[[Space Love Series]]||Green Star Mounted on Gold Ring||[[Frontier Cavern]]||100||5||10
| |
| |-
| |
| |[[File:Universal Com.jpg|30px]]||120||119||[[Universal Com]]||[[Space Love Series]]||Blue Square Mounted on Silver Ring||[[Dream Den]]||100||5||10
| |
| |-
| |
| |[[Image:-120Omniscient_Sphere.png|30px]]||121||120||[[Omniscient Sphere]]||[[Crystallized Emotion Series]]||Small Orange Marble||[[Frontier Cavern]]||85||1||8
| |
| |-
| |
| |[[Image:Thumb_crystalizedtelepathy.jpg|30px]]||122||121||[[Crystallized Telepathy]]||[[Crystallized Emotion Series]]||Large Red Marble||[[Snagret Hole]]||120||10 (1 in [[2-Player mode]])||20
| |
| |-
| |
| |[[Image:Thumb_lovesphere.jpg|30px]]||123||122||[[Love Sphere]]||[[Crystallized Emotion Series]]||Small Yellow Marble||[[Hole of Heroes]]||85||1||8
| |
| |-
| |
| |[[Image:Thumb_crystalizedtelekinesis.jpg|30px]]||124||123||[[Crystallized Telekinesis]]||[[Crystallized Emotion Series]]||Large Yellow Marble||[[Snagret Hole]]||120||10 (1 in [[2-Player mode]])||20
| |
| |-
| |
| |[[Image:Thumb_mirthsphere.jpg|30px]]||125||124||[[Mirth Sphere]]||[[Crystallized Emotion Series]]||Small Blue Marble||[[Cavern of Chaos]]||85||1||8
| |
| |-
| |
| |[[Image:Thumb_crystallizedclarvoyance.jpg|30px]]||126||125||[[Crystallized Clairvoyance]]||[[Crystallized Emotion Series]]||Large Blue Marble||[[Snagret Hole]]||120||10 (1 in [[2-Player mode]])||20
| |
| |-
| |
| |[[Image:-126Maternal_Sculpture.png|30px]]||127||126||[[Maternal Sculpture]]||[[Dream Series]]||Baby Bottle Top||[[Cavern of Chaos]]||55||15||25
| |
| |-
| |
| |[[Image:-127Extreme_Perspirator.png|30px]]||128||127||[[Extreme Perspirator]]||[[Dream Series]]||Wobbling Doll||[[Dream Den]]||150||15||25
| |
| |-
| |
| |[[Image:Thumb_rubberugly.jpg|30px]]||129||128||[[Rubber Ugly]]||[[Dream Series]]||Rubber Duck||[[Shower Room]]||90||8||15
| |
| |-
| |
| |[[Image:Thumb_paradoxicalenigma.jpg|30px]]||130||129||[[Paradoxical Enigma]]||[[Dream Series]]||Rubber Duck Head||[[Citadel of Spiders]]||80||4||8
| |
| |-
| |
| |[[Image:Thumb_silencer.jpg|30px]]||131||130||[[Silencer]]||[[Dream Series]]||Baby Doll Head||[[Cavern of Chaos]]||670 (666 in Japanese release)||20||25
| |
| |-
| |
| |[[Image:-131Wiggle_Noggin.png|30px]]||132||131||[[Wiggle Noggin]]||[[Dream Series]]||Cat Bobble-head||[[Cavern of Chaos]]||85||15||25
| |
| |-
| |
| |[[Image:-132Coiled_Launcher.png|30px]]||133||132||[[Coiled Launcher]]||[[Dream Series]]||Spring||[[Subterranean Complex]]||70||15||25
| |
| |-
| |
| |[[Image:Thumb boomcone.jpg|30px]]||134||---||[[Boom Cone]]||[[Dream Series]]||Firework cone||[[Glutton's Kitchen]]||100||10||15
| |
| |-
| |
| |[[Image:133Magical_Stage.png|30px]]||---||133||[[Magical Stage]]||[[Dream Series]]||Baby Toy||[[Glutton's Kitchen]]||150||30||
| |
| |-
| |
| |[[Image:-134Flame_Tiller.png|30px]]||135||134||[[Flame Tiller]]||[[Dream Series]]||Yo-Yo||[[Frontier Cavern]]||120||20||30
| |
| |-
| |
| |[[Image:Thumb_doomsdayapparatus.jpg|30px]]||136||135||[[Doomsday Apparatus]]||[[Dream Series]]||Weight||[[Wistful Wild]]||3000||1000||100
| |
| |-
| |
| |[[Image:Thumb_aquaticmine.jpg|30px]]||137||136||[[Aquatic Mine]]||[[Dream Series]]||Fishing Bobbin||[[Perplexing Pool]]||80||3||6
| |
| |-
| |
| |[[Image:Thumb_stupendouslens.jpg|30px]]||138||---||[[Stupendous Lens]]||[[Dream Series]]||Magnifying Glass||[[Snagret Hole]]||120||10||15
| |
| |-
| |
| |[[Image:Thumb_airbrake.jpg|30px]]||139||137||[[Air Brake]]||[[Dream Series]]||Badminton Birdie||[[Awakening Wood]]||100||15||25
| |
| |-
| |
| |[[Image:Thumb_worthlessstatue.jpg|30px]]||140||138||[[Worthless Statue]]||[[Dream Series]]||White King Chess Piece||[[Frontier Cavern]]||80||10||15
| |
| |-
| |
| |[[Image:Thumb_pricelessstatue.jpg|30px]]||141||139||[[Priceless Statue]]||[[Dream Series]]||Black Queen Chess Piece||[[Frontier Cavern]]||80||10||15
| |
| |-
| |
| |[[Image:Thumb_bossstone.jpg|30px]]||142||140||[[Boss Stone]]||[[Dream Series]]||Ah Fu Tile||[[Dream Den]]||110||8||15
| |
| |-
| |
| |[[Image:Thumb_luckwafer.jpg|30px]]||143||141||[[Luck Wafer]]||[[Dream Series]]||Ace of Spades Playing Card||[[Hole of Beasts]]||140||1||3
| |
| |-
| |
| |[[Image:Thumb_talisman_of_life.jpg|30px]]||144||142||[[Talisman of Life]]||[[Dream Series]]||Case of Playing Cards||[[Dream Den]]||90||15||25
| |
| |-
| |
| |[[Image:Thumb_strifemonolith.jpg|30px]]||145||143||[[Strife Monolith]]||[[Dream Series]]||Four-and-Three Domino||[[Hole of Beasts]]||150||12||20
| |
| |-
| |
| |[[Image:Thumb_chancetotem.jpg|30px]]||146||144||[[Chance Totem]]||[[Dream Series]]||Six-sided Die||[[Awakening Wood]]||100||15||25
| |
| |-
| |
| |[[Image:Thumb_dreamarchitect.jpg|30px]]||147||145||[[Dream Architect]]||[[Blast from the Past Series]]||Game and Watch||[[Hole of Beasts]]||280||20||30
| |
| |-
| |
| |[[Image:Thumb_stoneofglory.jpg|30px]]||148||146||[[Stone of Glory]]||[[Blast from the Past Series]]||Control Pad||[[Hole of Beasts]]||100||5||10
| |
| |-
| |
| |[[Image:Thumb_gleespinner.jpg|30px]]||149||147||[[Glee Spinner]]||[[Blast from the Past Series]]||Control Stick||[[Dream Den]]||140||6||12
| |
| |-
| |
| |[[Image:Thumb_cosmicarchive.jpg|30px]]||150||148||[[Cosmic Archive]]||[[Blast from the Past Series]]||Famicom Disk||[[Hole of Beasts]]||230||15||25
| |
| |-
| |
| |[[Image:Thumb_rememberedoldbuddy.jpg|30px]]||151||149||[[Remembered Old Buddy]]||[[Blast from the Past Series]]||ROB's head||[[Hole of Heroes]]||250||30||45
| |
| |-
| |
| |[[Image:Thumb_fondgyroblock.jpg|30px]]||152||150||[[Fond Gyro Block]]||[[Blast from the Past Series]]||Red ROB Block||[[Hole of Heroes]]||80||5||10
| |
| |-
| |
| |[[Image:Thumb_memorablegyroblock.jpg|30px]]||153||151||[[Memorable Gyro Block]]||[[Blast from the Past Series]]||Yellow ROB Block||[[Hole of Heroes]]||80||5||10
| |
| |-
| |
| |[[Image:Thumb_lostgyroblock.jpg|30px]]||154||152||[[Lost Gyro Block]]||[[Blast from the Past Series]]||Green ROB Block||[[Hole of Heroes]]||80||5||10
| |
| |-
| |
| |[[Image:Thumb_favoritegyroblock.jpg|30px]]||155||153||[[Favorite Gyro Block]]||[[Blast from the Past Series]]||Blue ROB Block||[[Hole of Heroes]]||80||5||10
| |
| |-
| |
| |[[Image:Thumb_treasuredgyroblock.jpg|30px]]||156||154||[[Treasured Gyro Block]]||[[Blast from the Past Series]]||White ROB Block||[[Hole of Heroes]]||80||5||10
| |
| |-
| |
| |[[Image:Thumb_protonaa.jpg|30px]]||157||155||[[Proton AA]]||[[Mystical Energy Series]]||AA Duracell Battery||[[Submerged Castle]]||90||6||12
| |
| |-
| |
| |[[Image:Thumb_durableenergycell.jpg|30px]]||158||156||[[Durable Energy Cell]]||[[Mystical Energy Series]]||C Duracell Battery||[[Shower Room]]||160||15||20
| |
| |-
| |
| |[[Image:Thumb_couragereactor.jpg|30px]]||159||157||[[Courage Reactor]]||[[Mystical Energy Series]]||D Duracell Battery||[[Valley of Repose]]||280||20||20
| |
| |-
| |
| |[[Image:Thumb_fuelreservoir.jpg|30px]]||160||158||[[Fuel Reservoir]]||[[Mystical Energy Series]]||9-Volt Duracell Battery||[[Cavern of Chaos]]||120||8||15
| |
| |-
| |
| |[[Image:159.png|30px]]||---||159||[[Container of Knowledge]]||[[Massive Receptacle Series]]||Sardines Container||[[Cavern of Chaos]]||130||20||
| |
| |-
| |
| |[[Image:160.png|30px]]||---||160||[[Container of Sea Bounty]]||[[Massive Receptacle Series]]||Herring Container||[[White Flower Garden]]||130||20||
| |
| |-
| |
| |[[Image:Thumb_dronesupplies.jpg|30px]]||161||---||[[Drone Supplies]]||[[Massive Receptacle Series]]||Deviled Ham Spread Container||[[Submerged Castle]]||130||15||25
| |
| |-
| |
| |[[File:172.png|30px]]||---||172||[[Drone Supplies]]||[[Massive Receptacle Series]]||Haribo Sweets||[[Glutton's Kitchen]]||130||15||25
| |
| |-
| |
| |[[Image:Thumb_patiencetester.jpg|30px]]||162||161||[[Patience Tester]]||[[Massive Receptacle Series]]||Water Chestnuts Container||[[Hole of Heroes]]||130||20||30
| |
| |-
| |
| |[[Image:162.png|30px]]||---||162||[[Perfect Container]]||[[Massive Receptacle Series]]||Sardine Container||[[Subterranean Complex]]||130||20||30
| |
| |-
| |
| |[[Image:162.png|30px]]||163||---||[[Endless Repository]]||[[Massive Receptacle Series]]||Sardine Container||[[Shower Room]]||130||20||30
| |
| |-
| |
| |[[Image:164.png|30px]]||---||164||[[Endless Repository]]||[[Massive Receptacle Series]]||Baby Clams Container||[[Shower Room]]||130||20||30
| |
| |-
| |
| |[[Image:FruitGuard.jpg|30px]]||164||---||[[Fruit Guard]]||[[Massive Receptacle Series]]||Juice Container||[[Cavern of Chaos]]||130||15||25
| |
| |-
| |
| |[[Image:165.png|30px]]||---||165||[[Open Architecture]]||[[Massive Receptacle Series]]||Open Can of Salmon||[[Citadel of Spiders]]||130||20||
| |
| |-
| |
| |[[Image:166Permanent_Container.png|30px]]||---||166||[[Permanent Container]]||[[Massive Receptacle Series]]||ICC Sealed Tin||[[Shower Room]]||130||20||
| |
| |-
| |
| |[[Image:167.png|30px]]||---||167||[[Empty space container]]||[[Massive Receptacle Series]]||Open Shellfish Can||[[Cavern of Chaos]]||130||20||
| |
| |-
| |
| |[[Image:Stringentcontainer.jpg|30px]]||166||163||[[Stringent Container]] (NTSC) / [[Survival Container]] (PAL)||[[Massive Receptacle Series]]||Baking powder container||[[Dream Den]] (NTSC) / [[Glutton's Kitchen]] (PAL)||130||10||15
| |
| |-
| |
| |[[Image:168.png|30px]]||---||168||[[Stringent Container]]||[[Massive Receptacle Series]]||Corned Beef Can||[[Hole of Heroes]]||130||10||
| |
| |-
| |
| |[[Image:169.png|30px]]||---||169||[[Open Archive]]||[[Massive Receptacle Series]]||Open Bean Tin||[[Submerged Castle]]||130||20||
| |
| |-
| |
| |[[Image:Thumb_nutrientsilo.jpg|30px]]||165||170||[[Nutrient Silo]]||[[Massive Receptacle Series]]||Peanut Butter Container||[[Hole of Heroes]] (NTSC) / [[White Flower Garden]] (PAL)||130||15||25
| |
| |-
| |
| |[[Image:171.png|30px]]||---||171||[[Plentiful Tank]]||[[Massive Receptacle Series]]||Honey Jar||[[Shower Room]]||50||8||
| |
| |-
| |
| |[[Image:Thumb_survivalointment.jpg|30px]]||167||---||[[Survival Ointment]]||[[Survival Series]]||Chapstick||[[White Flower Garden]]||90||6||12
| |
| |-
| |
| |[[Image:Cask.jpg|30px]]||168||---||[[Healing Cask]]||[[Survival Series]]||Carmex||[[Awakening Wood]]||60||6||10
| |
| |-
| |
| |[[Image:Thumb_abstractmasterpiece.jpg|30px]]||169||---||[[Abstract Masterpiece]]||[[Ancient Ad Series]]||Snapple Cap||[[Shower Room]]||30||6||12
| |
| |-
| |
| |[[File:Opticalillustration.jpg|30px]]||170||---||[[Optical Illustration]]||[[Ancient Ad Series]]||Ragu Cap||[[Perplexing Pool]]||140||15||20
| |
| |-
| |
| |[[Image:Thirst_Activator.jpg|30px]]||171||---||[[Thirst Activator]]||[[Ancient Ad Series]]||Tree Top Cap||[[Subterranean Complex]]||300||20||35
| |
| |-
| |
| |[[Image:Thumb_yellowtastetyrant.jpg|30px]]||172||173||[[Yellow Taste Tyrant]]||[[Ancient Ad Series]]||French's Cap||[[Dream Den]]||100||15||25
| |
| |-
| |
| |[[Image:Thumb_salivatrix.jpg|30px]]||173||174||[[Salivatrix]]||[[Ancient Ad Series]]||Dannon Cap||[[Snagret Hole]]||30||20||30
| |
| |-
| |
| |[[Image:Thumb_gherkingate.jpg|30px]]||174||175||[[Gherkin Gate]]||[[Ancient Ad Series]]||Vlasic Cap||[[Perplexing Pool]]||100||15||25
| |
| |-
| |
| |[[Image:Thumb_alienbillboard.jpg|30px]]||175||176||[[Alien Billboard]]||[[Ancient Ad Series]]||Kiwi Shoe Polish||[[White Flower Garden]]||80||15||25
| |
| |-
| |
| |[[Image:Thumb_activityarouser.jpg|30px]]||176||---||[[Activity Arouser]]||[[Ancient Ad Series]]||Wilson Tennis Balls Cap||[[Submerged Castle]]||100||15||25
| |
| |-
| |
| |[[Image:Thumb_hypnoticplatter.jpg|30px]]||177||---||[[Hypnotic Platter]]||[[Odd Logo Series]]||A&W Bottle Cap||[[Dream Den]]||100||4||8
| |
| |-
| |
| |[[Image:177.png|30px]]||---||177||[[Hypnotic Platter]]||[[Odd Logo Series]]||Vita-malz Cap||[[Awakening Wood]]||100||4||8
| |
| |-
| |
| |[[Image:Thumb_massivelid.jpg|30px]]||178||---||[[Massive Lid]]||[[Odd Logo Series]]||Yoo Hoo Cola Bottle Cap||[[Glutton's Kitchen]]||100||4||8
| |
| |-
| |
| |[[Image:Thumb_ponderingemblem.jpg|30px]]||179||---||[[Pondering Emblem]]||[[Odd Logo Series]]||Yoo Hoo Chocolate Milk Bottle Cap||[[Shower Room]]||100||4||8
| |
| |-
| |
| |[[Image:180.png|30px]]||---||180||[[Pondering Emblem]]||[[Odd Logo Series]]||tizer Cap||[[Submerged Castle]]||100||4||8
| |
| |-
| |
| |[[Image:Thumb_happinessemblem.jpg|30px]]||180||---||[[Happiness Emblem]]||[[Odd Logo Series]]||Squirt Bottle Cap||[[Glutton's Kitchen]]||100||4||8
| |
| |-
| |
| |[[Image:178.png|30px]]||---||178||[[Happiness Emblem]]||[[Odd Logo Series]]||Fristi Cap||[[Shower Room]]||100||4||8
| |
| |-
| |
| |[[File:179.png|30px]]||---||179||[[Abstract Masterpiece]]||[[Odd Logo Series]]||PscHitt! Cap||[[Perplexing Pool]]||30||6||12
| |
| |-
| |
| |[[Image:181.png|30px]]||---||181||[[Activity Arouser]]||[[Odd Logo Series]]||Sinalco Cap||[[Submerged Castle]]||100||15||25
| |
| |-
| |
| |[[Image:Thumb_quenchingemblem.jpg|30px]]||181||182||[[Quenching Emblem]]||[[Odd Logo Series]]||7-Up Bottle Cap||[[Emergence Cave]]||100||4||8
| |
| |-
| |
| |[[Image:Thumb_droughtender.jpg|30px]]||182||183||[[Drought Ender]]||[[Odd Logo Series]]||Dr. Pepper Bottle Cap||[[White Flower Garden]]||100||4||8
| |
| |-
| |
| |[[Image:Thumb_creativeinspiration.jpg|30px]]||183||---||[[Creative Inspiration]]||[[Odd Logo Series]]||Royal Crown Cola Bottle Cap||[[Citadel of Spiders]]||100||4||8
| |
| |-
| |
| |[[Image:Spherical Atlas.jpg|30px]]||184||184||[[Spherical Atlas]]||[[Explorer's Friend Series]]||Top Half of a Globe||[[Emergence Cave]]||200||101||100
| |
| |-
| |
| |[[Image:Geographic Projection.jpg|30px]]||185||185||[[Geographic Projection]]||[[Explorer's Friend Series]]||Bottom Half of a Globe||[[Awakening Wood]]||200||101||100
| |
| |-
| |
| |[[Image:Prototype Detector.jpg|30px]]||186||186||[[Prototype Detector]]||[[Explorer's Friend Series]]||Love Tester||[[Hole of Beasts]]||200||35||45
| |
| |-
| |
| |[[Image:Five-man Napsack.jpg|30px]]||187||187||[[Five-man Napsack]]||[[Explorer's Friend Series]]||Glove||[[White Flower Garden]]||100||15||25
| |
| |-
| |
| |[[Image:Brute Knuckles.jpg|30px]]||188||188||[[Brute Knuckles]]||[[Explorer's Friend Series]]||Fist Statue||[[Frontier Cavern]]||100||15||25
| |
| |-
| |
| |[[Image:Repugnant Appendage.jpg|30px]]||189||189||[[Repugnant Appendage]]||[[Explorer's Friend Series]]||big Pink Shoe||[[Frontier Cavern]]||100||20||30
| |
| |-
| |
| |[[Image:Stellar Orb.jpg|30px]]||190||190||[[Stellar Orb]]||[[Explorer's Friend Series]]||Light Bulb||[[Subterranean Complex]]||100||5||10
| |
| |-
| |
| |[[Image:Forged Courage.jpg|30px]]||191||191||[[Forged Courage]]||[[Explorer's Friend Series]]||Red Robot Toy||[[Bulblax Kingdom]]||100||20||30
| |
| |-
| |
| |[[Image:Dream Material.jpg|30px]]||192||192||[[Dream Material]]||[[Explorer's Friend Series]]||Eraser||[[Glutton's Kitchen]]||100||10||20
| |
| |-
| |
| |[[Image:Justice Alloy.jpg|30px]]||193||193||[[Justice Alloy]]||[[Explorer's Friend Series]]||Blue Robot Toy||[[Snagret Hole]]||100||20||30
| |
| |-
| |
| |[[Image:Amplified Amplifier.jpg|30px]]||194||194||[[Amplified Amplifier]]||[[Explorer's Friend Series]]||Stereo Speaker||[[Shower Room]]||100||20||30
| |
| |-
| |
| |[[Image:Professional Noisemaker.jpg|30px]]||195||195||[[Professional Noisemaker]]||[[Explorer's Friend Series]]||Megaphone||[[Submerged Castle]]||100||15||25
| |
| |-
| |
| |[[Image:The Key.jpg|30px]]||196||196||[[The Key]]||[[Explorer's Friend Series]]||Gold Key (unlocks [[Challenge Mode]])||[[Citadel of Spiders]]||100||1||3
| |
| |-
| |
| |[[Image:Shock Therapist.jpg|30px]]||197||197||[[Shock Therapist]]||[[Titan Dweevil Series]]||Electric Generator||[[Dream Den]]||1000||30||40
| |
| |-
| |
| |[[Image:Flare Cannon.jpg|30px]]||198||198||[[Flare Cannon]]||[[Titan Dweevil Series]]||Camping stove||[[Dream Den]]||1000||30||40
| |
| |-
| |
| |[[Image:Comedy bomb.jpg|30px]]||199||199||[[Comedy Bomb]]||[[Titan Dweevil Series]]||Poison Gas Container||[[Dream Den]]||1000||30||40
| |
| |-
| |
| |[[Image:Monster Pump.jpg|30px]]||200||200||[[Monster Pump]]||[[Titan Dweevil Series]]||Faucet with Pressure Gauge||[[Dream Den]]||1000||30||40
| |
| |-
| |
| |[[Image:Kingofbugs.jpg|30px]]||201||201||[[King of Bugs]]||[[Titan Dweevil Series]]||[[Louie]]||[[Dream Den]]||10||1||5
| |
| |}
| |
|
| |
|
| [[Category:Treasures| ]] | | [[Category:Treasures| ]] |