Dream Den: Difference between revisions
Greenpickle (talk | contribs) m (76 revisions) |
(Added Cavegen links.) |
||
| (240 intermediate revisions by 99 users not shown) | |||
| Line 1: | Line 1: | ||
{{ | {{game icons|p2=y}} | ||
{{ | {{infobox cave | ||
|image = Dream_Den_11.jpg | |||
|location = Wistful Wild | |||
|sublevels = 14 | |||
|treasures = 21 | |||
|hazards = {{fire}} {{water}} {{electricity}} {{poison}} {{explosion}} | |||
}} | }} | ||
The '''Dream Den''' is a [[cave]] in [[Pikmin 2]], found in the [[Wistful Wild]]. Because it contains what may be regarded as the game's final [[ | {{guide}} | ||
In this cave, | The '''Dream Den''' ({{j|夢の穴|Yume no Ana|Hole of Dreams}}) is a [[cave]] in ''[[Pikmin 2]]'', found in the [[Wistful Wild]]. Because of its location, difficulty, and the fact that it contains what may be regarded as the game's final [[boss]], the [[Titan Dweevil]], it is often the last cave completed. The cave is the game's second longest, with 14 sublevels, and contains a variety of enemies in large quantities. The cave design is also relatively varied, with many previously encountered themes showing up here. In order, a garden sublevel is found at the top, followed by a toybox sublevel, with metal, concrete, soil, and finally tile sublevels appearing in groups of 3. In this cave, there is a total of {{pokos|5965}} for all treasures in the US [[Region|version]], and {{pokos|5945}} in the European version. There are no [[Bulbmin]] or [[Candypop Bud]]s in this cave, so extra care should be taken. | ||
{{spoiler | {{spoiler section| | ||
The final floor of the Dream Den is the location of [[Louie]]. He is found atop the game's final boss, the [[Titan Dweevil]], and is afterwards collected as a treasure and added to the [[Treasure Hoard]]. He does not replace the [[President]] after having been rescued, however. | The final floor of the Dream Den is the location of [[Louie]]. He is found atop the game's final boss, the [[Titan Dweevil]], and is afterwards collected as a treasure and added to the [[Treasure Hoard]]. He does not replace the [[President]] after having been rescued, however. | ||
{{ | |the end of the plot in ''Pikmin 2'' | ||
}} | |||
==How to reach== | |||
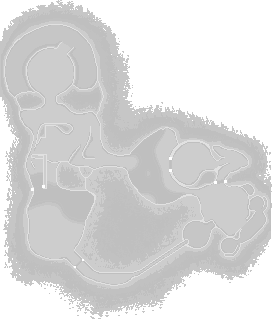
{{location map | width = 272 | height = 319 | image = WW texture.png | bg = #111 | caption = Location of the cave. | icons = | |||
{{map icon | cave | 238 | 160}} | |||
}} | |||
There are two methods to reach this cave: | |||
#One can bring Pikmin through the [[Hole of Heroes]] area, requiring [[Blue Pikmin]] to destroy a [[clog]] and [[Yellow Pikmin]] to destroy an electric gate, though the player will then be forced to fight the [[Creeping Chrysanthemum]]s and [[Puffy Blowhog]]s directly below. | |||
#They may alternatively go left and build a [[bridge]] by bringing [[Blue Pikmin]] across a lake. | |||
Either way, the player must then destroy one of two [[Gate#Bramble gate|black poison gates]]. | |||
All Pikmin types should be brought along. If the player intends to fight the [[Titan Dweevil]] on the first run, bringing more [[Yellow Pikmin]] is recommended. Like the [[Hole of Heroes]], water is present in this cave, so sufficient [[Blue Pikmin]] are required as well. | |||
{{clear}} | |||
{{notes|ship=y}} | |||
==Sublevel 1== | |||
* '''Theme''': Garden | |||
* '''Music''': ''[[Music in Pikmin 2#Grass|Grass]]'' | |||
* '''Treasures''': | |||
** {{icon|Disguised Delicacy|y|v=TH}} | |||
* '''Enemies''': | |||
** {{icon|Dwarf Orange Bulborb|y}} × 23 | |||
** {{icon|Hermit Crawmad|y}} × 2 | |||
** {{icon|Lesser Spotted Jellyfloat|y}} × 2 | |||
* '''Obstacles''': | |||
** {{icon|Poison emitter|v=P2|y}} × 3 | |||
* '''Vegetation''': | |||
** {{icon|Figwort|y}} (large red) × 5 | |||
** {{icon|Figwort|y}} (small brown) × 5 | |||
* '''Others''': | |||
** None | |||
The first level of the Dream Den harbors [[Dwarf Orange Bulborb]]s, two [[Hermit Crawmad]]s and two [[Lesser Spotted Jellyfloat]]s. There are also poisonous gas pipes. | |||
The enemies near the starting area, especially Dwarf Orange Bulborbs that are blocking paths, should be removed. Defeat the Lesser Spotted Jellyfloats (which may be near the starting area as well) the usual way. They will digest one Pikmin every thirty seconds. Once the area is clear of any obstructive enemies and gas pipes, the [[Disguised Delicacy]] can be taken back. Use Pikmin to destroy the [[clog]] on the hole, allowing you to continue down to the next sublevel. | |||
{{cavegen|dd1}} | |||
{{sublevel technical | |||
|cave = last_3 | |||
|enemymax = 30 | |||
|itemmax = 1 | |||
|gatemax = 0 | |||
|capmax = 100 | |||
|rooms = 2 | |||
|ctrratio = 0 | |||
|geyser = No | |||
|unitfile = 1_ABE_vshit67_toy.txt | |||
|lightfile = hiroba_toy_light_cha.ini | |||
|bg = hiroba | |||
|clog = Yes | |||
|hiddenfloor = 1 | |||
|units = | |||
{{sublevel units | |||
|item_cap_toy|Dead end with item | |||
|way3_toy|Three-way crossing | |||
|way4_toy|Four-way crossing | |||
|wayl_toy|Turning corridor | |||
|way2_toy|Corridor | |||
|way2x2_toy|Long corridor | |||
}} | |||
{{sublevel units | |||
|room_vs_hitode6x7_4_toy|'''Room with 4 exits''' | |||
}} | |||
}} | |||
{| class="wikitable mw-collapsible mw-collapsed technicaltable" | |||
! colspan="5" style="width: 288px;" | {{tt|Detailed object list|This is a representation of the data in the cave's file, and how the game makes use of it.}} | |||
|- | |||
! colspan="5" | The game spawns these "main" objects: | |||
|- | |||
! ID !! Object !! Amount !! Fall method !! Spawn location | |||
|- | |||
| 1 | |||
| {{icon|Lesser Spotted Jellyfloat|y}} | |||
| 2 | |||
| None | |||
| "Hard" enemy spots | |||
|- | |||
| 2 | |||
| {{icon|Hermit Crawmad|y}} | |||
| 2 | |||
| None | |||
| "Hard" enemy spots | |||
|- | |||
| 3 | |||
| {{icon|Poison emitter|v=P2|y}} | |||
| 3 | |||
| None | |||
| Cave unit seams | |||
|- | |||
! colspan="5" | Alongside it spawns 23 "main" objects. Chances: | |||
|- | |||
! ID !! Object !! Chance !! Fall method !! Spawn location | |||
|- | |||
| 4 | |||
| {{icon|Dwarf Orange Bulborb|y}} | |||
| 100% | |||
| None | |||
| "Easy" enemy spots | |||
|- | |||
! colspan="5" | Then it spawns these "decoration" objects: | |||
|- | |||
! ID !! Object !! Amount !! Fall method !! Spawn location | |||
|- | |||
| 5 | |||
| {{icon|Figwort|y}} (small brown) | |||
| 5 | |||
| None | |||
| Plant spots | |||
|- | |||
| 6 | |||
| {{icon|Figwort|y}} (large red) | |||
| 5 | |||
| None | |||
| Plant spots | |||
|- | |||
! colspan="5" | Then it spawns these "treasure" objects: | |||
|- | |||
! ID !! Object !! Amount !! Fall method !! Spawn location | |||
|- | |||
| 7 | |||
| {{icon|Disguised Delicacy|y|v=TH}} | |||
| 1 | |||
| None | |||
| Treasure spots | |||
|} | |||
:''For details on how objects are spawned, and how some may fail to spawn, see [[Pikmin 2 cave generation|here]].'' | |||
==Sublevel 2== | |||
[[File:Dream Den sublevel 2.jpg|thumb|Sublevel 2.]] | |||
* '''Theme''': Toybox | |||
* '''Music''': ''[[Music in Pikmin 2#Toy|Toy]]'' | |||
* '''Treasures''': | |||
** {{icon|Implement of Toil|y}} | |||
** {{icon|Manual Honer|y}} (inside Gatling Groink) | |||
* '''Enemies''': | |||
** {{icon|Gatling Groink|y}} (pedestal) × 1 | |||
** {{icon|Hairy Bulborb|y}} × 1 | |||
** {{icon|Snow Bulborb|y}} × 8 | |||
* '''Obstacles''': | |||
** None | |||
* '''Vegetation''': | |||
** None | |||
* '''Others''': | |||
** None | |||
There is a [[Gatling Groink]] on a raised platform that will start to attack the player as soon as the sublevel begins. Hide the Pikmin behind the wall of blocks, send one of the leaders out to distract the Groink, and attack with your Pikmin. Alternately, beat up the [[Snow Bulborb]]s and [[Hairy Bulborb]] with the fists of a leader or let the Gatling Groink kill them with its projectiles. | |||
To defeat the Groink, position a leader against the base of the platform it is standing on. With the other leader, take a group of [[Yellow Pikmin]], and while the Gatling Groink is distracted, walk up the slope and attack it from behind. The [[Manual Honer]], which was held by the Gatling Groink, and the [[Implement of Toil]], which is usually located somewhere close to the wall of blocks, are found on this level. | |||
{{cavegen|dd2}} | |||
{{sublevel technical | |||
|cave = last_3 | |||
|enemymax = 10 | |||
|itemmax = 1 | |||
|gatemax = 0 | |||
|capmax = 0 | |||
|rooms = 1 | |||
|ctrratio = 0 | |||
|geyser = No | |||
|unitfile = 1_units_tower_toy.txt | |||
|lightfile = toy_light_cha.ini | |||
|bg = flooring | |||
|clog = No | |||
|hiddenfloor = 1 | |||
|units = | |||
{{sublevel units | |||
|cap_toy|Dead end | |||
|way3_toy|Three-way crossing | |||
|way4_toy|Four-way crossing | |||
|wayl_toy|Turning corridor | |||
|way2_toy|Corridor | |||
|way2x2_toy|Long corridor | |||
}} | |||
{{sublevel units | |||
|room_mid_tower_8_toy|'''Room with tower''' | |||
}} | |||
}} | |||
{| class="wikitable mw-collapsible mw-collapsed technicaltable" | |||
! colspan="5" style="width: 288px;" | {{tt|Detailed object list|This is a representation of the data in the cave's file, and how the game makes use of it.}} | |||
|- | |||
! colspan="5" | The game spawns these "main" objects: | |||
|- | |||
! ID !! Object !! Amount !! Fall method !! Spawn location | |||
|- | |||
| 1 | |||
| {{icon|Gatling Groink|y}} (pedestal) | |||
| 1 | |||
| None | |||
| "Special" enemy spots | |||
|- | |||
| - | |||
| {{icon|Manual Honer|y}} | |||
| colspan="3" | Carried inside entry with ID 1 | |||
|- | |||
| 2 | |||
| {{icon|Hairy Bulborb|y}} | |||
| 1 | |||
| None | |||
| "Hard" enemy spots | |||
|- | |||
! colspan="5" | Alongside it spawns 8 "main" objects. Chances: | |||
|- | |||
! ID !! Object !! Chance !! Fall method !! Spawn location | |||
|- | |||
| 3 | |||
| {{icon|Snow Bulborb|y}} | |||
| 100% | |||
| None | |||
| "Easy" enemy spots | |||
|- | |||
! colspan="5" | Then it spawns these "treasure" objects: | |||
|- | |||
! ID !! Object !! Amount !! Fall method !! Spawn location | |||
|- | |||
| 4 | |||
| {{icon|Implement of Toil|y}} | |||
| 1 | |||
| None | |||
| Treasure spots | |||
|} | |||
:''For details on how objects are spawned, and how some may fail to spawn, see [[Pikmin 2 cave generation|here]].'' | |||
==Sublevel 3== | |||
* '''Theme''': Metal | |||
* '''Music''': ''[[Music in Pikmin 2#Metal 2|Metal 2]]'' | |||
* '''Treasures''': | |||
** {{icon|Glee Spinner|y}} (inside Spotty Bulbear) | |||
* '''Enemies''': | |||
** {{icon|Careening Dirigibug|y}} × 2 | |||
** {{icon|Dwarf Bulbear|y}} × 9 | |||
** {{icon|Spotty Bulbear|y}} × 1 | |||
* '''Obstacles''': | |||
** {{icon|Bomb-rock|y}} × 11 | |||
** {{icon|Electrical wire|y}} × 4 | |||
** {{icon|Poison emitter|v=P2|y}} × 3 | |||
* '''Vegetation''': | |||
** {{icon|Glowstem|y}} (green) × 6 | |||
** {{icon|Glowstem|y}} (red) × 6 | |||
* '''Others''': | |||
** None | |||
This sublevel is filled with falling bomb-rocks, electrical wires, poison emitters, and [[Dwarf Bulbear]]s. There are also some [[Careening Dirigibug]]s that [[throw]] bomb-rocks. Somewhere in the level, a [[Spotty Bulbear]] will fall from the sky. This creature contains a treasure. | |||
Pikmin or the leaders can be used to kill it; the player can also trick the Bulbear into falling off into the [[Pit|abyss]] (as the Bulbear will always take the most direct path towards the leaders), by making the Bulbear walk towards the leaders with a gap in between; subsequently, it will fall into the pit. Its treasure, the [[Glee Spinner]], will drop right where the Spotty Bulbear was before it fell into the abyss. | |||
Note that the bomb-rocks and Spotty Bulbear will only fall when Pikmin are near. In order to know beforehand where the Spotty Bulbear is, it is possible to follow the Dwarf Bulbears, since they will go to and idle next to the adult's spawning location. | |||
{{cavegen|dd3}} | |||
{{sublevel technical | |||
|cave = last_3 | |||
|enemymax = 30 | |||
|itemmax = 0 | |||
|gatemax = 0 | |||
|capmax = 30 | |||
|rooms = 4 | |||
|ctrratio = 0.2 | |||
|geyser = No | |||
|unitfile = 3_ABE_mid2_hit3_hit5_metal.txt | |||
|lightfile = metal_light_lv2.ini | |||
|bg = test | |||
|clog = No | |||
|hiddenfloor = 0 | |||
|units = | |||
{{sublevel units | |||
|item_cap_metal|Dead end with item | |||
|way3_metal|Three-way crossing | |||
|way4_metal|Four-way crossing | |||
|wayl_metal|Turning corridor | |||
|way2_metal|Corridor | |||
|way2x2_metal|Long corridor | |||
}} | |||
{{sublevel units | |||
|room_mid2_3_metal|'''T-shaped room''' | |||
|room_hitode3x3_5_metal|'''Room with blue ledge''' | |||
|room_hitode4x4_3_metal|'''Circular room with blue ledge''' | |||
}} | |||
}} | |||
{| class="wikitable mw-collapsible mw-collapsed technicaltable" | |||
! colspan="5" style="width: 288px;" | {{tt|Detailed object list|This is a representation of the data in the cave's file, and how the game makes use of it.}} | |||
|- | |||
! colspan="5" | The game spawns these "main" objects: | |||
|- | |||
! ID !! Object !! Amount !! Fall method !! Spawn location | |||
|- | |||
| 1 | |||
| {{icon|Spotty Bulbear|y}} | |||
| 1 | |||
| Falls when Pikmin are nearby | |||
| "Hard" enemy spots | |||
|- | |||
| - | |||
| {{icon|Glee Spinner|y}} | |||
| colspan="3" | Carried inside entry with ID 1 | |||
|- | |||
| 2 | |||
| {{icon|Dwarf Bulbear|y}} | |||
| 9 | |||
| None | |||
| "Easy" enemy spots | |||
|- | |||
| 3 | |||
| {{icon|Electrical wire|y}} | |||
| 4 | |||
| None | |||
| Cave unit seams | |||
|- | |||
| 4 | |||
| {{icon|Poison emitter|v=P2|y}} | |||
| 3 | |||
| None | |||
| "Hard" enemy spots | |||
|- | |||
| 5 | |||
| {{icon|Careening Dirigibug|y}} | |||
| 2 | |||
| None | |||
| "Hard" enemy spots | |||
|- | |||
! colspan="5" | Alongside it spawns 11 "main" objects. Chances: | |||
|- | |||
! ID !! Object !! Chance !! Fall method !! Spawn location | |||
|- | |||
| 6 | |||
| {{icon|Bomb-rock|y}} | |||
| 100% | |||
| Falls when Pikmin are nearby | |||
| "Easy" enemy spots | |||
|- | |||
! colspan="5" | Then it spawns these "decoration" objects: | |||
|- | |||
! ID !! Object !! Amount !! Fall method !! Spawn location | |||
|- | |||
| 7 | |||
| {{icon|Glowstem|y}} (red) | |||
| 6 | |||
| None | |||
| Plant spots | |||
|- | |||
| 8 | |||
| {{icon|Glowstem|y}} (green) | |||
| 6 | |||
| None | |||
| Plant spots | |||
|} | |||
:''For details on how objects are spawned, and how some may fail to spawn, see [[Pikmin 2 cave generation|here]].'' | |||
==Sublevel 4== | |||
* '''Theme''': Metal | |||
* '''Music''': ''[[Music in Pikmin 2#Metal 1|Metal 1]]'' | |||
* '''Treasures''': | |||
** {{icon|Mirrored Element|y}} | |||
* '''Enemies''': | |||
** {{icon|Anode Beetle|y}} × 8 | |||
** {{icon|Armored Cannon Larva|y|n=Armored Cannon Beetle Larva}} (surface) × 10 | |||
* '''Obstacles''': | |||
** {{icon|Poison emitter|v=P2|y}} × 3 | |||
* '''Vegetation''': | |||
** {{icon|Glowstem|y}} (green) × 5 | |||
** {{icon|Glowstem|y}} (red) × 5 | |||
* '''Others''': | |||
** None | |||
This sublevel is filled with [[Armored Cannon Larva|Armored Cannon Beetle Larva]]e and [[Anode Beetle]]s. While the positions of the Armored Cannon Beetle Larvae are constant, the positions of Anode Beetles and poison emitters are variable. There are a few strategies you can use to safely get through this level. One is to simply [[dismiss]] the Pikmin and take a small group of [[Purple Pikmin|Purple]] and [[White Pikmin]] with one of the leaders. The purples are then used to kill the enemies and the White Pikmin to disable poison emitters on the way. | |||
Another method is to dismiss all your Pikmin and just take one or both of your leaders out and try to trick the Armored Cannon Beetles into shooting the others of their own species and poison emitters. Once done with killing the Armored Cannon Beetle Larvae, the player can send in yellows and whites to kill Anode Beetles and disable poison emitters, respectively. | |||
After the coast is clear, retrieve the [[Mirrored Element]] (you may want to follow your Pikmin back, just in case). Another, much faster and easier way, albeit more dangerous, is to bring fifteen White Pikmin and run through the level, ignoring everything, and get them to carry the treasure. The White Pikmin should be able to carry it back without any dying, as they carry treasures very fast. | |||
It should be noted that when an Anode Beetle is near the edge, Pikmin may bounce off the edge when thrown onto it. | |||
{{cavegen|dd4}} | |||
{{sublevel technical | |||
|cave = last_3 | |||
|enemymax = 21 | |||
|itemmax = 1 | |||
|gatemax = 0 | |||
|capmax = 100 | |||
|rooms = 2 | |||
|ctrratio = 0 | |||
|geyser = No | |||
|unitfile = 2_ABE_nobo2_nor22_metal.txt | |||
|lightfile = metal_light_lv3.ini | |||
|bg = build | |||
|clog = No | |||
|hiddenfloor = 0 | |||
|units = | |||
{{sublevel units | |||
|item_cap_metal|Dead end with item | |||
|way3_metal|Three-way crossing | |||
|way4_metal|Four-way crossing | |||
|wayl_metal|Turning corridor | |||
|way2_metal|Corridor | |||
|way2x2_metal|Long corridor | |||
}} | |||
{{sublevel units | |||
|room_north2x2_1_metal|'''T-shaped room''' | |||
|room_nobo2_4_metal|'''Zigzagging room''' | |||
}} | |||
}} | |||
{| class="wikitable mw-collapsible mw-collapsed technicaltable" | |||
! colspan="5" style="width: 288px;" | {{tt|Detailed object list|This is a representation of the data in the cave's file, and how the game makes use of it.}} | |||
|- | |||
! colspan="5" | The game spawns these "main" objects: | |||
|- | |||
! ID !! Object !! Amount !! Fall method !! Spawn location | |||
|- | |||
| 1 | |||
| {{icon|Armored Cannon Larva|y|n=Armored Cannon Beetle Larva}} (surface) | |||
| 10 | |||
| None | |||
| "Hard" enemy spots | |||
|- | |||
| 2 | |||
| {{icon|Poison emitter|v=P2|y}} | |||
| 1 | |||
| None | |||
| "Easy" enemy spots | |||
|- | |||
| 3 | |||
| {{icon|Poison emitter|v=P2|y}} | |||
| 1 | |||
| None | |||
| "Easy" enemy spots | |||
|- | |||
| 4 | |||
| {{icon|Poison emitter|v=P2|y}} | |||
| 1 | |||
| None | |||
| "Easy" enemy spots | |||
|- | |||
| 5 | |||
| {{icon|Anode Beetle|y}} | |||
| 8 | |||
| None | |||
| "Easy" enemy spots | |||
|- | |||
! colspan="5" | Then it spawns these "decoration" objects: | |||
|- | |||
! ID !! Object !! Amount !! Fall method !! Spawn location | |||
|- | |||
| 6 | |||
| {{icon|Glowstem|y}} (red) | |||
| 5 | |||
| None | |||
| Plant spots | |||
|- | |||
| 7 | |||
| {{icon|Glowstem|y}} (green) | |||
| 5 | |||
| None | |||
| Plant spots | |||
|- | |||
! colspan="5" | Then it spawns these "treasure" objects: | |||
|- | |||
! ID !! Object !! Amount !! Fall method !! Spawn location | |||
|- | |||
| 8 | |||
| {{icon|Mirrored Element|y}} | |||
| 1 | |||
| None | |||
| Treasure spots | |||
|} | |||
:''For details on how objects are spawned, and how some may fail to spawn, see [[Pikmin 2 cave generation|here]].'' | |||
==Sublevel 5== | |||
[[File:Dream Den-sub5.jpg|thumb|Sublevel 5.]] | |||
* '''Theme''': Metal | |||
* '''Music''': ''[[Music in Pikmin 2#Metal 2|Metal 2]]'' | |||
* '''Treasures''': | |||
** {{icon|Insect Condo|y|v=TH}} (inside Fiery Bulblax) | |||
* '''Enemies''': | |||
** {{icon|Fiery Blowhog|y}} × 4 | |||
** {{icon|Fiery Bulblax|y}} × 1 | |||
** {{icon|Bulborb|y|n=Red Bulborb}} × 2 | |||
** {{icon|Withering Blowhog|y}} × 1 | |||
* '''Obstacles''': | |||
** {{icon|Fire geyser|y}} × 22 | |||
* '''Vegetation''': | |||
** {{icon|Glowstem|y}} (green) × 5 | |||
** {{icon|Glowstem|y}} (red) × 5 | |||
* '''Others''': | |||
** None | |||
This sublevel is littered with fire hazards and also contains a Fiery Bulblax. There are also two Red Bulborbs, Fiery Blowhogs, and a Withering one as well. Red Pikmin can easily disable fire traps and defeat any Red Bulborbs, Fiery Blowhogs, or Withering Blowhogs. | |||
When throwing Pikmin on a Fiery Blowhog, make sure it doesn't face the edge, or it could throw Pikmin into the [[Pit|abyss]]. The Fiery Bulblax can be killed with the same technique used on the Spotty Bulbear on sublevel 3. It will drop the [[Insect Condo]]. | |||
{{cavegen|dd5}} | |||
{{sublevel technical | |||
|cave = last_3 | |||
|enemymax = 30 | |||
|itemmax = 0 | |||
|gatemax = 0 | |||
|capmax = 0 | |||
|rooms = 3 | |||
|ctrratio = 0.2 | |||
|geyser = No | |||
|unitfile = 3_units_mid2_hit6_hit7_metal.txt | |||
|lightfile = metal_light_lv4.ini | |||
|bg = build | |||
|clog = No | |||
|hiddenfloor = 0 | |||
|units = | |||
{{sublevel units | |||
|cap_metal|Dead end | |||
|item_cap_metal|Dead end with item | |||
|way3_metal|Three-way crossing | |||
|way4_metal|Four-way crossing | |||
|wayl_metal|Turning corridor | |||
|way2_metal|Corridor | |||
}} | |||
{{sublevel units | |||
|way2x2_metal|Long corridor | |||
|room_hitode4x4_6_metal|'''Room with hatch''' | |||
|room_hitode4x4_7_metal|'''Room with blue circle''' | |||
|room_mid2_3_metal|'''T-shaped room''' | |||
}} | |||
}} | |||
{| class="wikitable mw-collapsible mw-collapsed technicaltable" | |||
! colspan="5" style="width: 288px;" | {{tt|Detailed object list|This is a representation of the data in the cave's file, and how the game makes use of it.}} | |||
|- | |||
! colspan="5" | The game spawns these "main" objects: | |||
|- | |||
! ID !! Object !! Amount !! Fall method !! Spawn location | |||
|- | |||
| 1 | |||
| {{icon|Fiery Bulblax|y}} | |||
| 1 | |||
| None | |||
| "Hard" enemy spots | |||
|- | |||
| - | |||
| {{icon|Insect Condo|y|v=TH}} | |||
| colspan="3" | Carried inside entry with ID 1 | |||
|- | |||
| 2 | |||
| {{icon|Withering Blowhog|y}} | |||
| 1 | |||
| None | |||
| "Hard" enemy spots | |||
|- | |||
| 3 | |||
| {{icon|Bulborb|y|n=Red Bulborb}} | |||
| 2 | |||
| None | |||
| "Hard" enemy spots | |||
|- | |||
| 4 | |||
| {{icon|Fiery Blowhog|y}} | |||
| 4 | |||
| None | |||
| "Hard" enemy spots | |||
|- | |||
! colspan="5" | Alongside it spawns 22 "main" objects. Chances: | |||
|- | |||
! ID !! Object !! Chance !! Fall method !! Spawn location | |||
|- | |||
| 5 | |||
| {{icon|Fire geyser|y}} | |||
| 50% | |||
| None | |||
| "Easy" enemy spots | |||
|- | |||
| 6 | |||
| {{icon|Fire geyser|y}} | |||
| 50% | |||
| None | |||
| Cave unit seams | |||
|- | |||
! colspan="5" | Then it spawns these "decoration" objects: | |||
|- | |||
! ID !! Object !! Amount !! Fall method !! Spawn location | |||
|- | |||
| 7 | |||
| {{icon|Glowstem|y}} (red) | |||
| 5 | |||
| None | |||
| Plant spots | |||
|- | |||
| 8 | |||
| {{icon|Glowstem|y}} (green) | |||
| 5 | |||
| None | |||
| Plant spots | |||
|} | |||
:''For details on how objects are spawned, and how some may fail to spawn, see [[Pikmin 2 cave generation|here]].'' | |||
==Sublevel 6== | |||
* '''Theme''': Concrete | |||
* '''Music''': ''[[Music in Pikmin 2#Concrete 2|Concrete 2]]'' | |||
* '''Treasures''': | |||
** {{icon|Future Orb|y}} (inside Greater Spotted Jellyfloat) | |||
* '''Enemies''': | |||
** {{icon|Armored Cannon Larva|y|n=Armored Cannon Beetle Larva}} (surface) × 3 | |||
** {{icon|Greater Spotted Jellyfloat|y}} × 1 | |||
** {{icon|Lesser Spotted Jellyfloat|y}} × 1 | |||
** {{icon|Mitite|y}} (group of 10) × 0 - 4 (from eggs) | |||
* '''Obstacles''': | |||
** None | |||
* '''Vegetation''': | |||
** {{icon|Shoot|y}} (small) × 6 | |||
* '''Others''': | |||
** [[Gate]] with 1800 [[Health|HP]] × 8 | |||
** {{icon|Egg|y}} × 4 | |||
You start near an alcove. There are three, or two Armored Cannon Beetle Larvae, one [[Greater Spotted Jellyfloat]], and one [[Lesser Spotted Jellyfloat]]. Armored Cannon Beetles can be used to kill each other with rocks. The sinkhole will affect the path of the rocks. | |||
Pikmin can be used to kill the Jellyfloats, but the larvae can also shoot them with the rocks. It works best with the Greater Spotted Jellyfloat, due to the fact that when it lands after sucking up a leader, it is an easy target for the Larvae. Remember to escape from the creature, or you will take damage. | |||
After they are killed, grab the [[Future Orb]] the Greater Spotted Jellyfloat left behind, break down gates with Pikmin to get nectar eggs, and continue down the hole which may be inside a gate. | |||
{{cavegen|dd6}} | |||
{{sublevel technical | |||
|cave = last_3 | |||
|enemymax = 5 | |||
|itemmax = 0 | |||
|gatemax = 8 | |||
|capmax = 100 | |||
|rooms = 1 | |||
|ctrratio = 0.2 | |||
|geyser = No | |||
|unitfile = 1_MAT_manq_2_conc.txt | |||
|lightfile = normal_light_lv4.ini | |||
|bg = | |||
|clog = No | |||
|hiddenfloor = 0 | |||
|units = | |||
{{sublevel units | |||
|item_cap_conc|Dead end with item | |||
|way3_conc|Three-way crossing | |||
|way4_conc|Four-way crossing | |||
|wayl_conc|Turning corridor | |||
|way2_conc|Corridor | |||
|way2x2_conc|Long corridor | |||
}} | |||
{{sublevel units | |||
|room_manh7x7q_8_conc|'''Circular room with sandpit''' | |||
}} | |||
}} | |||
{| class="wikitable mw-collapsible mw-collapsed technicaltable" | |||
! colspan="5" style="width: 288px;" | {{tt|Detailed object list|This is a representation of the data in the cave's file, and how the game makes use of it.}} | |||
|- | |||
! colspan="5" | The game spawns these "main" objects: | |||
|- | |||
! ID !! Object !! Amount !! Fall method !! Spawn location | |||
|- | |||
| 1 | |||
| {{icon|Greater Spotted Jellyfloat|y}} | |||
| 1 | |||
| None | |||
| "Hard" enemy spots | |||
|- | |||
| - | |||
| {{icon|Future Orb|y}} | |||
| colspan="3" | Carried inside entry with ID 1 | |||
|- | |||
| 2 | |||
| {{icon|Lesser Spotted Jellyfloat|y}} | |||
| 1 | |||
| None | |||
| "Easy" enemy spots | |||
|- | |||
| 3 | |||
| {{icon|Armored Cannon Larva|y|n=Armored Cannon Beetle Larva}} (surface) | |||
| 3 | |||
| None | |||
| "Easy" enemy spots | |||
|- | |||
! colspan="5" | Then it spawns these "decoration" objects: | |||
|- | |||
! ID !! Object !! Amount !! Fall method !! Spawn location | |||
|- | |||
| 4 | |||
| {{icon|Shoot|y}} (small) | |||
| 6 | |||
| None | |||
| Plant spots | |||
|- | |||
! colspan="5" | Then it spawns these "dead end" objects: | |||
|- | |||
! ID !! Object !! Amount !! Fall method !! Spawn location | |||
|- | |||
| 6 | |||
| {{icon|Egg|y}} | |||
| 4 | |||
| Falls from the sky | |||
| Dead ends | |||
|- | |||
! colspan="5" | Then it spawns 8 "gate" objects. Chances: | |||
|- | |||
! ID !! Object !! Chance !! Fall method !! Spawn location | |||
|- | |||
| 5 | |||
| [[Gate]] (1800 [[Health|HP]]) | |||
| 100% | |||
| None | |||
| Gate spots | |||
|} | |||
:''For details on how objects are spawned, and how some may fail to spawn, see [[Pikmin 2 cave generation|here]].'' | |||
==Sublevel 7== | |||
* '''Theme''': Concrete | |||
* '''Music''': ''[[Music in Pikmin 2#Concrete 1|Concrete 1]]'' | |||
* '''Treasures''': | |||
** {{icon|Essence of Desire|y}} (inside Puffy Blowhog) | |||
* '''Enemies''': | |||
** {{icon|Bumbling Snitchbug|y}} × 3 | |||
** {{icon|Careening Dirigibug|y}} × 4 | |||
** {{icon|Puffy Blowhog|y}} × 2 | |||
* '''Obstacles''': | |||
** None | |||
* '''Vegetation''': | |||
** {{icon|Figwort|y}} (small brown) × 5 | |||
* '''Others''': | |||
** None | |||
This is a very small level, but it contains several Bumbling Snitchbugs and Careening Dirigibugs, some of which may begin in your starting area. There are also two Puffy Blowhogs, one of which contains the [[Essence of Desire]]. When the treasure is collected and the coast is clear, the [[clog]] on the hole must be removed to continue downward. | |||
{{cavegen|dd7}} | |||
{{sublevel technical | |||
|cave = last_3 | |||
|enemymax = 9 | |||
|itemmax = 0 | |||
|gatemax = 0 | |||
|capmax = 0 | |||
|rooms = 2 | |||
|ctrratio = 0 | |||
|geyser = No | |||
|unitfile = 1_MAT_danh_conc.txt | |||
|lightfile = normal_light_lv4.ini | |||
|bg = | |||
|clog = Yes | |||
|hiddenfloor = 0 | |||
|units = | |||
{{sublevel units | |||
|item_cap_conc|Dead end with item | |||
|way3_conc|Three-way crossing | |||
|way4_conc|Four-way crossing | |||
|wayl_conc|Turning corridor | |||
|way2_conc|Corridor | |||
|way2x2_conc|Long corridor | |||
}} | |||
{{sublevel units | |||
|room_dan4x4h_2_conc|'''Room with 2 exits and a raised edge''' | |||
}} | |||
}} | |||
{| class="wikitable mw-collapsible mw-collapsed technicaltable" | |||
! colspan="5" style="width: 288px;" | {{tt|Detailed object list|This is a representation of the data in the cave's file, and how the game makes use of it.}} | |||
|- | |||
! colspan="5" | The game spawns these "main" objects: | |||
|- | |||
! ID !! Object !! Amount !! Fall method !! Spawn location | |||
|- | |||
| 1 | |||
| {{icon|Puffy Blowhog|y}} | |||
| 1 | |||
| None | |||
| "Hard" enemy spots | |||
|- | |||
| - | |||
| {{icon|Essence of Desire|y}} | |||
| colspan="3" | Carried inside entry with ID 1 | |||
|- | |||
| 2 | |||
| {{icon|Puffy Blowhog|y}} | |||
| 1 | |||
| None | |||
| "Hard" enemy spots | |||
|- | |||
| 3 | |||
| {{icon|Bumbling Snitchbug|y}} | |||
| 1 | |||
| None | |||
| "Hard" enemy spots | |||
|- | |||
| 4 | |||
| {{icon|Bumbling Snitchbug|y}} | |||
| 1 | |||
| None | |||
| "Hard" enemy spots | |||
|- | |||
| 5 | |||
| {{icon|Careening Dirigibug|y}} | |||
| 1 | |||
| None | |||
| "Hard" enemy spots | |||
|- | |||
| 6 | |||
| {{icon|Careening Dirigibug|y}} | |||
| 1 | |||
| None | |||
| "Hard" enemy spots | |||
|- | |||
| 7 | |||
| {{icon|Bumbling Snitchbug|y}} | |||
| 1 | |||
| None | |||
| "Easy" enemy spots | |||
|- | |||
| 8 | |||
| {{icon|Careening Dirigibug|y}} | |||
| 1 | |||
| None | |||
| "Easy" enemy spots | |||
|- | |||
| 9 | |||
| {{icon|Careening Dirigibug|y}} | |||
| 1 | |||
| None | |||
| "Easy" enemy spots | |||
|- | |||
! colspan="5" | Then it spawns these "decoration" objects: | |||
|- | |||
! ID !! Object !! Amount !! Fall method !! Spawn location | |||
|- | |||
| 10 | |||
| {{icon|Figwort|y}} (small brown) | |||
| 5 | |||
| None | |||
| Plant spots | |||
|} | |||
:''For details on how objects are spawned, and how some may fail to spawn, see [[Pikmin 2 cave generation|here]].'' | |||
==Sublevel 8== | |||
* '''Theme''': Concrete | |||
* '''Music''': ''[[Music in Pikmin 2#Concrete 3|Concrete 3]]'' | |||
* '''Treasures''': | |||
** {{icon|Extreme Perspirator|y}} | |||
** {{icon|Possessed Squash|y}} | |||
* '''Enemies''': | |||
** {{icon|Anode Dweevil|y}} × 3 | |||
** {{icon|Antenna Beetle|y}} × 1 | |||
** {{icon|Fiery Dweevil|y}} × 4 | |||
** {{icon|Hydro Dweevil|y}} × 4 | |||
** {{icon|Munge Dweevil|y}} × 3 | |||
* '''Obstacles''': | |||
** {{icon|Electrical wire|y}} × 5 | |||
** {{icon|Fire geyser|y}} × 6 | |||
** {{icon|Poison emitter|v=P2|y}} × 10 | |||
* '''Vegetation''': | |||
** None | |||
* '''Others''': | |||
** None | |||
This sublevel is filled with Dweevils of all types, as well as fire, electrical and poison hazards. There is also an [[Antenna Beetle]] which can easily be stunned by a Purple Pikmin and killed by [[Group move|swarming]]. | |||
There are two ways to kill the Dweevils and to reach the treasure. One is to dismiss the Pikmin and go out with one leader to kill them (this doesn't require much time with the [[Rocket Fist]] upgrade). The other is to go out with the entire army, using Purple Pikmin to kill the Dweevils (calling them back if they get into danger), and using [[Red Pikmin|Red]], [[Yellow Pikmin|Yellow]], and [[White Pikmin]] to disable hazards. If you can quickly call them back, your only real hazard is keeping them away from electrical wires and the shocks of the Anode Dweevil. | |||
The [[Extreme Perspirator]] and the [[Possessed Squash]], which are anywhere above ground but usually in dead-ends, are found here. | |||
{{cavegen|dd8}} | |||
{{sublevel technical | |||
|cave = last_3 | |||
|enemymax = 36 | |||
|itemmax = 2 | |||
|gatemax = 0 | |||
|capmax = 0 | |||
|rooms = 1 | |||
|ctrratio = 0 | |||
|geyser = No | |||
|unitfile = 1_units_spiral_conc.txt | |||
|lightfile = normal_light_lv4.ini | |||
|bg = vrbox | |||
|clog = No | |||
|hiddenfloor = 0 | |||
|units = | |||
{{sublevel units | |||
|item_cap_conc|Dead end with item | |||
|way3_conc|Three-way crossing | |||
|way4_conc|Four-way crossing | |||
|wayl_conc|Turning corridor | |||
|way2_conc|Corridor | |||
|way2x2_conc|Long corridor | |||
}} | |||
{{sublevel units | |||
|room_spiral_1_conc|'''Spiraling room''' | |||
}} | |||
}} | |||
{| class="wikitable mw-collapsible mw-collapsed technicaltable" | |||
! colspan="5" style="width: 288px;" | {{tt|Detailed object list|This is a representation of the data in the cave's file, and how the game makes use of it.}} | |||
|- | |||
! colspan="5" | The game spawns these "main" objects: | |||
|- | |||
! ID !! Object !! Amount !! Fall method !! Spawn location | |||
|- | |||
| 1 | |||
| {{icon|Antenna Beetle|y}} | |||
| 1 | |||
| None | |||
| "Special" enemy spots | |||
|- | |||
| 2 | |||
| {{icon|Fiery Dweevil|y}} | |||
| 4 | |||
| None | |||
| "Easy" enemy spots | |||
|- | |||
| 3 | |||
| {{icon|Hydro Dweevil|y}} | |||
| 4 | |||
| None | |||
| "Easy" enemy spots | |||
|- | |||
| 4 | |||
| {{icon|Anode Dweevil|y}} | |||
| 3 | |||
| None | |||
| "Easy" enemy spots | |||
|- | |||
| 5 | |||
| {{icon|Munge Dweevil|y}} | |||
| 3 | |||
| None | |||
| "Easy" enemy spots | |||
|- | |||
| 6 | |||
| {{icon|Fire geyser|y}} | |||
| 6 | |||
| None | |||
| "Hard" enemy spots | |||
|- | |||
| 7 | |||
| {{icon|Electrical wire|y}} | |||
| 5 | |||
| None | |||
| "Hard" enemy spots | |||
|- | |||
| 8 | |||
| {{icon|Poison emitter|v=P2|y}} | |||
| 5 | |||
| None | |||
| "Hard" enemy spots | |||
|- | |||
| 9 | |||
| {{icon|Poison emitter|v=P2|y}} | |||
| 5 | |||
| None | |||
| Cave unit seams | |||
|- | |||
! colspan="5" | Then it spawns these "decoration" objects: | |||
|- | |||
! ID !! Object !! Amount !! Fall method !! Spawn location | |||
|- | |||
| 10 | |||
| {{icon|Fiddlehead|y}} | |||
| 2<ref group="Sublevel 8 note">The sublevel's data makes it so 2 Fiddleheads should spawn in total, but the room used in this sublevel does not have any "decorative" object spots, so no Fiddleheads appear.</ref> | |||
| None | |||
| Plant spots | |||
|- | |||
! colspan="5" | Then it spawns these "treasure" objects: | |||
|- | |||
! ID !! Object !! Amount !! Fall method !! Spawn location | |||
|- | |||
| 11 | |||
| {{icon|Possessed Squash|y}} | |||
| 1 | |||
| None | |||
| Treasure spots | |||
|- | |||
| 12 | |||
| {{icon|Extreme Perspirator|y}} | |||
| 1 | |||
| None | |||
| Treasure spots | |||
|} | |||
<references group="Sublevel 8 note"/> | |||
:''For details on how objects are spawned, and how some may fail to spawn, see [[Pikmin 2 cave generation|here]].'' | |||
==Sublevel 9== | |||
* '''Theme''': Soil | |||
* '''Music''': ''[[Music in Pikmin 2#Relax|Relax]]'' | |||
* '''Treasures''': | |||
** None | |||
* '''Enemies''': | |||
** {{icon|Doodlebug|y}} × 2 | |||
** {{icon|Iridescent Flint Beetle|y}} × 1 | |||
** {{icon|Iridescent Glint Beetle|y}} × 1 | |||
* '''Obstacles''': | |||
** None | |||
* '''Vegetation''': | |||
** {{icon|Figwort|y}} (large red) × 2 | |||
** {{icon|Figwort|y}} (small red) × 2 | |||
* '''Others''': | |||
** None | |||
Sublevel 9 is the only rest level in the Dream Den. Several underground beetles reside here: one [[Iridescent Flint Beetle]], one [[Iridescent Glint Beetle]], and two [[Doodlebug]]s. Use [[Purple Pikmin]] to flip them easily with the help of their area-effective throw, or [[White Pikmin]] on the Doodlebugs for the safest approach. The bugs will drop lots of [[nectar]] and sprays. There are no treasures here so just continue down when you're ready, or use the geyser if you're in need of it. | |||
{{cavegen|dd9}} | |||
{{sublevel technical | |||
|cave = last_3 | |||
|enemymax = 2 | |||
|itemmax = 0 | |||
|gatemax = 0 | |||
|capmax = 100 | |||
|rooms = 2 | |||
|ctrratio = 0 | |||
|geyser = Yes | |||
|unitfile = 1_units_cent3_tsuchi.txt | |||
|lightfile = normal_light_lv4.ini | |||
|bg = | |||
|clog = No | |||
|hiddenfloor = 0 | |||
|units = | |||
{{sublevel units | |||
|item_cap_tsuchi|Dead end with item | |||
|way3_tsuchi|Three-way crossing | |||
|way4_tsuchi|Four-way crossing | |||
|wayl_tsuchi|Turning corridor | |||
|way2_tsuchi|Corridor | |||
|way2x2_tsuchi|Long corridor | |||
}} | |||
{{sublevel units | |||
|room_cent3_4_tsuchi| | |||
}} | |||
}} | |||
{| class="wikitable mw-collapsible mw-collapsed technicaltable" | |||
! colspan="5" style="width: 288px;" | {{tt|Detailed object list|This is a representation of the data in the cave's file, and how the game makes use of it.}} | |||
|- | |||
! colspan="5" | The game spawns these "main" objects: | |||
|- | |||
! ID !! Object !! Amount !! Fall method !! Spawn location | |||
|- | |||
| 1 | |||
| {{icon|Doodlebug|y}} | |||
| 2 | |||
| None | |||
| "Hard" enemy spots | |||
|- | |||
! colspan="5" | Then it spawns these "decoration" objects: | |||
|- | |||
! ID !! Object !! Amount !! Fall method !! Spawn location | |||
|- | |||
| 2 | |||
| {{icon|Figwort|y}} (small red) | |||
| 2 | |||
| None | |||
| Plant spots | |||
|- | |||
| 3 | |||
| {{icon|Figwort|y}} (large red) | |||
| 2 | |||
| None | |||
| Plant spots | |||
|- | |||
! colspan="5" | Then it spawns these "dead end" objects: | |||
|- | |||
! ID !! Object !! Amount !! Fall method !! Spawn location | |||
|- | |||
| 4 | |||
| {{icon|Iridescent Flint Beetle|y}} | |||
| 1 | |||
| None | |||
| Dead ends | |||
|- | |||
| 5 | |||
| {{icon|Iridescent Glint Beetle|y}} | |||
| 1 | |||
| None | |||
| Dead ends | |||
|} | |||
:''For details on how objects are spawned, and how some may fail to spawn, see [[Pikmin 2 cave generation|here]].'' | |||
== | ==Sublevel 10== | ||
*[[ | * '''Theme''': Soil | ||
* | * '''Music''': ''[[Music in Pikmin 2#Fire|Fire]]'' | ||
* | * '''Treasures''': | ||
* | ** {{icon|Talisman of Life|y}} (inside Lesser Spotted Jellyfloat) | ||
* | * '''Enemies''': | ||
* | ** {{icon|Fiery Blowhog|y}} × 4 | ||
* | ** {{icon|Gatling Groink|y}} (free) × 1 | ||
* | ** {{icon|Lesser Spotted Jellyfloat|y}} × 2 | ||
* | ** {{icon|Water Dumple|y}} × 5 | ||
* | ** {{icon|Wollywog|y}} × 2 | ||
* | * '''Obstacles''': | ||
* | ** None | ||
* | * '''Vegetation''': | ||
* | ** {{icon|Shoot|y}} (large) × 3 | ||
* | ** {{icon|Shoot|y}} (small) × 7 | ||
* | * '''Others''': | ||
* | ** None | ||
* | |||
* | |||
Ultra-bitter sprays are recommended here. Simply resetting the game and waiting for a better layout is a good tactic for this level if the enemy spawns are impractical, for instance, if an enemy spawns near the starting area. | |||
With one leader and no Pikmin, go out and find a [[Gatling Groink]] as soon as possible. Beat it up with your fists, and make sure to periodically check on the Pikmin, because sometimes a [[Lesser Spotted Jellyfloat]] will come over to your starting platform and start eating them. | |||
Another strategy is to use the Gatling Groink's projectiles to kill [[Fiery Blowhog]]s, [[Water Dumple]]s, and [[Wollywog]]s; however, this can take a long time, and enemies may have more than enough time to sneak up on your Pikmin. If you have a spare ultra-bitter spray, you can use it on the Gatling Groink when its health is three-fourths gone; if you can defeat it while it is frozen, you won't have to take the regenerating body back to the ship. | |||
The lone treasure, the [[Talisman of Life]], is inside a Lesser Spotted Jellyfloat, usually far away from the starting area; [[Blue Pikmin]] might be necessary to reach it. However, if you don't have 15 blues, there is actually a trick you can use to get the treasure, as long as you have two Purple Pikmin. | |||
To execute the trick, you must line up some dead enemy carcasses near land. Then, you want to get the Jellyfloat with the treasure as close to land as possible when it is defeated, so that when its treasure pops it, the carcasses beneath it make it bounce toward the land instead of away from it.{{cite youtube|7Gg3rysR6l4|showing the tenth sublevel of the Dream Den completed without Blue Pikmin}} Then take back any enemy carcasses you want, and continue down to the next level. | |||
=== | {{cavegen|dd10}} | ||
{{sublevel technical | |||
This | |cave = last_3 | ||
|enemymax = 14 | |||
|itemmax = 0 | |||
|gatemax = 0 | |||
|capmax = 0 | |||
|rooms = 1 | |||
|ctrratio = 0 | |||
|geyser = No | |||
|unitfile = 1_units_ike4_tsuchi.txt | |||
|lightfile = normal_light_lv4.ini | |||
|bg = | |||
|clog = No | |||
|hiddenfloor = 0 | |||
|units = | |||
{{sublevel units | |||
|item_cap_tsuchi|Dead end with item | |||
|way3_tsuchi|Three-way crossing | |||
|way4_tsuchi|Four-way crossing | |||
|wayl_tsuchi|Turning corridor | |||
|way2_tsuchi|Corridor | |||
|way2x2_tsuchi|Long corridor | |||
}} | |||
{{sublevel units | |||
|room_ike4_5_tsuchi|'''Swamp with trunks''' | |||
}} | |||
}} | |||
{| class="wikitable mw-collapsible mw-collapsed technicaltable" | |||
! colspan="5" style="width: 288px;" | {{tt|Detailed object list|This is a representation of the data in the cave's file, and how the game makes use of it.}} | |||
|- | |||
! colspan="5" | The game spawns these "main" objects: | |||
|- | |||
! ID !! Object !! Amount !! Fall method !! Spawn location | |||
|- | |||
| 1 | |||
| {{icon|Lesser Spotted Jellyfloat|y}} | |||
| 1 | |||
| None | |||
| "Special" enemy spots | |||
|- | |||
| - | |||
| {{icon|Talisman of Life|y}} | |||
| colspan="3" | Carried inside entry with ID 1 | |||
|- | |||
| 2 | |||
| {{icon|Lesser Spotted Jellyfloat|y}} | |||
| 1 | |||
| None | |||
| "Hard" enemy spots | |||
|- | |||
| 3 | |||
| {{icon|Gatling Groink|y}} (free) | |||
| 1 | |||
| None | |||
| "Special" enemy spots | |||
|- | |||
| 4 | |||
| {{icon|Fiery Blowhog|y}} | |||
| 4 | |||
| None | |||
| "Hard" enemy spots | |||
|- | |||
| 5 | |||
| {{icon|Wollywog|y}} | |||
| 1 | |||
| None | |||
| "Easy" enemy spots | |||
|- | |||
| 6 | |||
| {{icon|Wollywog|y}} | |||
| 1 | |||
| None | |||
| "Easy" enemy spots | |||
|- | |||
| 7 | |||
| {{icon|Water Dumple|y}} | |||
| 5 | |||
| None | |||
| "Easy" enemy spots | |||
|- | |||
! colspan="5" | Then it spawns these "decoration" objects: | |||
|- | |||
! ID !! Object !! Amount !! Fall method !! Spawn location | |||
|- | |||
| 8 | |||
| {{icon|Shoot|y}} (small) | |||
| 7 | |||
| None | |||
| Plant spots | |||
|- | |||
| 9 | |||
| {{icon|Shoot|y}} (large) | |||
| 3 | |||
| None | |||
| Plant spots | |||
|} | |||
:''For details on how objects are spawned, and how some may fail to spawn, see [[Pikmin 2 cave generation|here]].'' | |||
==Sublevel 11== | |||
* '''Theme''': Soil | |||
* '''Music''': ''[[Music in Pikmin 2#Soil 1|Soil 1]]'' | |||
* '''Treasures''': | |||
** {{icon|Boss Stone|y}} | |||
** {{icon|Yellow Taste Tyrant|y}} (US/Europe) / {{icon|Universally Best Art|y}} (Japan) | |||
* '''Enemies''': | |||
** {{icon|Breadbug|y}} × 1 | |||
** {{icon|Bumbling Snitchbug|y}} × 1 | |||
** {{icon|Cloaking Burrow-nit|y}} × 4 | |||
** {{icon|Dwarf Bulbear|y}} × 6 | |||
** {{icon|Fiery Blowhog|y}} × 2 | |||
** {{icon|Watery Blowhog|y}} × 2 | |||
* '''Obstacles''': | |||
** {{icon|Electrical wire|y}} × 2 | |||
** {{icon|Poison emitter|v=P2|y}} × 5 | |||
* '''Vegetation''': | |||
** {{icon|Figwort|y}} (large red) × 5 | |||
** {{icon|Figwort|y}} (small red) × 5 | |||
* '''Others''': | |||
** None | |||
This sublevel has both [[Fiery Blowhog]]s and [[Watery Blowhog]]s, some [[Dwarf Bulbear]]s, poison emitters, [[Cloaking Burrow-Nit]]s, a [[Breadbug]], and a [[Bumbling Snitchbug]]. Electrical wires are also usually encountered in this level, sometimes placed in bizarre locations such as on top of a stump. Sometimes the Cloaking Burrow-Nit will be near the poison emitters, so it will be difficult to disable them without having Pikmin eaten. | |||
This | |||
The best way to clear this level is to take all of the Pikmin and eliminate one threat at a time. Both treasures, the [[Boss Stone]] and the [[Yellow Taste Tyrant]], can be anywhere above ground, but usually on a high ledge or in a dead-end. Use [[Yellow Pikmin]] to get it. Collect your spoils, break the [[clog]] on the hole, and go down. | |||
=== | {{cavegen|dd11}} | ||
{{sublevel technical | |||
|cave = last_3 | |||
|enemymax = 23 | |||
|itemmax = 2 | |||
|gatemax = 0 | |||
|capmax = 0 | |||
|rooms = 3 | |||
|ctrratio = 0 | |||
|geyser = No | |||
|unitfile = E3_units_tsuchi.txt | |||
|lightfile = normal_light_lv4.ini | |||
|bg = | |||
|clog = Yes | |||
|hiddenfloor = No | |||
|units = | |||
{{sublevel units | |||
|item_cap_tsuchi|Dead end with item | |||
|way3_tsuchi|Three-way crossing | |||
|way4_tsuchi|Four-way crossing | |||
|wayl_tsuchi|Turning corridor | |||
|way2_tsuchi|Corridor | |||
|way2x2_tsuchi|Long corridor | |||
}} | |||
{{sublevel units | |||
|room_cent_4_tsuchi|'''Circular room with 4 exits''' | |||
|room_saka1_1_tsuchi|'''Room with trunk in center''' | |||
|room_saka2_2_tsuchi|'''Room with large trunk in wall''' | |||
|room_hitode3_4_tsuchi|'''Room with 4 exits''' | |||
|room_mid1_6_tsuchi|'''Room with 6 exits''' | |||
}} | |||
}} | |||
{| class="wikitable mw-collapsible mw-collapsed technicaltable" | |||
! colspan="5" style="width: 288px;" | {{tt|Detailed object list|This is a representation of the data in the cave's file, and how the game makes use of it.}} | |||
|- | |||
! colspan="5" | The game spawns these "main" objects: | |||
|- | |||
! ID !! Object !! Amount !! Fall method !! Spawn location | |||
|- | |||
| 1 | |||
| {{icon|Breadbug|y}} | |||
| 1 | |||
| None | |||
| "Hard" enemy spots | |||
|- | |||
| 2 | |||
| {{icon|Cloaking Burrow-nit|y}} | |||
| 4 | |||
| None | |||
| "Hard" enemy spots | |||
|- | |||
| 3 | |||
| {{icon|Fiery Blowhog|y}} | |||
| 2 | |||
| None | |||
| "Hard" enemy spots | |||
|- | |||
| 4 | |||
| {{icon|Watery Blowhog|y}} | |||
| 2 | |||
| None | |||
| "Hard" enemy spots | |||
|- | |||
| 5 | |||
| {{icon|Bumbling Snitchbug|y}} | |||
| 1 | |||
| None | |||
| "Hard" enemy spots | |||
|- | |||
| 6 | |||
| {{icon|Dwarf Bulbear|y}} | |||
| 6 | |||
| None | |||
| "Easy" enemy spots | |||
|- | |||
| 7 | |||
| {{icon|Poison emitter|v=P2|y}} | |||
| 5 | |||
| None | |||
| Cave unit seams | |||
|- | |||
| 8 | |||
| {{icon|Electrical wire|y}} | |||
| 2 | |||
| None | |||
| "Hard" enemy spots | |||
|- | |||
! colspan="5" | Then it spawns these "decoration" objects: | |||
|- | |||
! ID !! Object !! Amount !! Fall method !! Spawn location | |||
|- | |||
| 9 | |||
| {{icon|Figwort|y}} (small red) | |||
| 5 | |||
| None | |||
| Plant spots | |||
|- | |||
| 10 | |||
| {{icon|Figwort|y}} (large red) | |||
| 5 | |||
| None | |||
| Plant spots | |||
|- | |||
! colspan="5" | Then it spawns these "treasure" objects: | |||
|- | |||
! ID !! Object !! Amount !! Fall method !! Spawn location | |||
|- | |||
| 11 | |||
| {{icon|Boss Stone|y}} | |||
| 1 | |||
| None | |||
| Treasure spots | |||
|- | |||
| 12 | |||
| {{icon|Yellow Taste Tyrant|y}} (US/EU)<br>{{icon|Universally Best Art|y}} (JP) | |||
| 1 | |||
| None | |||
| Treasure spots | |||
|} | |||
:''For details on how objects are spawned, and how some may fail to spawn, see [[Pikmin 2 cave generation|here]].'' | |||
==Sublevel 12== | |||
* '''Theme''': Tiles | |||
* '''Music''': ''[[Music in Pikmin 2#Jellyfloat|Jellyfloat]]'' | |||
* '''Treasures''': | |||
** {{icon|Stringent Container|y|v=US}} (US) / {{icon|Endless Repository|y|v=EU}} (Europe/Japan) (inside Orange Bulborb in all regions) | |||
** {{icon|Universal Com|y}} (fully buried) | |||
* '''Enemies''': | |||
** {{icon|Antenna Beetle|y}} × 1 | |||
** {{icon|Orange Bulborb|y}} × 2 | |||
** {{icon|Wollywog|y}} × 2 | |||
* '''Obstacles''': | |||
** {{icon|Boulder|y}} × 4 | |||
** {{icon|Poison emitter|v=P2|y}} × 15 | |||
* '''Vegetation''': | |||
** None | |||
* '''Others''': | |||
** [[Gate]] with 2500 [[Health|HP]] × 4 | |||
There is an [[Antenna Beetle]] in this level, messing with the treasure gauge. There are also [[Wollywog]]s, [[Orange Bulborb]]s, poison emitters, and falling rocks. If an enemy is near a poison emitter, ignore it and continue. Once all the poison emitters are out of your way, you should lure any Wollywogs that were near them away, and attack them with [[Purple Pikmin]]. Once these die, use White Pikmin to take down the remaining obstacles and use Purple Pikmin to defeat all the enemies. | |||
If you can defeat the Antenna Beetle, finding the underground treasure in this sublevel will be much easier. There is also a treasure inside one of the Orange Bulborbs, so unless an enemy is in your way, defeat the Antenna Beetle first so you can easily find the treasures. Once all the poison emitters and enemies in your path are cleared out, take back the [[Stringent Container]] which was inside the Orange Bulborb, and use your treasure gauge to find the underground treasure, the [[Universal Com]]. Look for the hole and jump down. | |||
=== | {{cavegen|dd12}} | ||
{{sublevel technical | |||
|cave = last_3 | |||
|enemymax = 24 | |||
|itemmax = 1 | |||
|gatemax = 4 | |||
|capmax = 100 | |||
|rooms = 3 | |||
|ctrratio = 0.2 | |||
|geyser = No | |||
|unitfile = 2_ABE_d_dry_tile.txt | |||
|lightfile = normal_light_lv4.ini | |||
|bg = | |||
|clog = No | |||
|hiddenfloor = 0 | |||
|units = | |||
{{sublevel units | |||
|item_cap_conc|Dead end with item | |||
|way3_pipe|Three-way crossing | |||
|way4_pipe|Four-way crossing | |||
|wayl_pipe|Turning corridor | |||
|way2_pipe|Corridor | |||
|way2x2_pipe|Long corridor | |||
}} | |||
{{sublevel units | |||
|room_drypool5x5_5_tile|'''Room with waterless pool''' | |||
|room_4x4d_4_tile|'''Room with 4 exits''' | |||
}} | |||
}} | |||
{| class="wikitable mw-collapsible mw-collapsed technicaltable" | |||
! colspan="5" style="width: 288px;" | {{tt|Detailed object list|This is a representation of the data in the cave's file, and how the game makes use of it.}} | |||
|- | |||
! colspan="5" | The game spawns these "main" objects: | |||
|- | |||
! ID !! Object !! Amount !! Fall method !! Spawn location | |||
|- | |||
| 1 | |||
| {{icon|Orange Bulborb|y}} | |||
| 1 | |||
| None | |||
| "Hard" enemy spots | |||
|- | |||
| - | |||
| {{icon|Stringent Container|y|v=US}} (US)<br>{{icon|Endless Repository|y|v=EU}} (EU/JP) | |||
| colspan="3" | Carried inside entry with ID 1 | |||
|- | |||
| 2 | |||
| {{icon|Antenna Beetle|y}} | |||
| 1 | |||
| None | |||
| "Hard" enemy spots | |||
|- | |||
| 3 | |||
| {{icon|Orange Bulborb|y}} | |||
| 1 | |||
| None | |||
| "Hard" enemy spots | |||
|- | |||
| 4 | |||
| {{icon|Wollywog|y}} | |||
| 2 | |||
| None | |||
| "Hard" enemy spots | |||
|- | |||
| 5 | |||
| {{icon|Boulder|y}} | |||
| 2 | |||
| None | |||
| "Hard" enemy spots | |||
|- | |||
| 6 | |||
| {{icon|Boulder|y}} | |||
| 2 | |||
| None | |||
| "Easy" enemy spots | |||
|- | |||
| 7 | |||
| {{icon|Poison emitter|v=P2|y}} | |||
| 10 | |||
| None | |||
| "Hard" enemy spots | |||
|- | |||
| 8 | |||
| {{icon|Poison emitter|v=P2|y}} | |||
| 5 | |||
| None | |||
| Cave unit seams | |||
|- | |||
! colspan="5" | Then it spawns these "treasure" objects: | |||
|- | |||
! ID !! Object !! Amount !! Fall method !! Spawn location | |||
|- | |||
| 9 | |||
| {{icon|Universal Com|y}} | |||
| 1 | |||
| None | |||
| Treasure spots | |||
|- | |||
! colspan="5" | Then it spawns 4 "gate" objects. Chances: | |||
|- | |||
! ID !! Object !! Chance !! Fall method !! Spawn location | |||
|- | |||
| 10 | |||
| [[Gate]] (2500 [[Health|HP]]) | |||
| 100% | |||
| None | |||
| Gate spots | |||
|} | |||
:''For details on how objects are spawned, and how some may fail to spawn, see [[Pikmin 2 cave generation|here]].'' | |||
==Sublevel 13== | |||
[[File:DreamDen-sub13.jpg|thumb|Sublevel 13.]] | |||
* '''Theme''': Tiles | |||
[[ | * '''Music''': ''[[Music in Pikmin 2#Tile|Tile]]'' | ||
* '''Treasures''': | |||
** {{icon|Hypnotic Platter|y|v=US}} (US) / {{icon|Alien Billboard|y}} (Europe) / {{icon|Inviting...Thing|y}} (Japan) (inside Orange Bulborb in all regions) | |||
* '''Enemies''': | |||
** {{icon|Hairy Bulborb|y}} × 2 | |||
** {{icon|Mitite|y}} (group of 10) × indefinite amount (from eggs) | |||
** {{icon|Orange Bulborb|y}} × 2 | |||
** {{icon|Bulborb|y|n=Red Bulborb}} × 2 | |||
* '''Obstacles''': | |||
** None | |||
* '''Vegetation''': | |||
** None | |||
* '''Others''': | |||
** {{icon|Egg|y}} × indefinite amount | |||
This level is small, but cramped with Bulborbs. There are two [[Orange Bulborb]]s, two [[Bulborb|Red Bulborb]]s, and two [[Hairy Bulborb]]s. Inside one of the Orange Bulborbs is a treasure. The treasure gauge can be used to find the Bulborb with the treasure. If that Bulborb is dangerously close to another Bulborb, an [[Ultra-bitter spray]] could be used on both creatures, followed by bombarded them with volleys of [[Purple Pikmin]]. | |||
The [[Hypnotic Platter]] will be dropped by the creature. Clear the way back, deliver the treasure and enter the final hole. | |||
{{cavegen|dd13}} | |||
{{sublevel technical | |||
|cave = last_3 | |||
|enemymax = 6 | |||
|itemmax = 0 | |||
|gatemax = 0 | |||
|capmax = 100 | |||
|rooms = 4 | |||
|ctrratio = 0 | |||
|geyser = No | |||
|unitfile = 2_MAT_tak22_nor22_tile.txt | |||
|lightfile = normal_light_lv4.ini | |||
|bg = | |||
|clog = No | |||
|hiddenfloor = 0 | |||
|units = | |||
{{sublevel units | |||
|item_cap_pipe|Dead end with item | |||
|way3_pipe|Three-way crossing | |||
|way4_pipe|Four-way crossing | |||
|wayl_pipe|Turning corridor | |||
|way2_pipe|Corridor | |||
|way2x2_pipe|Long corridor | |||
}} | |||
{{sublevel units | |||
|room_tako2x2_8_tile|'''Square room with 4 exits''' | |||
|room_north2x2_1_tile|'''T-shaped room''' | |||
}} | |||
}} | |||
{| class="wikitable mw-collapsible mw-collapsed technicaltable" | |||
! colspan="5" style="width: 288px;" | {{tt|Detailed object list|This is a representation of the data in the cave's file, and how the game makes use of it.}} | |||
|- | |||
! colspan="5" | The game spawns these "main" objects: | |||
|- | |||
! ID !! Object !! Amount !! Fall method !! Spawn location | |||
|- | |||
| 1 | |||
| {{icon|Orange Bulborb|y}} | |||
| 1 | |||
| None | |||
| "Hard" enemy spots | |||
|- | |||
| - | |||
| {{icon|Hypnotic Platter|y|v=US}} (US)<br>{{icon|Alien Billboard|y}} (EU)<br>{{icon|Inviting...Thing|y}} (JP) | |||
| colspan="3" | Carried inside entry with ID 1 | |||
|- | |||
| 2 | |||
| {{icon|Orange Bulborb|y}} | |||
| 1 | |||
| None | |||
| "Hard" enemy spots | |||
|- | |||
| 3 | |||
| {{icon|Bulborb|y|n=Red Bulborb}} | |||
| 2 | |||
| None | |||
| "Hard" enemy spots | |||
|- | |||
| 4 | |||
| {{icon|Hairy Bulborb|y}} | |||
| 2 | |||
| None | |||
| "Hard" enemy spots | |||
|- | |||
! colspan="5" | Then it spawns "dead end" objects in as many dead ends as it can. Chances: | |||
|- | |||
! ID !! Object !! Chance !! Fall method !! Spawn location | |||
|- | |||
| 5 | |||
| {{icon|Egg|y}} | |||
| 100% | |||
| Falls from the sky | |||
| Dead ends | |||
|} | |||
:''For details on how objects are spawned, and how some may fail to spawn, see [[Pikmin 2 cave generation|here]].'' | |||
==Sublevel 14== | |||
* '''Theme''': Tiles | |||
* '''Music''': ''[[Music in Pikmin 2#Titan Dweevil|Titan Dweevil]]'' (only when combating) | |||
* '''Treasures''': | |||
** {{icon|Comedy Bomb|y}} (attached to Titan Dweevil) | |||
** {{icon|Flare Cannon|y}} (attached to Titan Dweevil) | |||
** {{icon|King of Bugs|y}} (attached to Titan Dweevil) | |||
** {{icon|Monster Pump|y}} (attached to Titan Dweevil) | |||
** {{icon|Shock Therapist|y}} (attached to Titan Dweevil) | |||
* '''Enemies''': | |||
** {{icon|Titan Dweevil|y}} × 1 | |||
* '''Obstacles''': | |||
** None | |||
* '''Vegetation''': | |||
** None | |||
* '''Others''': | |||
** None | |||
{{see also|Titan Dweevil#Strategy|t1=Titan Dweevil strategy}} | |||
''Note: 30 or more Pikmin must be left in order to carry most of the treasures back to the ship; three [[Purple Pikmin]] will also suffice.'' | |||
This is the last sublevel in the cave, and home to the [[Titan Dweevil]]. The sublevel has a sink-like appearance with the boss in the center. Several small [[Titan Dweevil#Trivia|firefly-like insects]] appear in this sublevel. There is a geyser available on this level that can be used to return to the surface without fighting the boss. There are several strategies that suggest this. Returning with almost 100 [[Yellow Pikmin]] is a strategy commonly used for a speedy defeat. An in-depth guide on how to defeat the Titan Dweevil can be found in the link above. The treasures the Titan Dweevil drops are the [[Flare Cannon]], the [[Shock Therapist]], the [[Comedy Bomb]], the [[Monster Pump]] and the [[King of Bugs]]. | |||
{{cavegen|dd14}} | |||
{{sublevel technical | |||
|cave = last_3 | |||
|enemymax = 1 | |||
|itemmax = 0 | |||
|gatemax = 0 | |||
|capmax = 0 | |||
|rooms = 1 | |||
|ctrratio = 0 | |||
|geyser = Yes | |||
|unitfile = 1_units_otakara_tile.txt | |||
|lightfile = oootakara_light.ini | |||
|bg = | |||
|clog = No | |||
|hiddenfloor = 0 | |||
|units = | |||
{{sublevel units | |||
|item_cap_conc|Dead end with item | |||
|item_cap_pipe|Dead end with item | |||
|way3_pipe|Three-way crossing | |||
|way4_pipe|Four-way crossing | |||
|wayl_pipe|Turning corridor | |||
|way2_pipe|Corridor | |||
}} | |||
{{sublevel units | |||
|way2x2_pipe|Long corridor | |||
|room_oootakara_tile|'''Titan Dweevil arena''' | |||
}} | |||
}} | |||
{| class="wikitable mw-collapsible mw-collapsed technicaltable" | |||
! colspan="5" style="width: 288px;" | {{tt|Detailed object list|This is a representation of the data in the cave's file, and how the game makes use of it.}} | |||
|- | |||
! colspan="5" | The game spawns these "main" objects: | |||
|- | |||
! ID !! Object !! Amount !! Fall method !! Spawn location | |||
|- | |||
| 1 | |||
| {{icon|Titan Dweevil|y}} | |||
| 1 | |||
| None | |||
| "Hard" enemy spots | |||
|} | |||
:''For details on how objects are spawned, and how some may fail to spawn, see [[Pikmin 2 cave generation|here]].'' | |||
==Gallery== | |||
<gallery> | |||
Dream Den Location.png|Entrance to the cave. | |||
</gallery> | |||
==Trivia== | ==Trivia== | ||
* | *The Dream Den is located where the first [[ship part]] of the [[S.S. Dolphin]], the [[Main Engine]], is found in ''[[Pikmin (game)|Pikmin]]''. | ||
*The final floor's layout is commonly thought as being based on a [[GameCube]]. In fact, it is nothing more than a kitchen sink. | |||
*The Official Nintendo Power game guide states that several early bosses return in this cave, like [[Man-at-Legs]], [[Empress Bulblax]], and many others. However, none of these bosses are found here. The [[Hole of Heroes]] on the other hand has most of the previous bosses. | |||
*According to the name of the [[cave units|unit]] definition file, it is possible that [[#Sublevel 11|sublevel 11]] uses the same general layout as a cave that had been previously presented at E3. It is the only sublevel in the game in which this is the case. | |||
*In sublevel 11, if an electrical wire spawns on top of the wooden structure, one of its ends will be on the structure while the other will be on the floor. The electric discharge between the two ends will still connect correctly.{{cite web|https://www.reddit.com/r/Pikmin/comments/d5emsh/how_do_the_electric_again/|How do the Electric Again?|reddit|published={{date|17|September|2019}}|retrieved={{date|17|September|2019}}}} | |||
*Curiously, the music track ''[[Music in Pikmin 2#Flooded Stump|Flooded Stump]]'' is defined to play on the ninth sublevel. In practice, it is overridden by the rest sublevel theme. The same occurs in all sublevels of the [[Submerged Castle]] as well. | |||
*This cave has more treasures than any other cave in ''Pikmin 2''. | |||
==Names in other languages== | |||
{{Foreignname | |||
|Jap=夢の穴 | |||
|JapR=Yume no Ana | |||
|JapM=Hole of Dreams | |||
|SpaA=Refugio de los Sueños | |||
|SpaAM=Dream Refuge | |||
|Fra=Pays des Rêves | |||
|FraM=Country of Dreams | |||
|Ita=Tana di Sogno | |||
|ItaM=Dream Den | |||
|Ger=Bau der Träume | |||
|GerM=Den of Dreams | |||
|ChiTrad=夢之洞穴 | |||
}} | |||
==See also== | |||
*[[Wistful Wild]] | |||
*[[Titan Dweevil Series]] | |||
==References== | |||
{{refs}} | |||
{{Wistful Wild}} | |||
{{p2 caves}} | |||
[[Category:Dream Den| ]] | |||
Latest revision as of 06:14, April 14, 2024
| Dream Den | |
|---|---|

| |
| Location | Wistful Wild |
| Sublevels | 14 |
| Treasures | 21 |
| Hazards | |
|
The following article or section contains guides. |
The Dream Den (夢の穴?, lit.: "Hole of Dreams") is a cave in Pikmin 2, found in the Wistful Wild. Because of its location, difficulty, and the fact that it contains what may be regarded as the game's final boss, the Titan Dweevil, it is often the last cave completed. The cave is the game's second longest, with 14 sublevels, and contains a variety of enemies in large quantities. The cave design is also relatively varied, with many previously encountered themes showing up here. In order, a garden sublevel is found at the top, followed by a toybox sublevel, with metal, concrete, soil, and finally tile sublevels appearing in groups of 3. In this cave, there is a total of ![]() × 5965 for all treasures in the US version, and
× 5965 for all treasures in the US version, and ![]() × 5945 in the European version. There are no Bulbmin or Candypop Buds in this cave, so extra care should be taken.
× 5945 in the European version. There are no Bulbmin or Candypop Buds in this cave, so extra care should be taken.
|
Warning: the following text contains major spoilers about the end of the plot in Pikmin 2.
|
|---|
|
The final floor of the Dream Den is the location of Louie. He is found atop the game's final boss, the Titan Dweevil, and is afterwards collected as a treasure and added to the Treasure Hoard. He does not replace the President after having been rescued, however. |
How to reach[edit]
There are two methods to reach this cave:
- One can bring Pikmin through the Hole of Heroes area, requiring Blue Pikmin to destroy a clog and Yellow Pikmin to destroy an electric gate, though the player will then be forced to fight the Creeping Chrysanthemums and Puffy Blowhogs directly below.
- They may alternatively go left and build a bridge by bringing Blue Pikmin across a lake.
Either way, the player must then destroy one of two black poison gates.
All Pikmin types should be brought along. If the player intends to fight the Titan Dweevil on the first run, bringing more Yellow Pikmin is recommended. Like the Hole of Heroes, water is present in this cave, so sufficient Blue Pikmin are required as well.
Notes
Ship's dialogs
“Perhaps you will find Louie in here! ...And yet, my CPU is on edge. Ludicrous dangers await!
Beasts lurk at the bottom of the deepest, darkest, most foul, sinister, horribly vile pit.
Do you still wish to enter? Of course you do. Courage is our true treasure!”Sublevel 1[edit]
- Theme: Garden
- Music: Grass
- Treasures:
- Enemies:
 Dwarf Orange Bulborb × 23
 Hermit Crawmad × 2
 Lesser Spotted Jellyfloat × 2
- Obstacles:
 Poison emitter × 3
- Vegetation:
- Others:
- None
The first level of the Dream Den harbors Dwarf Orange Bulborbs, two Hermit Crawmads and two Lesser Spotted Jellyfloats. There are also poisonous gas pipes.
The enemies near the starting area, especially Dwarf Orange Bulborbs that are blocking paths, should be removed. Defeat the Lesser Spotted Jellyfloats (which may be near the starting area as well) the usual way. They will digest one Pikmin every thirty seconds. Once the area is clear of any obstructive enemies and gas pipes, the Disguised Delicacy can be taken back. Use Pikmin to destroy the clog on the hole, allowing you to continue down to the next sublevel.
| Technical sublevel information | |||||
|---|---|---|---|---|---|
| Internal cave name | last_3 | ||||
| "Main" object maximum (?) | 30 | ||||
| "Treasure" object maximum (?) | 1 | ||||
| "Gate" object maximum (?) | 0 | ||||
| Dead end unit probability (?) | 100 | ||||
| Number of rooms (?) | 2 | ||||
| Corridor-to-room ratio (?) | 0 | ||||
| Escape geyser (?) | No | ||||
| Clogged hole (?) | Yes | ||||
| Cave units file (?) | 1_ABE_vshit67_toy.txt | ||||
| Lighting file (?) | hiroba_toy_light_cha.ini | ||||
| Background (?) | hiroba ( | ||||
| Cave units (?) | |||||
 |
 |
 |
 |
 |
 |
| Dead end with item | Three-way crossing | Four-way crossing | Turning corridor | Corridor | Long corridor |
 |
|||||
| Room with 4 exits | |||||
| Detailed object list | ||||
|---|---|---|---|---|
| The game spawns these "main" objects: | ||||
| ID | Object | Amount | Fall method | Spawn location |
| 1 | 2 | None | "Hard" enemy spots | |
| 2 | 2 | None | "Hard" enemy spots | |
| 3 | 3 | None | Cave unit seams | |
| Alongside it spawns 23 "main" objects. Chances: | ||||
| ID | Object | Chance | Fall method | Spawn location |
| 4 | 100% | None | "Easy" enemy spots | |
| Then it spawns these "decoration" objects: | ||||
| ID | Object | Amount | Fall method | Spawn location |
| 5 | 5 | None | Plant spots | |
| 6 | 5 | None | Plant spots | |
| Then it spawns these "treasure" objects: | ||||
| ID | Object | Amount | Fall method | Spawn location |
| 7 | 1 | None | Treasure spots | |
- For details on how objects are spawned, and how some may fail to spawn, see here.
Sublevel 2[edit]

- Theme: Toybox
- Music: Toy
- Treasures:
 Implement of Toil
 Manual Honer (inside Gatling Groink)
- Enemies:
 Gatling Groink (pedestal) × 1
 Hairy Bulborb × 1
 Snow Bulborb × 8
- Obstacles:
- None
- Vegetation:
- None
- Others:
- None
There is a Gatling Groink on a raised platform that will start to attack the player as soon as the sublevel begins. Hide the Pikmin behind the wall of blocks, send one of the leaders out to distract the Groink, and attack with your Pikmin. Alternately, beat up the Snow Bulborbs and Hairy Bulborb with the fists of a leader or let the Gatling Groink kill them with its projectiles.
To defeat the Groink, position a leader against the base of the platform it is standing on. With the other leader, take a group of Yellow Pikmin, and while the Gatling Groink is distracted, walk up the slope and attack it from behind. The Manual Honer, which was held by the Gatling Groink, and the Implement of Toil, which is usually located somewhere close to the wall of blocks, are found on this level.
| Technical sublevel information | |||||
|---|---|---|---|---|---|
| Internal cave name | last_3 | ||||
| "Main" object maximum (?) | 10 | ||||
| "Treasure" object maximum (?) | 1 | ||||
| "Gate" object maximum (?) | 0 | ||||
| Dead end unit probability (?) | 0 | ||||
| Number of rooms (?) | 1 | ||||
| Corridor-to-room ratio (?) | 0 | ||||
| Escape geyser (?) | No | ||||
| Clogged hole (?) | No | ||||
| Cave units file (?) | 1_units_tower_toy.txt | ||||
| Lighting file (?) | toy_light_cha.ini | ||||
| Background (?) | flooring ( | ||||
| Cave units (?) | |||||
 |
|
|
|
|
|
| Dead end | Three-way crossing | Four-way crossing | Turning corridor | Corridor | Long corridor |
 |
|||||
| Room with tower | |||||
| Detailed object list | ||||
|---|---|---|---|---|
| The game spawns these "main" objects: | ||||
| ID | Object | Amount | Fall method | Spawn location |
| 1 | 1 | None | "Special" enemy spots | |
| - | Carried inside entry with ID 1 | |||
| 2 | 1 | None | "Hard" enemy spots | |
| Alongside it spawns 8 "main" objects. Chances: | ||||
| ID | Object | Chance | Fall method | Spawn location |
| 3 | 100% | None | "Easy" enemy spots | |
| Then it spawns these "treasure" objects: | ||||
| ID | Object | Amount | Fall method | Spawn location |
| 4 | 1 | None | Treasure spots | |
- For details on how objects are spawned, and how some may fail to spawn, see here.
Sublevel 3[edit]
- Theme: Metal
- Music: Metal 2
- Treasures:
 Glee Spinner (inside Spotty Bulbear)
- Enemies:
 Careening Dirigibug × 2
 Dwarf Bulbear × 9
 Spotty Bulbear × 1
- Obstacles:
 Bomb-rock × 11
 Electrical wire × 4
- Poison emitter × 3
- Vegetation:
- Others:
- None
This sublevel is filled with falling bomb-rocks, electrical wires, poison emitters, and Dwarf Bulbears. There are also some Careening Dirigibugs that throw bomb-rocks. Somewhere in the level, a Spotty Bulbear will fall from the sky. This creature contains a treasure.
Pikmin or the leaders can be used to kill it; the player can also trick the Bulbear into falling off into the abyss (as the Bulbear will always take the most direct path towards the leaders), by making the Bulbear walk towards the leaders with a gap in between; subsequently, it will fall into the pit. Its treasure, the Glee Spinner, will drop right where the Spotty Bulbear was before it fell into the abyss.
Note that the bomb-rocks and Spotty Bulbear will only fall when Pikmin are near. In order to know beforehand where the Spotty Bulbear is, it is possible to follow the Dwarf Bulbears, since they will go to and idle next to the adult's spawning location.
| Technical sublevel information | |||||
|---|---|---|---|---|---|
| Internal cave name | last_3 | ||||
| "Main" object maximum (?) | 30 | ||||
| "Treasure" object maximum (?) | 0 | ||||
| "Gate" object maximum (?) | 0 | ||||
| Dead end unit probability (?) | 30 | ||||
| Number of rooms (?) | 4 | ||||
| Corridor-to-room ratio (?) | 0.2 | ||||
| Escape geyser (?) | No | ||||
| Clogged hole (?) | No | ||||
| Cave units file (?) | 3_ABE_mid2_hit3_hit5_metal.txt | ||||
| Lighting file (?) | metal_light_lv2.ini | ||||
| Background (?) | test ( | ||||
| Cave units (?) | |||||
 |
 |
 |
 |
 |
|
| Dead end with item | Three-way crossing | Four-way crossing | Turning corridor | Corridor | Long corridor |
 |
 |
 |
|||
| T-shaped room | Room with blue ledge | Circular room with blue ledge | |||
| Detailed object list | ||||
|---|---|---|---|---|
| The game spawns these "main" objects: | ||||
| ID | Object | Amount | Fall method | Spawn location |
| 1 | 1 | Falls when Pikmin are nearby | "Hard" enemy spots | |
| - | Carried inside entry with ID 1 | |||
| 2 | 9 | None | "Easy" enemy spots | |
| 3 | 4 | None | Cave unit seams | |
| 4 | 3 | None | "Hard" enemy spots | |
| 5 | 2 | None | "Hard" enemy spots | |
| Alongside it spawns 11 "main" objects. Chances: | ||||
| ID | Object | Chance | Fall method | Spawn location |
| 6 | 100% | Falls when Pikmin are nearby | "Easy" enemy spots | |
| Then it spawns these "decoration" objects: | ||||
| ID | Object | Amount | Fall method | Spawn location |
| 7 | 6 | None | Plant spots | |
| 8 | 6 | None | Plant spots | |
- For details on how objects are spawned, and how some may fail to spawn, see here.
Sublevel 4[edit]
- Theme: Metal
- Music: Metal 1
- Treasures:
- Enemies:
 Anode Beetle × 8
 Armored Cannon Beetle Larva (surface) × 10
- Obstacles:
- Poison emitter × 3
- Vegetation:
- Others:
- None
This sublevel is filled with Armored Cannon Beetle Larvae and Anode Beetles. While the positions of the Armored Cannon Beetle Larvae are constant, the positions of Anode Beetles and poison emitters are variable. There are a few strategies you can use to safely get through this level. One is to simply dismiss the Pikmin and take a small group of Purple and White Pikmin with one of the leaders. The purples are then used to kill the enemies and the White Pikmin to disable poison emitters on the way.
Another method is to dismiss all your Pikmin and just take one or both of your leaders out and try to trick the Armored Cannon Beetles into shooting the others of their own species and poison emitters. Once done with killing the Armored Cannon Beetle Larvae, the player can send in yellows and whites to kill Anode Beetles and disable poison emitters, respectively.
After the coast is clear, retrieve the Mirrored Element (you may want to follow your Pikmin back, just in case). Another, much faster and easier way, albeit more dangerous, is to bring fifteen White Pikmin and run through the level, ignoring everything, and get them to carry the treasure. The White Pikmin should be able to carry it back without any dying, as they carry treasures very fast.
It should be noted that when an Anode Beetle is near the edge, Pikmin may bounce off the edge when thrown onto it.
| Technical sublevel information | |||||
|---|---|---|---|---|---|
| Internal cave name | last_3 | ||||
| "Main" object maximum (?) | 21 | ||||
| "Treasure" object maximum (?) | 1 | ||||
| "Gate" object maximum (?) | 0 | ||||
| Dead end unit probability (?) | 100 | ||||
| Number of rooms (?) | 2 | ||||
| Corridor-to-room ratio (?) | 0 | ||||
| Escape geyser (?) | No | ||||
| Clogged hole (?) | No | ||||
| Cave units file (?) | 2_ABE_nobo2_nor22_metal.txt | ||||
| Lighting file (?) | metal_light_lv3.ini | ||||
| Background (?) | build ( | ||||
| Cave units (?) | |||||
|
|
|
|
|
|
| Dead end with item | Three-way crossing | Four-way crossing | Turning corridor | Corridor | Long corridor |
 |
 |
||||
| T-shaped room | Zigzagging room | ||||
| Detailed object list | ||||
|---|---|---|---|---|
| The game spawns these "main" objects: | ||||
| ID | Object | Amount | Fall method | Spawn location |
| 1 | 10 | None | "Hard" enemy spots | |
| 2 | 1 | None | "Easy" enemy spots | |
| 3 | 1 | None | "Easy" enemy spots | |
| 4 | 1 | None | "Easy" enemy spots | |
| 5 | 8 | None | "Easy" enemy spots | |
| Then it spawns these "decoration" objects: | ||||
| ID | Object | Amount | Fall method | Spawn location |
| 6 | 5 | None | Plant spots | |
| 7 | 5 | None | Plant spots | |
| Then it spawns these "treasure" objects: | ||||
| ID | Object | Amount | Fall method | Spawn location |
| 8 | 1 | None | Treasure spots | |
- For details on how objects are spawned, and how some may fail to spawn, see here.
Sublevel 5[edit]

- Theme: Metal
- Music: Metal 2
- Treasures:
 Insect Condo (inside Fiery Bulblax)
- Enemies:
 Fiery Blowhog × 4
 Fiery Bulblax × 1
 Red Bulborb × 2
 Withering Blowhog × 1
- Obstacles:
 Fire geyser × 22
- Vegetation:
- Others:
- None
This sublevel is littered with fire hazards and also contains a Fiery Bulblax. There are also two Red Bulborbs, Fiery Blowhogs, and a Withering one as well. Red Pikmin can easily disable fire traps and defeat any Red Bulborbs, Fiery Blowhogs, or Withering Blowhogs.
When throwing Pikmin on a Fiery Blowhog, make sure it doesn't face the edge, or it could throw Pikmin into the abyss. The Fiery Bulblax can be killed with the same technique used on the Spotty Bulbear on sublevel 3. It will drop the Insect Condo.
| Technical sublevel information | |||||
|---|---|---|---|---|---|
| Internal cave name | last_3 | ||||
| "Main" object maximum (?) | 30 | ||||
| "Treasure" object maximum (?) | 0 | ||||
| "Gate" object maximum (?) | 0 | ||||
| Dead end unit probability (?) | 0 | ||||
| Number of rooms (?) | 3 | ||||
| Corridor-to-room ratio (?) | 0.2 | ||||
| Escape geyser (?) | No | ||||
| Clogged hole (?) | No | ||||
| Cave units file (?) | 3_units_mid2_hit6_hit7_metal.txt | ||||
| Lighting file (?) | metal_light_lv4.ini | ||||
| Background (?) | build ( | ||||
| Cave units (?) | |||||
 |
|
|
|
|
|
| Dead end | Dead end with item | Three-way crossing | Four-way crossing | Turning corridor | Corridor |
 |
 |
|
|||
| Long corridor | Room with hatch | Room with blue circle | T-shaped room | ||
| Detailed object list | ||||
|---|---|---|---|---|
| The game spawns these "main" objects: | ||||
| ID | Object | Amount | Fall method | Spawn location |
| 1 | 1 | None | "Hard" enemy spots | |
| - | Carried inside entry with ID 1 | |||
| 2 | 1 | None | "Hard" enemy spots | |
| 3 | 2 | None | "Hard" enemy spots | |
| 4 | 4 | None | "Hard" enemy spots | |
| Alongside it spawns 22 "main" objects. Chances: | ||||
| ID | Object | Chance | Fall method | Spawn location |
| 5 | 50% | None | "Easy" enemy spots | |
| 6 | 50% | None | Cave unit seams | |
| Then it spawns these "decoration" objects: | ||||
| ID | Object | Amount | Fall method | Spawn location |
| 7 | 5 | None | Plant spots | |
| 8 | 5 | None | Plant spots | |
- For details on how objects are spawned, and how some may fail to spawn, see here.
Sublevel 6[edit]
- Theme: Concrete
- Music: Concrete 2
- Treasures:
 Future Orb (inside Greater Spotted Jellyfloat)
- Enemies:
- Armored Cannon Beetle Larva (surface) × 3
 Greater Spotted Jellyfloat × 1
- Lesser Spotted Jellyfloat × 1
 Mitite (group of 10) × 0 - 4 (from eggs)
- Obstacles:
- None
- Vegetation:
 Shoot (small) × 6
- Others:
You start near an alcove. There are three, or two Armored Cannon Beetle Larvae, one Greater Spotted Jellyfloat, and one Lesser Spotted Jellyfloat. Armored Cannon Beetles can be used to kill each other with rocks. The sinkhole will affect the path of the rocks.
Pikmin can be used to kill the Jellyfloats, but the larvae can also shoot them with the rocks. It works best with the Greater Spotted Jellyfloat, due to the fact that when it lands after sucking up a leader, it is an easy target for the Larvae. Remember to escape from the creature, or you will take damage.
After they are killed, grab the Future Orb the Greater Spotted Jellyfloat left behind, break down gates with Pikmin to get nectar eggs, and continue down the hole which may be inside a gate.
| Technical sublevel information | |||||
|---|---|---|---|---|---|
| Internal cave name | last_3 | ||||
| "Main" object maximum (?) | 5 | ||||
| "Treasure" object maximum (?) | 0 | ||||
| "Gate" object maximum (?) | 8 | ||||
| Dead end unit probability (?) | 100 | ||||
| Number of rooms (?) | 1 | ||||
| Corridor-to-room ratio (?) | 0.2 | ||||
| Escape geyser (?) | No | ||||
| Clogged hole (?) | No | ||||
| Cave units file (?) | 1_MAT_manq_2_conc.txt | ||||
| Lighting file (?) | normal_light_lv4.ini | ||||
| Background (?) | None | ||||
| Cave units (?) | |||||
 |
 |
 |
 |
 |
|
| Dead end with item | Three-way crossing | Four-way crossing | Turning corridor | Corridor | Long corridor |
 |
|||||
| Circular room with sandpit | |||||
| Detailed object list | ||||
|---|---|---|---|---|
| The game spawns these "main" objects: | ||||
| ID | Object | Amount | Fall method | Spawn location |
| 1 | 1 | None | "Hard" enemy spots | |
| - | Carried inside entry with ID 1 | |||
| 2 | 1 | None | "Easy" enemy spots | |
| 3 | 3 | None | "Easy" enemy spots | |
| Then it spawns these "decoration" objects: | ||||
| ID | Object | Amount | Fall method | Spawn location |
| 4 | 6 | None | Plant spots | |
| Then it spawns these "dead end" objects: | ||||
| ID | Object | Amount | Fall method | Spawn location |
| 6 | 4 | Falls from the sky | Dead ends | |
| Then it spawns 8 "gate" objects. Chances: | ||||
| ID | Object | Chance | Fall method | Spawn location |
| 5 | Gate (1800 HP) | 100% | None | Gate spots |
- For details on how objects are spawned, and how some may fail to spawn, see here.
Sublevel 7[edit]
- Theme: Concrete
- Music: Concrete 1
- Treasures:
 Essence of Desire (inside Puffy Blowhog)
- Enemies:
 Bumbling Snitchbug × 3
- Careening Dirigibug × 4
 Puffy Blowhog × 2
- Obstacles:
- None
- Vegetation:
 Figwort (small brown) × 5
- Others:
- None
This is a very small level, but it contains several Bumbling Snitchbugs and Careening Dirigibugs, some of which may begin in your starting area. There are also two Puffy Blowhogs, one of which contains the Essence of Desire. When the treasure is collected and the coast is clear, the clog on the hole must be removed to continue downward.
| Technical sublevel information | |||||
|---|---|---|---|---|---|
| Internal cave name | last_3 | ||||
| "Main" object maximum (?) | 9 | ||||
| "Treasure" object maximum (?) | 0 | ||||
| "Gate" object maximum (?) | 0 | ||||
| Dead end unit probability (?) | 0 | ||||
| Number of rooms (?) | 2 | ||||
| Corridor-to-room ratio (?) | 0 | ||||
| Escape geyser (?) | No | ||||
| Clogged hole (?) | Yes | ||||
| Cave units file (?) | 1_MAT_danh_conc.txt | ||||
| Lighting file (?) | normal_light_lv4.ini | ||||
| Background (?) | None | ||||
| Cave units (?) | |||||
|
|
|
|
|
|
| Dead end with item | Three-way crossing | Four-way crossing | Turning corridor | Corridor | Long corridor |
 |
|||||
| Room with 2 exits and a raised edge | |||||
| Detailed object list | ||||
|---|---|---|---|---|
| The game spawns these "main" objects: | ||||
| ID | Object | Amount | Fall method | Spawn location |
| 1 | 1 | None | "Hard" enemy spots | |
| - | Carried inside entry with ID 1 | |||
| 2 | 1 | None | "Hard" enemy spots | |
| 3 | 1 | None | "Hard" enemy spots | |
| 4 | 1 | None | "Hard" enemy spots | |
| 5 | 1 | None | "Hard" enemy spots | |
| 6 | 1 | None | "Hard" enemy spots | |
| 7 | 1 | None | "Easy" enemy spots | |
| 8 | 1 | None | "Easy" enemy spots | |
| 9 | 1 | None | "Easy" enemy spots | |
| Then it spawns these "decoration" objects: | ||||
| ID | Object | Amount | Fall method | Spawn location |
| 10 | 5 | None | Plant spots | |
- For details on how objects are spawned, and how some may fail to spawn, see here.
Sublevel 8[edit]
- Theme: Concrete
- Music: Concrete 3
- Treasures:
- Enemies:
 Anode Dweevil × 3
 Antenna Beetle × 1
 Fiery Dweevil × 4
 Hydro Dweevil × 4
 Munge Dweevil × 3
- Obstacles:
- Electrical wire × 5
- Fire geyser × 6
- Poison emitter × 10
- Vegetation:
- None
- Others:
- None
This sublevel is filled with Dweevils of all types, as well as fire, electrical and poison hazards. There is also an Antenna Beetle which can easily be stunned by a Purple Pikmin and killed by swarming.
There are two ways to kill the Dweevils and to reach the treasure. One is to dismiss the Pikmin and go out with one leader to kill them (this doesn't require much time with the Rocket Fist upgrade). The other is to go out with the entire army, using Purple Pikmin to kill the Dweevils (calling them back if they get into danger), and using Red, Yellow, and White Pikmin to disable hazards. If you can quickly call them back, your only real hazard is keeping them away from electrical wires and the shocks of the Anode Dweevil.
The Extreme Perspirator and the Possessed Squash, which are anywhere above ground but usually in dead-ends, are found here.
| Technical sublevel information | |||||
|---|---|---|---|---|---|
| Internal cave name | last_3 | ||||
| "Main" object maximum (?) | 36 | ||||
| "Treasure" object maximum (?) | 2 | ||||
| "Gate" object maximum (?) | 0 | ||||
| Dead end unit probability (?) | 0 | ||||
| Number of rooms (?) | 1 | ||||
| Corridor-to-room ratio (?) | 0 | ||||
| Escape geyser (?) | No | ||||
| Clogged hole (?) | No | ||||
| Cave units file (?) | 1_units_spiral_conc.txt | ||||
| Lighting file (?) | normal_light_lv4.ini | ||||
| Background (?) | vrbox (none)
| ||||
| Cave units (?) | |||||
|
|
|
|
|
|
| Dead end with item | Three-way crossing | Four-way crossing | Turning corridor | Corridor | Long corridor |
 |
|||||
| Spiraling room | |||||
| Detailed object list | ||||
|---|---|---|---|---|
| The game spawns these "main" objects: | ||||
| ID | Object | Amount | Fall method | Spawn location |
| 1 | 1 | None | "Special" enemy spots | |
| 2 | 4 | None | "Easy" enemy spots | |
| 3 | 4 | None | "Easy" enemy spots | |
| 4 | 3 | None | "Easy" enemy spots | |
| 5 | 3 | None | "Easy" enemy spots | |
| 6 | 6 | None | "Hard" enemy spots | |
| 7 | 5 | None | "Hard" enemy spots | |
| 8 | 5 | None | "Hard" enemy spots | |
| 9 | 5 | None | Cave unit seams | |
| Then it spawns these "decoration" objects: | ||||
| ID | Object | Amount | Fall method | Spawn location |
| 10 | 2[Sublevel 8 note 1] | None | Plant spots | |
| Then it spawns these "treasure" objects: | ||||
| ID | Object | Amount | Fall method | Spawn location |
| 11 | 1 | None | Treasure spots | |
| 12 | 1 | None | Treasure spots | |
- ^ The sublevel's data makes it so 2 Fiddleheads should spawn in total, but the room used in this sublevel does not have any "decorative" object spots, so no Fiddleheads appear.
- For details on how objects are spawned, and how some may fail to spawn, see here.
Sublevel 9[edit]
- Theme: Soil
- Music: Relax
- Treasures:
- None
- Enemies:
 Doodlebug × 2
 Iridescent Flint Beetle × 1
 Iridescent Glint Beetle × 1
- Obstacles:
- None
- Vegetation:
- Others:
- None
Sublevel 9 is the only rest level in the Dream Den. Several underground beetles reside here: one Iridescent Flint Beetle, one Iridescent Glint Beetle, and two Doodlebugs. Use Purple Pikmin to flip them easily with the help of their area-effective throw, or White Pikmin on the Doodlebugs for the safest approach. The bugs will drop lots of nectar and sprays. There are no treasures here so just continue down when you're ready, or use the geyser if you're in need of it.
| Technical sublevel information | |||||
|---|---|---|---|---|---|
| Internal cave name | last_3 | ||||
| "Main" object maximum (?) | 2 | ||||
| "Treasure" object maximum (?) | 0 | ||||
| "Gate" object maximum (?) | 0 | ||||
| Dead end unit probability (?) | 100 | ||||
| Number of rooms (?) | 2 | ||||
| Corridor-to-room ratio (?) | 0 | ||||
| Escape geyser (?) | Yes | ||||
| Clogged hole (?) | No | ||||
| Cave units file (?) | 1_units_cent3_tsuchi.txt | ||||
| Lighting file (?) | normal_light_lv4.ini | ||||
| Background (?) | None | ||||
| Cave units (?) | |||||
 |
 |
 |
 |
 |
|
| Dead end with item | Three-way crossing | Four-way crossing | Turning corridor | Corridor | Long corridor |
 |
|||||
| Detailed object list | ||||
|---|---|---|---|---|
| The game spawns these "main" objects: | ||||
| ID | Object | Amount | Fall method | Spawn location |
| 1 | 2 | None | "Hard" enemy spots | |
| Then it spawns these "decoration" objects: | ||||
| ID | Object | Amount | Fall method | Spawn location |
| 2 | 2 | None | Plant spots | |
| 3 | 2 | None | Plant spots | |
| Then it spawns these "dead end" objects: | ||||
| ID | Object | Amount | Fall method | Spawn location |
| 4 | 1 | None | Dead ends | |
| 5 | 1 | None | Dead ends | |
- For details on how objects are spawned, and how some may fail to spawn, see here.
Sublevel 10[edit]
- Theme: Soil
- Music: Fire
- Treasures:
 Talisman of Life (inside Lesser Spotted Jellyfloat)
- Enemies:
- Fiery Blowhog × 4
- Gatling Groink (free) × 1
- Lesser Spotted Jellyfloat × 2
 Water Dumple × 5
 Wollywog × 2
- Obstacles:
- None
- Vegetation:
- Others:
- None
Ultra-bitter sprays are recommended here. Simply resetting the game and waiting for a better layout is a good tactic for this level if the enemy spawns are impractical, for instance, if an enemy spawns near the starting area.
With one leader and no Pikmin, go out and find a Gatling Groink as soon as possible. Beat it up with your fists, and make sure to periodically check on the Pikmin, because sometimes a Lesser Spotted Jellyfloat will come over to your starting platform and start eating them.
Another strategy is to use the Gatling Groink's projectiles to kill Fiery Blowhogs, Water Dumples, and Wollywogs; however, this can take a long time, and enemies may have more than enough time to sneak up on your Pikmin. If you have a spare ultra-bitter spray, you can use it on the Gatling Groink when its health is three-fourths gone; if you can defeat it while it is frozen, you won't have to take the regenerating body back to the ship.
The lone treasure, the Talisman of Life, is inside a Lesser Spotted Jellyfloat, usually far away from the starting area; Blue Pikmin might be necessary to reach it. However, if you don't have 15 blues, there is actually a trick you can use to get the treasure, as long as you have two Purple Pikmin.
To execute the trick, you must line up some dead enemy carcasses near land. Then, you want to get the Jellyfloat with the treasure as close to land as possible when it is defeated, so that when its treasure pops it, the carcasses beneath it make it bounce toward the land instead of away from it.[1] Then take back any enemy carcasses you want, and continue down to the next level.
| Technical sublevel information | |||||
|---|---|---|---|---|---|
| Internal cave name | last_3 | ||||
| "Main" object maximum (?) | 14 | ||||
| "Treasure" object maximum (?) | 0 | ||||
| "Gate" object maximum (?) | 0 | ||||
| Dead end unit probability (?) | 0 | ||||
| Number of rooms (?) | 1 | ||||
| Corridor-to-room ratio (?) | 0 | ||||
| Escape geyser (?) | No | ||||
| Clogged hole (?) | No | ||||
| Cave units file (?) | 1_units_ike4_tsuchi.txt | ||||
| Lighting file (?) | normal_light_lv4.ini | ||||
| Background (?) | None | ||||
| Cave units (?) | |||||
|
|
|
|
|
|
| Dead end with item | Three-way crossing | Four-way crossing | Turning corridor | Corridor | Long corridor |
 |
|||||
| Swamp with trunks | |||||
| Detailed object list | ||||
|---|---|---|---|---|
| The game spawns these "main" objects: | ||||
| ID | Object | Amount | Fall method | Spawn location |
| 1 | 1 | None | "Special" enemy spots | |
| - | Carried inside entry with ID 1 | |||
| 2 | 1 | None | "Hard" enemy spots | |
| 3 | 1 | None | "Special" enemy spots | |
| 4 | 4 | None | "Hard" enemy spots | |
| 5 | 1 | None | "Easy" enemy spots | |
| 6 | 1 | None | "Easy" enemy spots | |
| 7 | 5 | None | "Easy" enemy spots | |
| Then it spawns these "decoration" objects: | ||||
| ID | Object | Amount | Fall method | Spawn location |
| 8 | 7 | None | Plant spots | |
| 9 | 3 | None | Plant spots | |
- For details on how objects are spawned, and how some may fail to spawn, see here.
Sublevel 11[edit]
- Theme: Soil
- Music: Soil 1
- Treasures:
 Boss Stone
 Yellow Taste Tyrant (US/Europe) /
  Universally Best Art (Japan)
- Enemies:
 Breadbug × 1
- Bumbling Snitchbug × 1
 Cloaking Burrow-nit × 4
- Dwarf Bulbear × 6
- Fiery Blowhog × 2
 Watery Blowhog × 2
- Obstacles:
- Electrical wire × 2
- Poison emitter × 5
- Vegetation:
- Others:
- None
This sublevel has both Fiery Blowhogs and Watery Blowhogs, some Dwarf Bulbears, poison emitters, Cloaking Burrow-Nits, a Breadbug, and a Bumbling Snitchbug. Electrical wires are also usually encountered in this level, sometimes placed in bizarre locations such as on top of a stump. Sometimes the Cloaking Burrow-Nit will be near the poison emitters, so it will be difficult to disable them without having Pikmin eaten.
The best way to clear this level is to take all of the Pikmin and eliminate one threat at a time. Both treasures, the Boss Stone and the Yellow Taste Tyrant, can be anywhere above ground, but usually on a high ledge or in a dead-end. Use Yellow Pikmin to get it. Collect your spoils, break the clog on the hole, and go down.
| Technical sublevel information | |||||
|---|---|---|---|---|---|
| Internal cave name | last_3 | ||||
| "Main" object maximum (?) | 23 | ||||
| "Treasure" object maximum (?) | 2 | ||||
| "Gate" object maximum (?) | 0 | ||||
| Dead end unit probability (?) | 0 | ||||
| Number of rooms (?) | 3 | ||||
| Corridor-to-room ratio (?) | 0 | ||||
| Escape geyser (?) | No | ||||
| Clogged hole (?) | Yes | ||||
| Cave units file (?) | E3_units_tsuchi.txt | ||||
| Lighting file (?) | normal_light_lv4.ini | ||||
| Background (?) | None | ||||
| Cave units (?) | |||||
|
|
|
|
|
|
| Dead end with item | Three-way crossing | Four-way crossing | Turning corridor | Corridor | Long corridor |
 |
 |
 |
 |
 |
|
| Circular room with 4 exits | Room with trunk in center | Room with large trunk in wall | Room with 4 exits | Room with 6 exits | |
| Detailed object list | ||||
|---|---|---|---|---|
| The game spawns these "main" objects: | ||||
| ID | Object | Amount | Fall method | Spawn location |
| 1 | 1 | None | "Hard" enemy spots | |
| 2 | 4 | None | "Hard" enemy spots | |
| 3 | 2 | None | "Hard" enemy spots | |
| 4 | 2 | None | "Hard" enemy spots | |
| 5 | 1 | None | "Hard" enemy spots | |
| 6 | 6 | None | "Easy" enemy spots | |
| 7 | 5 | None | Cave unit seams | |
| 8 | 2 | None | "Hard" enemy spots | |
| Then it spawns these "decoration" objects: | ||||
| ID | Object | Amount | Fall method | Spawn location |
| 9 | 5 | None | Plant spots | |
| 10 | 5 | None | Plant spots | |
| Then it spawns these "treasure" objects: | ||||
| ID | Object | Amount | Fall method | Spawn location |
| 11 | 1 | None | Treasure spots | |
| 12 | 1 | None | Treasure spots | |
- For details on how objects are spawned, and how some may fail to spawn, see here.
Sublevel 12[edit]
- Theme: Tiles
- Music: Jellyfloat
- Treasures:
 Stringent Container (US) /
  Endless Repository (Europe/Japan) (inside Orange Bulborb in all regions)
 Universal Com (fully buried)
- Enemies:
- Antenna Beetle × 1
 Orange Bulborb × 2
- Wollywog × 2
- Obstacles:
 Boulder × 4
- Poison emitter × 15
- Vegetation:
- None
- Others:
There is an Antenna Beetle in this level, messing with the treasure gauge. There are also Wollywogs, Orange Bulborbs, poison emitters, and falling rocks. If an enemy is near a poison emitter, ignore it and continue. Once all the poison emitters are out of your way, you should lure any Wollywogs that were near them away, and attack them with Purple Pikmin. Once these die, use White Pikmin to take down the remaining obstacles and use Purple Pikmin to defeat all the enemies.
If you can defeat the Antenna Beetle, finding the underground treasure in this sublevel will be much easier. There is also a treasure inside one of the Orange Bulborbs, so unless an enemy is in your way, defeat the Antenna Beetle first so you can easily find the treasures. Once all the poison emitters and enemies in your path are cleared out, take back the Stringent Container which was inside the Orange Bulborb, and use your treasure gauge to find the underground treasure, the Universal Com. Look for the hole and jump down.
| Technical sublevel information | |||||
|---|---|---|---|---|---|
| Internal cave name | last_3 | ||||
| "Main" object maximum (?) | 24 | ||||
| "Treasure" object maximum (?) | 1 | ||||
| "Gate" object maximum (?) | 4 | ||||
| Dead end unit probability (?) | 100 | ||||
| Number of rooms (?) | 3 | ||||
| Corridor-to-room ratio (?) | 0.2 | ||||
| Escape geyser (?) | No | ||||
| Clogged hole (?) | No | ||||
| Cave units file (?) | 2_ABE_d_dry_tile.txt | ||||
| Lighting file (?) | normal_light_lv4.ini | ||||
| Background (?) | None | ||||
| Cave units (?) | |||||
|
 |
 |
 |
 |
|
| Dead end with item | Three-way crossing | Four-way crossing | Turning corridor | Corridor | Long corridor |
 |
 |
||||
| Room with waterless pool | Room with 4 exits | ||||
| Detailed object list | ||||
|---|---|---|---|---|
| The game spawns these "main" objects: | ||||
| ID | Object | Amount | Fall method | Spawn location |
| 1 | 1 | None | "Hard" enemy spots | |
| - | Carried inside entry with ID 1 | |||
| 2 | 1 | None | "Hard" enemy spots | |
| 3 | 1 | None | "Hard" enemy spots | |
| 4 | 2 | None | "Hard" enemy spots | |
| 5 | 2 | None | "Hard" enemy spots | |
| 6 | 2 | None | "Easy" enemy spots | |
| 7 | 10 | None | "Hard" enemy spots | |
| 8 | 5 | None | Cave unit seams | |
| Then it spawns these "treasure" objects: | ||||
| ID | Object | Amount | Fall method | Spawn location |
| 9 | 1 | None | Treasure spots | |
| Then it spawns 4 "gate" objects. Chances: | ||||
| ID | Object | Chance | Fall method | Spawn location |
| 10 | Gate (2500 HP) | 100% | None | Gate spots |
- For details on how objects are spawned, and how some may fail to spawn, see here.
Sublevel 13[edit]

- Theme: Tiles
- Music: Tile
- Treasures:
 Hypnotic Platter (US) /
  Alien Billboard (Europe) /
  Inviting...Thing (Japan) (inside Orange Bulborb in all regions)
- Enemies:
- Hairy Bulborb × 2
- Mitite (group of 10) × indefinite amount (from eggs)
- Orange Bulborb × 2
- Red Bulborb × 2
- Obstacles:
- None
- Vegetation:
- None
- Others:
 Egg × indefinite amount
This level is small, but cramped with Bulborbs. There are two Orange Bulborbs, two Red Bulborbs, and two Hairy Bulborbs. Inside one of the Orange Bulborbs is a treasure. The treasure gauge can be used to find the Bulborb with the treasure. If that Bulborb is dangerously close to another Bulborb, an Ultra-bitter spray could be used on both creatures, followed by bombarded them with volleys of Purple Pikmin.
The Hypnotic Platter will be dropped by the creature. Clear the way back, deliver the treasure and enter the final hole.
| Technical sublevel information | |||||
|---|---|---|---|---|---|
| Internal cave name | last_3 | ||||
| "Main" object maximum (?) | 6 | ||||
| "Treasure" object maximum (?) | 0 | ||||
| "Gate" object maximum (?) | 0 | ||||
| Dead end unit probability (?) | 100 | ||||
| Number of rooms (?) | 4 | ||||
| Corridor-to-room ratio (?) | 0 | ||||
| Escape geyser (?) | No | ||||
| Clogged hole (?) | No | ||||
| Cave units file (?) | 2_MAT_tak22_nor22_tile.txt | ||||
| Lighting file (?) | normal_light_lv4.ini | ||||
| Background (?) | None | ||||
| Cave units (?) | |||||
 |
|
|
|
|
|
| Dead end with item | Three-way crossing | Four-way crossing | Turning corridor | Corridor | Long corridor |
 |
 |
||||
| Square room with 4 exits | T-shaped room | ||||
| Detailed object list | ||||
|---|---|---|---|---|
| The game spawns these "main" objects: | ||||
| ID | Object | Amount | Fall method | Spawn location |
| 1 | 1 | None | "Hard" enemy spots | |
| - | Carried inside entry with ID 1 | |||
| 2 | 1 | None | "Hard" enemy spots | |
| 3 | 2 | None | "Hard" enemy spots | |
| 4 | 2 | None | "Hard" enemy spots | |
| Then it spawns "dead end" objects in as many dead ends as it can. Chances: | ||||
| ID | Object | Chance | Fall method | Spawn location |
| 5 | 100% | Falls from the sky | Dead ends | |
- For details on how objects are spawned, and how some may fail to spawn, see here.
Sublevel 14[edit]
- Theme: Tiles
- Music: Titan Dweevil (only when combating)
- Treasures:
 Comedy Bomb (attached to Titan Dweevil)
 Flare Cannon (attached to Titan Dweevil)
 King of Bugs (attached to Titan Dweevil)
 Monster Pump (attached to Titan Dweevil)
 Shock Therapist (attached to Titan Dweevil)
- Enemies:
 Titan Dweevil × 1
- Obstacles:
- None
- Vegetation:
- None
- Others:
- None
- See also: Titan Dweevil strategy.
Note: 30 or more Pikmin must be left in order to carry most of the treasures back to the ship; three Purple Pikmin will also suffice.
This is the last sublevel in the cave, and home to the Titan Dweevil. The sublevel has a sink-like appearance with the boss in the center. Several small firefly-like insects appear in this sublevel. There is a geyser available on this level that can be used to return to the surface without fighting the boss. There are several strategies that suggest this. Returning with almost 100 Yellow Pikmin is a strategy commonly used for a speedy defeat. An in-depth guide on how to defeat the Titan Dweevil can be found in the link above. The treasures the Titan Dweevil drops are the Flare Cannon, the Shock Therapist, the Comedy Bomb, the Monster Pump and the King of Bugs.
| Technical sublevel information | |||||
|---|---|---|---|---|---|
| Internal cave name | last_3 | ||||
| "Main" object maximum (?) | 1 | ||||
| "Treasure" object maximum (?) | 0 | ||||
| "Gate" object maximum (?) | 0 | ||||
| Dead end unit probability (?) | 0 | ||||
| Number of rooms (?) | 1 | ||||
| Corridor-to-room ratio (?) | 0 | ||||
| Escape geyser (?) | Yes | ||||
| Clogged hole (?) | No | ||||
| Cave units file (?) | 1_units_otakara_tile.txt | ||||
| Lighting file (?) | oootakara_light.ini | ||||
| Background (?) | None | ||||
| Cave units (?) | |||||
|
|
|
|
|
|
| Dead end with item | Dead end with item | Three-way crossing | Four-way crossing | Turning corridor | Corridor |
 |
|||||
| Long corridor | Titan Dweevil arena | ||||
| Detailed object list | ||||
|---|---|---|---|---|
| The game spawns these "main" objects: | ||||
| ID | Object | Amount | Fall method | Spawn location |
| 1 | 1 | None | "Hard" enemy spots | |
- For details on how objects are spawned, and how some may fail to spawn, see here.
Gallery[edit]

Entrance to the cave.

Trivia[edit]
- The Dream Den is located where the first ship part of the S.S. Dolphin, the Main Engine, is found in Pikmin.
- The final floor's layout is commonly thought as being based on a GameCube. In fact, it is nothing more than a kitchen sink.
- The Official Nintendo Power game guide states that several early bosses return in this cave, like Man-at-Legs, Empress Bulblax, and many others. However, none of these bosses are found here. The Hole of Heroes on the other hand has most of the previous bosses.
- According to the name of the unit definition file, it is possible that sublevel 11 uses the same general layout as a cave that had been previously presented at E3. It is the only sublevel in the game in which this is the case.
- In sublevel 11, if an electrical wire spawns on top of the wooden structure, one of its ends will be on the structure while the other will be on the floor. The electric discharge between the two ends will still connect correctly.[2]
- Curiously, the music track Flooded Stump is defined to play on the ninth sublevel. In practice, it is overridden by the rest sublevel theme. The same occurs in all sublevels of the Submerged Castle as well.
- This cave has more treasures than any other cave in Pikmin 2.
Names in other languages[edit]
| Language | Name | Meaning |
|---|---|---|
| 夢の穴? Yume no Ana |
Hole of Dreams | |
(traditional) |
夢之洞穴 | |
| Pays des Rêves | Country of Dreams | |
| Bau der Träume | Den of Dreams | |
| Tana di Sogno | Dream Den | |
| Refugio de los Sueños | Dream Refuge |
See also[edit]
References[edit]
- ^ YouTube video showing the tenth sublevel of the Dream Den completed without Blue Pikmin
- ^ How do the Electric Again? on reddit, published on September 17th, 2019, retrieved on September 17th, 2019
| Wistful Wild | |||||||||
|---|---|---|---|---|---|---|---|---|---|
|
Click an object |
| ||||||||