Bomb rock: Difference between revisions
(Added an important task.) |
Tag: Mobile edit |
||
| (110 intermediate revisions by 52 users not shown) | |||
| Line 1: | Line 1: | ||
{{game icons|p=y|p2=y|p3=y|hp=y}} | {{game icons|p=y|p2=y|p3=y|p4=y|hp=y}} | ||
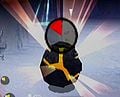
[[File:Bombrock.png|thumb|Artwork of a bomb rock, from ''[[New Play Control! Pikmin]]''.]] | [[File:Bombrock.png|thumb|Artwork of a bomb rock, from ''[[New Play Control! Pikmin]]''.]] | ||
{{todo|Point down how long the bombs take to explode, in all games. (Keep in mind EU ''Pikmin'' is slower, and that it is possible for | {{todo|Point down how long the bombs take to explode, in all games. (Keep in mind EU ''Pikmin'' is slower, and that it is possible for bombs to have a different timer.)}} | ||
'''Bomb rocks''' ( | '''Bomb rocks''' ({{j|バクダン岩|Bakudan iwa|Bomb rock}}; formatted as '''bomb-rocks''' prior to ''Pikmin 3'') are explosive rocks in the [[Pikmin series|''Pikmin'' games]]. Upon being activated, a rock's fuse starts going down (represented by a [[Health#Health wheel|colored wheel]] in the first two games), and when it reaches zero, the bomb causes a violent explosion, capable of damaging [[enemy|enemies]], [[leader]]s, some [[obstacle]]s and knocking back and subsequently killing any [[Pikmin family|Pikmin]]. | ||
How they work has changed, in some fashion, in every entry. In the [[Pikmin (game)|first]] and [[Pikmin 3|third]] games, they can be carried by Pikmin, but only by [[Yellow Pikmin]] in the former. In ''[[Pikmin 2]]'', they are much larger and serve as obstacles instead of tools, with the exception being on the [[2-Player Battle]] stage [[Hostile Territory]], where they can be picked up and thrown by leaders. They can also appear as items in 2-Player Battle and [[Bingo Battle]]. In ''[[Pikmin 4]]'' they're instead an item used by leaders and can be either found in the field or bought from [[Russ]] for 8 [[raw material]]s per bomb rock after accumulating a total of 3000 [[Sparklium]]. In the side story [[Olimar's Shipwreck Tale]], bomb rocks are similarly found scattered around the four areas, and Olimar gains additional bomb rocks as bonuses for recovering 2 and then 13 [[ship part]]s. | |||
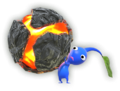
The explosions can trigger a chain reaction if they hit other bomb rocks. In ''Pikmin'', a bomb rock explosion will instantly make all bomb rocks in the vicinity explode. In ''Pikmin 2'', a bomb rock that gets hit from another's explosion will initiate its countdown, so the chain reaction is rather slow. In ''Pikmin 3'', an explosion triggers a neighboring bomb's explosion in around half a second, resulting in quite a fast chain of explosions. | Visually, they look like round rocks with cracks in them, where a yellow and red energy-based flow can be seen. Their sizes span from being a bit smaller than a Pikmin (''Pikmin'') to being larger than a leader (''Pikmin 2''); ''Pikmin 3''<nowiki>'</nowiki>s size is an in-between of the two other games' sizes. Bomb rocks in the ''[[New Play Control]]'' version are bigger than the ones in the GameCube version (the latter are the size of a Pikmin). | ||
The explosions can trigger a chain reaction if they hit other bomb rocks. In ''Pikmin'', a bomb-rock explosion will instantly make all bomb-rocks in the vicinity explode. In ''Pikmin 2'', a bomb-rock that gets hit from another's explosion will initiate its countdown, so the chain reaction is rather slow. In ''Pikmin 3'', an explosion triggers a neighboring bomb's explosion in around half a second, resulting in quite a fast chain of explosions. | |||
==Uses== | ==Uses== | ||
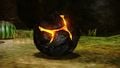
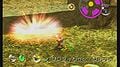
[[File:Explosion.png|thumb|A bomb rock exploding in ''Pikmin 2''.]] | [[File:Explosion.png|thumb|A bomb-rock exploding in ''Pikmin 2''.]] | ||
Bomb rocks can be used in a number of beneficial ways. | Bomb rocks can be used in a number of beneficial ways. | ||
===Destroying obstacles=== | ===Destroying obstacles=== | ||
In ''Pikmin'' and ''Pikmin | In ''Pikmin'', ''Pikmin 3'', and ''Pikmin 4'', there are some [[reinforced wall]]s that cannot be destroyed with Pikmin attacks like other types of [[gate]]. Instead, bomb rocks must be placed, activated, and detonated near them in order to slowly destroy them. Bomb rocks can also be used to destroy other gates, though, although some types are immune. Finally, they can be used to destroy certain other [[obstacle]]s and objects: | ||
*{{icon|Fire geyser|y}}s (''Pikmin 2'' only) | *{{icon|Fire geyser|y}}s (''Pikmin 2'' only) | ||
*{{icon|Electrical wire|y}}s | *{{icon|Electrical wire|y}}s | ||
*{{icon| | *{{icon|Poison emitter|v=P2|y}}s | ||
*{{icon|Egg|y}}s | *{{icon|Egg|y}}s | ||
*{{icon|Crystal wall|y}}s | *{{icon|Crystal wall|y}}s | ||
*{{icon|Cobblestone block|y}}s | |||
*{{icon|Breakable pot|v=P4|y}}s | |||
{{clear}} | {{clear}} | ||
===Harming enemies=== | ===Harming enemies=== | ||
{{todo|Finish the list for ''Pikmin'' and ''Pikmin 2''.}} | {{todo|Finish the list for ''Pikmin'' and ''Pikmin 2''.}} | ||
If a bomb rock explodes near an enemy, it will damage it, depending on the creature's vulnerabilities. Some enemies can also swallow bomb rocks, to suffer even | If a bomb rock explodes near an enemy, it will damage it, depending on the creature's vulnerabilities. Some enemies can also swallow bomb rocks, to suffer even greater damage once they explode inside. To swallow one, an enemy either has to be coaxed into eating a bomb rock lying on the ground, or chomp a bomb rock-carrying Pikmin, depending on the enemy. In ''Pikmin'', the carrier Pikmin will also be eaten and killed, but in ''Pikmin 3'', it merely gets tossed aside while the enemy swallows the isolated bomb rock instead. Similarly, in {{p4}}, if the player's character holds a bomb rock applicable enemies will eat it without affecting the character at all. | ||
The following enemies can eat bomb rocks: | The following enemies can eat bomb rocks: | ||
*''Pikmin'' | *''Pikmin'' | ||
**{{icon| | **{{icon|Burrowing Snagret|y}} | ||
**{{icon|Dwarf Bulbear|y}} | **{{icon|Dwarf Bulbear|y}} | ||
**{{icon|Dwarf | **{{icon|Dwarf Bulborb|y}} | ||
**{{icon|Emperor Bulblax|y}} | **{{icon|Emperor Bulblax|y}} | ||
**{{icon| | **{{icon|Pearly Clamclamp|y}} | ||
**{{icon|Male Sheargrub|y}} | **{{icon|Male Sheargrub|y|n=Sheargrub}} | ||
**{{icon|Shearwig|y}} | **{{icon|Shearwig|y}} | ||
**{{icon|Spotty Bulbear|y}} | |||
**{{icon|Bulborb|y|n=Spotty Bulborb}} | |||
**{{icon|Water Dumple|y}} (by using the [[Glitches in Pikmin#Throwing non-Blue Pikmin underwater|glitch]] that enables the player to throw a non-Blue Pikmin from the water) | **{{icon|Water Dumple|y}} (by using the [[Glitches in Pikmin#Throwing non-Blue Pikmin underwater|glitch]] that enables the player to throw a non-Blue Pikmin from the water) | ||
*''Pikmin 2'' | *''Pikmin 2'' | ||
**{{icon|Emperor Bulblax|y}} | **{{icon|Emperor Bulblax|y}} | ||
*''Pikmin 3'' | *''Pikmin 3'' (These enemies can also eat mines) | ||
**{{icon|Bug-Eyed Crawmad|y}} | |||
**{{icon|Bulborb|y|v=P3}} | |||
**{{icon|Burrowing Snagret|y|v=P3}} | |||
**{{icon|Candypop Bud|v=P3 red|y}} | |||
**{{icon|Orange Bulborb|v=P3|y}} | |||
**{{icon|Peckish Aristocrab|y}} | **{{icon|Peckish Aristocrab|y}} | ||
**{{icon|Pyroclasmic Slooch|y}} | **{{icon|Pyroclasmic Slooch|y}} | ||
**{{icon|Sandbelching Meerslug|y}} | **{{icon|Sandbelching Meerslug|y}} | ||
**{{icon|Burrowing Snagret|v= | **{{icon|Spotty Bulbear|y|v=P3}} | ||
**{{icon|Toady Bloyster|v= | **{{icon|Toady Bloyster|y|v=P3}} | ||
** | **{{icon|Whiptongue Bulborb|y}} | ||
*''Pikmin 4'' (These enemies can also eat mines, ice blasts, and trackonators) | |||
** {{icon|Bulborb|y|v=P4}} | |||
** {{icon|Jumbo Bulborb|y|v=P4}} | |||
** {{icon|Orange Bulborb|y|v=P4}} | |||
** {{icon|Spotty Bulbear|y|v=P4}} | |||
** {{icon|Frosty Bulborb|y|v=P4}} | |||
** {{icon|Fiery Bulblax|y|v=P4}} | |||
** {{icon|Whiptongue Bulborb|y|v=P4}} | |||
** {{icon|Emperor Bulblax|y|v=P4}} | |||
** {{icon|Sovereign Bulblax|y|v=P4}} | |||
** {{icon|Arctic Cannon Beetle|y|v=P4}} | |||
** {{icon|Creeping Chrysanthemum|y|v=P4}} | |||
** {{icon|Startle Spore|y|v=P4}} | |||
** {{icon|Gildemandwee|y|v=P4}} | |||
** {{icon|Gildemander|y|v=P4}} | |||
** {{icon|Sunsquish|y|v=P4}} | |||
** {{icon|Foolix|y|v=P4}} | |||
** {{icon|Burrowing Snagret|y|v=P4}} | |||
** {{icon|Waddlequaff|y|v=P4}} | |||
** {{icon|Moldy Slooch|y|v=P4}} | |||
** {{icon|Pyroclasmic Slooch|y|v=P4}} | |||
** {{icon|Lesser Spotted Jellyfloat|y|v=P4}} | |||
** {{icon|Greater Spotted Jellyfloat|y|v=P4}} | |||
** {{icon|Peckish Aristocrab|y|v=P4}} | |||
** {{icon|Bug-Eyed Crawmad|y|v=P4}} | |||
** {{icon|Crusted Rumpup|y|v=P4}} | |||
** {{icon|Pearly Clamclamp|y|v=P4}} | |||
** {{icon|Toady Bloyster|y|v=P4}} | |||
** {{icon|Bloomcap Bloyster|y|v=P4}} | |||
** {{icon|Bogswallow|y|v=P4}} | |||
** {{icon|Ancient Sirehound|y|v=P4}} | |||
** {{icon|Candypop Bud|y|v=P4}} | |||
The [[Emperor Bulblax]] reacts to bomb rocks in a different way, in that if they explode on its tongue or inside of it, they will stun it for some time. | The [[Emperor Bulblax]] reacts to bomb rocks in a different way, in that if they explode on its tongue or inside of it, they will stun it for some time. | ||
{{clear}} | |||
===Other uses=== | ===Other uses=== | ||
* Bomb rocks in ''Pikmin 3'' can be used to instantly [[ | * Bomb rocks in ''Pikmin 3'' and ''Pikmin 4'' can be used to instantly [[Dig|unearth]] buried [[fruit]], [[treasure]] and [[Onion]]s. | ||
* [[Candypop Bud]]s that take in Pikmin carrying bomb rocks in ''Pikmin 3'' will shrivel and die right afterwards. | * [[Candypop Bud]]s that take in Pikmin carrying bomb rocks in ''Pikmin 3'' will shrivel and die right afterwards. This is no longer the case in ''[[Pikmin 4]]'' as they will spew it out; this also happens with [[Ice Blast|ice blast]]s and Trackonators. | ||
==As obstacles== | ==As obstacles== | ||
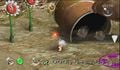
In ''[[Pikmin 2]]'', bomb rocks cannot be carried by Pikmin, but can be set off by attacking them. They can also spontaneously fall from the ceiling and instantly activate, and are also produced by [[Careening Dirigibug]]s. [[Volatile Dweevil]]s carry bomb rocks on their backs, presumably for protection, even though they themselves are killed in the blast. One should ''never'' [[throw]] [[Purple Pikmin]] onto a bomb rock, as that can cause near-instant detonation, which will likely kill the Pikmin. Bomb rocks can even be [[ultra-bitter spray|petrified]], so one should do that if in peril, but they will not release [[nectar]] or [[spray]] like many beasts do if destroyed in that state. Petrifying an inactive bomb rock will also activate it once it breaks free. Finally, petrifying a bomb rock in the same moment it is going to blow up will make it disappear without harm.{{cite youtube|Tt-oXztIb5w|demonstrating how a bomb rock can disappear if sprayed just as it is going to blow up}} | In ''[[Pikmin 2]]'', bomb rocks cannot be carried by Pikmin, but can be set off by attacking them. They can also spontaneously fall from the ceiling and instantly activate, and are also produced by [[Careening Dirigibug]]s. [[Volatile Dweevil]]s carry bomb rocks on their backs, presumably for protection, even though they themselves are killed in the blast. One should ''never'' [[throw]] [[Purple Pikmin]] onto a bomb rock, as that can cause near-instant detonation, which will likely kill the Pikmin. | ||
Bomb rocks can even be [[ultra-bitter spray|petrified]] to pause their timer, so one should do that if in peril, but they will not release [[nectar]] or [[spray]] like many beasts do if destroyed in that state. Petrifying an inactive bomb rock will also activate it once it breaks free. When petrified, one can be safely destroyed with five leader [[punch]]es or a few Pikmin smacks. Finally, petrifying a bomb rock in the same moment it is going to blow up will make it disappear without harm.{{cite youtube|Tt-oXztIb5w|demonstrating how a bomb rock can disappear if sprayed just as it is going to blow up}} | |||
Despite being obstacles and hard to control, bomb rocks in ''Pikmin 2'' can also be used to one's advantage, with the aforementioned uses. Fixed-location bomb rocks are less exploitable, but enemies that can generate bomb rock explosions can be abused more easily. For instance, one can have a Careening Dirigibug destroy an [[electrical wire]] without Pikmin having to be involved. | Despite being obstacles and hard to control, bomb rocks in ''Pikmin 2'' can also be used to one's advantage, with the aforementioned uses. Fixed-location bomb rocks are less exploitable, but enemies that can generate bomb rock explosions can be abused more easily. For instance, one can have a Careening Dirigibug destroy an [[electrical wire]] without Pikmin having to be involved. | ||
| Line 65: | Line 108: | ||
==Controlling== | ==Controlling== | ||
===''Pikmin''=== | ===''Pikmin''=== | ||
[[File:Yellow Pikmin holds bomb rock P1 art.png|thumb | [[File:Yellow Pikmin holds bomb rock P1 art.png|thumb|Artwork of a [[Yellow Pikmin]] holding a bomb rock.]] | ||
The [[controls]] when dealing with bomb rock | The [[controls]] when dealing with bomb-rock yielding Yellow Pikmin are a bit complex, and varies slightly depending on the console. | ||
====GameCube==== | ====GameCube==== | ||
On the GameCube version of the game, [[throw]]ing a Pikmin with a bomb rock will make it stay on the spot, but primed to use the bomb. It is possible to see that the Pikmin is not idle because its stem doesn't glow and its color doesn't become paler. If an enemy is close, the Pikmin will step back and throw the bomb rock at it. In this state, when called back using the [[whistle]], they'll drop and activate the bomb, and run towards Olimar. If, however, the player wants the Pikmin to join the party without dropping and activating the bomb, they must have Olimar touch the Pikmin directly. [[Dismiss]]ing will cause these Pikmin to go to their own group, but will actually become idle, as seen by their color and stem. In this state, they | On the GameCube version of the game, [[throw]]ing a Pikmin with a bomb-rock will make it stay on the spot, but primed to use the bomb. It is possible to see that the Pikmin is not [[idle]] because its stem doesn't glow and its color doesn't become paler. If an enemy is close, the Pikmin will step back and throw the bomb rock at it. In this state, when called back using the [[whistle]], they'll drop and activate the bomb, and run towards Olimar. If, however, the player wants the Pikmin to join the party without dropping and activating the bomb, they must have Olimar touch the Pikmin directly. [[Dismiss]]ing will cause these Pikmin to go to their own group, but will actually become idle, as seen by their color and stem. In this state, they will no longer activate their bomb when whistled. | ||
====Wii==== | ====Wii==== | ||
| Line 75: | Line 118: | ||
====GameCube and Wii==== | ====GameCube and Wii==== | ||
Pikmin holding bomb rocks will not interact with objects when | Pikmin holding bomb-rocks will not interact with objects when [[swarm]]ing, and when called to the yellow [[Onion]], Pikmin yielding bomb rocks will drop the explosives on the ground without igniting them. | ||
Curiously, when a Yellow Pikmin | Curiously, when a Yellow Pikmin actively uses a bomb-rock on something (i.e. dropping it near a reinforced wall or throwing it at an enemy), nearby idle Pikmin will rejoin Olimar in order to avoid the blast. However, if a Yellow Pikmin drops its bomb-rock via Olimar's whistle, idle Pikmin near the bomb-rock will not rejoin Olimar. | ||
{{clear}} | {{clear}} | ||
===''Pikmin 2''=== | ===''Pikmin 2''=== | ||
In the [[2-Player Battle]] stage [[Hostile Territory]], bomb rocks can be picked up and thrown by a leader, which can be used to defeat enemies, or deal a serious blow to the opponent's Pikmin count. To perform this, one merely needs to run into a bomb rock for around one second, at which point it'll be picked up. Players can then press {{button|gc|a|wii|a}} to throw it (the distance is around twice as far as the reach of the GameCube game's cursor), or {{button|gc|b|wii|b}} to drop it in place. In both cases, the bomb rock will be activated. In every other point in the game where bomb rocks are found, they can be activated by being attacked, provoked (in the case of Volatile Dweevils), or dropped (in the case of Careening Dirigibugs). | In the [[2-Player Battle]] stage [[Hostile Territory]], bomb-rocks can be picked up and thrown by a [[leader]], which can be used to defeat enemies, or deal a serious blow to the opponent's Pikmin count. To perform this, one merely needs to run into a bomb rock for around one second, at which point it'll be picked up. Players can then press {{button|gc|a|wii|a}} to throw it (the distance is around twice as far as the reach of the GameCube game's cursor), or {{button|gc|b|wii|b}} to drop it in place. In both cases, the bomb-rock will be activated. In every other point in the game where bomb-rocks are found, they can be activated by being attacked, provoked (in the case of Volatile Dweevils), or dropped (in the case of Careening Dirigibugs). | ||
===''Pikmin 3''=== | ===''Pikmin 3''=== | ||
Controlling the way Pikmin behave with | Controlling the way Pikmin behave with bomb rocks is much simpler in this game compared to ''Pikmin'' – a Pikmin will always keep hold of its bomb until said Pikmin is thrown, in which case it will drop the rock exactly where it landed, and run back to the group with a cry. When [[dismiss]]ed, any bomb rock-wielding Pikmin will separate from the group of their type, making it easier to get only the bombers. Pikmin with bomb rocks still cannot interact with other objects, not even by [[Charge|charging]]. In order to coax an enemy into eating a bomb rock, there should be a Pikmin idling with one nearby. When the enemy tries to eat that Pikmin, the Pikmin will be knocked back and the beast will eat the explosive instead. Despite appearances, bomb rocks are also unaffected by water. | ||
===''Pikmin 4''=== | |||
In ''Pikmin 4'', bomb rocks are a [[pack]] item carried by the player. The [[Pikmin 4 player character|player character]] and [[Oatchi]] can throw bomb rocks like how they would throw a Pikmin. Thus, they do not require Pikmin to operate like in previous games, but Pikmin can be thrown at bomb rocks on the floor to get them to bring the object back to the player. ''Pikmin 4'' also introduces an ice variant, the [[ice blast]], which [[Ice|freezes]] instead of dealing damage. In this game, if certain enemies bite a leader when they are holding either type of bomb rock, the enemy will swallow the bomb rock and be stunned instead of damaging the leader. Bomb rocks can also be thrown at enemies in the [[Piklopedia (Pikmin 4)|Piklopedia]]. | |||
===''Hey! Pikmin''=== | |||
When a Pikmin picks up a bomb rock, it will join Olimar's squad and be treated as a separate type of Pikmin from the other types. If bomb rock Pikmin are the selected type, throwing one will make it drop the bomb where it lands, and it will then walk back to Olimar during the bomb's countdown timer. There is no other way for a bomb rock Pikmin to drop its bomb, apart from dying, which will make the bomb explode. | |||
==Locations== | ==Locations== | ||
| Line 93: | Line 142: | ||
;Story mode: | ;Story mode: | ||
*[[The Impact Site]]: Inside the box that the Pikmin have to push on the first day. (5 bomb rocks) | *[[The Impact Site]]: Inside the box that the Pikmin have to push on the first day. (5 bomb rocks) | ||
*[[The Forest of Hope]]: In a tin can, near the great plain with [[ | *[[The Forest of Hope]]: In a tin can, near the great plain with [[Bulborb|Spotty Bulborb]]s (5), in another one near the place where the [[Yellow Onion]] is originally found (6). The last can is in the place where the [[Nova Blaster]] is found (15). 3 are found out of the cans, in front of the wall closing in between the Yellow Onion and the [[Whimsical Radar]]. | ||
*[[The Forest Navel]]: In a pipe, near the pool where the [[Number 1 Ionium Jet]] is found. There's another one next to the place the [[Gravity Jumper]] lies (15). | *[[The Forest Navel]]: In a pipe, near the pool where the [[Number 1 Ionium Jet|#1 Ionium Jet]] is found (10). There's another one next to the place the [[Gravity Jumper]] lies (15). | ||
*[[The Distant Spring]]: In a giant skull, inside a hollow tree stump guarded by a [[Spotty Bulbear]] (5) and in the beach where the [[Massage Machine]] is found. There is another skull near the pool with the [[Water Dumple]]s to the west (5). | *[[The Distant Spring]]: In a giant skull, inside a hollow tree stump guarded by a [[Spotty Bulbear]] (5) and in the beach where the [[Massage Machine]] is found. There is another skull near the pool with the [[Water Dumple]]s to the west (5). | ||
*[[The Final Trial]]: In a pipe, on a high place to the right of the starting point. There are three other pipes in the cliffs surrounding the arena where [[Emperor Bulblax]] is fought. Overall, there are | *[[The Final Trial]]: In a pipe, on a high place to the right of the starting point. There are three other pipes in the cliffs surrounding the arena where [[Emperor Bulblax]] is fought. Overall, there are 53 bomb rocks in this stage. | ||
;Challenge Mode: | ;Challenge Mode: | ||
*[[The Impact Site]]: Inside the box that the Pikmin have to push on the first day. | *[[The Impact Site]]: Inside the box that the Pikmin have to push on the first day. | ||
*[[The Forest of Hope]]: In a tin can, near the place where the [[Yellow Onion]] is originally found. There are also some in the ledge that leads to the arena where the [[Armored Cannon Beetle]] was. | *[[The Forest of Hope]]: In a tin can, near the place where the [[Yellow Onion]] is originally found. There are also some in the ledge that leads to the arena where the [[Armored Cannon Beetle]] was. | ||
*[[The Forest Navel]]: There are no bomb rocks in the | *[[The Forest Navel]]: There are no bomb rocks in the area. | ||
*[[The Distant Spring]]: There are no bomb rocks in the | *[[The Distant Spring]]: There are no bomb rocks in the area. | ||
*[[The Final Trial]]: In the walkway around the [[Emperor Bulblax]] arena where the pipes are normally. There aren't any inside pipes. | *[[The Final Trial]]: In the walkway around the [[Emperor Bulblax]] arena where the pipes are normally. There aren't any inside pipes. | ||
| Line 129: | Line 178: | ||
===''Pikmin 3''=== | ===''Pikmin 3''=== | ||
;Story Mode: | ;Story Mode: | ||
*[[Tropical Wilds]]: Bomb rocks | *[[Tropical Wilds]]: Bomb rocks are common here. They are found in the following locations: | ||
**2 are found directly west of the landing site, inside of a [[dirt mound]]. | **2 are found directly west of the landing site, inside of a [[dirt mound]]. | ||
**2 are found near the waterfall to the east of the landing site, inside of a dirt mound, and 1 is found exposed next to them. | **2 are found near the waterfall to the east of the landing site, inside of a dirt mound, and 1 is found exposed next to them. | ||
**3 are found in the northern section of the [[Shaggy Long Legs]] arena, inside of a dirt mound. | **3 are found in the northern section of the [[Shaggy Long Legs]] arena, inside of a dirt mound. | ||
**3 are found in the cave containing a [[Medusal Slurker]] that holds a [[Juicy Gaggle]], inside of various eggs. | **3 are found in the cave containing a [[Medusal Slurker]] that holds a [[Juicy Gaggle]], inside of various eggs. | ||
*[[Garden of Hope]]: There are no bomb rocks in the area. | |||
*[[Distant Tundra]]: A pile of 10 bomb rocks is found within a cave filled with Dwarf Bulbears, [[Fiery Blowhog]]s, and one Spotty Bulbear. They are intended to help defeat the Bulbear, but can cause a devastating explosion due to the amount of bomb rocks in the pile. | *[[Distant Tundra]]: A pile of 10 bomb rocks is found within a cave filled with Dwarf Bulbears, [[Fiery Blowhog]]s, and one Spotty Bulbear. They are intended to help defeat the Bulbear, but can cause a devastating explosion due to the amount of bomb rocks in the pile. | ||
*[[Twilight River]]: Four are found on top of a can near the [[Puffy Blowhog]], but they require either Yellow Pikmin or [[Winged Pikmin]] to reach them due to their height. | *[[Twilight River]]: Four are found on top of a can near the [[Puffy Blowhog]], but they require either Yellow Pikmin or [[Winged Pikmin]] to reach them due to their height. | ||
*[[Formidable Oak]]: Three are found in a dirt mound enclosed by a [[crystal wall]] near the start of the cave complex. Another three are located in another dirt mound, this one behind a dirt wall in the portion of the first room that contains the fragments. | *[[Formidable Oak]]: Three are found in a dirt mound enclosed by a [[crystal wall]] near the start of the cave complex. Another three are located in another dirt mound, this one behind a dirt wall in the portion of the first room that contains the fragments. | ||
===''Hey! Pikmin''=== | |||
{{game help|hp|Add all locations where bomb rocks can be found.}} | |||
*'''[[Sparkling Labyrinth]]:''' | |||
**[[Echo Cavern]]: The first area where bomb rocks appear in {{hp}}. | |||
*'''[[Sweltering Parchlands]]:''' | |||
**[[Blazing Winds]] | |||
==Mine== | ==Mine== | ||
{{image}} | {{image}} | ||
[[File:Bingo Battle Mine icon.png|thumb|Icon used for the mine.]] | [[File:Bingo Battle Mine icon.png|thumb|Icon used for the mine.]] | ||
Mines are [[Bingo Battle]] exclusive explosives that attach to anything. They act similar to bomb rocks in the way that Pikmin carry them, and they can explode. This item is most commonly obtained from a roulette spin, which can be caused by retrieving a [[Cupid's Grenade]], but can also be found on layout C of the [[Jigsaw Colosseum]]. When the "mine" roulette wheel item is used, a mine spawns near the player's group, and at that point, the player can issue a [[Pikmin family|Pikmin]] to pick it up. The Pikmin can then be thrown at the ground, a wall, a fruit, or anything else, and where it touches, the mine will stick. From this point on, the mine will be armed, and will detonate whenever a leader | Mines are [[Bingo Battle]] exclusive explosives that attach to anything. They act similar to bomb rocks in the way that Pikmin carry them, and they can explode. This item is most commonly obtained from a roulette spin, which can be caused by retrieving a [[Cupid's Grenade]], but can also be found on layout C of the [[Jigsaw Colosseum]], and from [[dirt mound]]s in layout C of the [[Rusted Labyrinth]]. When the "mine" roulette wheel item is used, a mine spawns near the player's group, and at that point, the player can issue a [[Pikmin family|Pikmin]] to pick it up. The Pikmin can then be thrown at the ground, a wall, a fruit, or anything else, and where it touches, the mine will stick. From this point on, the mine will be armed, and will detonate whenever a leader draws near. If there is a mine on a fruit or any carriable object, and that object is brought to an Onion without the mine blowing up, the explosive will slide off and fall on the ground. | ||
The mine resembles a metal barrel with a light on top. This light is green when the mine is unarmed. When it sticks onto something, the light will turn yellow, and two yellow lighthouse-like beacon lights will spin around its equator. A "boop" sound can also be heard every second or so. When it detects movement nearby, the light and beacons turn magenta, it beeps faster, and after three seconds, it explodes. | The mine resembles a metal barrel with a light on top. This light is green when the mine is unarmed. When it sticks onto something, the light will turn yellow, and two yellow lighthouse-like beacon lights will spin around its equator. A "boop" sound can also be heard every second or so. When it detects movement nearby, the light and beacons turn magenta, it beeps faster, and after three seconds, it explodes. | ||
''Pikmin 4'' introduces mines as an exploration item that can be purchased from [[Russ]], or found in an item capsule during a [[Dandori Battle]]. Mines function similarly to their ''Pikmin 3'' version, except that the light stays green when active and changes to an orange-yellow when triggered, gaining the same pre-explosion glow as bomb rocks. | |||
==Trackonator== | |||
The Trackonator is an exploration item introduced in ''Pikmin 4'', and can be purchased from Russ or found in an item capsule during Dandori Battles. Trackonators work similarly to Mines, but cannot stick to objects. Instead, they will chase nearby enemies for a few seconds before they detonate. In [[Olimar's Shipwreck Tale]], Olimar gains Trackonators as bonuses for recovering 9, 15 and finally 26 [[ship part]]s. | |||
==Badges== | |||
In {{p3d}}, there is a [[badge (Pikmin 3 Deluxe)|badge]] the player can gain from using a bomb rock: | |||
*'''Blast Radius''': Defeat three creatures with a bomb rock. | |||
<gallery> | |||
Badge 32 blastradius.png|Blast Radius. The badge shows three Bulborb silhouettes in front of an explosion. | |||
</gallery> | |||
==Glitches== | ==Glitches== | ||
| Line 151: | Line 219: | ||
In ''Pikmin'', Yellow Pikmin will sometimes fail to pick up bomb rocks, and will instead perform their "picking up" animation repeatedly. Whistling them and having them try it again is usually enough to fix the issue. | In ''Pikmin'', Yellow Pikmin will sometimes fail to pick up bomb rocks, and will instead perform their "picking up" animation repeatedly. Whistling them and having them try it again is usually enough to fix the issue. | ||
In ''Pikmin 3'', bomb rocks immediately explode if crushed by a Yellow Wollywog. If a Yellow Wollywog lands on a bomb rock that has been thrown but has not yet exploded, the bomb rock will prematurely explode, but the light effects of the about-to-explode bomb rock will continue to play as usual. This is a purely visual bug and does not affect gameplay in any way. | |||
==Technical information== | ==Technical information== | ||
In ''Pikmin 2'', bomb rocks cause 500 [[Health|points of damage]]. While the values for ''Pikmin | In ''Pikmin 2'', bomb rocks cause 500 [[Health|points of damage]]. While the values for ''Pikmin'' are not exactly known, observation indicates that the bombs are just as strong. In ''Pikmin 3'', each enemy has data that specifies how much damage the bomb explosions cause – specifically, each enemy has data on how many bomb rock explosions are required to kill it, as well as how many bomb rock ingestions. | ||
{{p2 enemy technical | {{p2 enemy technical | ||
| Line 219: | Line 289: | ||
<gallery> | <gallery> | ||
The Forest of Hope P1 bomb rocks.jpg|A few bomb rocks in a can. | The Forest of Hope P1 bomb rocks.jpg|A few bomb rocks in a can. | ||
Pikmin bomb rock size GC.jpg|A [[Yellow Pikmin]] holding a bomb rock, in the [[GameCube]] version of {{p1}}. | |||
Pikmin bomb rock size Wii.jpg|Same as the previous screenshot, but in the [[Wii]] version. | |||
Bomb-rock.jpg|A bomb rock about to explode in ''Pikmin 2''. | Bomb-rock.jpg|A bomb rock about to explode in ''Pikmin 2''. | ||
Bomb rock P3 close up.jpg|A closeup of a bomb rock in ''Pikmin 3''. | Bomb rock P3 close up.jpg|A closeup of a bomb rock in ''Pikmin 3''. | ||
| Line 226: | Line 298: | ||
Red Pikmin carries bomb-rock P3.png|A Red Pikmin carrying a bomb rock in ''Pikmin 3''. | Red Pikmin carries bomb-rock P3.png|A Red Pikmin carrying a bomb rock in ''Pikmin 3''. | ||
Bomb Rock Rock Pikmin.jpg|A Rock Pikmin carrying a bomb rock in ''Pikmin 3''. | Bomb Rock Rock Pikmin.jpg|A Rock Pikmin carrying a bomb rock in ''Pikmin 3''. | ||
P1 Unused Red Leaf Bomb Rock Icon.png|An unused texture from ''Pikmin,'' showing a Red Pikmin with a bomb rock. The other textures can be found [[Unused content in Pikmin#Unused bomb-rock textures|here]]. | |||
Cypress cones (real world).jpg|Real life cypress cones. | Cypress cones (real world).jpg|Real life cypress cones. | ||
Pikminology10.jpg|The data file explaining bomb rocks. | Pikminology10.jpg|The data file explaining bomb rocks. | ||
Bomb P2.jpg|Screenshot of [[Captain Olimar]] holding a bomb rock. | Bomb P2.jpg|Screenshot of [[Captain Olimar]] holding a bomb rock. | ||
PikShotBoom.jpg|A bomb-rock exploding in ''Pikmin''. | PikShotBoom.jpg|A bomb-rock exploding in ''Pikmin''. | ||
P2 Explosions High Scores Artwork.png|Drawing used to represent Pikmin killed by explosions in ''Pikmin 2''{{'s}} [[high scores menu]]. | |||
Hey! Pikmin bomb rock.png|Artwork of a Pikmin holding a bomb rock in {{hp}}. | Hey! Pikmin bomb rock.png|Artwork of a Pikmin holding a bomb rock in {{hp}}. | ||
</gallery> | </gallery> | ||
| Line 238: | Line 310: | ||
*It is suggested that [[Red Pikmin|Red]] and [[Blue Pikmin]] could once carry bomb rocks along with the [[Yellow Pikmin]] in the original ''Pikmin'', as seen in some [[Unused content in Pikmin|unused files]]. All Pikmin gained this ability in ''Pikmin 3''. | *It is suggested that [[Red Pikmin|Red]] and [[Blue Pikmin]] could once carry bomb rocks along with the [[Yellow Pikmin]] in the original ''Pikmin'', as seen in some [[Unused content in Pikmin|unused files]]. All Pikmin gained this ability in ''Pikmin 3''. | ||
*If a Pikmin is holding a bomb rock when it is called to the Onion, it will leave it beneath the Onion's pillar of light. | *If a Pikmin is holding a bomb rock when it is called to the Onion, it will leave it beneath the Onion's pillar of light. | ||
*Bomb rocks in ''Pikmin'' | *Bomb rocks in ''Pikmin'' shrink and disappear if they touch the water. This can be seen on [[The Forest Navel]] where, on the southernmost point of the map, there is a tube with bomb rocks. If Olimar [[Lie down|lies down]] next to the one outside the tube, closest to the water, he will begin sliding towards the lake and drag the bomb rock with him. | ||
*In ''[[Pikmin 2]]'', if a bomb rock in a cluster of bomb rocks explodes off-screen, it will not activate the others. This is because [[Camera#Off-camera objects|off-camera objects]] have special behaviors. | *In ''[[Pikmin 2]]'', if a bomb rock in a cluster of bomb rocks explodes off-screen, it will not activate the others. This is because [[Camera#Off-camera objects|off-camera objects]] have special behaviors. | ||
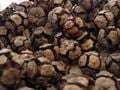
* | *Bomb rocks' visually resemble real-life {{w|cypress cone}}s. | ||
*Pikmin holding bomb rocks in ''Pikmin 3'' will not roll when [[dodging]], but will walk faster to keep up with the dodge. | *Pikmin holding bomb rocks in ''Pikmin 3'' will not roll when [[dodging]], but will walk faster to keep up with the dodge. | ||
*In ''Pikmin 3'', if a Pikmin is already under the effect of another hazard (such as electricity), it can't get killed by an explosion. | *In ''Pikmin 3'', if a Pikmin is already under the effect of another hazard (such as electricity), it can't get killed by an explosion. | ||
*Bomb rocks are larger in size in the {{npcp1}} release of the first game, compared to the GameCube original. | |||
*In ''Pikmin 3'', if a bomb rock spawns on a sloped surface, such as in Layout B of [[Sandbox Kingdom]], it will normally remain stationary until picked up. However, if another bomb rock explosion occurs anywhere in the vicinity, the bomb rock on the slope will mysteriously become affected by gravity and will roll down the slope. | |||
==Names in other languages== | ==Names in other languages== | ||
{{Foreignname | {{Foreignname | ||
|Jap=バクダン岩 | |||
|JapR=Bakudan iwa | |||
|JapM=Bomb rock | |||
|ChiTrad=炸彈岩 | |||
|ChiTradR=Zhàdàn yán | |||
|ChiTradM=Bomb rock | |||
|ChiSimp=炸弹岩 | |||
|ChiSimpR=Zhàdàn yán | |||
|ChiSimpM=Bomb rock | |||
|Dut=Bomrots | |Dut=Bomrots | ||
|DutM=Bomb rock | |DutM=Bomb rock | ||
|Fra=Bombe-roc | |||
|Fra=Bombe | |FraM=Bomb-rock | ||
|FraM=Bomb-rock | |Ger=Steinbombe | ||
|GerM=Stone bomb | |||
|Ger= | |Ita=Roccia bomba | ||
|GerM= | |||
|Ita= | |||
|ItaM=Bomb rock | |ItaM=Bomb rock | ||
| | |Spa=Roca-bomba (''Pikmin'')<br>Roca bomba (''Pikmin 3'' and ''Pikmin 4'') | ||
| | |SpaM=Bomb-rock<br>Bomb rock | ||
|Kor=폭탄바위 | |Kor=폭탄바위 | ||
|KorR= | |KorR=pogtanbawi | ||
|KorM=Bomb rock | |KorM=Bomb rock | ||
|PorB=Pedra-bomba | |||
|PorBM=Bomb-stone | |||
|PorP = Pedra bomba<br>Rocha-bomba | |PorP = Pedra bomba<br>Rocha-bomba | ||
|PorPM = Bomb stone<br>Bomb-rock | |PorPM = Bomb stone<br>Bomb-rock | ||
|PorPN = | |PorPN = Name taken from the ''New Play Control! Pikmin'' website.<br>Name taken from the ''Pikmin'' instruction manual | ||
|Rus=взрывающихся камень | |||
|RusR=vzryvayushchikhsya kamen' | |||
|RusM=Exploding stone | |||
|RusN=Name taken from the ''New Play Control! Pikmin'' website. | |||
|notes = y | |notes = y | ||
}} | }} | ||
| Line 274: | Line 358: | ||
*[[Reinforced wall]] | *[[Reinforced wall]] | ||
*[[Cobblestone block]] | *[[Cobblestone block]] | ||
*[[Sneak Bomb]] | |||
==References== | ==References== | ||
Latest revision as of 10:13, April 9, 2024

|
To do: Point down how long the bombs take to explode, in all games. (Keep in mind EU Pikmin is slower, and that it is possible for bombs to have a different timer.) |
Bomb rocks (バクダン岩?, lit.: "Bomb rock"; formatted as bomb-rocks prior to Pikmin 3) are explosive rocks in the Pikmin games. Upon being activated, a rock's fuse starts going down (represented by a colored wheel in the first two games), and when it reaches zero, the bomb causes a violent explosion, capable of damaging enemies, leaders, some obstacles and knocking back and subsequently killing any Pikmin.
How they work has changed, in some fashion, in every entry. In the first and third games, they can be carried by Pikmin, but only by Yellow Pikmin in the former. In Pikmin 2, they are much larger and serve as obstacles instead of tools, with the exception being on the 2-Player Battle stage Hostile Territory, where they can be picked up and thrown by leaders. They can also appear as items in 2-Player Battle and Bingo Battle. In Pikmin 4 they're instead an item used by leaders and can be either found in the field or bought from Russ for 8 raw materials per bomb rock after accumulating a total of 3000 Sparklium. In the side story Olimar's Shipwreck Tale, bomb rocks are similarly found scattered around the four areas, and Olimar gains additional bomb rocks as bonuses for recovering 2 and then 13 ship parts.
Visually, they look like round rocks with cracks in them, where a yellow and red energy-based flow can be seen. Their sizes span from being a bit smaller than a Pikmin (Pikmin) to being larger than a leader (Pikmin 2); Pikmin 3's size is an in-between of the two other games' sizes. Bomb rocks in the New Play Control version are bigger than the ones in the GameCube version (the latter are the size of a Pikmin).
The explosions can trigger a chain reaction if they hit other bomb rocks. In Pikmin, a bomb-rock explosion will instantly make all bomb-rocks in the vicinity explode. In Pikmin 2, a bomb-rock that gets hit from another's explosion will initiate its countdown, so the chain reaction is rather slow. In Pikmin 3, an explosion triggers a neighboring bomb's explosion in around half a second, resulting in quite a fast chain of explosions.
Uses[edit]

Bomb rocks can be used in a number of beneficial ways.
Destroying obstacles[edit]
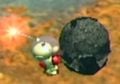
In Pikmin, Pikmin 3, and Pikmin 4, there are some reinforced walls that cannot be destroyed with Pikmin attacks like other types of gate. Instead, bomb rocks must be placed, activated, and detonated near them in order to slowly destroy them. Bomb rocks can also be used to destroy other gates, though, although some types are immune. Finally, they can be used to destroy certain other obstacles and objects:
 Fire geysers (Pikmin 2 only)
 Electrical wires
 Poison emitters
 Eggs
Eggs Crystal walls
 Cobblestone blocks
 Breakable pots
Harming enemies[edit]
|
To do: Finish the list for Pikmin and Pikmin 2. |
If a bomb rock explodes near an enemy, it will damage it, depending on the creature's vulnerabilities. Some enemies can also swallow bomb rocks, to suffer even greater damage once they explode inside. To swallow one, an enemy either has to be coaxed into eating a bomb rock lying on the ground, or chomp a bomb rock-carrying Pikmin, depending on the enemy. In Pikmin, the carrier Pikmin will also be eaten and killed, but in Pikmin 3, it merely gets tossed aside while the enemy swallows the isolated bomb rock instead. Similarly, in Pikmin 4, if the player's character holds a bomb rock applicable enemies will eat it without affecting the character at all.
The following enemies can eat bomb rocks:
- Pikmin
 Burrowing Snagret
 Dwarf Bulbear
 Dwarf Bulborb
 Emperor Bulblax
 Pearly Clamclamp
 Sheargrub
 Shearwig
 Spotty Bulbear
 Spotty Bulborb
 Water Dumple (by using the glitch that enables the player to throw a non-Blue Pikmin from the water)
- Pikmin 2
- Pikmin 3 (These enemies can also eat mines)
- Pikmin 4 (These enemies can also eat mines, ice blasts, and trackonators)
 Bulborb
 Jumbo Bulborb
 Orange Bulborb
 Spotty Bulbear
 Frosty Bulborb
 Fiery Bulblax
 Whiptongue Bulborb
 Emperor Bulblax
 Sovereign Bulblax
 Arctic Cannon Beetle
 Creeping Chrysanthemum
 Startle Spore
 Gildemandwee
 Gildemander
 Sunsquish
 Foolix
 Burrowing Snagret
 Waddlequaff
 Moldy Slooch
 Pyroclasmic Slooch
 Lesser Spotted Jellyfloat
 Greater Spotted Jellyfloat
 Peckish Aristocrab
 Bug-Eyed Crawmad
 Crusted Rumpup
 Pearly Clamclamp
 Toady Bloyster
 Bloomcap Bloyster
 Bogswallow
 Ancient Sirehound
 Candypop Bud
The Emperor Bulblax reacts to bomb rocks in a different way, in that if they explode on its tongue or inside of it, they will stun it for some time.
Other uses[edit]
- Bomb rocks in Pikmin 3 and Pikmin 4 can be used to instantly unearth buried fruit, treasure and Onions.
- Candypop Buds that take in Pikmin carrying bomb rocks in Pikmin 3 will shrivel and die right afterwards. This is no longer the case in Pikmin 4 as they will spew it out; this also happens with ice blasts and Trackonators.
As obstacles[edit]
In Pikmin 2, bomb rocks cannot be carried by Pikmin, but can be set off by attacking them. They can also spontaneously fall from the ceiling and instantly activate, and are also produced by Careening Dirigibugs. Volatile Dweevils carry bomb rocks on their backs, presumably for protection, even though they themselves are killed in the blast. One should never throw Purple Pikmin onto a bomb rock, as that can cause near-instant detonation, which will likely kill the Pikmin.
Bomb rocks can even be petrified to pause their timer, so one should do that if in peril, but they will not release nectar or spray like many beasts do if destroyed in that state. Petrifying an inactive bomb rock will also activate it once it breaks free. When petrified, one can be safely destroyed with five leader punches or a few Pikmin smacks. Finally, petrifying a bomb rock in the same moment it is going to blow up will make it disappear without harm.[1]
Despite being obstacles and hard to control, bomb rocks in Pikmin 2 can also be used to one's advantage, with the aforementioned uses. Fixed-location bomb rocks are less exploitable, but enemies that can generate bomb rock explosions can be abused more easily. For instance, one can have a Careening Dirigibug destroy an electrical wire without Pikmin having to be involved.
In Hey! Pikmin[edit]
Bomb rocks can be found in several areas and function like in the main games. The timer starts ticking when a thrown bomb rock Pikmin hits the ground, and explodes after five seconds. A Pikmin holding a bomb rock can't climb up vines and will start running around in disarray if Olimar does; the bomb rock is also removed as a standby Pikmin option. However, if Olimar climbs down a vine, the Pikmin will remain on the same spot and remain an option until Olimar gets off the vine. Bomb rocks can clear harder material that Rock Pikmin can't, and are used in the fight against the Fiery Blowhog in Blazing Winds.
Controlling[edit]
Pikmin[edit]

The controls when dealing with bomb-rock yielding Yellow Pikmin are a bit complex, and varies slightly depending on the console.
GameCube[edit]
On the GameCube version of the game, throwing a Pikmin with a bomb-rock will make it stay on the spot, but primed to use the bomb. It is possible to see that the Pikmin is not idle because its stem doesn't glow and its color doesn't become paler. If an enemy is close, the Pikmin will step back and throw the bomb rock at it. In this state, when called back using the whistle, they'll drop and activate the bomb, and run towards Olimar. If, however, the player wants the Pikmin to join the party without dropping and activating the bomb, they must have Olimar touch the Pikmin directly. Dismissing will cause these Pikmin to go to their own group, but will actually become idle, as seen by their color and stem. In this state, they will no longer activate their bomb when whistled.
Wii[edit]
In the New Play Control! version, switching to a different Pikmin while holding one (i.e. pressing ![]() when holding
when holding ![]() ) will treat Yellow Pikmin as being different from bomb rock-holding Yellow Pikmin. In addition, Pikmin no longer use the bomb when called to the group, regardless of scenario.
) will treat Yellow Pikmin as being different from bomb rock-holding Yellow Pikmin. In addition, Pikmin no longer use the bomb when called to the group, regardless of scenario.
GameCube and Wii[edit]
Pikmin holding bomb-rocks will not interact with objects when swarming, and when called to the yellow Onion, Pikmin yielding bomb rocks will drop the explosives on the ground without igniting them.
Curiously, when a Yellow Pikmin actively uses a bomb-rock on something (i.e. dropping it near a reinforced wall or throwing it at an enemy), nearby idle Pikmin will rejoin Olimar in order to avoid the blast. However, if a Yellow Pikmin drops its bomb-rock via Olimar's whistle, idle Pikmin near the bomb-rock will not rejoin Olimar.
Pikmin 2[edit]
In the 2-Player Battle stage Hostile Territory, bomb-rocks can be picked up and thrown by a leader, which can be used to defeat enemies, or deal a serious blow to the opponent's Pikmin count. To perform this, one merely needs to run into a bomb rock for around one second, at which point it'll be picked up. Players can then press ![]() /
/ ![]() to throw it (the distance is around twice as far as the reach of the GameCube game's cursor), or
to throw it (the distance is around twice as far as the reach of the GameCube game's cursor), or ![]() /
/ ![]() to drop it in place. In both cases, the bomb-rock will be activated. In every other point in the game where bomb-rocks are found, they can be activated by being attacked, provoked (in the case of Volatile Dweevils), or dropped (in the case of Careening Dirigibugs).
to drop it in place. In both cases, the bomb-rock will be activated. In every other point in the game where bomb-rocks are found, they can be activated by being attacked, provoked (in the case of Volatile Dweevils), or dropped (in the case of Careening Dirigibugs).
Pikmin 3[edit]
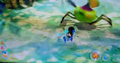
Controlling the way Pikmin behave with bomb rocks is much simpler in this game compared to Pikmin – a Pikmin will always keep hold of its bomb until said Pikmin is thrown, in which case it will drop the rock exactly where it landed, and run back to the group with a cry. When dismissed, any bomb rock-wielding Pikmin will separate from the group of their type, making it easier to get only the bombers. Pikmin with bomb rocks still cannot interact with other objects, not even by charging. In order to coax an enemy into eating a bomb rock, there should be a Pikmin idling with one nearby. When the enemy tries to eat that Pikmin, the Pikmin will be knocked back and the beast will eat the explosive instead. Despite appearances, bomb rocks are also unaffected by water.
Pikmin 4[edit]
In Pikmin 4, bomb rocks are a pack item carried by the player. The player character and Oatchi can throw bomb rocks like how they would throw a Pikmin. Thus, they do not require Pikmin to operate like in previous games, but Pikmin can be thrown at bomb rocks on the floor to get them to bring the object back to the player. Pikmin 4 also introduces an ice variant, the ice blast, which freezes instead of dealing damage. In this game, if certain enemies bite a leader when they are holding either type of bomb rock, the enemy will swallow the bomb rock and be stunned instead of damaging the leader. Bomb rocks can also be thrown at enemies in the Piklopedia.
Hey! Pikmin[edit]
When a Pikmin picks up a bomb rock, it will join Olimar's squad and be treated as a separate type of Pikmin from the other types. If bomb rock Pikmin are the selected type, throwing one will make it drop the bomb where it lands, and it will then walk back to Olimar during the bomb's countdown timer. There is no other way for a bomb rock Pikmin to drop its bomb, apart from dying, which will make the bomb explode.
Locations[edit]
Pikmin[edit]
|
The following article or section is in need of assistance from someone who plays Pikmin. |
Bomb rocks are usually found inside tin cans, pipes, or large animal skulls.
- Story mode
- The Impact Site: Inside the box that the Pikmin have to push on the first day. (5 bomb rocks)
- The Forest of Hope: In a tin can, near the great plain with Spotty Bulborbs (5), in another one near the place where the Yellow Onion is originally found (6). The last can is in the place where the Nova Blaster is found (15). 3 are found out of the cans, in front of the wall closing in between the Yellow Onion and the Whimsical Radar.
- The Forest Navel: In a pipe, near the pool where the #1 Ionium Jet is found (10). There's another one next to the place the Gravity Jumper lies (15).
- The Distant Spring: In a giant skull, inside a hollow tree stump guarded by a Spotty Bulbear (5) and in the beach where the Massage Machine is found. There is another skull near the pool with the Water Dumples to the west (5).
- The Final Trial: In a pipe, on a high place to the right of the starting point. There are three other pipes in the cliffs surrounding the arena where Emperor Bulblax is fought. Overall, there are 53 bomb rocks in this stage.
- Challenge Mode
- The Impact Site: Inside the box that the Pikmin have to push on the first day.
- The Forest of Hope: In a tin can, near the place where the Yellow Onion is originally found. There are also some in the ledge that leads to the arena where the Armored Cannon Beetle was.
- The Forest Navel: There are no bomb rocks in the area.
- The Distant Spring: There are no bomb rocks in the area.
- The Final Trial: In the walkway around the Emperor Bulblax arena where the pipes are normally. There aren't any inside pipes.
Pikmin 2[edit]
- Story mode
- Subterranean Complex: On almost every floor, there is at least one bomb rock or bomb rock-related enemy (Volatile Dweevil or Careening Drigibug).
- Bulblax Kingdom: On some floors, especially near buried or partially buried treasure, bomb rocks may spawn.
- Cavern of Chaos: On sublevels 1 and 4, they are present, and in the latter, can be used to defeat Emperor Bulblax.
- Submerged Castle: Many bomb rocks and Careening Dirigibugs are present on Sublevels 2 and 4.
- Hole of Heroes: Bomb rocks, Careening Dirigibugs, and Volatile Dweevils are found on sublevel 2.
- Frontier Cavern: Bomb rocks can spawn on sublevel 3.
- Shower Room: Some Volatile Dweevils can be in the pipes on sublevel 6.
- Dream Den: Bomb rocks and Careening Dirigibugs are found on sublevel 3.
- Challenge Mode
- Concrete Maze: Many bomb rocks and Volatile Dweevils fall from the ceiling.
- Abduction Den: Careening Dirigibugs can spawn bomb rocks.
- Cave of Pain: Many Volatile Dweevils and bomb rocks fall from the ceiling.
- Bully Den: Two Volatile Dweevils are found in the pipe structures.
- 2-Player Battle
- Hostile Territory: Many bomb rocks are littered here. Interestingly, leaders can pick up bomb rocks and use them.
Note: a Volatile Dweevil can appear in any 2-player stage as a roulette item.
Pikmin 3[edit]
- Story Mode
- Tropical Wilds: Bomb rocks are common here. They are found in the following locations:
- 2 are found directly west of the landing site, inside of a dirt mound.
- 2 are found near the waterfall to the east of the landing site, inside of a dirt mound, and 1 is found exposed next to them.
- 3 are found in the northern section of the Shaggy Long Legs arena, inside of a dirt mound.
- 3 are found in the cave containing a Medusal Slurker that holds a Juicy Gaggle, inside of various eggs.
- Garden of Hope: There are no bomb rocks in the area.
- Distant Tundra: A pile of 10 bomb rocks is found within a cave filled with Dwarf Bulbears, Fiery Blowhogs, and one Spotty Bulbear. They are intended to help defeat the Bulbear, but can cause a devastating explosion due to the amount of bomb rocks in the pile.
- Twilight River: Four are found on top of a can near the Puffy Blowhog, but they require either Yellow Pikmin or Winged Pikmin to reach them due to their height.
- Formidable Oak: Three are found in a dirt mound enclosed by a crystal wall near the start of the cave complex. Another three are located in another dirt mound, this one behind a dirt wall in the portion of the first room that contains the fragments.
Hey! Pikmin[edit]
|
The following article or section is in need of assistance from someone who plays Hey! Pikmin. |
- Sparkling Labyrinth:
- Echo Cavern: The first area where bomb rocks appear in Hey! Pikmin.
- Sweltering Parchlands:
Mine[edit]
|
This article or section is in need of more images. |
Mines are Bingo Battle exclusive explosives that attach to anything. They act similar to bomb rocks in the way that Pikmin carry them, and they can explode. This item is most commonly obtained from a roulette spin, which can be caused by retrieving a Cupid's Grenade, but can also be found on layout C of the Jigsaw Colosseum, and from dirt mounds in layout C of the Rusted Labyrinth. When the "mine" roulette wheel item is used, a mine spawns near the player's group, and at that point, the player can issue a Pikmin to pick it up. The Pikmin can then be thrown at the ground, a wall, a fruit, or anything else, and where it touches, the mine will stick. From this point on, the mine will be armed, and will detonate whenever a leader draws near. If there is a mine on a fruit or any carriable object, and that object is brought to an Onion without the mine blowing up, the explosive will slide off and fall on the ground.
The mine resembles a metal barrel with a light on top. This light is green when the mine is unarmed. When it sticks onto something, the light will turn yellow, and two yellow lighthouse-like beacon lights will spin around its equator. A "boop" sound can also be heard every second or so. When it detects movement nearby, the light and beacons turn magenta, it beeps faster, and after three seconds, it explodes.
Pikmin 4 introduces mines as an exploration item that can be purchased from Russ, or found in an item capsule during a Dandori Battle. Mines function similarly to their Pikmin 3 version, except that the light stays green when active and changes to an orange-yellow when triggered, gaining the same pre-explosion glow as bomb rocks.
Trackonator[edit]
The Trackonator is an exploration item introduced in Pikmin 4, and can be purchased from Russ or found in an item capsule during Dandori Battles. Trackonators work similarly to Mines, but cannot stick to objects. Instead, they will chase nearby enemies for a few seconds before they detonate. In Olimar's Shipwreck Tale, Olimar gains Trackonators as bonuses for recovering 9, 15 and finally 26 ship parts.
Badges[edit]
In Pikmin 3 Deluxe, there is a badge the player can gain from using a bomb rock:
- Blast Radius: Defeat three creatures with a bomb rock.
Blast Radius. The badge shows three Bulborb silhouettes in front of an explosion.

Glitches[edit]
|
To do: Elaborate and add to the glitches article. |
In places where a bomb rock falls near Mitites, such as sublevel 6 of Bulblax Kingdom, there is a chance of it being launched back into the air if it lands on one, landing somewhere else on the level.
In Pikmin, Yellow Pikmin will sometimes fail to pick up bomb rocks, and will instead perform their "picking up" animation repeatedly. Whistling them and having them try it again is usually enough to fix the issue.
In Pikmin 3, bomb rocks immediately explode if crushed by a Yellow Wollywog. If a Yellow Wollywog lands on a bomb rock that has been thrown but has not yet exploded, the bomb rock will prematurely explode, but the light effects of the about-to-explode bomb rock will continue to play as usual. This is a purely visual bug and does not affect gameplay in any way.
Technical information[edit]
In Pikmin 2, bomb rocks cause 500 points of damage. While the values for Pikmin are not exactly known, observation indicates that the bombs are just as strong. In Pikmin 3, each enemy has data that specifies how much damage the bomb explosions cause – specifically, each enemy has data on how many bomb rock explosions are required to kill it, as well as how many bomb rock ingestions.
| Pikmin 2 technical information (?) | |||
|---|---|---|---|
| Internal name | bomb
| ||
| Global properties (List) | |||
| ID | Japanese comment | Property | Value |
| s000 | friction(not used) | Friction | 0.5 |
| s001 | wallReflection | Unknown (wall bounce speed multiplier?) | 0.5 |
| s002 | faceDirAdjust | Unknown | 0.25 |
| s003 | accel | Acceleration | 0.1 |
| s004 | bounceFactor | Unknown (bounce when it hits the ground?) | 0.3 |
| fp00 | ライフ | HP | 4.5 |
| fp01 | マップとの当り | Unknown (related to slopes) | 25 |
| fp02 | ダメージスケールXZ | Horizontal damage scale | 0.2 |
| fp03 | ダメージスケールY | Vertical damage scale | 0.25 |
| fp04 | ダメージフレーム | Damage scale duration | 0.35 |
| fp05 | 質量 | Unknown (weight?) | 0.5 |
| fp06 | 速度 | Move speed | 30 |
| fp08 | 回転速度率 | Rotation acceleration | 0.1 |
| fp09 | テリトリー | Territory radius | 300 |
| fp10 | ホーム範囲 | "Home" radius | 30 |
| fp11 | プライベート距離 | "Private" radius | 30 |
| fp12 | 視界距離 | Sight radius | 700 |
| fp13 | 視界角度 | FOV | 180 |
| fp14 | 探索距離 | Unknown (exploration radius?) | 0 |
| fp15 | 探索角度 | Unknown (exploration angle?) | 0 |
| fp16 | 振り払い率 | Successful shake rate | 1 |
| fp17 | 振り払い力 | Shake knockback | 0 |
| fp18 | 振り払いダメージ | Shake damage | 0 |
| fp19 | 振り払い範囲 | Shake range | 0 |
| fp20 | 攻撃可能範囲 | Unknown (shock attack max range?) | 30 |
| fp21 | 攻撃可能角度 | Unknown (shock attack max angle?) | 15 |
| fp22 | 攻撃ヒット範囲 | Unknown (attack hit range?) | 90 |
| fp23 | 攻撃ヒット角度 | Unknown (attack hit angle?) | 15 |
| fp24 | 攻撃力 | Attack damage | 10 |
| fp25 | 視界高 | Unknown (height visibility?) | 50 |
| fp26 | 探索高 | Unknown (exploration height?) | 0 |
| fp27 | ライフの高さ | HP wheel height | 35 |
| fp28 | 回転最大速度 | Rotation speed | 10 |
| fp29 | 警戒時間 | Unknown (warning time?) | 0 |
| fp30 | 警戒ライフ | Unknown | 0 |
| fp31 | ライフ回復率 | Regeneration rate | 0 |
| fp32 | LOD半径 | Off-camera radius | 25 |
| fp33 | マップとのあたりポリゴンの選定 | Collision processing radius | 25 |
| fp34 | ピクミンとのあたり | Pikmin damage radius | 25 |
| fp35 | 石化時間 | Petrification duration | 1 |
| fp36 | ヒップドロップダメージ | Purple Pikmin drop damage | 10 |
| fp37 | 地震気絶確立 | Purple Pikmin stun chance | 0 (0%) |
| fp38 | 地震気絶時間 | Purple Pikmin stun time | 10 |
| ip01 | 振り払い打撃A | Shake mode 1 – hit count | 1 |
| ip02 | 振り払い張付1 | Shake mode 1 – Pikmin requirement | 1 |
| ip03 | 振り払い打撃B | Shake mode 2 – hit count | 2 |
| ip04 | 振り払い張付2 | Shake mode 2 – Pikmin requirement | 2 |
| ip05 | 振り払い打撃C | Shake mode 3 – hit count | 5 |
| ip06 | 振り払い張付3 | Shake mode 3 – Pikmin requirement | 3 |
| ip07 | 振り払い打撃D | Shake mode 4 – hit count | 10 |
| Specific properties | |||
| ID | Japanese comment | Property | Value |
| fp01 | 敵へのダメージ | Enemy damage | 500 |
| fp02 | 爆風範囲高さ+- | Unknown (vertical explosion radius?) | 50 |
| ip01 | ダメージリミット | Unknown (max damage multiplier?) | 1 |
| ip02 | 誘爆リミット | Unknown | 15 |
Gallery[edit]
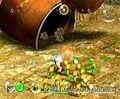
A few bomb rocks in a can.
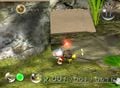
A Yellow Pikmin holding a bomb rock, in the GameCube version of Pikmin.
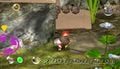
Same as the previous screenshot, but in the Wii version.
A bomb rock about to explode in Pikmin 2.
A closeup of a bomb rock in Pikmin 3.
Olimar standing next to some bomb rocks.
A bomb rock as seen in early Pikmin 3 footage.
A Blue Pikmin carrying a bomb rock in Pikmin 3.

A Red Pikmin carrying a bomb rock in Pikmin 3.

A Rock Pikmin carrying a bomb rock in Pikmin 3.

An unused texture from Pikmin, showing a Red Pikmin with a bomb rock. The other textures can be found here.
Real life cypress cones.
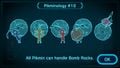
The data file explaining bomb rocks.
Screenshot of Captain Olimar holding a bomb rock.
A bomb-rock exploding in Pikmin.

Drawing used to represent Pikmin killed by explosions in Pikmin 2's high scores menu.
Artwork of a Pikmin holding a bomb rock in Hey! Pikmin.


.jpg)


Trivia[edit]
- It is suggested that Red and Blue Pikmin could once carry bomb rocks along with the Yellow Pikmin in the original Pikmin, as seen in some unused files. All Pikmin gained this ability in Pikmin 3.
- If a Pikmin is holding a bomb rock when it is called to the Onion, it will leave it beneath the Onion's pillar of light.
- Bomb rocks in Pikmin shrink and disappear if they touch the water. This can be seen on The Forest Navel where, on the southernmost point of the map, there is a tube with bomb rocks. If Olimar lies down next to the one outside the tube, closest to the water, he will begin sliding towards the lake and drag the bomb rock with him.
- In Pikmin 2, if a bomb rock in a cluster of bomb rocks explodes off-screen, it will not activate the others. This is because off-camera objects have special behaviors.
- Bomb rocks' visually resemble real-life cypress cones.
- Pikmin holding bomb rocks in Pikmin 3 will not roll when dodging, but will walk faster to keep up with the dodge.
- In Pikmin 3, if a Pikmin is already under the effect of another hazard (such as electricity), it can't get killed by an explosion.
- Bomb rocks are larger in size in the New Play Control! Pikmin release of the first game, compared to the GameCube original.
- In Pikmin 3, if a bomb rock spawns on a sloped surface, such as in Layout B of Sandbox Kingdom, it will normally remain stationary until picked up. However, if another bomb rock explosion occurs anywhere in the vicinity, the bomb rock on the slope will mysteriously become affected by gravity and will roll down the slope.
Names in other languages[edit]
| Language | Name | Meaning | Notes |
|---|---|---|---|
| バクダン岩? Bakudan iwa |
Bomb rock | ||
(traditional) |
炸彈岩 Zhàdàn yán |
Bomb rock | |
(simplified) |
炸弹岩 Zhàdàn yán |
Bomb rock | |
| Bomrots | Bomb rock | ||
| Bombe-roc | Bomb-rock | ||
| Steinbombe | Stone bomb | ||
| Roccia bomba | Bomb rock | ||
| 폭탄바위 pogtanbawi |
Bomb rock | ||
| Pedra-bomba | Bomb-stone | ||
| Pedra bomba Rocha-bomba |
Bomb stone Bomb-rock |
Name taken from the New Play Control! Pikmin website. Name taken from the Pikmin instruction manual | |
| Roca-bomba (Pikmin) Roca bomba (Pikmin 3 and Pikmin 4) |
Bomb-rock Bomb rock |
||
| взрывающихся камень vzryvayushchikhsya kamen' |
Exploding stone | Name taken from the New Play Control! Pikmin website. |
See also[edit]
References[edit]
- ^ YouTube video demonstrating how a bomb rock can disappear if sprayed just as it is going to blow up
| Hazards | ||||||||||||||
|---|---|---|---|---|---|---|---|---|---|---|---|---|---|---|
| ||||||||||||||
| Other hazards |
- Pikmin 1
- Pikmin 2
- Pikmin 3
- Pikmin 4
- Hey! Pikmin
- Hazards
- The Impact Site
- The Forest of Hope
- The Forest Navel
- The Distant Spring
- The Final Trial
- Subterranean Complex
- Frontier Cavern
- Bulblax Kingdom
- Submerged Castle
- Cavern of Chaos
- Dream Den
- Hole of Heroes
- Tropical Wilds
- Distant Tundra
- Twilight River
- Formidable Oak
- Sparkling Labyrinth
- Sweltering Parchlands
- Lushlife Murk