

Bramble gate

|
Since this subject has no official name, the name "Bramble gate" is conjectural. |
|
It has been suggested that this page should be moved to Wooden gate. Reason: |
Bramble gates (土のカベ?, lit.: "Dirt wall", also known as wooden gates[1]) are the most basic type of gate in Pikmin and Pikmin 2, being replaced by dirt walls in later games. Any Pikmin type can damage a bramble gate, lowering it bit by bit until it's gone. They come in two varieties, white and black; black gates take longer to break down than white ones.
Mechanics[edit]
Bramble gates have 3 stages of destruction. Initially, they are at their full height, with the central part of the gate being as high as the supports on the side, which is about high enough that a thrown Yellow Pikmin can get on top of, but not other types. After being attacked for some time, the gate will partially fall down through the ground, becoming two-thirds of its initial height. After some more time, it will fall down some more to become one-third of its original height, and eventually, it will completely fall down, and Pikmin and leaders will be able to walk through the space the gate once occupied.
Health[edit]
Each bramble gate has some amount of health, and Pikmin attacking these gates use their standard damage values.
In Pikmin, gates typically have between 48 and 73 hit points, and can also be destroyed with one to four bomb-rocks – each bomb-rock deals 20 hit points of damage to the gate. Pikmin cause 0.01666 points of damage to gates. Different gates have different health values, even within the same category of color; for example, the white gate that encloses the Emperor Bulblax's arena in The Final Trial is surprisingly frail at just 5 hit points.
In Pikmin 2, normal gates above ground have between 10000 and 43000 hit points. They tend in general to be much sturdier than the randomly generated ones in caves (300 - 12000) and Challenge Mode levels (3 - 12000). For comparison, a Red Bulborb has 750 hit points.
Poison gate[edit]
Some bramble gates in Pikmin 2 have poison emitters within them. Due to this, only White Pikmin can be used to break the gates, as all other types will be poisoned. These types of gates never appear underground. Once the gate is destroyed, the poison emitters will need to be destroyed separately to allow all types of Pikmin to safely pass the gate.
If a Gatling Groink attempts to target a leader or Pikmin near a poison gate, there is a chance that the mortar's splash damage will hit and damage the emitters inside. If both emitters are destroyed, the gate will effectively become normal, allowing all types to safely break it.
Locations[edit]
Pikmin[edit]
|
The following article or section is in need of assistance from someone who plays Pikmin. |
Areas[edit]
- The Impact Site
- White, 48 (28,811.6 effective) HP: Can be found towards the west of the map, on the raised section that contains the three Pearly Clamclamps (with one holding the Positron Generator). This wall allows for a quicker route to carry back the ship part, as well as the pearls from the Pearly Clamclamps.
- The Forest of Hope
- White, 54 (32,412.9 effective) HP: Located in the landing site, on the southern side of the section. The wall allows for access to the southern part of the area, which is full of Dwarf Bulborbs.
- White, 24 (14,405.7 effective) HP: Can be found slightly southwest of the landing site, with a Bulborb on either side (or a pair on one side and a single one after day 4). This wall creates a path to the Yellow Onion.
- White, 24 (14,405.7 effective) HP: Located north of the landing site, in the thin section that contains the Nova Blaster. This gate is slightly submerged in water and it allows Olimar to reach the black bramble gate, blocking access to the Armored Cannon Beetle's arena, which contains the Radiation Canopy.
- Black, 73 (43,817.5 effective) HP: Slightly east of the sleeping Bulborb at the north of the area. Allows for the Nova Blaster to be retrieved when opened.
- Black, 73 (43,817.5 effective) HP: Blocking access to the Armored Cannon Beetle's area.
- The Forest Navel
- White, 36 (21,608.6 effective) HP: Can be found ever-so-slightly north of the S.S. Dolphin. The wall allows for the #1 Ionium Jet to be collected.
- Black, 73 (43,817.5 effective) HP: Located towards the far west, blocking passage to the Libra and the Analog Computer.
- Black, 73 (43,817.5 effective) HP: Can be found towards the far east, close to the arena where the Beady Long Legs can be found. This gate doesn't block access to the arena, but can allow for a faster route for the ship part the beast holds to be retrieved.
- The Distant Spring
- White, 36 (21,608.6 effective) HP: Located towards the northwest of the landing site, next to the long body of water. The wall is blocking access to the Zirconium Rotor, which is inside of a large tree stump towards the far west.
- White, 36 (21,608.6 effective) HP: Can be found slightly northwest of the landing site, adjacent to the large tree trunk housing the Armored Cannon Beetle. The walls creates a path for the Bowsprit to be carried back (which is inside of the Cannon Beetle).
- Black, 36 (21,608.6 effective) HP: Located directly opposite the first white bramble gate; the one near the Zirconium Rotor. Slightly north of this gate is the Pilot's Seat.
- The Final Trial
- White, 5 (3,001.2 effective) HP: Before the Emperor Bulblax's arena, to the north.
- White, 5 (3,001.2 effective) HP: After the Emperor Bulblax's arena, to the south.
Challenge Mode[edit]
- The Forest Navel:
- White, 5 (3,001.2 effective) HP: Blocking the entrance to what would be the Beady Long Legs's arena in Story Mode.
- White, 5 (3,001.2 effective) HP: Northeast of the beach, blocking the slope that leads to the next level of elevation.
- The Final Trial:
- White, 5 (3,001.2 effective) HP: Blocking the entrance to what would be the Emperor Bulblax's arena in Story Mode.
Pikmin 2[edit]
Areas[edit]
- Valley of Repose
- White, 48,000 HP: North of the landing site, behind the manhole with the Red Bulborb. This gate blocks access to the Emergence Cave.
- White, 30,000 HP: Found close to the previous gate, with it being submerged the water slightly east.
- White with poison, 42,000 HP: Found in the northern segment, past several enemies, some of which Blowhogs, and towards the east; directly forward from where the northern half is entered from. This gate blocks access to the Subterranean Complex.
- Awakening Wood
- White, 48,000 HP: Found slightly north of the landing site, to its immediate right. It is slightly submerged and next to a clog that can drain the water the gate is in.
- White, 48,000 HP: On the southern plateau, near a Burrowing Snagret, and past several bridges over water. It is nestled in the roots of a tree and blocks access to the Snagret Hole.
- Black, 129,000 HP: Found just west of the landing site, behind the courtyard with a pair of Burgeoning Spiderworts, and blocking access to a large amount of the area.
- White with poison 30,000 HP: In the western portion of the area, past several Creeping Chrysanthemums and the Hole of Beastss, blocking access to the Geographic Projection.
- White with poison 42,000 HP: In the northwest of the area, past the bag that takes the weight of 200 Pikmin to crush, and located directly next to the White Flower Garden.
- Perplexing Pool
- Black, 126,000 HP: By the west side of the landing site's concrete block, and guarded by some Water Dumples. It blocks off the southwest of the area and the Onion Replica.
- Black, 126,000 HP: At the north end of the area's westernmost "corridor", near several electric gates blocking off access to the Glutton's Kitchen and a treasure. The gate itself blocks access to the very north of the area, and by extension the Submerged Castle and Massage Girdle.
- White with poison, 30,000 HP: Blocks access to the central stump cluster containing the Yellow Pikmin and their Onion, and is blocked itself by a Fiery Bulblax.
- Wistful Wild
- White, 51,000 HP: Located directly south of the landing site, down a small metal path. It is submerged in water and guarded by a Hermit Crawmad, and blocks off entry to the area's Burgeoning Spiderworts and the clog for the body of water it's in.
- Black with poison, 60,000 HP: Located directly near the northern entrance to the area's west half and the bridge that connects them, and is built into a stump. It is guarded by several enemies, and it itself is one of two gates that guard two treasures and the entrance to the Dream Den.
- Black with poison, 60,000 HP: Located a bit farther southwest from the previous gate, between two rocks and just north of the western half's open field containing three Creeping Chrysanthemums. It is one of two gates that guard two treasures and the entrance to the Dream Den.
Caves[edit]
- Bulblax Kingdom
- One can be seen on sublevel 7, with 12000 HP.
- Snagret Hole
- Six can be seen on sublevel 3, each with 7500 HP.
- Three can be seen on sublevel 6, each with 7500 HP.
- Five can be seen on sublevel 7, each with 7500 HP.
- Citadel of Spiders
- One can be seen on sublevel 2, with 12000 HP.
- Two can be seen on sublevel 3, each with 12000 HP.
- Three can be seen on sublevel 4, each with 12000 HP.
- Shower Room
- One can be seen on sublevel 2, with 12000 HP.
- Two can be seen on sublevel 3, each with 12000 HP.
- Three can be seen on sublevel 5, each with 12000 HP.
- Three can be seen on sublevel 6, each with 12000 HP.
- Six can be seen on sublevel 7, each with 300 HP.
- Submerged Castle
- Two can be seen on sublevel 2, each with 12000 HP.
- Three can be seen on sublevel 3, each with 12000 HP.
- Four can be seen on sublevel 4, each with 12000 HP.
- Four can be seen on sublevel 5, each with 300 HP.
- Cavern of Chaos
- Four can be seen on sublevel 3, each with 12000 HP.
- Three can be seen on sublevel 4, each with 12000 HP.
- Four can be seen on sublevel 7, each with 12000 HP.
- Hole of Heroes
- Five can be seen on sublevel 2, each with 7500 HP.
- Eight can be seen on sublevel 3, each with 7500 HP.
- Five can be seen on sublevel 7, each with 12000 HP.
- Three can be seen on sublevel 9, each with 7500 HP.
- One can be seen on sublevel 11, with 7500 HP.
- Two can be seen on sublevel 15, each with 7500 HP.
- Dream Den
- Eight can be seen on sublevel 6, each with 5400 HP.
- Four can be seen on sublevel 12, each with 7500 HP.
Challenge Mode[edit]
- Creator's Garden
- Two can be seen on sublevel 1, each with 12000 HP.
- Concrete Maze
- Four can be seen on sublevel 1, each with 3 HP.
- Six can be seen on sublevel 2, each with 3 HP.
- Rumbling Grotto
- Three can be seen on sublevel 1, each with 12 HP.
- Breeding Ground
- Ten can be seen on sublevel 2, each with 12000 HP.
- Three can be seen on sublevel 3, each with 12000 HP.
- Bully Den
- Five can be seen on sublevel 1, each with 3000 HP.
Naming[edit]

|
This section is a stub. You can help Pikipedia by expanding it. |
Internally, in Pikmin, these gates are called soft gate.
Names in other languages[edit]
| Language | Name | Meaning |
|---|---|---|
 Japanese Japanese |
土のカベ Tsuchi no Kabe 白い土のカベ Shiroi Tsuchi no Kabe 黒い土のカベ Kuroi Tsuchi no Kabe? |
Dirt wall White dirt wall Black dirt wall |
Gallery[edit]
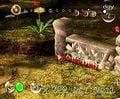 An official screenshot of a white bramble gate being destroyed in The Forest of Hope.
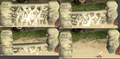 The 4 states of a white bramble gate in Pikmin.
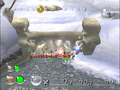 A standard white bramble gate.
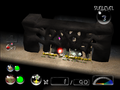 A regular black bramble gate.
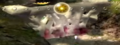 A poisonous white bramble gate.
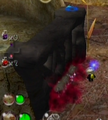 A black poisonous bramble gate in the Wistful Wild.


See also[edit]
References[edit]
- ^ “Wooden gates, such as the white one near your landing site, are breakable, so call all of the Pikmin from the red onion and put them to work.” – The Forest of Hope section 3-A: "Storming the Gate" in the Pikmin Nintendo Player's Guide
| Obstacles |
|---|
|
|
| Minor obstacles |


