Sequence break
Sequence breaks are exploits in video games that allow things to be done out of order, such as collecting an item before it's intended to be collected, or skipping a part of the game entirely. The Pikmin games contain several sequence breaks, and they are usually made possible by going out of bounds in a specific place or by abusing a glitch. Sequence breaks are often used in challenge runs. This article is a list of known sequence breaks in Pikmin games, organized by game.
Pikmin[edit]
Pikmin does not have many sequence breaks because the game as a whole does not have much of a sequence. There is an intended order of unlocking areas and Pikmin types, but ship parts can be collected in any order. However, tricks do exist to collect parts with an unintended type of Pikmin, or to skip bridges and gates in the way of parts. Through the discovery of some of these sequence breaks, the minimum number of days necessary to complete the game was reduced to just 6.
Geiger Counter without Blue Pikmin[edit]
| Reproducibility | Consequences | Versions | Demonstration |
|---|---|---|---|
| High | Helpful | Pikmin: Yes New Play Control! Pikmin: Yes Pikmin 1 (Nintendo Switch): Yes |
YouTube video |
- Effects: Allows the Geiger Counter to be collected without Blue Pikmin.
- Prerequisites: Have unlocked The Forest of Hope and have destroyed the gates blocking the southwest portion of the area.
- How to: Throw at least 10 Pikmin on top of the cardboard box, and then move Olimar inside of it to whistle the Pikmin from below. Swarm the Pikmin off the back side of the box, towards the area with the Burrowing Snagrets, and then back towards the box.
- Notes: Strangely, Pikmin will very often leave Olimar's squad and go idle when standing on the box's lower half, making it annoying to throw Pikmin up on top of the box.
- What would happen normally: The cardboard box is normally pushed with Blue Pikmin, thrown from the neighboring lakes.
- Possible explanation: None.
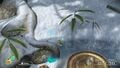
Gluon Drive without building the bridge[edit]
| Reproducibility | Consequences | Versions | Demonstration |
|---|---|---|---|
| Medium | Helpful | Pikmin: Yes New Play Control! Pikmin: Yes Pikmin 1 (Nintendo Switch): Yes |
YouTube video |
- Effects: Allows the Gluon Drive to be collected without building the 2 bridges that lead to it.
- Prerequisites: Have unlocked The Distant Spring.
- How to: Go to the island in the west with the Gluon Drive with a large group of Blue Pikmin. Defeat the Shearwigs near the start of the bridge. Carry the Gluon Drive towards the bridge, and then stop carrying it. Swarm the Shearwig corpses such that Pikmin carrying them push the ship part slightly towards the water. Call the Pikmin off and repeat several times as the ship part slowly enters the water. Once it's in the water, it can be carried normally.
- Notes: None.
- Possible explanation: The Gluon Drive normally has to be carried over the bridge because of the carrying paths in The Distant Spring, but by pushing it into the water with the Shearwig corpses, it becomes more efficient to use a different route through the water, so it instead takes that route to the S.S. Dolphin.
Positron Generator on day 2[edit]
| Reproducibility | Consequences | Versions | Demonstration |
|---|---|---|---|
| Low | Helpful | Pikmin: Yes New Play Control! Pikmin: Yes Pikmin 1 (Nintendo Switch): Yes |
YouTube video |
- Effects: Allows the Positron Generator to be collected without Yellow Pikmin or Blue Pikmin, which can be done as early as day 2.
- Prerequisites: Have completed day 1, unlocking the ability to lie down.
- How to: Go onto the large wooden circle in the southwest of The Impact Site and throw Pikmin off the side of it to the north. Walk to the southernmost wooden circle with the narrow ramp, and lie down between the pellet and the ledge to go out of bounds. Walk around the edge of the terrain to the west and then north, calling the group of Pikmin along the way. Walk back in-bounds after passing the white gate and call the Pikmin through the water. Get most to start destroying the wall, and take a small group to defeat the Pearly Clamclamp with the Positron Generator. This can be done by throwing them from the tiny island in the lake and whistling them to get out of the water after whistling them away from the enemy. Once it is defeated and the ship part flies out, use the object nudging glitch to very slowly push the Positron Generator out of the water. Using the 20 pellet elsewhere on the beach can help. Once it is out of the water, carry it to the S.S. Dolphin.
- Notes: This can make a 6-day completion of the game easier, as you can start with more Pikmin in The Forest of Hope.
- Possible explanation: None.
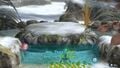
Radiation Canopy without Blue Pikmin[edit]
| Reproducibility | Consequences | Versions | Demonstration |
|---|---|---|---|
| High | Helpful | Pikmin: Yes, but harder New Play Control! Pikmin: Yes Pikmin 1 (Nintendo Switch): Yes |
YouTube video |
- Effects: Allows the Radiation Canopy to be collected without Blue Pikmin.
- Prerequisites: Have unlocked The Forest of Hope and Yellow Pikmin, and have some bomb-rocks.
- How to: To get past the white gate in the lake, precisely throw a Yellow Pikmin with a bomb-rock on top of the gate. It will drop the bomb on the gate, damaging it, and then fall into the water, where it can be rescued. Repeat to destroy the gate. Any Pikmin type can now be thrown up the ledge and onto the black gate that blocks the room with the ship part.
- Notes: None.
- What would happen normally: Blue Pikmin are normally necessary to destroy the gate in the water.
- Possible explanation: None.
Sagittarius without Blue Pikmin[edit]
| Reproducibility | Consequences | Versions | Demonstration |
|---|---|---|---|
| High | Helpful | Pikmin: Yes, but harder New Play Control! Pikmin: Yes Pikmin 1 (Nintendo Switch): Yes |
YouTube video |
- Effects: Allows the Sagittarius to be collected without Blue Pikmin.
- Prerequisites: Have unlocked The Forest of Hope and have destroyed the bramble gate next to the landing site.
- How to: Get to the first of the 2 islands in the southeast of the area. Throw some Pikmin in the water towards the second island, and get them to the small section at ground level (the drowning reset glitch can help with this). From there, throw them up the ledge to start building the bridge. Once both parts of the bridge are built, the part can be carried back to the landing site normally.
- Notes: None.
- Possible explanation: None.
Pikmin 2[edit]
|
The following article or section is in need of assistance from someone who plays Pikmin 2. |
Pikmin 2 doesn't impose much of a sequence on the player. While there is an intended order of unlocking Pikmin types and areas, other things like caves can generally be completed in any order. However, methods exist to reach places in faster and unintended ways, and it is possible to skip parts of the game's intended sequence. It is through the discovery of several of these tricks that the minimum number of days necessary to complete the game was reduced from 8 to 5.
Early Blue Pikmin[edit]
| Reproducibility | Consequences | Versions | Demonstration |
|---|---|---|---|
| Low | Helpful | Pikmin 2: Yes New Play Control! Pikmin 2: Yes, but harder Pikmin 2 (Nintendo Switch): Yes |
YouTube video |
- Effects: Unlock Blue Pikmin before unlocking Yellow Pikmin.
- Prerequisites: Have unlocked the Awakening Wood and completed the White Flower Garden.
- How to: Go to the pair of seesaw blocks in the northeast of the area with some Pikmin. Have a leader stand on the seesaw block closer to the wall, and cause the seesaw blocks to shift at the same time a cutscene plays. (This cutscene could be a treasure collection cutscene or a cutscene about a Pikmin suffering from a hazard.) If done correctly, the leader will be inside the seesaw block, and can walk into the wall. Walk a precise path through the out-of-bounds area, and eventually fall into the abyss, landing in the room with the Blue Onion.
- Notes: While the Blue Pikmin can be whistled immediately in the original GameCube version, they cannot be whistled immediately in the New Play Control! and Nintendo Switch versions. Blue Pikmin can still be unlocked early, but it is more difficult. See the notes on the Early Yellow Pikmin sequence break.
- Possible explanation: None.
Early Emergence Cave[edit]
| Reproducibility | Consequences | Versions | Demonstration |
|---|---|---|---|
| Extremely low | Helpful | Pikmin 2: Yes New Play Control! Pikmin 2: No Pikmin 2 (Nintendo Switch): No |
YouTube video |
- Effects: Allows access to the Emergence Cave on day 1.
- Prerequisites: Have performed the cutscene timer storage glitch and restarted the game from the beginning.
- How to: As Olimar, call the Pikmin off the Dwarf Red Bulborb, but don't defeat it. Switch to Louie when you can (made possible by the cutscene timer storage glitch), and grow some Pikmin. Push down the bag. After that, go to the ledge near the ship, and throw the Pikmin up it. Lure the Dwarf Red Bulborb over and use its biting attack to ascend the wall. From here, call the Pikmin, go around the lake, and go towards the Emergence Cave.
- Notes: This trick makes it possible to access the Awakening Wood on day 2, by collecting the Spherical Atlas on day 1. However, the Dwarf Red Bulborb clip is incredibly precise, and is most feasibly done in tool-assisted superplays. This sequence break is not possible in the Wii and Nintendo Switch versions because the cutscene timer storage glitch cannot be done for the cutscene that plays after defeating the Dwarf Red Bulborb. Technically it is still possible to access the Emergence Cave early in these versions, but it would not be possible to use the Candypop Buds in the cave.
- Possible explanation: None.
Early Snagret Hole[edit]
| Reproducibility | Consequences | Versions | Demonstration |
|---|---|---|---|
| Low | Helpful | Pikmin 2: Yes New Play Control! Pikmin 2: Unknown Pikmin 2 (Nintendo Switch): Unknown |
YouTube video |
- Effects: Allows access to the Snagret Hole without having to build the bridges.
- Prerequisites: Have unlocked the Awakening Wood.
- How to: Go to the long ledge across the field from the landing site. Throw some Pikmin up the ledge and get the Creeping Chrysanthemum to wake up. Get it to come towards you and fall off the ledge. Throw all your Pikmin onto the ledge in a different place. With the leader, go back to the Creeping Chrysanthemum and punch it while standing in between it and the wall. Get it to perform its attack where it slams towards the ground while the leader is right next to it. If the leader is positioned and angled correctly, they will fly into the air and land on top of the ledge. From there, they can call the Pikmin and go towards the entrance to the Snagret Hole.
- Notes: This trick can be used to access a few other places early in the Awakening Wood.
- Possible explanation: None.
Early Yellow Pikmin[edit]
|
The following article or section is in need of assistance from someone who plays Pikmin 2. |
| Reproducibility | Consequences | Versions | Demonstration |
|---|---|---|---|
| High | Depends | Pikmin 2: Yes New Play Control! Pikmin 2: Yes, but harder Pikmin 2 (Nintendo Switch): Yes |
YouTube video |
- Effects: Allows access to Yellow Pikmin without breaking down the poison gate.
- Prerequisites: Have access to the Perplexing Pool and have the Napsack.
- How to: From the landing site, take one Pikmin with you and go to the small hollowed out stump next to the area with the Yellow Pikmin. Stand on the small slope left of the entryway, and lay down. The Pikmin should pick you up and carry you up the trunk. If you time waking up correctly, the Pikmin will drop you off on top of the rim. From there, simply follow the rim up to the rim of the area with the wild Yellow Pikmin, and jump down into it. If you're playing on the original Pikmin 2, you can go ahead and whistle them, however if you're playing New Play Control Pikmin 2, there are a few more steps. From here you must stand next to the tree on the side opposite the longer of the 2 branches. Perform another Napsack carry exploit to get on top of the tree, and shove one of the wild Yellow Pikmin off of it. Keep shoving the Pikmin towards and eventually off the ledge and into the nectar weed patch, and then wait for the Pikmin to finish plucking it. Once it finishes, it will join your party, though Yellow Pikmin still won't officially be unlocked. To unlock them, you must bring this Pikmin into the Citadel of Spiders, and progress to sublevel 3. On this sublevel, let a Swooping Snitchbug grab the Pikmin and plant it, then pluck it. This will cause the Yellow Pikmin unlock cutscene and the subsequent unlock.
- Notes: When attempting this sequence break in New Play Control Pikmin 2, there will be many odd side effects.
- The Pikmin used for the sequence break will die after discovery, unless the cave is exited through the menu quick enough. This is due to the fact that its discovery cutscene has it jump down off the tree, which causes it to jump under the collision and into the void when done elsewhere. To prevent an extinction and to boost Yellow Pikmin numbers, one can use the Queen Candypop Bud on the sublevel to gain more.
- The flag that allows wild Blue Pikmin to be whistled will not be set off. Whistling or bumping into one will not cause it to join your party. To unlock them, you must shove a wild Blue Pikmin all the way to the nectar weed by the landing site, or the bridge by the Geographic Projection to get it to join your party, in which the Wollywog super-jump glitch is required to get a wild Blue Pikmin past the electric gate. After that, you can get the Swooping Snitchbug on sublevel 3 of Snagret Hole to plant it before proceeding to pluck it.
- Yellow Pikmin will never bring anything back to their own Onion. This is again, due to the fact that the flags for obtaining Yellow Pikmin have not been properly set off. When ordered to carry corpses, they will always bring them to the Red Onion. The only ways to obtain more Yellow Pikmin are through Queen Candypop Buds, Golden Candypop Buds, and Pikmin extinctions.
- The Onion may perform a startup animation similar to the one from the original Pikmin when landing for the morning or coming out of a cave. This is purely cosmetic, and doesn't change the interactions with the Onion nor prevent you from opening the Onion menu.
- Possible explanation: None.
Pikmin 3[edit]
|
The following article or section is in need of assistance from someone who plays Pikmin 3. |
Pikmin 3 is a very linear game, with the expectation that players complete all the story-related tasks in order. However, the game's physics system and diverse movement options allow there to be a large number of places where it's possible to go out of bounds, and this makes it possible to perform several sequence breaks that skip some required tasks. These tricks make it easier to complete the game in the minimum number of days, though they do not reduce the total number of days necessary to complete the game.
Day 1 escape[edit]
|
To do: Document more of the effects that this trick can have. |
| Reproducibility | Consequences | Versions | Demonstration |
|---|---|---|---|
| Low | Depends | Pikmin 3: Yes Pikmin 3 Deluxe: Yes |
Twitch video |
- Effects: Allows the player to skip the section of the day 1 tutorial where Captain Charlie gets captured by the Vehemoth Phosbat, and instead, lets the player explore the rest of the Distant Tundra.
- Prerequisites: None.
- How to: Near the tin can where the throwing tutorial takes place, there is a root. It is possible to climb up the root by walking against it, with the wall to Charlie's right, and finding the right angle. Afterwards, the player can go left from the top of the root and travel out of bounds. Further ahead, there is another root that can be climbed by walking against it at a specific angle, roughly at the halfway point of the root. By continuing around the edge of the in-bounds area near the ledge, there is a branching root near some Spotcaps; the player can walk around the first root branch by going near the ledge, and then walk up the trunk of the root to bypass the rest. A bit farther ahead in the out-of-bounds snow, there is a large hill which can be slowly climbed by walking back and forth over a small distance. In the middle of this hill, there is a bright spot, and by carefully maneuvering around just to the left of where the bright spot is, it is possible to continue up the hill by slowly walking straight up. Once at the top, the player can carefully go left, over the entrance to a cave, and finally land back in-bounds behind the crystals that form a barrier in the tutorial section. From here, it is possible to enter the cave and explore the rest of the Distant Tundra. The Yellow Pikmin you start with can be taken with you by calling them from the other side of the crystal.
- Notes: This sequence break opens up many strange effects. These include the following:
- Many objects are missing from the rest of the area. While bomb rocks, Bouncy Mushrooms, geysers, and the S.S. Drake appear, gates, enemies, fruits, Bloominous Stemples, and most other objects are missing.
- The player can unlock Red Pikmin by using the Crimson Candypop Buds to the south of the landing site. Plucking the first Red Pikmin here will make the discovery cutscene play in the void out-of-bounds with no music. The first Red Pikmin plucked will die, but not subsequent Red Pikmin.
- By going out of bounds to access the Vehemoth Phosbat arena via the entrance from the main part of the area, the boss can be fought. Only the 30 Pikmin obtainable in the area can be used, and they can only be thrown, not charged or dismissed. There will also be no music. The boss fight will otherwise function normally.
- Defeating the boss will "rescue" Captain Charlie in a broken cutscene, and for the rest of the day afterwards, the player will control 2 Charlies. It is possible to throw and whistle the second Charlie, but not switch to him. It is also possible to end the day, which will show the voyage log about the Vehemoth Phosbat being defeated.
- By going to the cave where the Vehemoth Phosbat is normally seen on day 1, and walking past a trigger point, it is possible to get the cutscene where the Vehemoth Phosbat captures Charlie, even after the boss has been defeated. This will continue to Alph's section of day 1, and the game will continue normally, but when the Distant Tundra is returned to, the Vehemoth Phosbat will still be defeated.
- Alternatively, Brittany's cave can be entered. The player can activate the Yellow Onion in the cave, though there is no iron ball to push nor stone wall to block the entrance.
- Leaving Brittany's cave will trigger the cutscene that normally plays when Brittany leaves the cave, but Captain Charlie will take the place of Brittany, using the same animations and dialog.
- After the cutscene, the Sun Meter appears, and the game will play the Alph's Crash Site theme in non-cave segments of the area. This eventually stops being the case for unknown reasons. It is also possible to end the day, which will show the voyage log about the first trip to the Distant Tundra with Brittany.
- After the sunset cutscene at the end of the day, only the Red Onion will fly with the S.S. Drake. There will also be no music.
- The next day, the player can choose between landing in the Tropical Wilds, Garden of Hope, or Distant Tundra. If the Vehemoth Phosbat has been defeated, the player will even have access to all 3 leaders, which would theoretically make the Sandbelching Meerslug accessible. Unfortunately, it is not possible to make progress in the game from here, as no matter which area is landed in, no Onion will be present at the landing site, and it will be impossible to grow any Pikmin, making the game impossible to complete.
- By entering the Distant Tundra again the next day, the player can see the Red Onion follow the S.S. Drake. The Red Onion will also be in the Yellow Onion's cave, slightly mispositioned, and will manage Yellow Pikmin only.
- In the Tropical Wilds, by entering and exiting the cave Alph goes through on day 1, the S.S. Drake's discovery cutscene will play, and the game will crash afterwards.
- In the Garden of Hope, the inactive Blue Onion will appear as an active Red Onion, and by going out of bounds to get to the Rock Onion's cave, it is possible to lock-on to a Medusal Slurker that isn't there, and the Rock Onion will be nowhere to be found.
- Possible explanation: Pikmin 3 uses a progress value system to store where the player is in the game. Whether an object in an area appears or not is controlled by this progress value, which is why many objects do not appear, as they aren't supposed to be there on day 1. The progress value is generally changed by cutscenes, which is why the game is able to advance after the cave exit cutscene or the Vehemoth Phosbat defeat cutscene. However, the unlocking of Onions and controls is not tied to this progress value, meaning that if an Onion is not unlocked, it won't be accessible later on, which is why the game is uncompletable after this sequence break is done in most cases.
Walking up the root to go out of bounds.
Walking up the hill.
Exiting Brittany's cave, resulting in a broken cutscene.
Unlocking Red Pikmin with the Candypop Buds, resulting in a broken cutscene.
Unlocking a second Charlie.

The lack of an Onion after the sequence break is performed means that the game can't be completed.


Distant Tundra bridge skip[edit]
|
To do: Document the "backdoor Phosbat" trick and how it relates to this. |
| Reproducibility | Consequences | Versions | Demonstration |
|---|---|---|---|
| High | Helpful | Pikmin 3: Yes Pikmin 3 Deluxe: No |
YouTube video |
- Effects: Reunite Brittany and Alph in the Distant Tundra before constructing the double bridge.
- Prerequisites: Have Brittany and Alph separated at the Distant Tundra without having built the double bridge, and have obtained the Dodge Whistle with Alph.
- How to: At the Distant Tundra, with Brittany, go to the top of the slide near the Whiptongue Bulborb and dodge roll to hit the west side of the slide's edge, then walk against it. If done correctly, Brittany should not slide down, but rather be walking against the wall. Continue walking down the wall and it should be possible to get up the wall and out of bounds. Once Brittany is out of bounds, she can jump off over at the side of the river where Alph is. However, it will be impossible to call Alph (or Brittany, after switching) and they will not react to being pushed, either. After the day ends, Brittany will automatically be sent back into the cave, unless the double bridge is finished.
- Notes: If 20 Yellow Pikmin are brought out of bounds with Brittany, they can be thrown on the iron ball, allowing the double bridge to be skipped. This makes a 1 day completion in Distant Tundra easier. Additionally, if the light in the cave where the Vehemoth Phosbat first appears is lit, Brittany will be considered as reunited, and will return to the Drake at day's end even if the double bridge is unfinished.
- Possible explanation: None.
Early Quaggled Mireclops[edit]
| Reproducibility | Consequences | Versions | Demonstration |
|---|---|---|---|
| Medium | Helpful | Pikmin 3: Yes Pikmin 3 Deluxe: Yes |
YouTube video |
- Effects: Get access to the Quaggled Mireclops without having to build the pot bridge.
- Prerequisites: Make sure Blue Pikmin have been discovered.
- How to: At the Garden of Hope once Louie has ran away, discover the Blue Pikmin and take a group of Winged Pikmin under the large pail underwater. By standing in that certain spot, the Winged Pikmin will go higher and higher until they are on the land above the pail. From there, have them collect the group of 10 fragments by charging, and have a small group dig up the remaining fragments. If done correctly, a leader can now be thrown across to the incomplete blue bridge. Throw a few Rock Pikmin along with the leader to get the last 20 fragments inside the crystal. Alternatively, it is possible to clip a leader inside the rock and dismiss them, causing them to fall out of the map and respawn up on the ledge. From here, Pikmin can be whistled across the gap, allowing the bridge to be built.
- Notes: The Peckish Aristocrab will not interfere with the Winged Pikmin if the first method is used.
- Possible explanation: None.
Early Scornet Maestro[edit]
| Reproducibility | Consequences | Versions | Demonstration |
|---|---|---|---|
| Medium | Helpful | Pikmin 3: Yes Pikmin 3 Deluxe: Yes |
YouTube video |
- Effects: Get access to the Scornet Maestro without having to build the red bridge.
- Prerequisites: Have the second half of the Twilight River unlocked, and have three leaders ready.
- How to: The method is different in the original Pikmin 3 and Pikmin 3 Deluxe.
- In the original Pikmin 3, go to the area to the side of the red bridge (the area with two Desiccated Skitter Leaves and leading to the three Orange Bulborbs). From there, throw two leaders up onto the root near the pink 5 Pellet Posy. And from there, quickly throw another leader up onto the elevated area above. This must be done quickly or else the leaders will slide back down. Then, switch to the leader up above and have them walk near the rock closest to the path. If they continue to walk, they will eventually phase through it, fall out of bounds, and appear on the path to the Scornet Maestro's lair. Have them whistle a group of Pikmin under the path. When the leader at the top enters the transition zone, all Pikmin in the group will teleport to their side.
- In Pikmin 3 Deluxe, go to the area near the bamboo gate, then lift the gate and move the Portable Sunset past the gate. Throw two leaders on top of the fruit, switch to one of them, and throw the other out of bounds onto the nearby ledge. Navigate to the root intersection with a rock with no collision, and clip into the root. Navigate around the stump until you reach the bridge and then drop into the abyss and respawn on the path. Have them whistle a group of Pikmin under the path. When the leader at the top enters the transition zone, all Pikmin in the group will teleport to their side.
- Notes: It is also advised to start building the bridge while the boss fight is going on, so that when it is defeated, spoils can easily be carried back. Also, in versions 1.4 and later in the original Pikmin 3, and in all versions of Pikmin 3 Deluxe, the out-of-bounds leader will lose a portion of their health when falling through the abyss.
- Possible explanation: Collision detection algorithms should be simple when it comes to scenery. While the path's wall pushes the leader back, the rock pushes them forward, resulting in no lateral movement. The forward movement, however, is still enough to move the leader forwards (considering there are no collision forces stopping them efficiently on that direction), so they slowly make progress forward, until they no longer collide with the geometry and go through. Additionally, in the case of Pikmin 3 Deluxe, it was never considered that leaders could be thrown on fruits to go out of bounds.
Early Shaggy Long Legs[edit]
| Reproducibility | Consequences | Versions | Demonstration | Other demonstrations |
|---|---|---|---|---|
| Medium | Helpful | Pikmin 3: Yes Pikmin 3 Deluxe: Yes |
YouTube video | YouTube video (Deluxe method) YouTube video (alternate Deluxe method) |
- Effects: Makes the player fight against the Shaggy Long Legs in the Distant Tundra earlier than normal, and with unlimited time.
- Prerequisites: Have access to the Distant Tundra, and have not gone there before.
- How to: The method is different in the original Pikmin 3 and Pikmin 3 Deluxe.
- In the original Pikmin 3, in the cave where the Yellow Pikmin are found, after breaking down the exit's blockade, go out of bounds using the same method as in the Yellow Onion skip glitch, only, rather than going above the entrance, go behind it and walk around to the Shaggy Long Legs' arena. The battle will proceed as normal, only there will be an unlimited day length, and Brittany will have infinite health.
- In Pikmin 3 Deluxe, in the cave were the Yellow Pikmin are found, walk along the wall which has the 5-pellet on the can above it, away from where the ledge of the path to the Shaggy Long Legs is. If done correctly, Brittany will reach the top of the wall at the far end, and will be able to walk out-of-bounds to reach the path to the Shaggy Long Legs. An alternate method is to first knock down the Pellet Posy closest to the Shaggy Long Legs's path. Then, knock down the Pellet Posy down the path closest to the previous one, and let a Pikmin carry the pellet close to the first pellet. Have Brittany walk into the pellets to push them such that one of them is close to the starting point of the root, and the other is to its west, roughly 3/4 of a pellet apart in distance. Finally, have Brittany squeeze between the two to go up the easternmost one, and then from there hug the root to get on top the westernmost one, and climb up the root to the boss's path.
- Notes: When battling the Shaggy Long Legs before breaking the blockade, if enough Pikmin die, it will be impossible to gain enough Pikmin to push the iron ball, and if all the Pikmin die, the Yellow Onion will not eject another seed. Additionally, any Red Pikmin (obtained via the Crimson Candypop Bud) will be invisible during the cutscene when the weight is pushed.
- Possible explanation: When Brittany is in the cave, the day is set to be in a "tutorial" state, where the leader have unlimited health and the day lasts forever, as with day 1. When exiting the main entrance of the cave, it is set to end the "tutorial" state and begin the day as normal, but if one exits via the other entrance, it will not.
Early Winged Pikmin[edit]
| Reproducibility | Consequences | Versions | Demonstration |
|---|---|---|---|
| High | Helpful | Pikmin 3: Yes Pikmin 3 Deluxe: Yes |
YouTube video |
- Effects: Allows the player to get to the Winged Pikmin's Onion without building the long cyan bridge across the river.
- Prerequisites: Have the Twilight River unlocked and have two leaders.
- How to: At the Twilight River, have one leader walk across the river next to the landing site with no Pikmin in the squad. Go past the Water Dumple towards the stationary lily pad. What to do here differs between Pikmin 3 and Pikmin 3 Deluxe. In the original Pikmin 3, once near the lily pad, have the leader walk in the corner of the rock to the left of it and the lily pad. If done correctly, the leader will begin to go through the rock. An easy way to tell if the leader is clipping in the rocks is if they're not shaking around, and is only moving out of bounds. Walk away from where you went out of bounds and the leader will fall down into an abyss, respawning on the side of the river near the Winged Onion. In Pikmin 3 Deluxe, this trick requires a leader clip. Walk into the tight corner to the right of the lily pad. With gyro-only controls, point towards the Flukeweed on the other side of the pathway, hold the other leader, and whistle, dropping the leader. If done correctly, the other leader will go through the wall. Dismiss them to drop them into the abyss, where they'll respawn on the ledge near the Winged Onion. In both versions, have another leader throw across some Pikmin, preferably Rock Pikmin, to free the Onion from the Arachnode's web. Throw some in the water, and then switch to the other leader so that they can call them to the other shore. From here, Winged Pikmin can be unlocked. On Ultra-Spicy difficulty in Pikmin 3 Deluxe, due to Pikmin drowning faster, throwing Pikmin towards the lily pad from the shoreline does not allow enough time to whistle them onto the lily pad. Stand atop the hill from which you can see the Winged Pikmin Onion, then throw two or three Pikmin over the raised edge of the hill towards the lily pad. Swap quickly and whistle immediately.
- Notes: In version 1.0 of the original Pikmin 3, the leader takes no damage if they fall into the abyss. However, in version 1.4 and onwards and in Pikmin 3 Deluxe, they take damage equal to 1/3 of their total health. Even though the bridge is skipped, it is recommended to build it eventually to allow easy retrieval of items. Also in versions 1.0 to 1.3, you can throw a leader and they will end up behind the paper bag.
- Possible explanation: Collision detection algorithms should be simple, in order to not overload the console, especially for things as trivial as scenery objects such as rocks. It is possible that the gap between the rocks angles inwards, and when the leader attempts to move between them, each wall pushes them in opposite directions, which results in no lateral movement. The forward movement, however, is still enough to move the leader forwards (considering there are no collision forces stopping them efficiently on that direction), so they slowly make progress forward, until they no longer collide with the geometry and go through. In the case of Pikmin 3 Deluxe, what happens when the leader is released through whistling is that they try to go in front of the active leader, which, with perfect alignment, results in them going through the wall instead of to the side.
Formidable Oak light skip[edit]
|
To do: Document the method in the original Pikmin 3. |
| Reproducibility | Consequences | Versions | Demonstration |
|---|---|---|---|
| Medium | Helpful | Pikmin 3: Different method Pikmin 3 Deluxe: Yes |
YouTube video |
- Effects: Allows the player to skip doing the puzzle with the lights in the dark room of the Formidable Oak.
- Prerequisites: Have made it to the dark room of the Formidable Oak with Brittany, have Olimar being carried with Winged Pikmin in or towards the room, and have at least 5 non-Winged Pikmin.
- How to: Upon entering the room, turn right and continue along the lower level until encountering a root in the wall of the area. Throw at least 5 non-Winged Pikmin on top of the ledge, and walk up the middle of the root. Brittany will slowly make it to the top. Once on top, call the Pikmin and wait until Olimar reaches Brittany. The Winged Pikmin will fly upwards to make it to the out-of-bounds terrain. Walk slowly around the edge of the area going north, making sure the Winged Pikmin don't carry Olimar back in-bounds. If they do, wait until they reach Brittany again. After going over a large bump that forms the entrance to the room and encountering another root, whistle the Winged Pikmin off Olimar and put the non-Winged Pikmin on. Walk over the root and continue slowly around the edge of the area, making sure that Olimar stays behind Brittany at all times. After passing the dirt wall below, walk back onto the regular path and go straight to the exit of the cave.
- Notes: None.
- Possible explanation: The root has a shallow enough angle to allow leaders to walk up it, albeit slowly. Pikmin carrying Olimar will aim to carry him towards Brittany, but they'll only carry him directly towards Brittany at close range; in most cases they will follow the network of carrying paths. There are no carrying paths in out-of-bounds terrain, so if Brittany gets too far away from Olimar, the Pikmin will notice that the carrying path is closer and carry him back in-bounds. This is why Brittany needs to stay close to Olimar.
Yellow Onion skip[edit]
| Reproducibility | Consequences | Versions | Demonstration |
|---|---|---|---|
| Medium | Depends | Pikmin 3: Yes Pikmin 3 Deluxe: Yes |
YouTube video |
- Effects: Allows the player to skip the Yellow Onion and continue the game without it.
- Prerequisites: Have access to the Distant Tundra, and have not gone there before.
- How to: In the cave where the Yellow Pikmin are found, go between the iron ball and the slide and walk against the wall. If done correctly, Brittany should walk against the edge of the slide, rather than sliding down. Continue pushing against the wall while going down the slide to get out of bounds; from there, walk above the blocked entrance, and the game will treat it as you have exited the cave. Use the five yellow Pikmin and the Golden Candypop Buds to reunite Alph and Brittany. The day after, the Yellow Onion will be missing from the cave, and Yellow Pikmin produced by Candypop Buds will bring their loot to the master Onion and produce more Yellow Pikmin, although it is impossible to deposit or withdraw any into the Onion, and any Yellow Pikmin will vanish at the end of the day, even if they are in your squad or close to the landing site. Once you gain access to the Twilight River and rescue the Winged Pikmin, it is possible to withdraw Yellow Pikmin by using the "take out all types" feature; every one Red and Rock Pikmin taken out with this feature takes out one Yellow as well. To deposit Yellow Pikmin, take out Winged Pikmin and begin depositing them, but then hold the button that allows you to take out all the types, and Yellow Pikmin should be put in, instead.
- Notes:
- If the player also skips the cutscene that plays when meeting the Yellow Pikmin, it will not be possible to use the whistle until the end of the day, unless the player holds a Pikmin and whistles (the whistle's duration will be reduced to less than a second). Also, if the player goes back with Alph and Yellow Pikmin while Brittany is knocked out, the cutscene will play with Brittany's lines, except the first one will be empty.[1]
- After unlocking Winged Pikmin, one can get strange Pikmin counts within the Onion, including negative numbers.
- Possible explanation: Some flags that the game keeps to hold track of the story mode progression might get set or not set like intended if the glitch is performed. This results in the Onion's menu using some behaviors for some flags, resulting in unintended behavior.
A negative Pikmin count.

Pikmin 4[edit]
|
The following article or section is in need of assistance from someone who plays Pikmin 4. |
|
To do: Add a description about Pikmin 4's sequence breaks. |
Rush and whistle tutorial skip[edit]
|
To do: Document the weight of the paper bags with Pikmin. Things that are still not known: Wiping out all of the Pikmin with elemental hazards if it is different from the Porquillion wiping out all Pikmin, Olimar reacting to Pikmin dying to electricity like drowning, and if Olimar's reaction to collecting every Pikmin is unchanged if one or more wild Pikmin died to the Porquillion prior. |
| Reproducibility | Consequences | Demonstration |
|---|---|---|
| Low | Depends | YouTube video |
- Effects: Allows the player to skip destroying the breakable pots at the start of the tutorial containing the 5 Red Pikmin, explore the rest of the Hero's Hideaway in the tutorial (the layout and objects are similar to in Olimar's Shipwreck Tale with a few differences), and complete it without collecting Pikmin.
- Prerequisites: Encounter the pots found at the beginning of the tutorial to be able to use Moss's Rush, but do not destroy them.
- How to: Use Moss's Rush against the railings, and with precise timing, cancel it to clip over the invisible walls to reach the main floor.
- Notes:
- Some things still function normally after skipping the pots. Olimar reacts to the Pikmin's strange behavior and his surroundings. If no progress is done for a while, Olimar will stop moving to inform about Moss's ability to track down the ship part and the scent trail leading to the Porquillion will appear. The Porquillion can still be fought and defeated, despite no Pikmin being collected.
- The Pikmin cannot be collected due to the whistle tutorial being skipped, but they can die to the Porquillion's spikes. They can be collected once the pots containing the 5 Red Pikmin at the beginning are destroyed.
- On the other side of the pots at the beginning, the invisible wall extends to the railings, but it can be stood by using the block for elevation and jumping. The invisible walls are high enough to reach the desk close by, enabling you to reach the small stairs in between the kitchen and living room. Both paper bags can also be pushed down, but with no known weight value. Reaching the second paper bag and kitchen requires standing on the invisible wall that blocks the first stair, and using an angled Rush to land and run on top of another invisible box that surrounds the first paper bag's original spot to pass the second stair. The invisible box also acts as a softlock if the player hops off from the second stair to the original spot of the first paper bag.
- Once both paper bags are pushed down, Pikmin can be brought to the kitchen. Destroying the pots containing the 5 Red Pikmin at the beginning removes the railing's invisible walls. The invisible wall blocking the first stair is still present, so the only way to reach the kitchen is using an angled Rush on the first paper bag to go over the invisible wall.
- The Feasting Center base is not there. The narrow tunnel behind breakable pots is absent, resulting in the floating platform that lowers down by the desk being inaccessible. The button on the stovetop is turned off. The clay mound is there, but it cannot be built. However, this unfinished structure can be used for an angled Rush to get over the small ledge and access the freezer and frozen hydro jellies, which contain Ice Blasts. These Ice Blasts can be collected or picked up by Pikmin, but cannot be used as items due to shortcut settings and the pack not being usable.
- Objects found in the tutorial allow for some Pikmin actions, abilities, and behavior to be utilized despite not being intended, such as drinking nectar found inside breakable pots, digging a tunnel, pressing buttons or switches, decreasing in maturity, and seeing elemental immunities and weaknesses for all Pikmin types when interacting with the sink's water and the electric gate. Aside from decreasing in maturity, all of these actions and abilities also apply to Moss. Notably, if a Pikmin drowns in water, Olimar will react to it, which he does not do if the Porquillion kills one (with the only exception being if all Pikmin are wiped out).
- The Pebble Pitcher can still be used to destroy frozen hydro jellies and the electric gate.
- The bunker can be accessed with the floating platform, but it is locked instead of open. Its dials can still be turned with Pikmin. The three-digit code can be guessed, but unlocking it contains nothing inside. This three-digit code will not correspond to the bunkers found in the Hero's Hideaway in the main game, or in the Dream Home.
- Although not usable as an item, Ice Blasts can still be activated with the Porquillion's spikes, and the Porquillion can be defeated while it is in a frozen state, though there is a damage cap before it breaks out, unable to shatter it (it also cannot be shattered in Olimar's Shipwreck Tale). This can be done if an Ice Blast is carried by a Pikmin, led back to the Porquillion's arena, and then moved in a circle around it for the Pikmin to be close enough to get hit by its spikes and being in range for the Ice Blast to freeze it. The Ice Blasts can also freeze Pikmin, but can be whistled or hit by the Porquillion's spikes (if it survives) to be unfrozen.
- When the tutorial starts, Olimar hops onto Moss, but because the ability to switch characters is not introduced, they are treated as one whole character. If Moss digs the tunnel, Olimar will be dragged inside as well. If she is electrocuted by the electric gate, or frozen by an Ice Blast, the elemental hazards affect Moss, but not Olimar.
- Possible explanation: There is a chance that Moss's Rush can suddenly get a quick small bump in speed after cancelling it, which may be the reason why she can skip pass the railing's invisible wall.
See also[edit]
References[edit]
- ^ YouTube video showing how to get an empty line in Brittany's speech
| Anomalies | |
|---|---|
| Glitches | Pikmin • Pikmin 2 • Pikmin 3 • Pikmin 4 • Hey! Pikmin • Pikmin Bloom Pikipedia's glitch notes |
| Other anomalies | Crash • Mistake • Out of bounds • Path oversights • Sequence break |