Gear: Difference between revisions
m (Espyo moved page Gear (Pikmin 4) to Gear without leaving a redirect: This will be the main article for upgrades and gear in the series.) |
(Complete rework to document all gear in the series.) Tag: Disambiguation links |
||
| Line 1: | Line 1: | ||
{{game icons|p4=y}} | {{game icons|p2=y|p3=y|hp=y|p4=y}} | ||
[[File:Exploration Kit menu.jpg|thumb|300px|The [[Exploration Kit]], as seen in {{p2}}'s pause menu.]] | |||
{{new game spoiler|various unlocks and end-game rewards}} | {{new game spoiler|various unlocks and end-game rewards}} | ||
{{game help|p4|Fill in the requirements to unlock the items.}} | {{game help|p4|Fill in the requirements to unlock the items.}} | ||
{{Stub}} | {{Stub}} | ||
{{redirects|Upgrade|the updates to the games' software|update}} | |||
In most [[Pikmin series|''Pikmin'' games]], players are able to obtain diverse pieces of '''gear''' that empower the main characters, typically by granting immunities to some [[hazard]]s, increasing stats, or unlocking new abilities. The method by which they are obtained depends on the game, and some pieces of gear appear in multiple games. Before {{p4}} these upgrades were not given a name, and are specifically referred to as "gear" in various places of ''Pikmin 4''. Also unique to ''Pikmin 4'' is the ability to enable or disable any upgrade (besides the [[#Survey Drone|Survey Drone]], [[#Idler's Alert|Idler's Alert]] and [[#Homesick Signal|Homesick Signal]]) once obtained. | |||
== Obtaining == | |||
In ''Pikmin 2'', the player needs to retrieve certain [[treasure]]s, usually guarded by [[boss]]es. When the [[Hocotate ship]] takes the treasure in, it is able to make use of it to create an upgrade. The upgrades can be found on a checklist called the [[Exploration Kit]] on the [[pause menu]], and there is a distinction between the treasure itself and the upgrade. If the player exits the cave from the [[pause menu]] after getting the treasure instead of using a [[geyser]], the treasure will be left behind but the leaders will keep the upgrade. | |||
In ''Pikmin 3'', the two important pieces of gear that allow reaching new [[area]]s are cellphones that need to be retrieved to the [[S.S. Drake]], while the optional [[spacesuit]] upgrades can be found buried or off the beaten path in the form of {{w|Gashapon}} capsules; these too need to be brought back to the S.S. Drake and there isn't much of a difference between the object and the upgrade proper. | |||
In ''Pikmin 4'', upgrades can be obtained by purchasing them from [[Russ]]'s lab, or by completing certain [[Mission (Pikmin 4)|missions]]. In the case of the lab, they will have an associated [[raw material]] cost, and some only become available in the shop when certain [[Sparklium]] thresholds are met or when certain things happen in-game. | |||
== List == | |||
{| class="wikitable sortable" | |||
|- | |||
! Purpose || Gear || ''Pikmin 2'' || ''Pikmin 3'' || ''Pikmin 4'' | |||
|- | |||
| Stat improvement | |||
| [[#Air Armor|Air Armor]] | |||
| See [[#Metal Suit Z|Metal Suit Z]] | |||
| See [[#Metal Suit Z|Metal Suit Z]] | |||
| {{yes}} | |||
|- | |||
| Stat improvement | |||
| [[#Air Armor (Oatchi)|Air Armor (Oatchi)]] | |||
| {{no}} | |||
| {{no}} | |||
| {{yes}} | |||
|- | |||
| Stat improvement | |||
| [[#Air Armor+|Air Armor+]] | |||
| {{no}} | |||
| {{no}} | |||
| {{yes}} | |||
|- | |||
| Stat improvement | |||
| [[#Air Armor+ (Oatchi)|Air Armor+ (Oatchi)]] | |||
| {{no}} | |||
| {{no}} | |||
| {{yes}} | |||
|- | |||
| Stat improvement | |||
| [[#Air Armor++|Air Armor++]] | |||
| {{no}} | |||
| {{no}} | |||
| {{yes}} | |||
|- | |||
| Stat improvement | |||
| [[#Air Armor++ (Oatchi)|Air Armor++ (Oatchi)]] | |||
| {{no}} | |||
| {{no}} | |||
| {{yes}} | |||
|- | |||
| Hazard immunity | |||
| [[#Anti-Electrifier|Anti-Electrifier]] | |||
| {{yes}} | |||
| {{yes}} | |||
| {{yes}} | |||
|- | |||
| Hazard immunity | |||
| [[#Anti-Electrifier (Oatchi)|Anti-Electrifier (Oatchi)]] | |||
| {{no}} | |||
| {{no}} | |||
| {{yes}} | |||
|- | |||
| Misc. | |||
| [[#Brace Boots|Brace Boots]] | |||
| {{no}} | |||
| {{no}} | |||
| {{yes}} | |||
|- | |||
| New ability | |||
| [[#Charging Horn|Charging Horn]] | |||
| {{no}} | |||
| {{no}} | |||
| {{yes}} | |||
|- | |||
| Discovering new areas | |||
| [[#Data Glutton|Data Glutton]] | |||
| {{no}} | |||
| {{yes}} | |||
| {{no}} | |||
|- | |||
| New ability | |||
| [[#Dodge Whistle|Dodge Whistle]] | |||
| {{no}} | |||
| {{yes}} | |||
| {{no}} | |||
|- | |||
| New ability | |||
| [[#Extra Hand|Extra Hand]] | |||
| {{no}} | |||
| {{no}} | |||
| {{yes}} | |||
|- | |||
| Discovering new areas | |||
| [[#Folded Data Glutton|Folded Data Glutton]] | |||
| {{no}} | |||
| {{yes}} | |||
| {{no}} | |||
|- | |||
| Misc. | |||
| [[#Gunk Busters|Gunk Busters]] | |||
| {{no}} | |||
| {{no}} | |||
| {{yes}} | |||
|- | |||
| Misc. | |||
| [[#Headlamp|Headlamp]] | |||
| See [[#Solar System|Solar System]] | |||
| {{no}} | |||
| {{yes}} | |||
|- | |||
| Misc. | |||
| [[#Headlamp+|Headlamp+]] | |||
| {{no}} | |||
| {{no}} | |||
| {{yes}} | |||
|- | |||
| Misc. | |||
| [[#Homesick Signal|Homesick Signal]] | |||
| {{no}} | |||
| {{no}} | |||
| {{yes}} | |||
|- | |||
| Misc. | |||
| [[#Idle Counter|Idle Counter]] | |||
| {{no}} | |||
| {{no}} | |||
| {{yes}} | |||
|- | |||
| Misc. | |||
| [[#Idler's Alert|Idler's Alert]] | |||
| {{no}} | |||
| {{no}} | |||
| {{yes}} | |||
|- | |||
| New ability | |||
| [[#Lineup Trumpet|Lineup Trumpet]] | |||
| {{no}} | |||
| {{no}} | |||
| {{yes}} | |||
|- | |||
| Stat improvement | |||
| [[#Mega Tweeter|Mega Tweeter]] | |||
| {{yes}} | |||
| {{no}} | |||
| See [[#Power Whistle|Power Whistle]] | |||
|- | |||
| Stat improvement | |||
| [[#Metal Suit Z|Metal Suit Z]] | |||
| {{yes}} | |||
| {{yes}} | |||
| See [[#Air Armor|Air Armor]] | |||
|- | |||
| New ability | |||
| [[#Napsack|Napsack]] | |||
| {{yes}} | |||
| {{no}} | |||
| {{no}} | |||
|- | |||
| New ability | |||
| [[#Pluckaphone|Pluckaphone]] | |||
| {{yes}} | |||
| {{no}} | |||
| See [[#Plucking Whistle|Plucking Whistle]] | |||
|- | |||
| New ability | |||
| [[#Plucking Whistle|Plucking Whistle]] | |||
| See [[#Pluckaphone|Pluckaphone]] | |||
| {{no}} | |||
| {{yes}} | |||
|- | |||
| Stat improvement | |||
| [[#Power Whistle|Power Whistle]] | |||
| See [[#Mega Tweeter|Mega Tweeter]] | |||
| {{no}} | |||
| {{yes}} | |||
|- | |||
| New ability | |||
| [[#Rocket Fist|Rocket Fist]] | |||
| {{yes}} | |||
| {{no}} | |||
| See [[#Triple Threat|Triple Threat]] | |||
|- | |||
| Stat improvement | |||
| [[#Rush Boots|Rush Boots]] | |||
| {{yes}} | |||
| {{no}} | |||
| {{yes}} | |||
|- | |||
| Hazard immunity | |||
| [[#Scorch Guard|Scorch Guard]] | |||
| {{yes}} | |||
| {{yes}} | |||
| {{yes}} | |||
|- | |||
| Hazard immunity | |||
| [[#Scorch Guard (Oatchi)|Scorch Guard (Oatchi)]] | |||
| {{no}} | |||
| {{no}} | |||
| {{yes}} | |||
|- | |||
| Hazard immunity | |||
| [[#Sniff Saver (Oatchi)|Sniff Saver (Oatchi)]] | |||
| {{no}} | |||
| {{no}} | |||
| {{yes}} | |||
|- | |||
| Misc. | |||
| [[#Solar System|Solar System]] | |||
| {{yes}} | |||
| {{no}} | |||
| See [[#Headlamp|Headlamp]] | |||
|- | |||
| Discovering new areas | |||
| [[#Sphere Chart|Sphere Chart]] | |||
| {{yes}} | |||
| {{no}} | |||
| {{no}} | |||
|- | |||
| Discovering new areas | |||
| [[#Survey Chart|Survey Chart]] | |||
| {{yes}} | |||
| {{no}} | |||
| {{no}} | |||
|- | |||
| Misc. | |||
| [[#Survey Drone|Survey Drone]] | |||
| {{no}} | |||
| {{no}} | |||
| {{yes}} | |||
|- | |||
| Hazard immunity | |||
| [[#Thermal Defense|Thermal Defense]] | |||
| {{no}} | |||
| {{no}} | |||
| {{yes}} | |||
|- | |||
| Hazard immunity | |||
| [[#Thermal Defense (Oatchi)|Thermal Defense (Oatchi)]] | |||
| {{no}} | |||
| {{no}} | |||
| {{yes}} | |||
|- | |||
| Misc. | |||
| [[#Treasure Gauge|Treasure Gauge]] | |||
| {{yes}} | |||
| {{no}} | |||
| {{yes}} | |||
|- | |||
| Misc. | |||
| [[#Treasure Gauge+|Treasure Gauge+]] | |||
| {{no}} | |||
| {{no}} | |||
| {{yes}} | |||
|- | |||
| New ability | |||
| [[#Triple Threat|Triple Threat]] | |||
| See [[#Rocket Fist|Rocket Fist]] | |||
| {{no}} | |||
| {{yes}} | |||
|- | |||
| Stat improvement | |||
| [[#Tuff Stuff|Tuff Stuff]] | |||
| {{no}} | |||
| {{no}} | |||
| {{yes}} | |||
|- | |||
| Stat improvement | |||
| [[#Tuff Stuff (Oatchi)|Tuff Stuff (Oatchi)]] | |||
| {{no}} | |||
| {{no}} | |||
| {{yes}} | |||
|- | |||
| Stat improvement | |||
| [[#Tuff Stuff+|Tuff Stuff+]] | |||
| {{no}} | |||
| {{no}} | |||
| {{yes}} | |||
|- | |||
| Stat improvement | |||
| [[#Tuff Stuff+ (Oatchi)|Tuff Stuff+ (Oatchi)]] | |||
| {{no}} | |||
| {{no}} | |||
| {{yes}} | |||
|- | |||
| Stat improvement | |||
| [[#Tuff Stuff++|Tuff Stuff++]] | |||
| {{no}} | |||
| {{no}} | |||
| {{yes}} | |||
|- | |||
| Stat improvement | |||
| [[#Tuff Stuff++ (Oatchi)|Tuff Stuff++ (Oatchi)]] | |||
| {{no}} | |||
| {{no}} | |||
| {{yes}} | |||
|} | |||
In addition, there is [[#Hey! Pikmin upgrades|a list of upgrades in ''Hey! Pikmin'']]. | |||
=== Air Armor === | |||
{{infobox upgrade | |||
|p4 = y | |||
|name = Air Armor | |||
|icon = Air Armor P4 icon.png | |||
|image = Air Armor P4 icon.png | |||
|size = x150px | |||
|caption = The Air Armor's icon. | |||
|function = Increases defense | |||
|requirements = Own [[#Tuff Stuff|Tuff Stuff]], buy for {{icon|Raw material}} × 40 | |||
}} | |||
{{clear}} | |||
=== Air Armor (Oatchi) === | |||
{{infobox upgrade | |||
|p4 = y | |||
|name = Air Armor (Oatchi) | |||
|icon = Air Armor (Oatchi) P4 icon.png | |||
|image = Air Armor (Oatchi) P4 icon.png | |||
|size = x150px | |||
|caption = The Air Armor (Oatchi)'s icon. | |||
|function = Increases defense | |||
|requirements = Own [[#Tuff Stuff (Oatchi)|Tuff Stuff (Oatchi)]], buy for {{icon|Raw material}} × 80 | |||
}} | |||
{{clear}} | |||
=== Air Armor+ === | |||
{{infobox upgrade | |||
|p4 = y | |||
|name = Air Armor+ | |||
|icon = Air Armor+ P4 icon.png | |||
|image = Air Armor+ P4 icon.png | |||
|size = x150px | |||
|caption = The Air Armor+'s icon. | |||
|function = Increases defense | |||
|requirements = Buy for {{icon|Raw material}} × 80, further requirements unknown | |||
}} | |||
{{clear}} | |||
=== Air Armor+ (Oatchi) === | |||
{{infobox upgrade | |||
|p4 = y | |||
|name = Air Armor+ (Oatchi) | |||
|icon = Air Armor+ (Oatchi) P4 icon.png | |||
|image = Air Armor+ (Oatchi) P4 icon.png | |||
|size = x150px | |||
|caption = The Air Armor+ (Oatchi)'s icon. | |||
|function = Increases defense | |||
|requirements = Buy for {{icon|Raw material}} × 120, further requirements unknown | |||
}} | |||
{{clear}} | |||
=== Air Armor++ === | |||
{{infobox upgrade | |||
|p4 = y | |||
|name = Air Armor++ | |||
|icon = Air Armor++ P4 icon.png | |||
|image = Air Armor++ P4 icon.png | |||
|size = x150px | |||
|caption = The Air Armor++'s icon. | |||
|function = Increases defense | |||
|requirements = Buy for {{icon|Raw material}} × 120, further requirements unknown | |||
}} | |||
{{clear}} | |||
=== Air Armor++ (Oatchi) === | |||
{{infobox upgrade | |||
|p4 = y | |||
|name = Air Armor++ (Oatchi) | |||
|icon = Air Armor++ (Oatchi) P4 icon.png | |||
|image = Air Armor++ (Oatchi) P4 icon.png | |||
|size = x150px | |||
|caption = The Air Armor++ (Oatchi)'s icon. | |||
|function = Increases defense | |||
|requirements = {{icon|Raw material}} × 160, further requirements unknown | |||
}} | |||
{{clear}} | |||
=== Anti-Electrifier === | |||
{{infobox upgrade | |||
|p2 = y | |||
|p3 = y | |||
|p4 = y | |||
|name = Anti-Electrifier | |||
|icon = Anti-Electrifier P4 icon.png | |||
|image = Anti-Electrifier P4 icon.png | |||
|size = x150px | |||
|caption = The Anti-Electrifier's icon in ''Pikmin 4''. | |||
|function = Gives [[electricity]] resistance | |||
|requirements2 = Defeat the [[Giant Breadbug]], retrieve the [[Dream Material]] | |||
|requirements3 = Retrieve the capsule | |||
|requirements4 = Have had the [[Pikmin 4 player character|player character]] or [[Oatchi]] take electric [[damage]], buy for {{icon|Raw material}} × 50 | |||
}} | |||
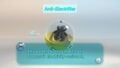
The Anti-Electrifier, when unlocked, makes the [[leader]]s' suits immune to [[electricity]], including electrical attacks. | |||
In ''Pikmin 2'', it is obtained by defeating the [[Giant Breadbug]] in the [[Glutton's Kitchen]], and collecting the [[Dream Material]]. Although leaders become invulnerable to electrical attacks, the [[Titan Dweevil]]'s Shock Therapist will still manage to stun them, despite not causing any damage. | |||
In ''Pikmin 3'', it can be found [[Dig|buried]] near the place where [[Charlie]] crashed onto the planet's surface in the [[Distant Tundra]], guarded by an [[Arctic Cannon Larva]]. The capsule has a weight of 10, and can be carried by up to 20 Pikmin. This device is particularly useful when trying to pass by electrical hazards with a group of [[Yellow Pikmin]]. | |||
<gallery> | |||
P3 Anti-Electrifier Artwork.png|The Anti-Electrifier's capsule in ''Pikmin 3''. | |||
P3 Anti-Electrifier Analysis.jpg|Analysis of the Anti-Electrifier. | |||
RubberSuit.jpg|Close up of the Anti-Electrifier after being dug up. | |||
</gallery> | |||
{{clear}} | |||
=== Anti-Electrifier (Oatchi) === | |||
{{infobox upgrade | |||
|p4 = y | |||
|name = Anti-Electrifier (Oatchi) | |||
|icon = Anti-Electrifier (Oatchi) P4 icon.png | |||
|image = Anti-Electrifier (Oatchi) P4 icon.png | |||
|size = x150px | |||
|caption = The Anti-Electrifier (Oatchi)'s icon. | |||
|function = Gives [[electricity]] resistance | |||
|requirements = Have had the [[Pikmin 4 player character|player character]] or [[Oatchi]] take electric [[damage]], buy for {{icon|Raw material}} × 100 | |||
}} | |||
{{clear}} | |||
=== Brace Boots === | |||
{{infobox upgrade | |||
|p4 = y | |||
|name = Brace Boots | |||
|icon = Brace Boots P4 icon.png | |||
|image = Brace Boots P4 icon.png | |||
|size = x150px | |||
|caption = The Brace Boots's icon. | |||
|function = Gives resistance to [[wind]] and being sucked up | |||
|requirements = Have the [[Pikmin 4 player character|player character]] hit by wind or be sucked up in a previous [[day]], buy for {{icon|Raw material}} × 80 | |||
}} | |||
{{clear}} | |||
=== Charging Horn === | |||
{{infobox upgrade | |||
|p4 = y | |||
|name = Charging Horn | |||
|icon = Charging Horn P4 icon.png | |||
|image = Charging Horn P4 icon.png | |||
|size = x150px | |||
|caption = The Charging Horn's icon. | |||
|function = Unlocks the ability to [[charge]] | |||
|requirements = Have reached {{sparklium|p4|450}}, buy for {{icon|Raw material}} × 20 | |||
}} | |||
{{see more|Charge}} | |||
The Charging Horn grants the player the ability to charge. | |||
{{clear}} | |||
=== Data Glutton === | |||
{{infobox upgrade | |||
|p3 = y | |||
|name = Data Glutton | |||
|icon = Data Glutton icon.png | |||
|image = DataGluttonArtwork.png | |||
|size = 200px | |||
|caption = The Data Glutton. | |||
|function = Unlocks the [[Distant Tundra]] | |||
|requirements = Defeat the Armored Mawdad, retrieve the cellphone | |||
}} | |||
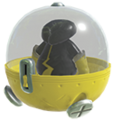
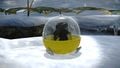
The Data Glutton is an old cellphone, and is found within the belly of the [[Armored Mawdad]] in the [[Garden of Hope]]. It has a weight of 10, and can be carried by up to 20 Pikmin. It emits a signal that [[Alph]] and [[Brittany]] first assume to be [[Charlie]]. Upon collecting the device, Alph uses its technology to boost the signal strength of the [[S.S. Drake]], allowing them to access the [[Distant Tundra]]. | |||
<gallery> | |||
Dataglutton2.jpg|The Data Glutton being scanned. | |||
Data Glutton P3 revealed.png|The Data Glutton is rewarded for defeating the Armored Mawdad. | |||
DataGluttonCarry.png|Carrying the Data Glutton. | |||
</gallery> | |||
{{clear}} | |||
=== Dodge Whistle === | |||
{{infobox upgrade | |||
|p3 = y | |||
|name = Dodge Whistle | |||
|icon = Dodge Whistle icon.png | |||
|image = DodgeWhistleArt.png | |||
|caption = The Dodge Whistle's capsule. | |||
|area = [[Distant Tundra]] | |||
|weight = 10 | |||
|max_carriers = 20 | |||
|function = Allows leaders and Pikmin to dodge | |||
|requirements = Retrieve the capsule | |||
}} | |||
{{see more|Dodge}} | |||
The Dodge Whistle can be found on a small cliff a short distance away from the exit to the [[Vehemoth Phosbat]] cave, where the Pikmin will carry the spoils of the battle through. It can be obtained by throwing Pikmin onto the [[Bouncy Mushroom]] between it and the path. There are some enemies in the way, however: two [[Swooping Snitchbug]]s are guarding the object, and [[Joustmite]]s, [[Skeeterskate]]s, and [[Bearded Amprat]]s can be found on the route the Pikmin will use to take it to the [[Drake]]. However, this all can be bypassed by having [[Winged Pikmin]] carry it. It has a weight of 10, and can be carried by up to 20 Pikmin. | |||
Collecting it allows the leaders to [[dodge]] left or right, guiding the Pikmin. It is done in a straight line normally, or in an arc around a [[lock-on]] target (in the original ''Pikmin 3'' only). When rolling, the leaders do not lose height, making certain [[sequence breaks]] possible. | |||
[[File:DodgeWhistle.jpg|thumb|200px|left|Closeup of the Dodge Whistle's capsule.]] | |||
{{clear}} | |||
=== Extra Hand === | |||
{{infobox upgrade | |||
|p4 = y | |||
|name = Extra Hand | |||
|icon = Extra Hand P4 icon.png | |||
|image = Extra Hand P4 icon.png | |||
|size = x150px | |||
|caption = The Extra Hand's icon. | |||
|function = Allows the [[Pikmin 4 player character|player character]] to carry objects | |||
|requirements = Complete all of Louie's [[Mission (Pikmin 4)#Side Mission|side missions]] | |||
}} | |||
{{clear}} | |||
=== Folded Data Glutton === | |||
{{infobox upgrade | |||
|p3 = y | |||
|name = Folded Data Glutton | |||
|icon = Folded Data Glutton icon.png | |||
|image = FoldedDataGluttonArt.png | |||
|size = 200px | |||
|caption = The Folded Data Glutton. | |||
|function = Unlocks the [[Twilight River]] | |||
|requirements = Defeat the Sandbelching Meerslug, retrieve the cellphone | |||
}} | |||
The '''Folded Data Glutton''' is a more modern, folding cellphone, found within the belly of the [[Sandbelching Meerslug]] in the [[Tropical Wilds]]. It emits a signal that the leaders first assume to be [[Olimar]]. Upon collecting the device, Alph uses its technology to boost the signal strength of the Drake, allowing them to access the [[Twilight River]]. It has a weight of 10, and can be carried by up to 20 Pikmin. | |||
This cellphone has an image of two {{W|ferret}}s on its display. Despite its supposed lack of recent use, the interface on the phone claims that its current battery life is quite high, implying that it was either recently charged, or has been only recently turned back on after a long period of dormancy. | |||
One can [[throw]] Pikmin at it when it is first found and have them [[dig]] it out without triggering the cutscene where the boss awakens. This is possible if the leaders are positioned just far away enough to not trigger the event, but still close enough for the Pikmin throw to reach. However, the Pikmin will never make any progress towards digging it out, forcing the player to face the boss. Alternatively, using a [[sequence break]] involving the Dodge Whistle, it is possible to observe this behavior regardless of proximity, by reaching the Meerslug's arena before rescuing Charlie from the [[Vehemoth Phosbat]]. | |||
<gallery> | |||
Folded Data Glutton analysis.jpg|The Folded Data Glutton being scanned. | |||
P3 Buried Folded Data Glutton.jpg|The Folded Data Glutton buried in the sand. | |||
FDGMeerslug1.png|The Folded Data Glutton next to a deceased [[Sandbelching Meerslug]]. | |||
FDataGluttonCarry.jpeg|Pikmin carrying the Folded Data Glutton. | |||
</gallery> | |||
=== Gunk Busters === | |||
{{infobox upgrade | |||
|p4 = y | |||
|name = Gunk Busters | |||
|icon = Gunk Busters P4 icon.png | |||
|image = Gunk Busters P4 icon.png | |||
|size = x150px | |||
|caption = The Gunk Buster's icon. | |||
|function = Allows normal movement on [[sticky mold]] | |||
|requirements = Have gone through sticky mold, buy for {{icon|Raw material}} × 240 | |||
}} | |||
{{clear}} | |||
=== Headlamp === | |||
{{infobox upgrade | |||
|p4 = y | |||
|name = Headlamp | |||
|icon = Headlamp P4 icon.png | |||
|image = Headlamp P4 icon.png | |||
|size = x150px | |||
|caption = The Headlamp's icon. | |||
|function = Gives some light to dark caves | |||
|requirements = Have reached {{sparklium|p4|2000}}, buy for {{icon|Raw material}} × 30 | |||
}} | |||
{{clear}} | |||
=== Headlamp+ === | |||
{{infobox upgrade | |||
|p4 = y | |||
|name = Headlamp+ | |||
|icon = Headlamp+ P4 icon.png | |||
|image = Headlamp+ P4 icon.png | |||
|size = x150px | |||
|caption = The Headlamp+'s icon. | |||
|function = Increases the light in dark caves | |||
|requirements = Own [[#Headlamp|Headlamp]], buy for {{icon|Raw material}} × 100 | |||
}} | |||
{{clear}} | |||
=== Homesick Signal === | |||
{{infobox upgrade | |||
|p4 = y | |||
|name = Homesick Signal | |||
|icon = Homesick Signal P4 icon.png | |||
|image = Homesick Signal P4 icon.png | |||
|size = x150px | |||
|caption = The Homesick Signal's icon. | |||
|function = Calls all Pikmin not with a leader towards the base | |||
|requirements = Buy for {{icon|Raw material}} × 80, further requirements unknown | |||
}} | |||
{{clear}} | |||
=== Idle Counter === | |||
{{infobox upgrade | |||
|p4 = y | |||
|name = Idle Counter | |||
|icon = Idle Counter P4 icon.png | |||
|image = Idle Counter P4 icon.png | |||
|size = x150px | |||
|caption = The Idle Counter's icon. | |||
|function = Shows an indicator of how many Pikmin are [[idling]] | |||
|requirements = Have reached {{sparklium|p4|2500}}, buy for {{icon|Raw material}} × 40 | |||
}} | |||
{{clear}} | |||
=== Idler's Alert === | |||
{{infobox upgrade | |||
|p4 = y | |||
|name = Idler's Alert | |||
|icon = Idler's Alert P4 icon.png | |||
|image = Idler's Alert P4 icon.png | |||
|size = x150px | |||
|caption = The Idler's Alert's icon. | |||
|function = Calls all [[idle]] Pikmin to wherever it was used | |||
|requirements = Have reached {{sparklium|p4|3500}}, buy for {{icon|Raw material}} × 80 | |||
}} | |||
{{clear}} | |||
=== Lineup Trumpet === | |||
{{infobox upgrade | |||
|p4 = y | |||
|name = Lineup Trumpet | |||
|icon = Lineup Trumpet P4 icon.png | |||
|image = Lineup Trumpet P4 icon.png | |||
|size = x150px | |||
|caption = The Lineup Trumpet's icon. | |||
|function = Unlocks the ability to [[swarm]] | |||
|requirements = Complete all of [[Frisé]]'s side missions | |||
}} | |||
{{see more|Swarm}} | |||
The Lineup Trumpet grants the player the ability to swarm. | |||
{{clear}} | |||
=== Mega Tweeter === | |||
{{infobox upgrade | |||
|p2 = y | |||
|name = Mega Tweeter | |||
|image = Amplified Amplifier.png | |||
|size = 200px | |||
|caption = The Amplified Amplifier. | |||
|function = Increases the whistle's range | |||
|requirements = Retrieve the [[Amplified Amplifier]] | |||
}} | |||
The Mega Tweeter ({{j|メガ・スピーカー|Mega Supīkā|Mega Speaker}}) is obtained by defeating the [[Ranging Bloyster]] in the [[Shower Room]], and collecting the [[Amplified Amplifier]]. This upgrade increases the range of the whistles of all [[leader]]s. The diameter of the visible circle projected on the ground increases to about 144% of its original size, thus more than doubling the area the whistle affects. This makes it easier to call scattered [[Pikmin family|Pikmin]] to the leader's side. | |||
{{clear}} | |||
=== Metal Suit Z === | |||
{{infobox upgrade | |||
|p2 = y | |||
|p3 = y | |||
|name = Metal Suit Z | |||
|icon = Metal Suit Z icon.png | |||
|image = MetalSuitZArt.png | |||
|caption = The Metal Suit Z's capsule in ''Pikmin 3''. | |||
|function = Gives higher defense | |||
|requirements2 = Defeat the Pileated Snagret, retrieve the [[Justice Alloy]] | |||
|requirements3 = Retrieve the capsule | |||
}} | |||
The Metal Suit Z increases the integrity of the leaders' suits, reducing damage taken by half. In ''Pikmin 2'', it is obtained by defeating the [[Pileated Snagret]] in the [[Snagret Hole]], and collecting the [[Justice Alloy]]. In ''Pikmin 3'', it can be found on a strip of path that connects the shore near the [[Mock Bottom]] and the place where [[Alph]] crash-landed, and must be reached by throwing leaders up either side. To note is that the [[Hermit Crawmad]] near the bridge could interfere with the carrier Pikmin. | |||
This upgrade is useful for attempts in defeating a large [[Bulborb]] or [[Spotty Bulbear]] with [[leader]]s alone without coming to much harm. The [[Hocotate ship]] in ''Pikmin 2'' claims that it will make enemy bites and being stepped on produce minimal pain. This is a gross simplification on its part, intended to avoid having to explain the intricacies in detail. In reality, all sources of pain will be reduced dramatically, not just those two, and enemies like [[Shearwig]]s and [[Wollywog]]s will still produce a significant amount of damage. | |||
[[File:MetalSuitZ1.jpeg|thumb|200px|left|Close up of the Metal Suit Z.]] | |||
{{clear}} | |||
=== Napsack === | |||
{{infobox upgrade | |||
|p2 = y | |||
|name = Napsack | |||
|image = Five-man Napsack.jpg | |||
|size = 200px | |||
|caption = The Five-man Napsack. | |||
|function = Allows leaders to lie down | |||
|requirements = Defeat the Burrowing Snagret, retrieve the [[Five-Man Napsack]] | |||
}} | |||
{{see more|Lie down}} | |||
The Napsack can be obtained by defeating the [[Burrowing Snagret]] in the [[White Flower Garden]], and collecting the [[Five-Man Napsack]]. This upgrade provides a quick method of returning to the Pikmin [[Onion]]s above ground or the [[Research Pod]] when [[cave|underground]], which is achieved by holding {{button|gc|x|wii|c}} once it has been obtained. When used, the [[leader]] in control [[lie down|falls asleep]], and any nearby [[Pikmin family|Pikmin]], up to a maximum of four, [[carry]] him to their associated Onion (or Research Pod), a minimum of just one being required. | |||
{{clear}} | |||
=== Pluckaphone === | |||
{{infobox upgrade | |||
|p2 = y | |||
|name = Pluckaphone | |||
|image = Professional Noisemaker.png | |||
|size = 200px | |||
|caption = The Professional Noisemaker. | |||
|function = Allows whistle to pluck Pikmin | |||
|requirements = Defeat the Waterwraith, retrieve the [[Professional Noisemaker]] | |||
}} | |||
The Pluckaphone is obtained by defeating the [[Waterwraith]] in the [[Submerged Castle]] and collecting the [[Professional Noisemaker]]. It is an upgrade that allows the [[leader]]s' whistles to call buried [[Pikmin family|Pikmin]] out from the ground, saving precious time that would otherwise be spent [[pluck]]ing them out. As well as picking newly produced Pikmin at the [[Onion]]s, this is useful for calling out Pikmin that were planted by a [[Mamuta]] or a [[Swooping Snitchbug]], as well as transformed by [[Candypop Bud]]s. | |||
In the first trailer for {{p1}}, Olimar is seen calling Pikmin from the ground, so the Pluckaphone may be an implementation of a [[Pikmin prerelease information|prerelease element]] from the first ''Pikmin'' game. | |||
{{clear}} | |||
=== Plucking Whistle === | |||
{{infobox upgrade | |||
|p4 = y | |||
|name = Plucking Whistle | |||
|icon = Plucking Whistle P4 icon.png | |||
|image = Plucking Whistle P4 icon.png | |||
|size = x150px | |||
|caption = The Plucking Whistle's icon. | |||
|function = Allows whistle to pluck Pikmin | |||
|requirements = Have completed [[Russ]]'s "An Ode to Science" side mission, buy for {{icon|Raw material}} × 80 | |||
}} | |||
{{clear}} | |||
=== Power Whistle === | |||
{{infobox upgrade | |||
|p4 = y | |||
|name = Power Whistle | |||
|icon = Power Whistle P4 icon.png | |||
|image = Power Whistle P4 icon.png | |||
|size = x150px | |||
|caption = The Power Whistle's icon. | |||
|function = Increases the whistle's range | |||
|requirements = Buy for {{icon|Raw material}} × 120, further requirements unknown | |||
}} | |||
{{clear}} | |||
=== Rocket Fist === | |||
{{infobox upgrade | |||
|p2 = y | |||
|name = Rocket Fist | |||
|image = Brute Knuckles.jpg | |||
|size = 200px | |||
|caption = The Brute Knuckles. | |||
|function = Gives leaders a punch combo | |||
|requirements = Defeat the Mamuta, retrieve the [[Brute Knuckles]] | |||
}} | |||
{{see more|Punch}} | |||
The Rocket Fist can be obtained by defeating one of the [[Mamuta]] in the [[Frontier Cavern]], and collecting the [[Brute Knuckles]]. It enables a new, stronger [[punch]]ing combo attack for use by the [[leader]]s, which makes defeating [[Enemy|enemies]] with leaders alone much easier and more efficient. Without the upgrade, the {{button|gc|a|wii|a}} button will produce a simple right punch. Once this treasure has been collected, pressing {{button|gc|a|wii|a}} a second time will perform a left-hook, and a third time launches a devastating wind-up punch. Due to [[Glitches in Pikmin 2#Sped up punching|a glitch]], punching while moving makes the attacks come out faster, which greatly boosts the Rocket Fist's effectiveness. | |||
{{clear}} | |||
=== Rush Boots === | |||
{{infobox upgrade | |||
|p2 = y | |||
|p4 = y | |||
|name = Rush Boots | |||
|image = Repugnant Appendage.jpg | |||
|icon = Rush Boots P4 icon.png | |||
|size = 200px | |||
|caption = The Repugnant Appendage. | |||
|function = Makes leaders run faster | |||
|requirements2 = Defeat the Empress Bulblax, retrieve the [[Repugnant Appendage]] | |||
|requirements4 = Buy for {{icon|Raw material}} × 120, further requirements unknown | |||
}} | |||
The Rush Boots can be obtained by defeating the [[Empress Bulblax]] in the [[Frontier Cavern]], and collecting the [[Repugnant Appendage]]. It is a modification to the [[leader]]s' footwear that allows them to run more quickly, around 1.3 times faster,{{cite youtube|TdI0nSfJO_8|comparing the same trek with and without the Rush Boots|published={{date|12|April|2019}}|retrieved={{date|12|April|2019}}}} or at around the same speed as flowered [[White Pikmin]]. The Rush Boots also renders the blowing attack of [[Puffy Blowhog|Puffy]] and [[Withering Blowhog]]s ineffective against leaders. The ship explains both functions as the result of lowered air resistance. It can provide to be a minor hindrance however, as the Pikmin's speed is not increased alongside the leader's, so they fall behind, are harder to control and often get stuck when going around corners. | |||
{{clear}} | |||
=== Scorch Guard === | |||
{{infobox upgrade | |||
|p2 = y | |||
|p3 = y | |||
|p4 = y | |||
|name = Scorch Guard | |||
|icon = Scorch Guard P4 icon.png | |||
|image = Scorch Guard P4 icon.png | |||
|caption = The Scorch Guard's icon in ''Pikmin 4''. | |||
|function = Gives fire resistance | |||
|requirements2 = Defeat the Emperor Bulblax, retrieve the [[Forged Courage]] | |||
|requirements3 = Retrieve the capsule | |||
|requirements4 = Have had the [[Pikmin 4 player character|player character]] or [[Oatchi]] take fire [[damage]], buy for {{icon|Raw material}} × 50 | |||
}} | |||
The '''Scorch Guard''' is an armor upgrade that makes all [[leader]]s' suits impervious to [[fire]]. In ''Pikmin 2'', it is obtained by defeating the [[Emperor Bulblax]] in the [[Bulblax Kingdom]], and collecting the [[Forged Courage]]. In ''Pikmin 3'', it can be found [[Dig|buried]] on a ledge to the north of the strip of wood Pikmin and leaders hop to when the [[lily pad]] ride ends. The [[Burrowing Snagret]] and [[Desiccated Skitter Leaf|Desiccated Skitter Leaves]] could stop the Pikmin from carrying this piece back. Should the [[paper bag]] outside the Snagret's arena not be pushed down, the Pikmin may take a longer route to the Drake, which involves some Desiccated Skitter Leaves, an [[Arachnode]], and a [[Flighty Joustmite]]. | |||
With this upgrade, there is no need to worry about being hurt when destroying [[fire geyser]]s, or fighting enemies such as the [[Fiery Blowhog]] or [[Fiery Bulblax]]. However, the [[Titan Dweevil]]'s Flare Cannon will still be able to stun leaders, even if it does not harm them. | |||
<gallery> | |||
ScorchGuardArt.png|The Scorch Guard's capsule in ''Pikmin 3''. | |||
Scorch Guard location P3.jpg|Location of the Scorch Guard. | |||
ScorchGuard.jpeg|Closeup of the Scorch Guard in ''Pikmin 3'', after being dug out. | |||
Scorch Guard P3 carried.jpg|Blue Pikmin carry the Scorch Guard. | |||
</gallery> | |||
{{clear}} | |||
=== Scorch Guard (Oatchi) === | |||
{{infobox upgrade | |||
|p4 = y | |||
|name = Scorch Guard (Oatchi) | |||
|icon = Scorch Guard (Oatchi) P4 icon.png | |||
|image = Scorch Guard (Oatchi) P4 icon.png | |||
|size = x150px | |||
|caption = The Scorch Guard (Oatchi)'s icon. | |||
|function = Gives fire resistance | |||
|requirements = Have had the [[Pikmin 4 player character|player character]] or [[Oatchi]] take fire [[damage]], buy for {{icon|Raw material}} × 100 | |||
}} | |||
{{clear}} | |||
=== Sniff Saver (Oatchi) === | |||
{{infobox upgrade | |||
|p4 = y | |||
|name = Sniff Saver (Oatchi) | |||
|icon = Sniff Saver (Oatchi) P4 icon.png | |||
|image = Sniff Saver (Oatchi) P4 icon.png | |||
|size = x150px | |||
|caption = The Sniff Saver (Oatchi)'s icon. | |||
|function = Grants [[poison]] immunity | |||
|requirements = Have had [[Oatchi]] take poison [[damage]], buy for {{icon|Raw material}} × 100 | |||
}} | |||
{{clear}} | |||
=== Solar System === | |||
{{infobox upgrade | |||
|p2 = y | |||
|name = Solar System | |||
|image = Stellar Orb.jpg | |||
|size = 200px | |||
|caption = The Stellar Orb. | |||
|function = Increases lighting | |||
|requirements = Defeat the Man-at-Legs, retrieve the [[Stellar Orb]] | |||
}} | |||
The Solar System can be collected by defeating the [[Man-at-Legs]] in the [[Subterranean Complex]], and collecting the [[Stellar Orb]]. It is a device that will illuminate any sort of darkness inside a [[cave]]'s sublevels. This way, it is possible to see things that are very far away when underground. Although the name refers to a system that produces solar-like light, it is also a play on words on the system that planet Earth is located in. | |||
When it is collected, the game gradually changes the cave's lighting to fit the new, brighter settings. This lasts around 3 seconds, and can be seen on the retrieved treasure analysis cutscene. | |||
<gallery> | |||
File:Stellar Orb nolight.jpg|The final sublevel of the Subterranean Complex, before retrieving the Stellar Orb. | |||
File:Stellar-Orb-With light.jpg|Same sublevel, after retrieving the Stellar Orb. | |||
</gallery> | |||
==== Cavern of Chaos 10 ==== | |||
Oddly, the upgrade has an opposite effect on sublevel 10 of the [[Cavern of Chaos]]: the sublevel will be darker if the Stellar Orb was retrieved. The reason for this is because this sublevel uses the lighting configuration file <code>light.ini</code>, which is both only used on this sublevel, and the only configuration file that is in the version 0000 format (besides any [[Unused content in Pikmin 2|unused]] files and settings in the disc). All other sublevels use a file in the 0001 version. Version 0000 has no support for different lighting with and without the Solar System; it only has one set of data for lighting instead of two. When a lighting file on this version is loaded into the final game, the values that are there are used to light up the cave when the Solar System is present, and because there is no data for what lighting to use when the upgrade is missing, it uses some default values. These default values make the tenth sublevel of the Cavern of Chaos look lighter when the upgrade has not been collected yet. | |||
<gallery> | |||
Sublevel 10 Cavern Of Chaos without bulb.jpg|Sublevel 10 of the Cavern of Chaos before collecting the Stellar Orb. | |||
Sublevel 10 Cavern of Chaos with bulb.jpg|The same sublevel after collecting the Stellar Orb. | |||
</gallery> | |||
{{clear}} | |||
=== Sphere Chart === | |||
{{infobox upgrade | |||
|p2 = y | |||
|name = Sphere Chart | |||
|image = Spherical Atlas.jpg | |||
|size = 200px | |||
|caption = The Spherical Atlas. | |||
|function = Unlocks the [[Awakening Wood]] | |||
|requirements = Retrieve the [[Spherical Atlas]] | |||
}} | |||
The Sphere Chart is the name given by the ship to the data found within the [[Spherical Atlas]]. By collecting the Spherical Atlas from the [[Emergence Cave]], the ship is able to create charts of the [[Awakening Wood]], allowing the player to explore that area. | |||
{{clear}} | |||
=== Survey Chart === | |||
{{infobox upgrade | |||
|p2 = y | |||
|name = Survey Chart | |||
|image = Geographic Projection TH.jpg | |||
|size = 200px | |||
|caption = The Geographic Projection. | |||
|function = Unlocks the [[Perplexing Pool]] | |||
|requirements = Retrieve the [[Geographic Projection]] | |||
}} | |||
The Survey Chart is the name given by the ship to the data found within the [[Geographic Projection]]. By collecting the Geographical Projection from the [[Awakening Wood]], the ship is able to create charts of the [[Perplexing Pool]], allowing the player to explore that area. | |||
{{clear}} | |||
=== Survey Drone === | |||
{{infobox upgrade | |||
|p4 = y | |||
|name = Survey Drone | |||
|icon = Survey Drone P4 icon.png | |||
|image = Survey Drone P4 icon.png | |||
|size = x150px | |||
|caption = The Survey Drone's icon. | |||
|function = Allows a birds-eye view of the area | |||
|requirements = Buy for {{icon|Raw material}} × 10, further requirements unknown | |||
}} | |||
{{clear}} | |||
=== Thermal Defense === | |||
{{infobox upgrade | |||
|p4 = y | |||
|name = Thermal Defense | |||
|icon = Thermal Defense P4 icon.png | |||
|image = Thermal Defense P4 icon.png | |||
|size = x150px | |||
|caption = The Thermal Defense's icon. | |||
|function = Grants [[ice]] immunity | |||
|requirements = Have had the [[Pikmin 4 player character|player character]] or [[Oatchi]] take ice [[damage]], buy for {{icon|Raw material}} × 50 | |||
}} | |||
{{clear}} | |||
=== Thermal Defense (Oatchi) === | |||
{{infobox upgrade | |||
|p4 = y | |||
|name = Thermal Defense (Oatchi) | |||
|icon = Thermal Defense (Oatchi) P4 icon.png | |||
|image = Thermal Defense (Oatchi) P4 icon.png | |||
|size = x150px | |||
|caption = The Thermal Defense (Oatchi)'s icon. | |||
|function = Grants [[ice]] immunity | |||
|requirements = Have had the [[Pikmin 4 player character|player character]] or [[Oatchi]] take ice [[damage]], buy for {{icon|Raw material}} × 100 | |||
}} | |||
{{clear}} | |||
=== Treasure Gauge === | |||
{{infobox upgrade | |||
|p2 = y | |||
|p4 = y | |||
|name = Treasure Gauge | |||
|image = Treasure Gauge P4 icon.png | |||
|icon = Treasure Gauge P4 icon.png | |||
|size = 200px | |||
|caption = The Prototype Detector's icon in ''Pikmin 4''. | |||
|function = Shows a treasure proximity indicator | |||
|requirements2 = Defeat the Empress Bulblax, retrieve the [[Prototype Detector]] | |||
|requirements4 = Have reached {{sparklium|p4|1000}}, buy for {{icon|Raw material}} × 40 | |||
}} | |||
{{see more|HUD#Treasure Gauge|t1=HUD}} | |||
The Treasure Gauge is a helpful device found in ''Pikmin 2'' that helps with tracking down every treasure in the game, no matter if is out in the open, an enemy has it or it is buried. It is obtained by collecting the [[Prototype Detector]] from the [[Empress Bulblax]] in the [[Hole of Beasts]]. When it is in the Exploration Kit, a gauge appears on the [[HUD]]. In it, there is a needle that wiggles continuously when a treasure is in the current field or cave, and the closer the current leader is to a treasure, the farther to the right it goes, and the harder it beeps. If there are no treasures in a given area or sublevel, the gauge will be greyed out, and a chime will sound shortly after collecting the last treasure. It can be interfered with by the [[Antenna Beetle]], the only Exploration Kit upgrade to be specifically targeted in gameplay. | |||
<gallery> | |||
Prototype Detector.jpg|The Prototype Detector. | |||
</gallery> | |||
{{clear}} | |||
=== Treasure Gauge+ === | |||
{{infobox upgrade | |||
|p4 = y | |||
|name = Treasure Gauge+ | |||
|icon = Treasure Gauge+ P4 icon.png | |||
|image = Treasure Gauge+ P4 icon.png | |||
|size = x150px | |||
|caption = The Treasure Gauge+'s icon. | |||
|function = Shows the total amount and location of treasures | |||
|requirements = Buy for {{icon|Raw material}} × 100, further requirements unknown | |||
}} | |||
{{clear}} | |||
=== Triple Threat === | |||
{{infobox upgrade | |||
|p4 = y | |||
|name = Triple Threat | |||
|icon = Triple Threat P4 icon.png | |||
|image = Triple Threat P4 icon.png | |||
|size = x150px | |||
|caption = The Triple Threat's icon. | |||
|function = Gives leaders a punch combo | |||
|requirements = Buy for {{icon|Raw material}} × 40, further requirements unknown | |||
}} | |||
{{clear}} | |||
=== Tuff Stuff === | |||
{{infobox upgrade | |||
|p4 = y | |||
|name = Tuff Stuff | |||
|icon = Tuff Stuff P4 icon.png | |||
|image = Tuff Stuff P4 icon.png | |||
|size = x150px | |||
|caption = The Tuff Stuff's icon. | |||
|function = Adds more health | |||
|requirements = Have reached {{sparklium|p4|3200}}, buy for {{icon|Raw material}} × 40 | |||
}} | |||
{{clear}} | |||
=== Tuff Stuff (Oatchi) === | |||
{{infobox upgrade | |||
|p4 = y | |||
|name = Tuff Stuff (Oatchi) | |||
|icon = Tuff Stuff (Oatchi) P4 icon.png | |||
|image = Tuff Stuff (Oatchi) P4 icon.png | |||
|size = x150px | |||
|caption = The Tuff Stuff (Oatchi)'s icon. | |||
|function = Adds more health | |||
|requirements = Have reached {{sparklium|p4|3200}}, buy for {{icon|Raw material}} × 80 | |||
}} | |||
{{clear}} | |||
=== Tuff Stuff+ === | |||
{{infobox upgrade | |||
|p4 = y | |||
|name = Tuff Stuff+ | |||
|icon = Tuff Stuff+ P4 icon.png | |||
|image = Tuff Stuff+ P4 icon.png | |||
|size = x150px | |||
|caption = The Tuff Stuff+'s icon. | |||
|function = Adds more health | |||
|requirements = Buy for {{icon|Raw material}} × 80, further requirements unknown | |||
}} | |||
{{clear}} | |||
=== Tuff Stuff+ (Oatchi) === | |||
{{infobox upgrade | |||
|p4 = y | |||
|name = Tuff Stuff+ (Oatchi) | |||
|icon = Tuff Stuff+ (Oatchi) P4 icon.png | |||
|image = Tuff Stuff+ (Oatchi) P4 icon.png | |||
|size = x150px | |||
|caption = The Tuff Stuff+ (Oatchi)'s icon. | |||
|function = Adds more health | |||
|requirements = Buy for {{icon|Raw material}} × 120, further requirements unknown | |||
}} | |||
{{clear}} | |||
=== Tuff Stuff++ === | |||
{{infobox upgrade | |||
|p4 = y | |||
|name = Tuff Stuff++ | |||
|icon = Tuff Stuff++ P4 icon.png | |||
|image = Tuff Stuff++ P4 icon.png | |||
|size = x150px | |||
|caption = The Tuff Stuff++'s icon. | |||
|function = Adds more health | |||
|requirements = Buy for {{icon|Raw material}} × 120, further requirements unknown | |||
}} | |||
{{clear}} | |||
=== Tuff Stuff++ (Oatchi) === | |||
{{infobox upgrade | |||
|p4 = y | |||
|name = Tuff Stuff++ (Oatchi) | |||
|icon = Tuff Stuff++ (Oatchi) P4 icon.png | |||
|image = Tuff Stuff++ (Oatchi) P4 icon.png | |||
|size = x150px | |||
|caption = The Tuff Stuff++ (Oatchi)'s icon. | |||
|function = Adds more health | |||
|requirements = Buy for {{icon|Raw material}} × 240, further requirements unknown | |||
}} | |||
{{clear}} | |||
== ''Hey! Pikmin'' upgrades == | |||
In {{hp}}, upgrades are provided by the [[S.S. Dolphin II]], after the player collects certain amounts of [[Sparklium]]. These become unlocked at the specified levels of Sparklium, and don't decrease the Sparklium count when doing so. | |||
{| class="wikitable" | |||
! Feature || Sparklium || Description | |||
|- | |||
| [[Radar]] || 2,000 || Allows the player to toggle the radar on the top screen with {{button|3ds|l|3ds|r}}. | |||
|- | |||
| 4 [[health]] bars || 6,000 || Gives Captain Olimar an extra bar of health. | |||
|- | |||
| Enemy logs || 10,000 || Allows access to the enemy category in the logs. | |||
|- | |||
| Extended [[jetpack]] duration || 14,000 || Allows the jetpack to fly for longer. | |||
|- | |||
| 5 health bars || 18,000 || Gives Captain Olimar an extra bar of health. | |||
|- | |||
| Maximum jetpack duration || 22,000 || Allows the jetpack to fly for longer. | |||
|- | |||
| 6 health bars || 26,000 || Gives Captain Olimar an extra bar of health. | |||
|} | |||
== In ''Pikmin'' == | |||
While {{p1}} does not have an upgrade system, some [[ship part]]s change the appearance of the S.S. Dolphin, and one ship part, the [[Whimsical Radar]], does provide a change to gameplay by unlocking the [[radar]]. | |||
== Badges == | |||
In {{p3d}}, there are two [[badge (Pikmin 3 Deluxe)|badges]] the player can gain from collecting upgrades: | |||
*'''Evasive Action''': Acquire the Dodge Whistle. | |||
*'''Strong on the Inside''': Acquire the Metal Suit Z, Anti-Electrifier, or Scorch Guard. | |||
<gallery> | |||
Badge 17 evasiveaction.png|Evasive Action. The badge shows the Dodge Whistle emerging from its capsule. | |||
Badge 18 strongontheinside.png|Strong on the Inside. The badge shows a space suit emerging from a capsule, with symbols representing each of the three suit upgrades. | |||
</gallery> | |||
== Gallery == | |||
<gallery> | |||
Rocket Punch.png|A different angle of Olimar using the Rocket Fist. | |||
Pluckaphone plucking.jpg|The Pluckaphone being used. | |||
Lie down Olimar-P2.jpg|The Napsack being used. | |||
WhistleDiscover.jpg|Alph encounters the Dodge Whistle. | |||
ArmourUpgrade.jpg|The Metal Suit Z is encountered by Charlie. | |||
AntiElectrifierCutscene.jpeg|Brittany finds the Anti-Electrifier. | |||
ScorchGuardCutscene.jpeg|Brittany finds the Scorch Guard. | |||
DodgeWhistleScanned.jpg|The Dodge Whistle once returned to the Drake. | |||
MetalSuitZ.jpg|The Metal Suit Z once returned to the Drake. | |||
P3 Anti-Electrifier Analysis.jpg|The Anti-Electrifier once returned to the Drake. | |||
ScorchGaurd.jpg|The Scorch Guard once returned to the Drake. | |||
WhistleLocation.jpg|Location of the Dodge Whistle. | |||
MetalSuitZlocation.jpg|Location of the Metal Suit Z. In this case, it is on a ledge next to Charlie. | |||
Anti-ElectrifierLocation.jpg|Location of the Anti-Electrifier. | |||
ScorchGuardLocation.jpg|Location of the Scorch Guard. In this case, it is on the ledge right next to Alph. | |||
DodgeWhistleDataFile.jpeg|The [[data file]] for the Dodge Whistle. | |||
MetalSuitZDataFile.jpeg|The data file that corresponds with the Metal Suit Z. | |||
P3 Anti-Electrifier Data File.jpg|The data file that explains the Anti-Electrifier. | |||
ScorchGuardDataFile.jpeg|The data file for the Scorch Guard. | |||
</gallery> | |||
== Trivia == | |||
* In the North American version of the ''New Play Control!'' game, with the language set to French, the Sphere Chart is called "Carte Sphérique" (Spherical Map) in the [[Ship's dialogs]] and "Système Solaire" (Solar System) in the pause menu. Since another upgrade is also called "Système Solaire" (the [[Upgrade#Solar System|Solar System]]), this is likely a [[mistake]]. | |||
== Names in other languages == | |||
'''Sphere Chart''' | |||
{{Foreignname | |||
|Jap=わくせいデータ | |||
|JapR=Wakusei Dēta | |||
|JapM=Planet Data | |||
|FraA=Carte Sphérique ([[Ship's dialogs]])<br>Système solaire (pause menu) | |||
|FraAM=Spherical map<br>Solar system | |||
|FraE=Pôle Nord | |||
|FraEM=North Pole | |||
|Ger=Sphärenkarte | |||
|GerM=Sphere Map | |||
|Ita=Mapposfera | |||
|ItaM=Sphere Map | |||
|Spa=Carta esférica | |||
|SpaM=Spherical map | |||
}} | |||
'''Survey Chart''' | |||
{{Foreignname | |||
|Jap=たんさデータ | |||
|JapR=Tansa Dēta | |||
|JapM=Search Data | |||
|FraA=Carte topographique | |||
|FraAM=Topographical map | |||
|FraE=Pôle Sud | |||
|FraEM=South Pole | |||
|Ger=Übersichtskarte | |||
|GerM=Overlook Map | |||
|Ita=Mappa rilievo | |||
|ItaM=Overlook Map | |||
|Spa=Mapa de cotas | |||
|SpaM=Heightmap | |||
}} | |||
'''Data Glutton''' | |||
{{Foreignname | |||
|Jap=いにしえのパケシス | |||
|JapR=Inishie no Pakeshisu | |||
|JapM= | |||
|SpaA=Fósil de datos | |||
|SpaAM=Data fossil | |||
}} | |||
'''Folded Data Glutton''' | |||
{{Foreignname | |||
|Jap=折れたパケシス | |||
|JapR=Oreta Pakeshisu | |||
|JapM= | |||
}} | |||
'''Scorch Guard''' | |||
{{Foreignname | |||
|Jap=フレア・ガード | |||
|JapR=Furea Gādo | |||
|JapM=Flare Guard | |||
|ChiTrad=防火装 | |||
|ChiTradR= | |||
|ChiTradM=Fire Guard | |||
|ChiSimp=防火装 | |||
|ChiSimpR= | |||
|ChiSimpM=Fire Guard | |||
|Fra=Para-brûlure | |||
|FraM=Burn counter | |||
|Ger=Flammschutz | |||
|GerM=Fire Protection | |||
|Ita=Parafuoco | |||
|ItaM=Fire suit | |||
|Kor=방화복 | |||
|KorR=banghwabog | |||
|KorM=Fire Suit | |||
|Spa=Antillamas | |||
|SpaM=Anti-flames | |||
}} | |||
'''Anti-Electrifier''' | |||
{{Foreignname | |||
|Jap=アンチ・エレキ | |||
|JapR=Anchi Ereki | |||
|JapM=Anti Electric | |||
|ChiTrad=抗電装 | |||
|ChiTradR= | |||
|ChiTradM=Anti-electric equipment | |||
|ChiSimp=抗电装 | |||
|ChiSimpR= | |||
|ChiSimpM=Anti-electric equipment | |||
|Fra=Anti-choc | |||
|FraM=Anti-shock | |||
|Ger=Elektroschutz | |||
|GerM=Electric Protection | |||
|Ita=Anti-shock | |||
|ItaM=Anti-Shock | |||
|Kor=방진복 | |||
|KorR=bangjinbog | |||
|KorM= | |||
|Spa=Anti-eléctric (''Pikmin 2'')<br>Antieléctrico (''Pikmin 3'') | |||
|SpaM=Anti-"electric"<br>Anti-electric | |||
}} | |||
'''Metal Suit Z''' | |||
{{Foreignname | |||
|Jap=メタルスーツZ | |||
|JapR=Metarusūtsu Z | |||
|JapM=Metal Suit Z | |||
|ChiTrad=金屬装Z | |||
|ChiTradR= | |||
|ChiTradM=Metal Pack Z | |||
|ChiSimp=金属装Z | |||
|ChiSimpR= | |||
|ChiSimpM=Metal Pack Z | |||
|FraA=Combinaison Z | |||
|FraAM=Z Suit | |||
|FraE=Combifer | |||
|FraEM=Ironsuit | |||
|FraEN=Portmanteau of "Combinaison" (suit) and "fer" (iron). | |||
|Ger=Metallanzug Z | |||
|GerM=Metal Suit z | |||
|Ita=Tuta metallo Z | |||
|ItaM=Metal Suit z | |||
|Kor=강철복 Z | |||
|KorR=gangcheolbog Z | |||
|KorM=Stel Suit Z | |||
|Spa=Armadura Z | |||
|SpaM=Armor Z | |||
|notes=y | |||
}} | |||
'''Napsack''' | |||
{{Foreignname | |||
|Jap=たんけんねぶくろ | |||
|JapR=Tanken Nebukuro | |||
|JapM=Expedition Sleeping Bag | |||
|FraA=Sacdodo | |||
|FraAM=Napsack | |||
|FraE=Sac Zzzz | |||
|FraEM=Zzzz sack | |||
|Ger=Schlafsack | |||
|GerM=Sleep Bag | |||
|Ita=Sacconanna | |||
|ItaM=Sleepy Time Bag | |||
|Spa=Saco de dormir | |||
|SpaM=Sleeping bag | |||
}} | |||
'''Rocket Fist''' | |||
{{Foreignname | |||
|Jap=ロケットパンチ | |||
|JapR=Roketto Panchi | |||
|JapM=Rocket Punch | |||
|Fra=Poing Fusée | |||
|FraM=Rocket Fist | |||
|Ger=Raketenfaust | |||
|GerM=Rocket Fist | |||
|Ita=Pugno razzo | |||
|ItaM=Rocket punch | |||
|Spa=Puño volador | |||
|SpaM=Flying fist | |||
}} | |||
'''Rush Boots''' | |||
{{Foreignname | |||
|Jap=ダッシュブーツ | |||
|JapR=Dasshu Būtsu | |||
|JapM=Dash Boots | |||
|FraA=Bottes grand V | |||
|FraAM=Very fast boots | |||
|FraE=Bottes Grand V | |||
|FraEM=Very Fast Boots | |||
|Ger=Flinkstiefel | |||
|GerM=Fast Boots | |||
|Ita=Stivali lesti | |||
|ItaM=Ready boots | |||
|Spa=Velocibotas | |||
|SpaM=Speed-boots | |||
}} | |||
'''Mega Tweeter''' | |||
{{Foreignname | |||
|Jap=メガ・スピーカー | |||
|JapR=Mega Supīkā | |||
|JapM=Mega Speaker | |||
|FraA=Haut-parleur d'aigus | |||
|FraAM=High-pitched sound (producing) loudspeaker | |||
|FraE=Méga Tweeter | |||
|FraEM=Mega Tweeter | |||
|Ger=Mega-Pleife | |||
|GerM= | |||
|Ita=Megaspeaker | |||
|ItaM=Mega Speaker | |||
|Spa=Megabocina | |||
|SpaM=Mega-siren | |||
}} | |||
'''Pluckaphone''' | |||
{{Foreignname | |||
|Jap=ひきぬきメガホン | |||
|JapR=Hikinuki Megahon | |||
|JapM= | |||
|Fra=Déterraphone | |||
|FraM=Pluckaphone | |||
|Ger=Pflückerfon | |||
|GerM=Pluckaphone | |||
|Ita=Sradicofono | |||
|ItaM=Pluckaphone | |||
|SpaA=Cosecháfono | |||
|SpaAM=Harvestphone | |||
}} | |||
'''Solar System''' | |||
{{Foreignname | |||
|Jap=ソーラーシステム | |||
|JapR=Sōrā Shisutemu | |||
|JapM=Solar System | |||
|FraA=Système solaire | |||
|FraAM=Solar system | |||
|FraE=Système Solaire | |||
|FraEM=Solar System | |||
|Ger=Sonnensystem | |||
|GerM=Solar System | |||
|Ita=Sistema solare | |||
|ItaM=Solar System | |||
|Spa=Sistema solar | |||
|SpaM=Solar system | |||
}} | |||
'''Treasure Gauge''' | |||
{{Foreignname | |||
|Jap=おたからセンサー | |||
|JapR=Otakara Sensā | |||
|JapM=Treasure Sensor | |||
|FraA=Jauge à trésors | |||
|FraAM=Treasure gauge | |||
|FraE=Senseur | |||
|FraEM=Sensor | |||
|Ger=Schatzanzeiger | |||
|GerM=Treasure Seeker | |||
|Ita=Tesorometro | |||
|ItaM=Treasure meter | |||
|Spa=Tesorímetro | |||
|SpaM=Treasure meter | |||
}} | |||
== See also == | |||
* [[Pack]] | |||
* [[Treasure]] | |||
* [[Fruit]] | |||
* [[Go Here!]] | |||
== References == | |||
{{refs}} | |||
[[Category:Gameplay]] | |||
[[Category:Boss rewards]] | |||
==Types of gear== | ==Types of gear== | ||
| Line 14: | Line 1,386: | ||
! data-sort-type=number|Requirement | ! data-sort-type=number|Requirement | ||
|- | |- | ||
| [[File:Charging Horn P4 icon.png|50px]] | | [[File:Charging Horn P4 icon.png|50px]] | ||
| Charging Horn | | Charging Horn | ||
| Line 183: | Line 1,550: | ||
|- | |- | ||
| [[File:Thermal Defense P4 icon.png|50px]] | | [[File:Thermal Defense P4 icon.png|50px]] | ||
| Thermal | | Thermal Defense | ||
| 50 | | 50 | ||
| Makes the player's character resistant to freezing. | | Makes the player's character resistant to freezing. | ||
| Line 189: | Line 1,556: | ||
|- | |- | ||
| [[File:Thermal Defense (Oatchi) P4 icon.png|50px]] | | [[File:Thermal Defense (Oatchi) P4 icon.png|50px]] | ||
| Thermal | | Thermal Defense (Oatchi) | ||
| 100 | | 100 | ||
| Makes Oatchi resistant to freezing. | | Makes Oatchi resistant to freezing. | ||
| Line 230: | Line 1,597: | ||
| Awarded by completing all of [[Frisé]]'s side missions | | Awarded by completing all of [[Frisé]]'s side missions | ||
|} | |} | ||
Revision as of 18:02, August 20, 2023

|
The following contains spoilers about a recently released game. |
|
The following article or section is in need of assistance from someone who plays Pikmin 4. |
|
This article is a stub. You can help Pikipedia by expanding it. |
- "Upgrade" redirects here. For the updates to the games' software, see update.
In most Pikmin games, players are able to obtain diverse pieces of gear that empower the main characters, typically by granting immunities to some hazards, increasing stats, or unlocking new abilities. The method by which they are obtained depends on the game, and some pieces of gear appear in multiple games. Before Pikmin 4 these upgrades were not given a name, and are specifically referred to as "gear" in various places of Pikmin 4. Also unique to Pikmin 4 is the ability to enable or disable any upgrade (besides the Survey Drone, Idler's Alert and Homesick Signal) once obtained.
Obtaining
In Pikmin 2, the player needs to retrieve certain treasures, usually guarded by bosses. When the Hocotate ship takes the treasure in, it is able to make use of it to create an upgrade. The upgrades can be found on a checklist called the Exploration Kit on the pause menu, and there is a distinction between the treasure itself and the upgrade. If the player exits the cave from the pause menu after getting the treasure instead of using a geyser, the treasure will be left behind but the leaders will keep the upgrade.
In Pikmin 3, the two important pieces of gear that allow reaching new areas are cellphones that need to be retrieved to the S.S. Drake, while the optional spacesuit upgrades can be found buried or off the beaten path in the form of Gashapon capsules; these too need to be brought back to the S.S. Drake and there isn't much of a difference between the object and the upgrade proper.
In Pikmin 4, upgrades can be obtained by purchasing them from Russ's lab, or by completing certain missions. In the case of the lab, they will have an associated raw material cost, and some only become available in the shop when certain Sparklium thresholds are met or when certain things happen in-game.
List
| Purpose | Gear | Pikmin 2 | Pikmin 3 | Pikmin 4 |
|---|---|---|---|---|
| Stat improvement | Air Armor | See Metal Suit Z | See Metal Suit Z | Yes |
| Stat improvement | Air Armor (Oatchi) | No | No | Yes |
| Stat improvement | Air Armor+ | No | No | Yes |
| Stat improvement | Air Armor+ (Oatchi) | No | No | Yes |
| Stat improvement | Air Armor++ | No | No | Yes |
| Stat improvement | Air Armor++ (Oatchi) | No | No | Yes |
| Hazard immunity | Anti-Electrifier | Yes | Yes | Yes |
| Hazard immunity | Anti-Electrifier (Oatchi) | No | No | Yes |
| Misc. | Brace Boots | No | No | Yes |
| New ability | Charging Horn | No | No | Yes |
| Discovering new areas | Data Glutton | No | Yes | No |
| New ability | Dodge Whistle | No | Yes | No |
| New ability | Extra Hand | No | No | Yes |
| Discovering new areas | Folded Data Glutton | No | Yes | No |
| Misc. | Gunk Busters | No | No | Yes |
| Misc. | Headlamp | See Solar System | No | Yes |
| Misc. | Headlamp+ | No | No | Yes |
| Misc. | Homesick Signal | No | No | Yes |
| Misc. | Idle Counter | No | No | Yes |
| Misc. | Idler's Alert | No | No | Yes |
| New ability | Lineup Trumpet | No | No | Yes |
| Stat improvement | Mega Tweeter | Yes | No | See Power Whistle |
| Stat improvement | Metal Suit Z | Yes | Yes | See Air Armor |
| New ability | Napsack | Yes | No | No |
| New ability | Pluckaphone | Yes | No | See Plucking Whistle |
| New ability | Plucking Whistle | See Pluckaphone | No | Yes |
| Stat improvement | Power Whistle | See Mega Tweeter | No | Yes |
| New ability | Rocket Fist | Yes | No | See Triple Threat |
| Stat improvement | Rush Boots | Yes | No | Yes |
| Hazard immunity | Scorch Guard | Yes | Yes | Yes |
| Hazard immunity | Scorch Guard (Oatchi) | No | No | Yes |
| Hazard immunity | Sniff Saver (Oatchi) | No | No | Yes |
| Misc. | Solar System | Yes | No | See Headlamp |
| Discovering new areas | Sphere Chart | Yes | No | No |
| Discovering new areas | Survey Chart | Yes | No | No |
| Misc. | Survey Drone | No | No | Yes |
| Hazard immunity | Thermal Defense | No | No | Yes |
| Hazard immunity | Thermal Defense (Oatchi) | No | No | Yes |
| Misc. | Treasure Gauge | Yes | No | Yes |
| Misc. | Treasure Gauge+ | No | No | Yes |
| New ability | Triple Threat | See Rocket Fist | No | Yes |
| Stat improvement | Tuff Stuff | No | No | Yes |
| Stat improvement | Tuff Stuff (Oatchi) | No | No | Yes |
| Stat improvement | Tuff Stuff+ | No | No | Yes |
| Stat improvement | Tuff Stuff+ (Oatchi) | No | No | Yes |
| Stat improvement | Tuff Stuff++ | No | No | Yes |
| Stat improvement | Tuff Stuff++ (Oatchi) | No | No | Yes |
In addition, there is a list of upgrades in Hey! Pikmin.
Air Armor
| |||
|---|---|---|---|
| The Air Armor's icon. | |||
| Games | Pikmin 4 | ||
| Function | Increases defense | ||
| How to obtain | Own Tuff Stuff, buy for | ||
Air Armor (Oatchi)
| |||
|---|---|---|---|
| The Air Armor (Oatchi)'s icon. | |||
| Games | Pikmin 4 | ||
| Function | Increases defense | ||
| How to obtain | Own Tuff Stuff (Oatchi), buy for | ||
Air Armor+
| |||
|---|---|---|---|
| The Air Armor+'s icon. | |||
| Games | Pikmin 4 | ||
| Function | Increases defense | ||
| How to obtain | Buy for | ||
Air Armor+ (Oatchi)
| |||
|---|---|---|---|
| The Air Armor+ (Oatchi)'s icon. | |||
| Games | Pikmin 4 | ||
| Function | Increases defense | ||
| How to obtain | Buy for | ||
Air Armor++
| |||
|---|---|---|---|
| The Air Armor++'s icon. | |||
| Games | Pikmin 4 | ||
| Function | Increases defense | ||
| How to obtain | Buy for | ||
Air Armor++ (Oatchi)
| |||
|---|---|---|---|
| The Air Armor++ (Oatchi)'s icon. | |||
| Games | Pikmin 4 | ||
| Function | Increases defense | ||
| How to obtain | |||
Anti-Electrifier
| |||
|---|---|---|---|
| The Anti-Electrifier's icon in Pikmin 4. | |||
| Games | Pikmin 2, Pikmin 3, Pikmin 4 | ||
| Function | Gives electricity resistance | ||
| How to obtain | |||
The Anti-Electrifier, when unlocked, makes the leaders' suits immune to electricity, including electrical attacks.
In Pikmin 2, it is obtained by defeating the Giant Breadbug in the Glutton's Kitchen, and collecting the Dream Material. Although leaders become invulnerable to electrical attacks, the Titan Dweevil's Shock Therapist will still manage to stun them, despite not causing any damage.
In Pikmin 3, it can be found buried near the place where Charlie crashed onto the planet's surface in the Distant Tundra, guarded by an Arctic Cannon Larva. The capsule has a weight of 10, and can be carried by up to 20 Pikmin. This device is particularly useful when trying to pass by electrical hazards with a group of Yellow Pikmin.
The Anti-Electrifier's capsule in Pikmin 3.
Analysis of the Anti-Electrifier.
Close up of the Anti-Electrifier after being dug up.


Anti-Electrifier (Oatchi)
| |||
|---|---|---|---|
| The Anti-Electrifier (Oatchi)'s icon. | |||
| Games | Pikmin 4 | ||
| Function | Gives electricity resistance | ||
| How to obtain | Have had the player character or Oatchi take electric damage, buy for | ||
Brace Boots
| |||
|---|---|---|---|
| The Brace Boots's icon. | |||
| Games | Pikmin 4 | ||
| Function | Gives resistance to wind and being sucked up | ||
| How to obtain | Have the player character hit by wind or be sucked up in a previous day, buy for | ||
Charging Horn
| |||
|---|---|---|---|
| The Charging Horn's icon. | |||
| Games | Pikmin 4 | ||
| Function | Unlocks the ability to charge | ||
| How to obtain | Have reached | ||
- See more: Charge.
The Charging Horn grants the player the ability to charge.
Data Glutton
| |||
|---|---|---|---|

| |||
| The Data Glutton. | |||
| Games | Pikmin 3 | ||
| Function | Unlocks the Distant Tundra | ||
| How to obtain | Defeat the Armored Mawdad, retrieve the cellphone | ||
The Data Glutton is an old cellphone, and is found within the belly of the Armored Mawdad in the Garden of Hope. It has a weight of 10, and can be carried by up to 20 Pikmin. It emits a signal that Alph and Brittany first assume to be Charlie. Upon collecting the device, Alph uses its technology to boost the signal strength of the S.S. Drake, allowing them to access the Distant Tundra.
The Data Glutton being scanned.
The Data Glutton is rewarded for defeating the Armored Mawdad.
Carrying the Data Glutton.


Dodge Whistle
| |||
|---|---|---|---|

| |||
| The Dodge Whistle's capsule. | |||
| Games | Pikmin 3 | ||
| Function | Allows leaders and Pikmin to dodge | ||
| How to obtain | Retrieve the capsule | ||
- See more: Dodge.
The Dodge Whistle can be found on a small cliff a short distance away from the exit to the Vehemoth Phosbat cave, where the Pikmin will carry the spoils of the battle through. It can be obtained by throwing Pikmin onto the Bouncy Mushroom between it and the path. There are some enemies in the way, however: two Swooping Snitchbugs are guarding the object, and Joustmites, Skeeterskates, and Bearded Amprats can be found on the route the Pikmin will use to take it to the Drake. However, this all can be bypassed by having Winged Pikmin carry it. It has a weight of 10, and can be carried by up to 20 Pikmin.
Collecting it allows the leaders to dodge left or right, guiding the Pikmin. It is done in a straight line normally, or in an arc around a lock-on target (in the original Pikmin 3 only). When rolling, the leaders do not lose height, making certain sequence breaks possible.

Extra Hand
| |||
|---|---|---|---|
| The Extra Hand's icon. | |||
| Games | Pikmin 4 | ||
| Function | Allows the player character to carry objects | ||
| How to obtain | Complete all of Louie's side missions | ||
Folded Data Glutton
| |||
|---|---|---|---|

| |||
| The Folded Data Glutton. | |||
| Games | Pikmin 3 | ||
| Function | Unlocks the Twilight River | ||
| How to obtain | Defeat the Sandbelching Meerslug, retrieve the cellphone | ||
The Folded Data Glutton is a more modern, folding cellphone, found within the belly of the Sandbelching Meerslug in the Tropical Wilds. It emits a signal that the leaders first assume to be Olimar. Upon collecting the device, Alph uses its technology to boost the signal strength of the Drake, allowing them to access the Twilight River. It has a weight of 10, and can be carried by up to 20 Pikmin.
This cellphone has an image of two ferrets on its display. Despite its supposed lack of recent use, the interface on the phone claims that its current battery life is quite high, implying that it was either recently charged, or has been only recently turned back on after a long period of dormancy.
One can throw Pikmin at it when it is first found and have them dig it out without triggering the cutscene where the boss awakens. This is possible if the leaders are positioned just far away enough to not trigger the event, but still close enough for the Pikmin throw to reach. However, the Pikmin will never make any progress towards digging it out, forcing the player to face the boss. Alternatively, using a sequence break involving the Dodge Whistle, it is possible to observe this behavior regardless of proximity, by reaching the Meerslug's arena before rescuing Charlie from the Vehemoth Phosbat.
The Folded Data Glutton being scanned.

The Folded Data Glutton buried in the sand.

The Folded Data Glutton next to a deceased Sandbelching Meerslug.
- FDataGluttonCarry.jpeg
Pikmin carrying the Folded Data Glutton.


Gunk Busters
| |||
|---|---|---|---|
| The Gunk Buster's icon. | |||
| Games | Pikmin 4 | ||
| Function | Allows normal movement on sticky mold | ||
| How to obtain | Have gone through sticky mold, buy for | ||
Headlamp
| |||
|---|---|---|---|
| The Headlamp's icon. | |||
| Games | Pikmin 4 | ||
| Function | Gives some light to dark caves | ||
| How to obtain | Have reached | ||
Headlamp+
| |||
|---|---|---|---|
| The Headlamp+'s icon. | |||
| Games | Pikmin 4 | ||
| Function | Increases the light in dark caves | ||
| How to obtain | Own Headlamp, buy for | ||
Homesick Signal
| |||
|---|---|---|---|
| The Homesick Signal's icon. | |||
| Games | Pikmin 4 | ||
| Function | Calls all Pikmin not with a leader towards the base | ||
| How to obtain | Buy for | ||
Idle Counter
| |||
|---|---|---|---|
| The Idle Counter's icon. | |||
| Games | Pikmin 4 | ||
| Function | Shows an indicator of how many Pikmin are idling | ||
| How to obtain | Have reached | ||
Idler's Alert
| |||
|---|---|---|---|
| The Idler's Alert's icon. | |||
| Games | Pikmin 4 | ||
| Function | Calls all idle Pikmin to wherever it was used | ||
| How to obtain | Have reached | ||
Lineup Trumpet
| |||
|---|---|---|---|
| The Lineup Trumpet's icon. | |||
| Games | Pikmin 4 | ||
| Function | Unlocks the ability to swarm | ||
| How to obtain | Complete all of Frisé's side missions | ||
- See more: Swarm.
The Lineup Trumpet grants the player the ability to swarm.
Mega Tweeter
| Mega Tweeter | |
|---|---|

| |
| The Amplified Amplifier. | |
| Games | Pikmin 2 |
| Function | Increases the whistle's range |
| How to obtain | Retrieve the Amplified Amplifier |
The Mega Tweeter (メガ・スピーカー?, lit.: "Mega Speaker") is obtained by defeating the Ranging Bloyster in the Shower Room, and collecting the Amplified Amplifier. This upgrade increases the range of the whistles of all leaders. The diameter of the visible circle projected on the ground increases to about 144% of its original size, thus more than doubling the area the whistle affects. This makes it easier to call scattered Pikmin to the leader's side.
Metal Suit Z
| |||
|---|---|---|---|

| |||
| The Metal Suit Z's capsule in Pikmin 3. | |||
| Games | Pikmin 2, Pikmin 3 | ||
| Function | Gives higher defense | ||
| How to obtain | |||
The Metal Suit Z increases the integrity of the leaders' suits, reducing damage taken by half. In Pikmin 2, it is obtained by defeating the Pileated Snagret in the Snagret Hole, and collecting the Justice Alloy. In Pikmin 3, it can be found on a strip of path that connects the shore near the Mock Bottom and the place where Alph crash-landed, and must be reached by throwing leaders up either side. To note is that the Hermit Crawmad near the bridge could interfere with the carrier Pikmin.
This upgrade is useful for attempts in defeating a large Bulborb or Spotty Bulbear with leaders alone without coming to much harm. The Hocotate ship in Pikmin 2 claims that it will make enemy bites and being stepped on produce minimal pain. This is a gross simplification on its part, intended to avoid having to explain the intricacies in detail. In reality, all sources of pain will be reduced dramatically, not just those two, and enemies like Shearwigs and Wollywogs will still produce a significant amount of damage.

Napsack
| Napsack | |
|---|---|
| File:Five-man Napsack.jpg | |
| The Five-man Napsack. | |
| Games | Pikmin 2 |
| Function | Allows leaders to lie down |
| How to obtain | Defeat the Burrowing Snagret, retrieve the Five-Man Napsack |
- See more: Lie down.
The Napsack can be obtained by defeating the Burrowing Snagret in the White Flower Garden, and collecting the Five-Man Napsack. This upgrade provides a quick method of returning to the Pikmin Onions above ground or the Research Pod when underground, which is achieved by holding ![]() /
/ ![]() once it has been obtained. When used, the leader in control falls asleep, and any nearby Pikmin, up to a maximum of four, carry him to their associated Onion (or Research Pod), a minimum of just one being required.
once it has been obtained. When used, the leader in control falls asleep, and any nearby Pikmin, up to a maximum of four, carry him to their associated Onion (or Research Pod), a minimum of just one being required.
Pluckaphone
| Pluckaphone | |
|---|---|
| File:Professional Noisemaker.png | |
| The Professional Noisemaker. | |
| Games | Pikmin 2 |
| Function | Allows whistle to pluck Pikmin |
| How to obtain | Defeat the Waterwraith, retrieve the Professional Noisemaker |
The Pluckaphone is obtained by defeating the Waterwraith in the Submerged Castle and collecting the Professional Noisemaker. It is an upgrade that allows the leaders' whistles to call buried Pikmin out from the ground, saving precious time that would otherwise be spent plucking them out. As well as picking newly produced Pikmin at the Onions, this is useful for calling out Pikmin that were planted by a Mamuta or a Swooping Snitchbug, as well as transformed by Candypop Buds.
In the first trailer for Pikmin, Olimar is seen calling Pikmin from the ground, so the Pluckaphone may be an implementation of a prerelease element from the first Pikmin game.
Plucking Whistle
| |||
|---|---|---|---|
| The Plucking Whistle's icon. | |||
| Games | Pikmin 4 | ||
| Function | Allows whistle to pluck Pikmin | ||
| How to obtain | Have completed Russ's "An Ode to Science" side mission, buy for | ||
Power Whistle
| |||
|---|---|---|---|
| The Power Whistle's icon. | |||
| Games | Pikmin 4 | ||
| Function | Increases the whistle's range | ||
| How to obtain | Buy for | ||
Rocket Fist
| Rocket Fist | |
|---|---|

| |
| The Brute Knuckles. | |
| Games | Pikmin 2 |
| Function | Gives leaders a punch combo |
| How to obtain | Defeat the Mamuta, retrieve the Brute Knuckles |
- See more: Punch.
The Rocket Fist can be obtained by defeating one of the Mamuta in the Frontier Cavern, and collecting the Brute Knuckles. It enables a new, stronger punching combo attack for use by the leaders, which makes defeating enemies with leaders alone much easier and more efficient. Without the upgrade, the ![]() /
/ ![]() button will produce a simple right punch. Once this treasure has been collected, pressing
button will produce a simple right punch. Once this treasure has been collected, pressing ![]() /
/ ![]() a second time will perform a left-hook, and a third time launches a devastating wind-up punch. Due to a glitch, punching while moving makes the attacks come out faster, which greatly boosts the Rocket Fist's effectiveness.
a second time will perform a left-hook, and a third time launches a devastating wind-up punch. Due to a glitch, punching while moving makes the attacks come out faster, which greatly boosts the Rocket Fist's effectiveness.
Rush Boots
| |||
|---|---|---|---|

| |||
| The Repugnant Appendage. | |||
| Games | Pikmin 2, Pikmin 4 | ||
| Function | Makes leaders run faster | ||
| How to obtain | |||
The Rush Boots can be obtained by defeating the Empress Bulblax in the Frontier Cavern, and collecting the Repugnant Appendage. It is a modification to the leaders' footwear that allows them to run more quickly, around 1.3 times faster,[1] or at around the same speed as flowered White Pikmin. The Rush Boots also renders the blowing attack of Puffy and Withering Blowhogs ineffective against leaders. The ship explains both functions as the result of lowered air resistance. It can provide to be a minor hindrance however, as the Pikmin's speed is not increased alongside the leader's, so they fall behind, are harder to control and often get stuck when going around corners.
Scorch Guard
| |||
|---|---|---|---|
| The Scorch Guard's icon in Pikmin 4. | |||
| Games | Pikmin 2, Pikmin 3, Pikmin 4 | ||
| Function | Gives fire resistance | ||
| How to obtain | |||
The Scorch Guard is an armor upgrade that makes all leaders' suits impervious to fire. In Pikmin 2, it is obtained by defeating the Emperor Bulblax in the Bulblax Kingdom, and collecting the Forged Courage. In Pikmin 3, it can be found buried on a ledge to the north of the strip of wood Pikmin and leaders hop to when the lily pad ride ends. The Burrowing Snagret and Desiccated Skitter Leaves could stop the Pikmin from carrying this piece back. Should the paper bag outside the Snagret's arena not be pushed down, the Pikmin may take a longer route to the Drake, which involves some Desiccated Skitter Leaves, an Arachnode, and a Flighty Joustmite.
With this upgrade, there is no need to worry about being hurt when destroying fire geysers, or fighting enemies such as the Fiery Blowhog or Fiery Bulblax. However, the Titan Dweevil's Flare Cannon will still be able to stun leaders, even if it does not harm them.
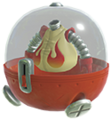
The Scorch Guard's capsule in Pikmin 3.
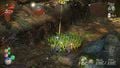
Location of the Scorch Guard.
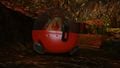
Closeup of the Scorch Guard in Pikmin 3, after being dug out.
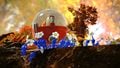
Blue Pikmin carry the Scorch Guard.


Scorch Guard (Oatchi)
| |||
|---|---|---|---|
| The Scorch Guard (Oatchi)'s icon. | |||
| Games | Pikmin 4 | ||
| Function | Gives fire resistance | ||
| How to obtain | Have had the player character or Oatchi take fire damage, buy for | ||
Sniff Saver (Oatchi)
| |||
|---|---|---|---|
| The Sniff Saver (Oatchi)'s icon. | |||
| Games | Pikmin 4 | ||
| Function | Grants poison immunity | ||
| How to obtain | Have had Oatchi take poison damage, buy for | ||
Solar System
| Solar System | |
|---|---|

| |
| The Stellar Orb. | |
| Games | Pikmin 2 |
| Function | Increases lighting |
| How to obtain | Defeat the Man-at-Legs, retrieve the Stellar Orb |
The Solar System can be collected by defeating the Man-at-Legs in the Subterranean Complex, and collecting the Stellar Orb. It is a device that will illuminate any sort of darkness inside a cave's sublevels. This way, it is possible to see things that are very far away when underground. Although the name refers to a system that produces solar-like light, it is also a play on words on the system that planet Earth is located in.
When it is collected, the game gradually changes the cave's lighting to fit the new, brighter settings. This lasts around 3 seconds, and can be seen on the retrieved treasure analysis cutscene.
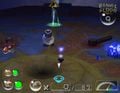
The final sublevel of the Subterranean Complex, before retrieving the Stellar Orb.
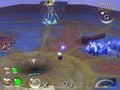
Same sublevel, after retrieving the Stellar Orb.


Cavern of Chaos 10
Oddly, the upgrade has an opposite effect on sublevel 10 of the Cavern of Chaos: the sublevel will be darker if the Stellar Orb was retrieved. The reason for this is because this sublevel uses the lighting configuration file light.ini, which is both only used on this sublevel, and the only configuration file that is in the version 0000 format (besides any unused files and settings in the disc). All other sublevels use a file in the 0001 version. Version 0000 has no support for different lighting with and without the Solar System; it only has one set of data for lighting instead of two. When a lighting file on this version is loaded into the final game, the values that are there are used to light up the cave when the Solar System is present, and because there is no data for what lighting to use when the upgrade is missing, it uses some default values. These default values make the tenth sublevel of the Cavern of Chaos look lighter when the upgrade has not been collected yet.
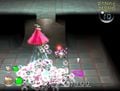
Sublevel 10 of the Cavern of Chaos before collecting the Stellar Orb.
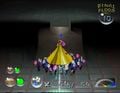
The same sublevel after collecting the Stellar Orb.


Sphere Chart
| Sphere Chart | |
|---|---|

| |
| The Spherical Atlas. | |
| Games | Pikmin 2 |
| Function | Unlocks the Awakening Wood |
| How to obtain | Retrieve the Spherical Atlas |
The Sphere Chart is the name given by the ship to the data found within the Spherical Atlas. By collecting the Spherical Atlas from the Emergence Cave, the ship is able to create charts of the Awakening Wood, allowing the player to explore that area.
Survey Chart
| Survey Chart | |
|---|---|
| File:Geographic Projection TH.jpg | |
| The Geographic Projection. | |
| Games | Pikmin 2 |
| Function | Unlocks the Perplexing Pool |
| How to obtain | Retrieve the Geographic Projection |
The Survey Chart is the name given by the ship to the data found within the Geographic Projection. By collecting the Geographical Projection from the Awakening Wood, the ship is able to create charts of the Perplexing Pool, allowing the player to explore that area.
Survey Drone
| |||
|---|---|---|---|
| The Survey Drone's icon. | |||
| Games | Pikmin 4 | ||
| Function | Allows a birds-eye view of the area | ||
| How to obtain | Buy for | ||
Thermal Defense
| |||
|---|---|---|---|
| The Thermal Defense's icon. | |||
| Games | Pikmin 4 | ||
| Function | Grants ice immunity | ||
| How to obtain | Have had the player character or Oatchi take ice damage, buy for | ||
Thermal Defense (Oatchi)
| |||
|---|---|---|---|
| The Thermal Defense (Oatchi)'s icon. | |||
| Games | Pikmin 4 | ||
| Function | Grants ice immunity | ||
| How to obtain | Have had the player character or Oatchi take ice damage, buy for | ||
Treasure Gauge
| |||
|---|---|---|---|
| The Prototype Detector's icon in Pikmin 4. | |||
| Games | Pikmin 2, Pikmin 4 | ||
| Function | Shows a treasure proximity indicator | ||
| How to obtain | |||
- See more: HUD.
The Treasure Gauge is a helpful device found in Pikmin 2 that helps with tracking down every treasure in the game, no matter if is out in the open, an enemy has it or it is buried. It is obtained by collecting the Prototype Detector from the Empress Bulblax in the Hole of Beasts. When it is in the Exploration Kit, a gauge appears on the HUD. In it, there is a needle that wiggles continuously when a treasure is in the current field or cave, and the closer the current leader is to a treasure, the farther to the right it goes, and the harder it beeps. If there are no treasures in a given area or sublevel, the gauge will be greyed out, and a chime will sound shortly after collecting the last treasure. It can be interfered with by the Antenna Beetle, the only Exploration Kit upgrade to be specifically targeted in gameplay.
The Prototype Detector.

Treasure Gauge+
| |||
|---|---|---|---|
| The Treasure Gauge+'s icon. | |||
| Games | Pikmin 4 | ||
| Function | Shows the total amount and location of treasures | ||
| How to obtain | Buy for | ||
Triple Threat
| |||
|---|---|---|---|
| The Triple Threat's icon. | |||
| Games | Pikmin 4 | ||
| Function | Gives leaders a punch combo | ||
| How to obtain | Buy for | ||
Tuff Stuff
| |||
|---|---|---|---|
| The Tuff Stuff's icon. | |||
| Games | Pikmin 4 | ||
| Function | Adds more health | ||
| How to obtain | Have reached | ||
Tuff Stuff (Oatchi)
| |||
|---|---|---|---|
| The Tuff Stuff (Oatchi)'s icon. | |||
| Games | Pikmin 4 | ||
| Function | Adds more health | ||
| How to obtain | Have reached | ||
Tuff Stuff+
| |||
|---|---|---|---|
| The Tuff Stuff+'s icon. | |||
| Games | Pikmin 4 | ||
| Function | Adds more health | ||
| How to obtain | Buy for | ||
Tuff Stuff+ (Oatchi)
| |||
|---|---|---|---|
| The Tuff Stuff+ (Oatchi)'s icon. | |||
| Games | Pikmin 4 | ||
| Function | Adds more health | ||
| How to obtain | Buy for | ||
Tuff Stuff++
| |||
|---|---|---|---|
| The Tuff Stuff++'s icon. | |||
| Games | Pikmin 4 | ||
| Function | Adds more health | ||
| How to obtain | Buy for | ||
Tuff Stuff++ (Oatchi)
| |||
|---|---|---|---|
| The Tuff Stuff++ (Oatchi)'s icon. | |||
| Games | Pikmin 4 | ||
| Function | Adds more health | ||
| How to obtain | Buy for | ||
Hey! Pikmin upgrades
In Hey! Pikmin, upgrades are provided by the S.S. Dolphin II, after the player collects certain amounts of Sparklium. These become unlocked at the specified levels of Sparklium, and don't decrease the Sparklium count when doing so.
| Feature | Sparklium | Description |
|---|---|---|
| Radar | 2,000 | Allows the player to toggle the radar on the top screen with |
| 4 health bars | 6,000 | Gives Captain Olimar an extra bar of health. |
| Enemy logs | 10,000 | Allows access to the enemy category in the logs. |
| Extended jetpack duration | 14,000 | Allows the jetpack to fly for longer. |
| 5 health bars | 18,000 | Gives Captain Olimar an extra bar of health. |
| Maximum jetpack duration | 22,000 | Allows the jetpack to fly for longer. |
| 6 health bars | 26,000 | Gives Captain Olimar an extra bar of health. |
In Pikmin
While Pikmin does not have an upgrade system, some ship parts change the appearance of the S.S. Dolphin, and one ship part, the Whimsical Radar, does provide a change to gameplay by unlocking the radar.
Badges
In Pikmin 3 Deluxe, there are two badges the player can gain from collecting upgrades:
- Evasive Action: Acquire the Dodge Whistle.
- Strong on the Inside: Acquire the Metal Suit Z, Anti-Electrifier, or Scorch Guard.

Evasive Action. The badge shows the Dodge Whistle emerging from its capsule.

Strong on the Inside. The badge shows a space suit emerging from a capsule, with symbols representing each of the three suit upgrades.


Gallery
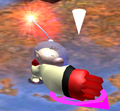
A different angle of Olimar using the Rocket Fist.
The Pluckaphone being used.
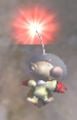
The Napsack being used.
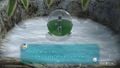
Alph encounters the Dodge Whistle.

The Metal Suit Z is encountered by Charlie.
Brittany finds the Anti-Electrifier.
Brittany finds the Scorch Guard.
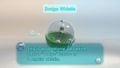
The Dodge Whistle once returned to the Drake.
The Metal Suit Z once returned to the Drake.
The Anti-Electrifier once returned to the Drake.
The Scorch Guard once returned to the Drake.
Location of the Dodge Whistle.
Location of the Metal Suit Z. In this case, it is on a ledge next to Charlie.
Location of the Anti-Electrifier.
Location of the Scorch Guard. In this case, it is on the ledge right next to Alph.
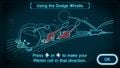
The data file for the Dodge Whistle.
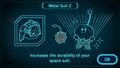
The data file that corresponds with the Metal Suit Z.
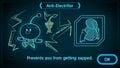
The data file that explains the Anti-Electrifier.
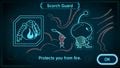
The data file for the Scorch Guard.


Trivia
- In the North American version of the New Play Control! game, with the language set to French, the Sphere Chart is called "Carte Sphérique" (Spherical Map) in the Ship's dialogs and "Système Solaire" (Solar System) in the pause menu. Since another upgrade is also called "Système Solaire" (the Solar System), this is likely a mistake.
Names in other languages
Sphere Chart
| Language | Name | Meaning |
|---|---|---|
| わくせいデータ? Wakusei Dēta |
Planet Data | |
| Carte Sphérique (Ship's dialogs) Système solaire (pause menu) |
Spherical map Solar system | |
| Pôle Nord | North Pole | |
| Sphärenkarte | Sphere Map | |
| Mapposfera | Sphere Map | |
| Carta esférica | Spherical map |
Survey Chart
| Language | Name | Meaning |
|---|---|---|
| たんさデータ? Tansa Dēta |
Search Data | |
| Carte topographique | Topographical map | |
| Pôle Sud | South Pole | |
| Übersichtskarte | Overlook Map | |
| Mappa rilievo | Overlook Map | |
| Mapa de cotas | Heightmap |
Data Glutton
| Language | Name | Meaning |
|---|---|---|
| いにしえのパケシス? Inishie no Pakeshisu |
||
| Fósil de datos | Data fossil |
Folded Data Glutton
| Language | Name | Meaning |
|---|---|---|
| 折れたパケシス? Oreta Pakeshisu |
Scorch Guard
| Language | Name | Meaning |
|---|---|---|
| フレア・ガード? Furea Gādo |
Flare Guard | |
(traditional) |
防火装 | Fire Guard |
(simplified) |
防火装 | Fire Guard |
| Para-brûlure | Burn counter | |
| Flammschutz | Fire Protection | |
| Parafuoco | Fire suit | |
| 방화복 banghwabog |
Fire Suit | |
| Antillamas | Anti-flames |
Anti-Electrifier
| Language | Name | Meaning |
|---|---|---|
| アンチ・エレキ? Anchi Ereki |
Anti Electric | |
(traditional) |
抗電装 | Anti-electric equipment |
(simplified) |
抗电装 | Anti-electric equipment |
| Anti-choc | Anti-shock | |
| Elektroschutz | Electric Protection | |
| Anti-shock | Anti-Shock | |
| 방진복 bangjinbog |
||
| Anti-eléctric (Pikmin 2) Antieléctrico (Pikmin 3) |
Anti-"electric" Anti-electric |
Metal Suit Z
| Language | Name | Meaning | Notes |
|---|---|---|---|
| メタルスーツZ? Metarusūtsu Z |
Metal Suit Z | ||
(traditional) |
金屬装Z | Metal Pack Z | |
(simplified) |
金属装Z | Metal Pack Z | |
| Combinaison Z | Z Suit | ||
| Combifer | Ironsuit | Portmanteau of "Combinaison" (suit) and "fer" (iron). | |
| Metallanzug Z | Metal Suit z | ||
| Tuta metallo Z | Metal Suit z | ||
| 강철복 Z gangcheolbog Z |
Stel Suit Z | ||
| Armadura Z | Armor Z |
Napsack
| Language | Name | Meaning |
|---|---|---|
| たんけんねぶくろ? Tanken Nebukuro |
Expedition Sleeping Bag | |
| Sacdodo | Napsack | |
| Sac Zzzz | Zzzz sack | |
| Schlafsack | Sleep Bag | |
| Sacconanna | Sleepy Time Bag | |
| Saco de dormir | Sleeping bag |
Rocket Fist
| Language | Name | Meaning |
|---|---|---|
| ロケットパンチ? Roketto Panchi |
Rocket Punch | |
| Poing Fusée | Rocket Fist | |
| Raketenfaust | Rocket Fist | |
| Pugno razzo | Rocket punch | |
| Puño volador | Flying fist |
Rush Boots
| Language | Name | Meaning |
|---|---|---|
| ダッシュブーツ? Dasshu Būtsu |
Dash Boots | |
| Bottes grand V | Very fast boots | |
| Bottes Grand V | Very Fast Boots | |
| Flinkstiefel | Fast Boots | |
| Stivali lesti | Ready boots | |
| Velocibotas | Speed-boots |
Mega Tweeter
| Language | Name | Meaning |
|---|---|---|
| メガ・スピーカー? Mega Supīkā |
Mega Speaker | |
| Haut-parleur d'aigus | High-pitched sound (producing) loudspeaker | |
| Méga Tweeter | Mega Tweeter | |
| Mega-Pleife | ||
| Megaspeaker | Mega Speaker | |
| Megabocina | Mega-siren |
Pluckaphone
| Language | Name | Meaning |
|---|---|---|
| ひきぬきメガホン? Hikinuki Megahon |
||
| Déterraphone | Pluckaphone | |
| Pflückerfon | Pluckaphone | |
| Sradicofono | Pluckaphone | |
| Cosecháfono | Harvestphone |
Solar System
| Language | Name | Meaning |
|---|---|---|
| ソーラーシステム? Sōrā Shisutemu |
Solar System | |
| Système solaire | Solar system | |
| Système Solaire | Solar System | |
| Sonnensystem | Solar System | |
| Sistema solare | Solar System | |
| Sistema solar | Solar system |
Treasure Gauge
| Language | Name | Meaning |
|---|---|---|
| おたからセンサー? Otakara Sensā |
Treasure Sensor | |
| Jauge à trésors | Treasure gauge | |
| Senseur | Sensor | |
| Schatzanzeiger | Treasure Seeker | |
| Tesorometro | Treasure meter | |
| Tesorímetro | Treasure meter |
See also
References
- ^ YouTube video comparing the same trek with and without the Rush Boots, published on April 12th, 2019, retrieved on April 12th, 2019
Types of gear
| Icon | Name | Cost (Raw Material) | Function | Requirement |
|---|---|---|---|---|
| Charging Horn | 20 | Allows the player to charge their Pikmin at an enemy or treasure with |
450 Sparklium | |
| Idle Counter | 40 | Displays a tally of how many Pikmin are idle. | 2500 Sparkliuim | |
| Treasure Gauge | 40 | Detects treasure and castaways nearby. | 1000 Sparklium | |
| Treasure Gauge+ | 100 | Allows the player to see the total amount and locations of treasure. | Unknown | |
| Idler's Alert | 80 | Recalls idle Pikmin to wherever the alarm is sounded. | 3500 Sparkliuim | |
| Tuff Stuff | 40 | Increases the HP of the player's character. | 3200 Sparkliuim | |
| Tuff Stuff (Oatchi) | 80 | Increases Oatchi's HP. | 3200 Sparkliuim | |
| Tuff Stuff+ | 80 | Increases the HP of the player's character. | Unknown | |
| Tuff Stuff+ (Oatchi) | 120 | Increases Oatchi's HP. | Unknown | |
| Tuff Stuff++ | 120 | Increases the HP of the player's character to the max. | Unknown | |
| Tuff Stuff++ (Oatchi) | 240 | Increases Oatchi's HP to the max. | Unknown | |
| Air Armor | 40 | Increases the defense of the player's character. | Tuff Stuff purchased | |
| Air Armor (Oatchi) | 80 | Increases Oatchi's defense. | Tuff Stuff (Oatchi) purchased | |
| Air Armor+ | 80 | Reduces the damage the player's character takes by 50% | Unknown | |
| Air Armor+ (Oatchi) | 120 | Reduces the damage Oatchi takes by 50% | Unknown | |
| Air Armor++ | 120 | Reduces the damage the player's character takes by 75% | Unknown | |
| Air Armor++ (Oatchi) | 160 | Reduces the damage Oatchi takes by 75% | Unknown | |
| Headlamp | 30 | Brightens caves, improving visibility. | 2000 Sparklium | |
| Headlamp+ | 100 | Further brightens caves, improving visibility to the max. | Unknown | |
| Anti-Electrifier | 50 | Makes the player's character resistant to electricity. | Take electric damage | |
| Anti-Electrifier (Oatchi) | 100 | Makes Oatchi resistant to electricity. | Take electric damage | |
| Power Whistle | 120 | Increases the whistle's radius. | Unknown | |
| Rush Boots | 120 | Increases the walk speed of the player character's by about 1.3 times. | Unknown | |
| Scorch Guard | 50 | Makes the player's character resistant to fire. | Take fire damage | |
| Scorch Guard (Oatchi) | 100 | Makes Oatchi resistant to fire. | Take fire damage | |
| Homesick Signal | 80 | Calls all Pikmin, including idle Pikmin, back to the S.S. Beagle. | Unknown | |
| Triple Threat | 40 | Allows the player's character to do a powerful punch on the third |
Unknown | |
| Thermal Defense | 50 | Makes the player's character resistant to freezing. | Take ice damage | |
| Thermal Defense (Oatchi) | 100 | Makes Oatchi resistant to freezing. | Take ice damage | |
| Brace Boots | 80 | Prevents the player's character from being blown away or sucked up by creature attacks. | Get blown away or sucked up by an enemy at least once | |
| Gunk Busters | 240 | Allows the player's character to traverse sticky mold without losing speed. | Go through sticky mold | |
| Sniff Saver | 100 | Makes Oatchi resistant to poison. | Take Posion damage | |
| Plucking Whistle | 240 | Allows the whistle to pluck buried Pikmin when used. | Available to purchase in the Lab after completing Russ' side mission "An Ode to Science" | |
| Extra Hand | N/A | Allows the player's character to carry objects, with a weight of 1. | Awarded by defeating the Ancient Sirehound and completing all of Louie's side missions | |
| Lineup Trumpet | N/A | Allows the player' character to swarm Pikmin by holding |
Awarded by completing all of Frisé's side missions |